
Some time ago, Erik Cortina challenged me to start shooting F-Class. I’m finally starting my F-Class build, a 7mm PRCW.
Disclaimer
Ultimate Reloader LLC / Making with Metal Disclaimer: (by reading this article and/or watching video content you accept these terms). The content on this website (including videos, articles, ammunition reloading data, technical articles, gunsmithing and other information) is for demonstration purposes only. Do not attempt any of the processes or procedures shown or described on this website. All gunsmithing procedures should be carried out by a qualified and licensed gunsmith at their own risk. Do not attempt to repair or modify any firearms based on information on this website. Ultimate Reloader, LLC and Making With Metal can not be held liable for property or personal damage due to viewers/readers of this website performing activities, procedures, techniques, or practices described in whole or part on this website. By accepting these terms, you agree that you alone are solely responsible for your own safety and property as it pertains to activities, procedures, techniques, or practices described in whole or part on this website.
About the WOOX Titano
Brian from Build Hunt Xplore told me to check out WOOX at the 2023 SHOT Show. I was blown away by their stocks.
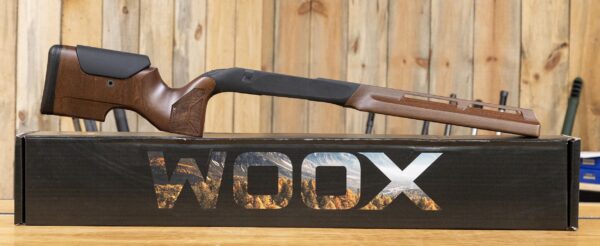
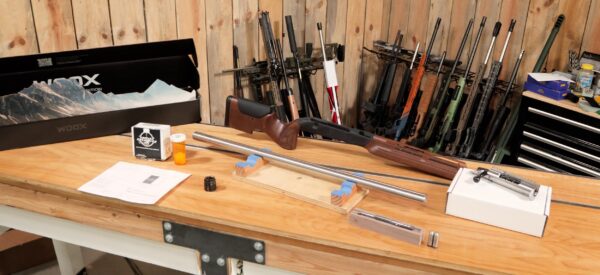
For this build, I have a WOOX Titano. It’s made with stunning walnut— my favorite wood — and specifically designed for benchrest and F-Class competition.
From WOOX:
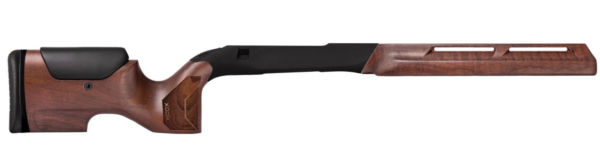
Designed to suit the needs of Benchrest and F-Class shooters, the WOOX Titano is impressive platform for the most demanding marksman while standing apart for its gorgeous American walnut stock.
Measuring 34”, Titano has a massive 3”-wide fore end for shooting off sleds, bags and other surfaces. The barrel channel accommodates barrels up to 1.20” in diameter within the fore end is the WOOX Suspense™ weight system with ports for up to six 2.5-ounce weights for achieving an ideal balance.
The handcrafted shoulder stock has an adjustable cheek riser, beautifully checkered straight grip, smooth-bottom bag rider and fits ever so comfortably in the hand. Integrated thumb rests in the aircraft-grade aluminum chassis complete the system.
Proudly Made in Italy and assembled in Hickory, NC
About the Build
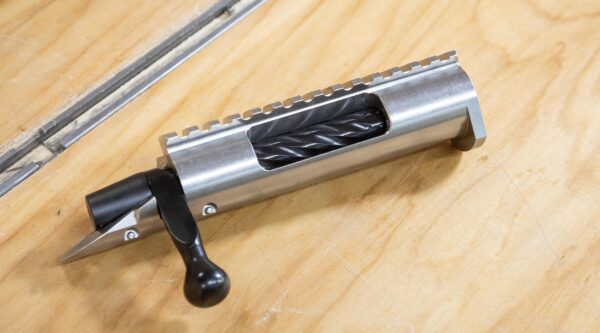
The WOOX Titano is cut for a REM 700 action. I have a custom short action BAT VR for this project—their varmint repeater but with no bottom cut. This makes the action more rigid. Also, I will be single-loading, so it doesn’t matter. The action also has an integral lug and Picatinny rail.
While my Eddie Van Halen tribute rifle was also a benchrest rifle, it was a much different build. I had to do custom inletting for a BAT Model M. The WOOX Titano is ready to drop a REM 700 action in.
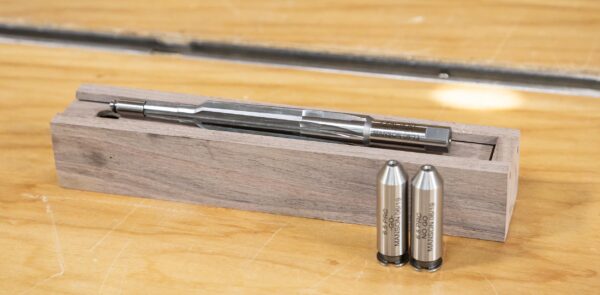
I have a Manson Precision Finish Reamer cut to Erik Cortina’s specifications and go and no-go gauges from my 6.5 PRC build. These will work for 7 PRCW as it is essentially a 6.5 PRC necked up to 7mm.
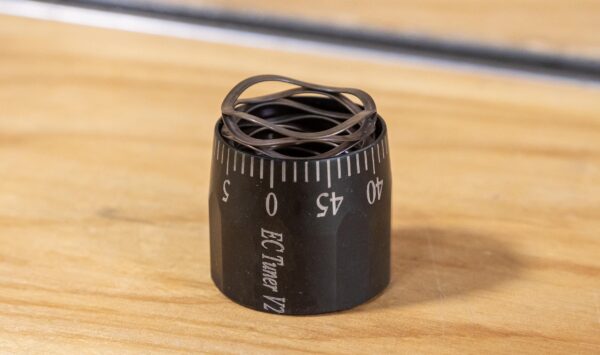
I also have the EC Tuner V2 – watch for a dedicated video on it!
Erik was also kind enough to send me a Brux barrel blank (1 ¼”).
![]()
I’ve never used a Brux barrel before, so I’m eager to see how it performs. Due to the slightly larger size compared to the Titano’s 1.2” inlet, I’ll have to do some inletting.
The Lathe
For this precision job, I turned to my Precision Matthews TL-1660 lathe, the larger of my two lathes.

This lathe is a beast! Here are some of the specs for the Precision Matthews TL-1660:
- Ultra Precision, made in Taiwan
- 16″ swing, 60″ between centers capacity
- D1-6 high precision spindle
- English and Metric threading without gear changes
- One shot lube on the carriage
- 3-Phase 5hp motor
*Note: for most gunsmiths, the TL-1640 would be a great choice. You likely won’t need 60″ between centers like the TL-1660 offers. The TL-1640 can save both space, and significant money on freight! I opted for the larger lathe because I wanted to have a lathe on hand with extended capacity between centers.
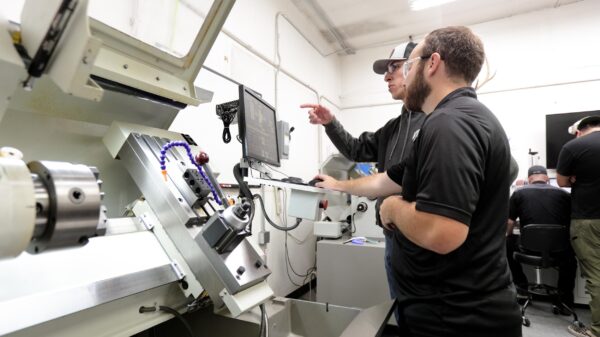
Machining
I would be remiss if I didn’t mention Bruce Thom and Gordy Gritters. I have learned so much from both of them. Learning hands-on from great teachers is invaluable. If you are interested in gunsmithing, don’t forget to check out the Colorado School of Trades.
The preparation work is extremely important. This was my first 7PRCW chambering job and I wanted to do it properly. To prepare for a chambering job, I get the tenon print from the rifle action manufacturer, tooling, SAAMI diagram and pre-drill specifications.
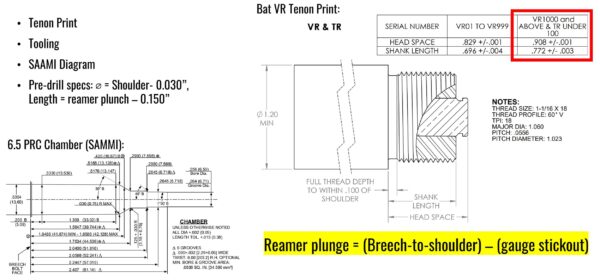
Though the SAAMI specs list both the cartridge and the chamber, I focus primarily on the chamber. To determine reamer plunge, how far the reamer needs to go in, I subtract the gauge stickout from the breech-to-shoulder measurement. This allows me to calculate pre-drill.
Next, I had to prepare a temporary ⅝”x24 muzzle threading. This is required for the pressure flush system. When I use a threading often enough, I create an adapter for it. This time, I used part of the barrel I would be cutting off regardless so there was no waste. Luckily precision was not required for this temporary threading, so I didn’t need to dial it in. The whole process took 13 minutes. After the threading was complete, I added my homemade barrel extension.
This is helpful for long-spindle lathes and is used to keep the barrel in place during pressure flush or compressed air blow-out.
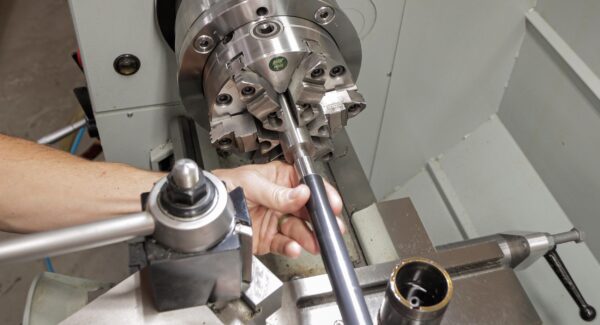
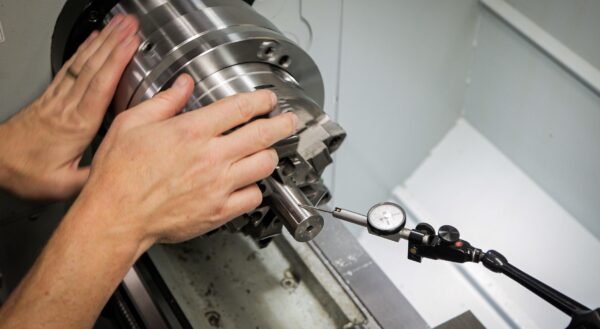
Pre-drill comes next. I dialed the barrel on OD to 0.001”, pre-drilled the chamber, and dialed the barrel to 0.0001” (direct indicating lands/grooves). To thread the tenon, I also have a process. I used a single-point boring technique with a boring bar to bore the single-point true. I then faced the barrel using a VNMG insert to zero the Z axis on the DRO. I turned the OD to the proper specification, a few thousandths under the nominal diameter. In this case, 1 1/16 x 18 was turned to 1.060” instead of 1.0625”. As I turned the OD of the tenon, I stopped a couple thousandths short so I could clean up the shoulder later. I verified the diameters with my Mitutoyo OD micrometer. Since I zeroed the Z axis, I know exactly where my tenon length is. When I reached the appropriate tenon diameter, I faced the shoulder and cut the thread relief.
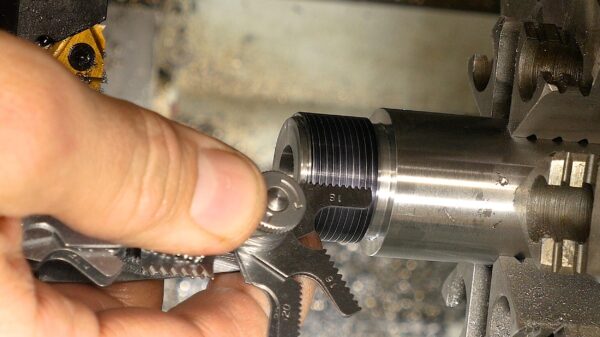
When threading the tenon, it’s important to pay attention to the OD, threads per inch, pitch diameter and to keep the compound infeed at 29 degrees. I set the cross-slide depth stop (my own design) so the dial returns to zero each time. I did a test cut, then verified the thread pitch with a gauge. I continued on, removing the bulk material by infeeding 0.005” at a time at 29 degrees with the compound. 0.002” passes followed, verified by a micrometer. When I’m content with the threads, I test fit the action.
For chambering, I connect the pressure flush system and with the reamer in place, start with a 0.500” cut. I then check the runout, do a 1.000” cut, and check runout again. (Bruce Thom taught me to zero the saddle—Z axis—and ensure it is zeroed on the DRO.)
Throughout this process, I always use a rigid reamer holder. I cut to the anticipated depth minus 0.005”.
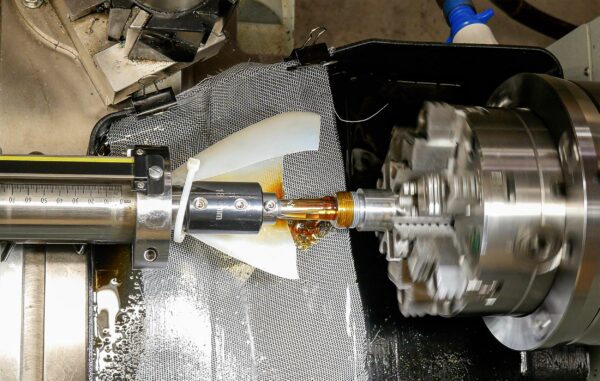
After checking headspace, I cut to “GO” from a go gauge plus 0.0015”. Finally, I polished the chamber and chamfered the entrance.
Conclusion
The entire process went very well. After running a few patches through the chambered barrel to clean out the oil, I’m ready for the next step in the process, working on the muzzle end and installing a V2 EC Tuner.
Get the Gear
Manson Precision Finish Reamer
Don’t miss out on Ultimate Reloader updates, make sure you’re subscribed!
Thanks,
Gavin Gear


