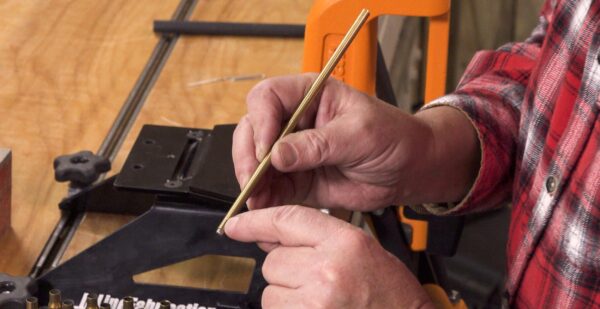
In the first video in this series, we cleaned once-fired Federal cases using Lyman’s vibratory tumbler and walnut shell media. We then resized the cases, decapped/deprimed them, trimmed them and did any other necessary case-prep work. Next up is priming!
Disclaimer
Ultimate Reloader LLC / Making with Metal Disclaimer: (by reading this article and/or watching video content you accept these terms). The content on this website (including videos, articles, ammunition reloading data, technical articles, gunsmithing and other information) is for demonstration purposes only. Do not attempt any of the processes or procedures shown or described on this website. All gunsmithing procedures should be carried out by a qualified and licensed gunsmith at their own risk. Do not attempt to repair or modify any firearms based on information on this website. Ultimate Reloader, LLC and Making With Metal can not be held liable for property or personal damage due to viewers/readers of this website performing activities, procedures, techniques, or practices described in whole or part on this website. By accepting these terms, you agree that you alone are solely responsible for your own safety and property as it pertains to activities, procedures, techniques, or practices described in whole or part on this website.
Priming Safety
During the firing sequence, a firearm’s firing pin strikes the primer, creating a spark that ignites the powder. Pulling the trigger actuates the firing pin, but sometimes the primer is activated inadvertently.
Some think a primer on its own is nothing to be concerned about, but they can cause damage. To illustrate this, I loaded some primed cases (no powder, no bullet) in my .357 mag revolver to show the strength of just a primer.

It’s still loud and produces flame, sparks, and particles. I’ve personally observed some of these hot particles can ignite old carpet or other items.
Hodgdon offers some prudent words on primer safety.
GENERAL PRIMER SAFETY
Small arms primers contain an initiating explosive mixture. By design, this explosive is easily initiated by impact energy. Two key safety issues with primers are dusting and mass detonation.
“Dusting” is the term describing minute particles of the primer explosive mix. The dust from a primer contains the same initiating and explosive qualities of the primer itself, including initiating sensitivity to friction (impact). At the time of manufacture, the explosive mixture of the primer has a binding ingredient. After manufacture, handling of the primer can result in some of the mixture breaking apart, forming explosive dust. Over time the primer dust can form a thin layer in and around the handling and storage areas of primers. Friction or spark can initiate the dust. Proper cleaning is the best way to avoid a problem.
A mass quantity of primers loose in a container can detonate with the power of the total explosive quantity of the individual primers. If an initiating force ignites just one primer, the explosive energy can create a “mass detonation” of all the primers.
When primers are manufactured, they are placed directly into packaging designed to prevent propagation and mass detonation. Always store primers in their original containers. When reloading, limit the quantity of primers you remove from the factory packaging.
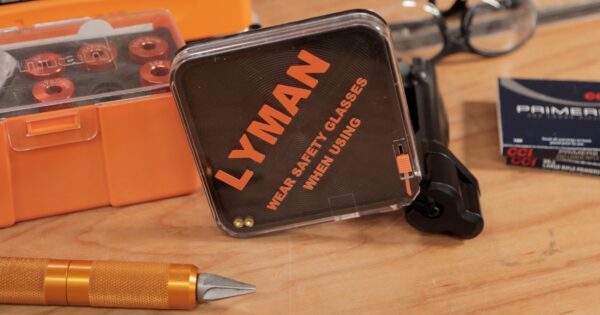
Always wear safety glasses when working with primers and handle them with care. Store primers in their original packaging in a cool, dry place and stop priming if something doesn’t seem right.
Primer Selection
Your loading manual should recommend a particular type of large or small primer. This may be a more powerful “magnum” primer for igniting a large charge of slow-burning powder or a match-grade primer if you’re looking for the utmost precision. Always be sure to first select the proper size primer, then refer to the recommendation of the load manual for the cartridge you’re loading and the powder you are using. Primer brands are generally interchangeable though over time you may discover you have particular preferences for certain loads. The big difference comes in the type of primer (magnum, match-grade, etc.).
For loading 308 in this series, I’m using CCI BR-2 large rifle primers.
SAFETY NOTE: If you’ve already worked up to a maximum level load and can’t obtain the same brand/type of primer you’ve been loading with, drop your powder charge a grain or two and work back up with the new primer.
Sierra Bullets published a great little article by Mitchel Demand regarding primer substitution.
PRIMER SUBSTITUTIONS
By Mitchel Demand
I do not need to tell any of you about the shortages we have in ammunition and reloading supplies. We can all see it every time we walk into a sporting goods store or gun shop. Because primers are so hard to find we have been getting quite a few questions about substituting primers in the loading process. Here is a chart of primer dimensions just to get us started. This chart came right off the SAMMI website.
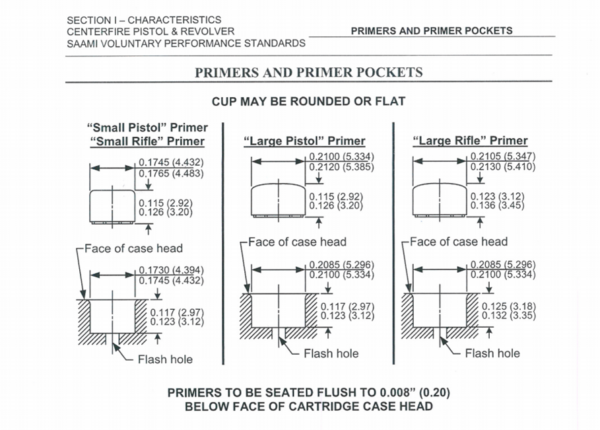
Let us start with Large Rifle Primers (LRP) vs Large Pistol Primers (LPP). Both are roughly the same diameter. This is where the similarity ends. The LRP is at least .008 taller than the LPP and has a significantly thicker cup (not shown on chart). This means a LRP will not seat flush or below the face of the case head in a pistol cartridge, thus creating a dangerous situation; However, the LPP will fit and seat in a LRP primer pocket, but it will seat too deep. Just because it fits does not mean it will work. The thinner cup of the LPP can be pierced by the firing pin of a rifle and harm the gun and its user. Also due to the slower burning powders in a rifle ammunition the charge from the LPP is insufficient for reliable use. In summary, do not substitute LPP for LRP at all, period.
Here is where math and physics can get you hurt. Small Pistol Primers (SPP) and Small Rifle Primers (SRP) are virtually identical in size as are the primer pockets of their respective cases. This does not mean that they can be substituted for each other. The SRP still has a much thicker cup and hotter ignition. There is no verifiable data for the difference in fire rate between the primers. Ask any of the primer manufacturers and they will not tell you. Been there done that. Here again a SPP should never be substituted for an SRP. I do realize there are times that one can use a SRP in place of a Small Pistol Magnum Primer. My issue with this, where is the data? How do we know it is safe? People say they have done it with no issues and good for them. In a revolver I can see giving it a try if one can find verifiable data. I certainly would not risk it with an unsupported chamber in a semi-auto pistol.
To sum it all up, do not substitute SPP for SRP or LPP for LRP at all, period. It is possible to substitute LRP for Small Pistol Magnum Primers in certain situations if the certified loading data supports it.
Have fun and stay safe
Mitchell
On Press Priming
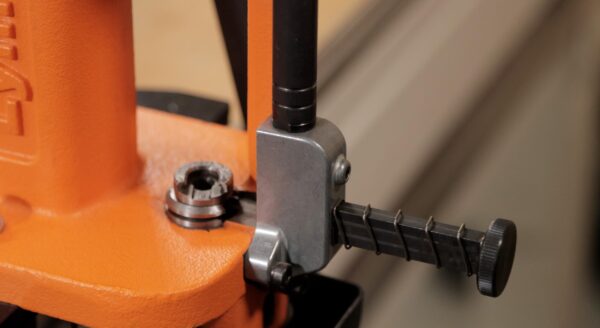
On press priming with the Lyman Victory is both simple and safe. A shield around the primer tube protects the user, but the user should still wear safety glasses. Remember that if the primers do somehow detonate, the shield will direct the blast upwards, out the top end of the primer tube. Lyman cautions users NOT to use the priming system without the blast shield in place. Lyman’s website also notes that the primer feed comes with a heavy steel shield around the primer tubes for additional safety. Most on press priming systems have a similar shield.
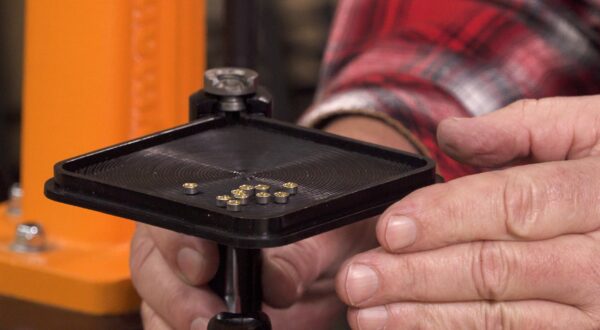
To start priming, you first need to fill the tube. It’s easiest to use a small tray designed for this purpose to help get all primers in the proper orientation. I used the base of the Double Alpha Academy PrimaFill, but an inexpensive primer tray will work just as well.
Press down with the smaller “pick up” end with the flat part of the primers facing up to fill the primer tube.
Ensure there is a clip installed at the base of the tube, then flip it over. (If you lose the included clip, a paperclip works as well.) This clip prevents primers from falling out. Once you’ve inserted the primer tube into the priming mechanism, remove the clip. This allows the primers to drop into place. Add the shield before continuing.
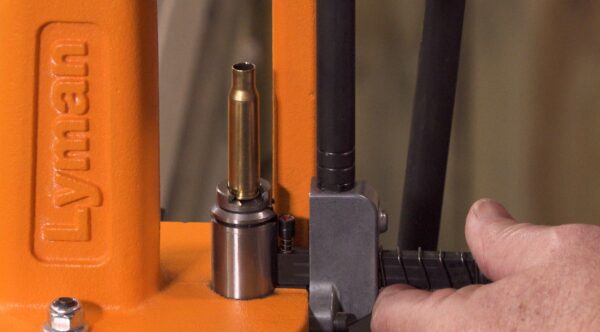
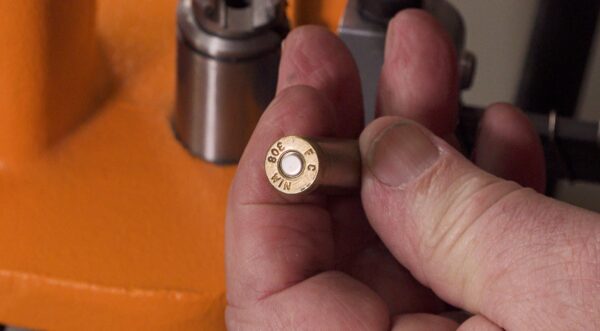
Work the handle on the Victory to pick up a primer, then seat it on the press. There is ample leverage for this. The primer should be just below flush. Running a finger or thumb across the primed case head can reveal if the primer is not flush.
Standing the case primer side down on a level surface will also reveal if the primer is proud.
Off Press Priming
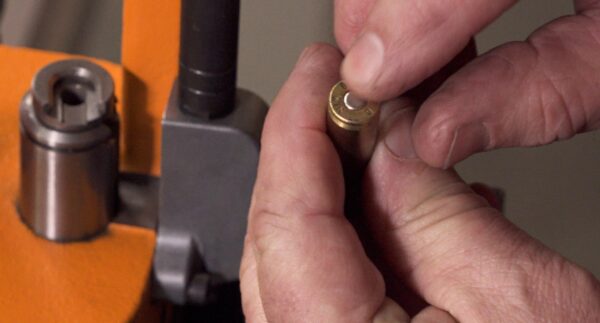
There are an abundance of options for off press priming, but I decided to use Lyman’s E-ZEE Prime handheld priming tool. Hand primers are easier to travel with than a full press and also allow you to really feel the primer seat.
The Lyman E-ZEE PRIME hand priming tool is well made and easy to use. When using a hand priming tool, you should keep the tool pointing away from your face at all times in case a primer detonates and you should always wear glasses.
The first step is to install the appropriate shellholder. On the E-ZEE PRIME, this requires removing the black piece that sits against the tray, adding the shellholder, then replacing the black piece to keep it in place.
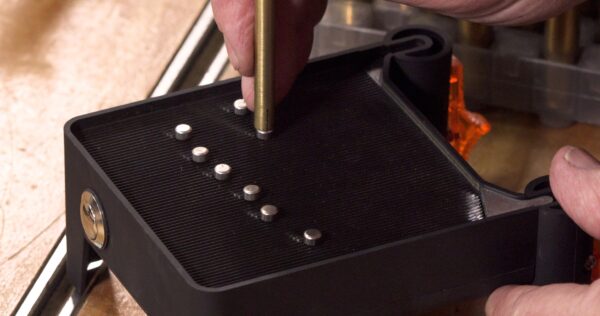
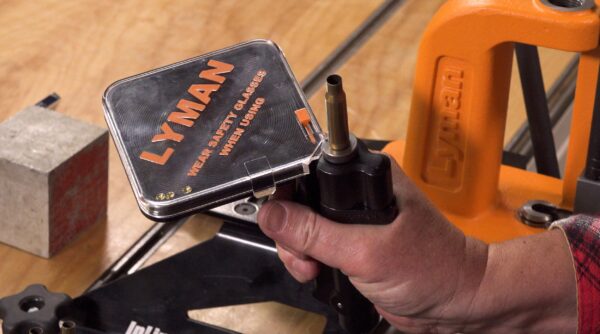
To get the primers into the handheld tray, it’s easiest to move them directly from the original packaging to the tray. This is done by removing the cover of the hand primer and placing the tray part of the primer so it covers the open box of primers. Hold them tight against one another and flip. All the primers will have migrated to the tray on the hand primer. (If you don’t want a full 100 primers at once, only expose the desired number of primers in the original box before migrating them to the tray.)
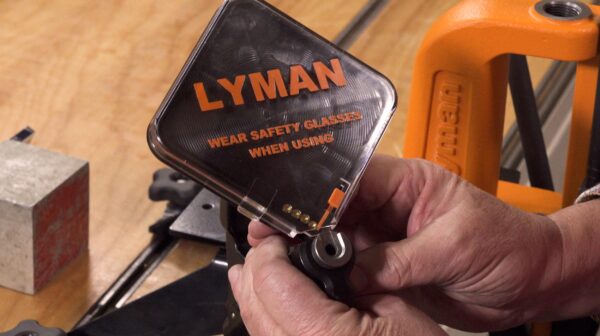
Lightly shake the tool side to side until all primers are in the same orientation, then replace the cover. A small plastic dam prevents primers from inadvertently escaping from the tray.
Open the dam to allow a primer to enter, squeeze the handle to raise the small ram and seat the primer, and examine the primed case to determine if the primer has been properly seated.
This dam is especially helpful if you need to stop priming or take a break for any reason. Ensure there is no primer in the shellholder, then close the dam.
Sometimes you need gravity’s help to get the primer in the shellholder. Many reloaders rotate the hand priming tool towards their face to accomplish this. This is ok as long as you rotate the tool again and seat the primer away from you.
Conclusion
We’ve now primed our sized cases. This step can be somewhat dangerous if proper procedures aren’t followed and is a step one many reloaders become too relaxed about. Avoid distractions and stop priming if something doesn’t feel right! Next we’ll charge the case with powder!
Get the Gear
Lyman Brass Smith Victory Single Stage Press at Midsouth Shooters Supply
Lyman E-ZEE Prime Handheld Priming Tool
Lyman Primer Tray at Midsouth Shooters Supply
Double Alpha Academy PrimaFill
Don’t miss out on Ultimate Reloader updates, make sure you’re subscribed!
Thanks,
Guy Miner


I agree that this step is overlooked by reloaders. It is very dangerous! I spend much of my time ensuring that the primer pockets are cleaned and reamed so that the insertion process goes easy. I use Hornady progressive press for priming with no issues. It is far enough away that if I do have an accidental blast, I am protected. Also, being meticulous on case preparation makes the process safer and easier!
thanks