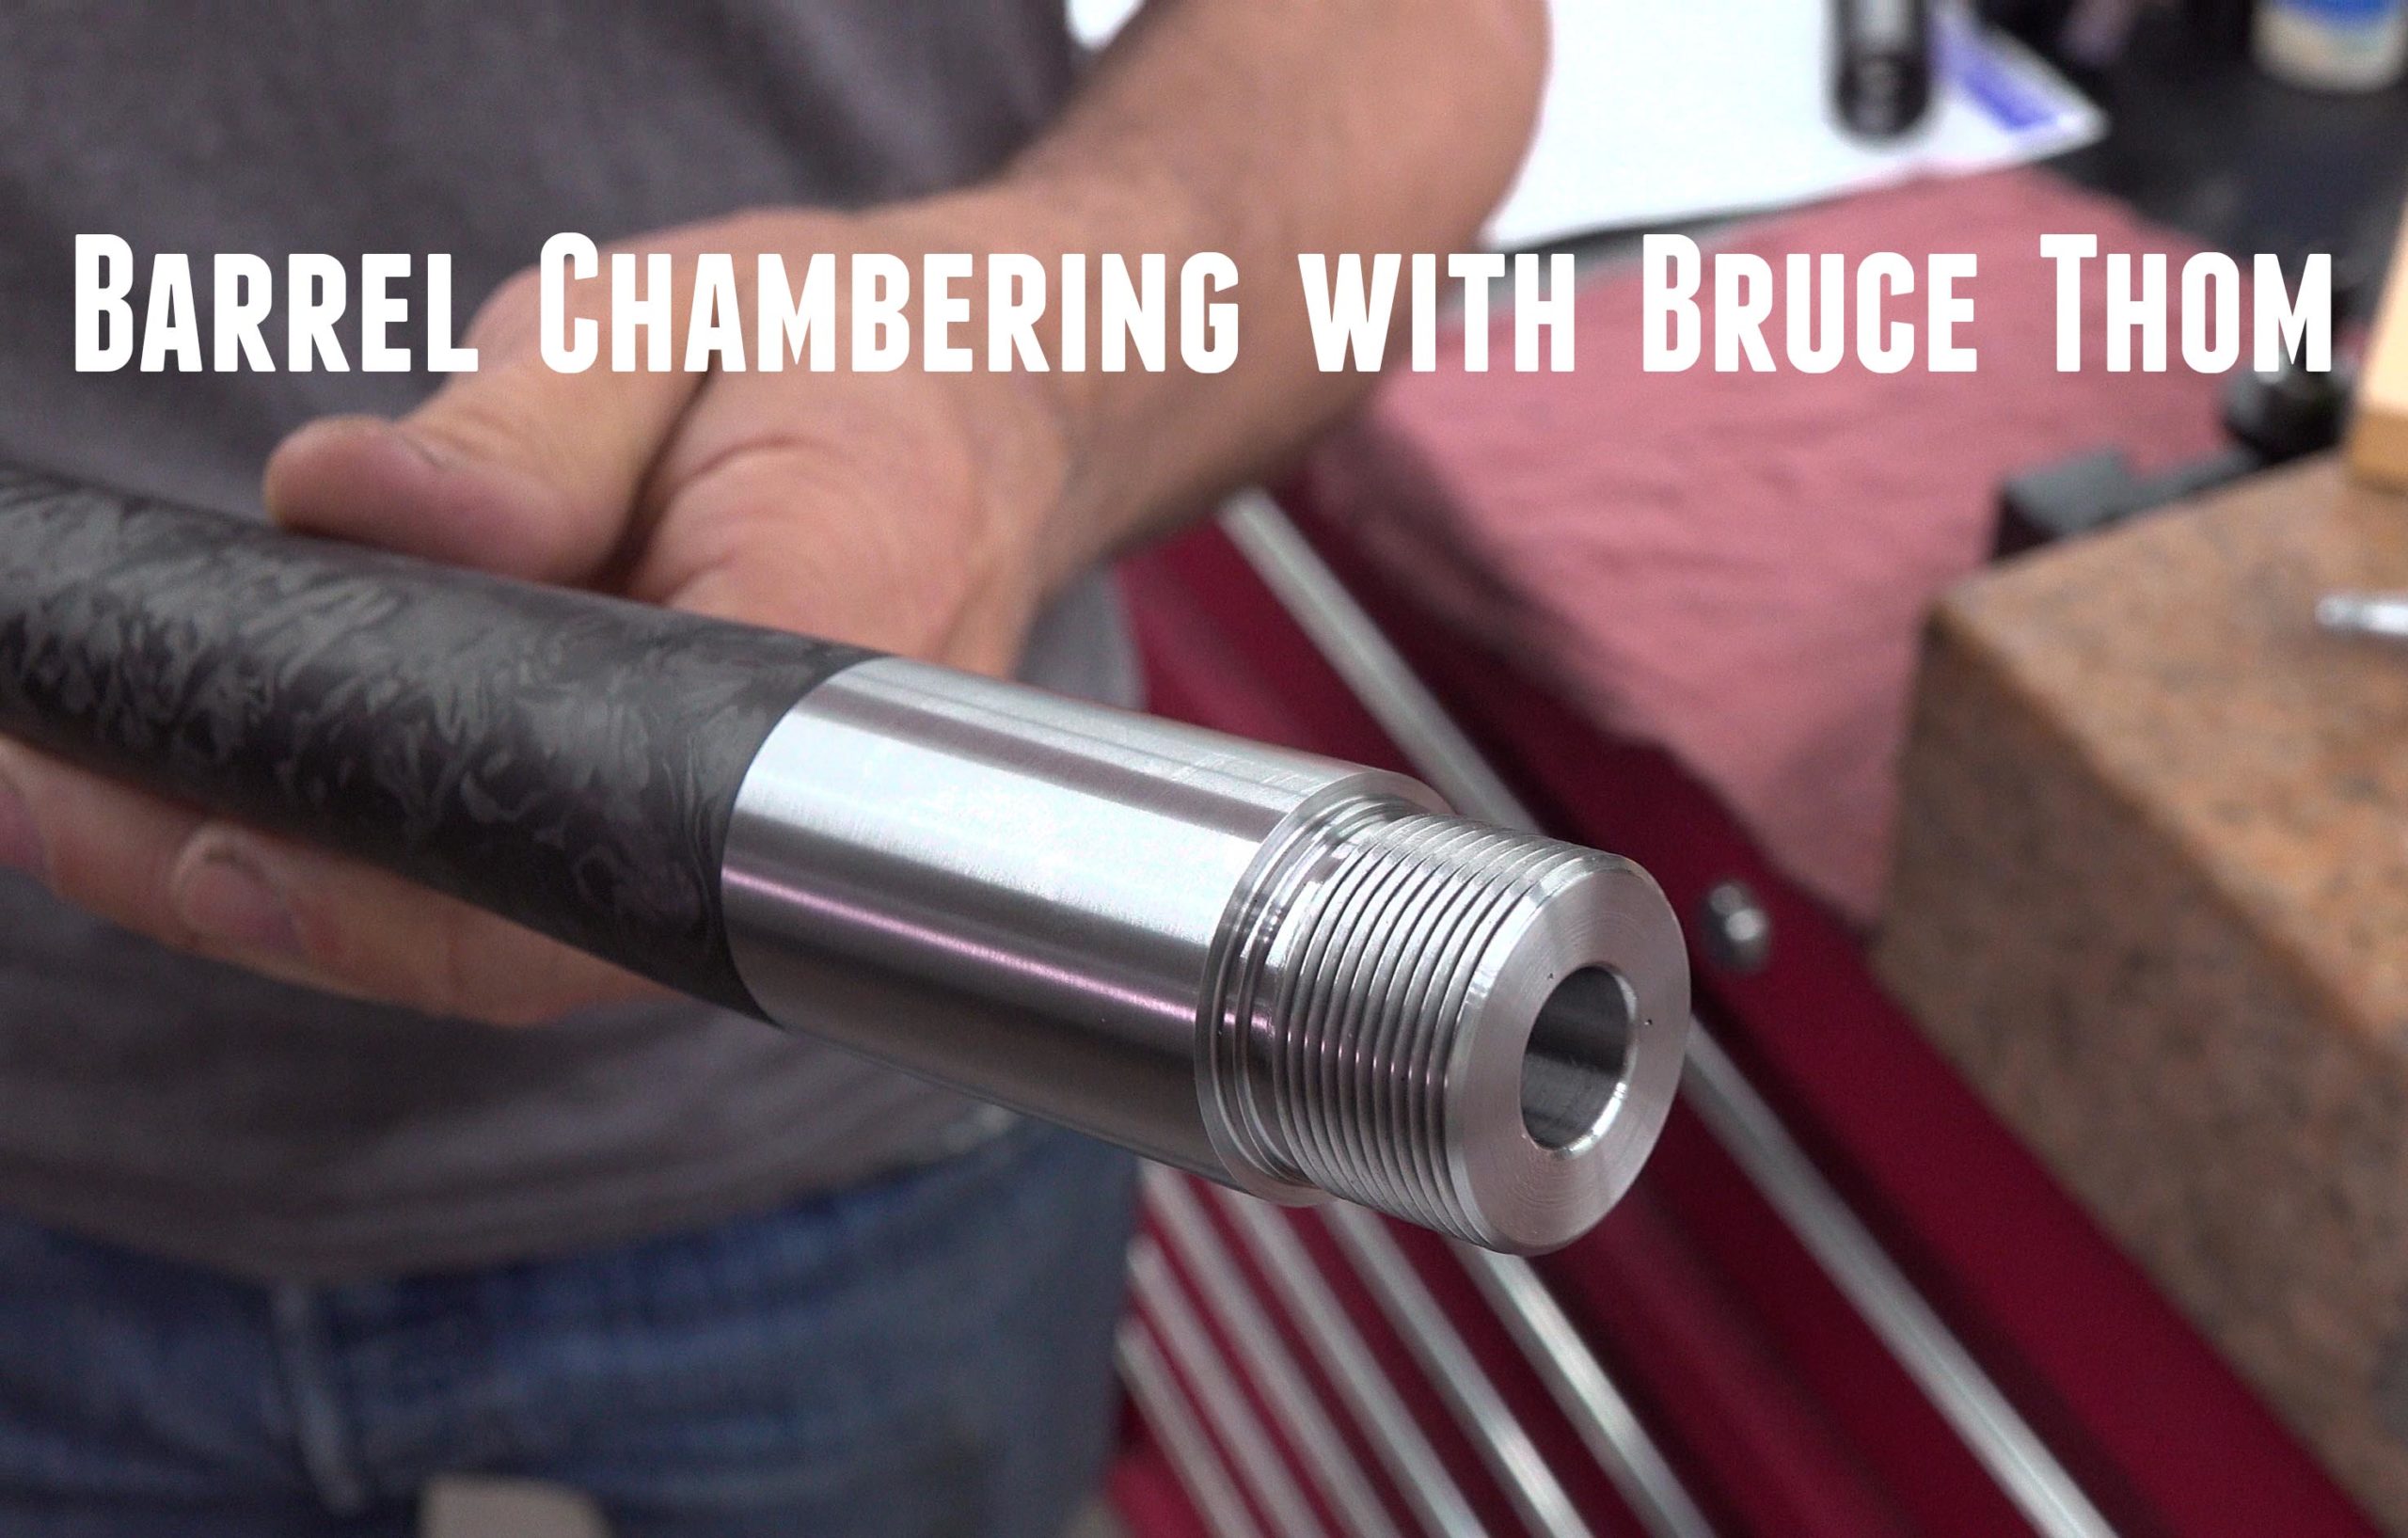
It is truly a privilege to have the opportunity to work with some of the best experts in the gunsmithing and manufacturing industry. During my recent visit to Bat Machine, I had the opportunity to watch owner Bruce Thom perform a complete barrel job including threading the muzzle and chambering the barrel for 22 Creedmoor. In this story, I’ll share insights from that experience, and contrast Bruce’s techniques with those I’ve shared on this channel.
Disclaimer
Ultimate Reloader LLC / Making with Metal Disclaimer: (by reading this article and/or watching video content you accept these terms)
- The content on this website (including videos, articles, ammunition reloading data, technical articles, gunsmithing and other information) is for demonstration purposes only.
- Do not attempt any of the processes or procedures shown or described on this website.
- All gunsmithing procedures should be carried out by a qualified and licensed gunsmith at their own risk.
- Do not attempt to repair or modify any firearms based on information on this website
- Ultimate Reloader, LLC and Making With Metal can not be held liable for property or personal damage due to viewers/readers of this website performing activities, procedures, techniques, or practices described in whole or part on this website.
- By accepting these terms, you agree that you alone are solely responsible for your own safety and property as it pertains to activities, procedures, techniques, or practices described in whole or part on this website.
Background: Bat Machine
If you haven’t already checked it out, I published a complete story covering how Bat Machine makes custom rifle actions. Here’s the video from that story:
I also recently published a “tour” of some of Bruce Thom’s early home-built complete rifles, here’s the video from that story:
Now on to the barrel work! I’ll take the approach of contrasting Bruce’s strategy and techniques where possible since I’ve published a LOT of related rifle build stories here on the channel.
Machines Overview and Prepping for Barrel Work
Here are some of the tooling and machinery related specifics I discussed with Bruce while at his shop!
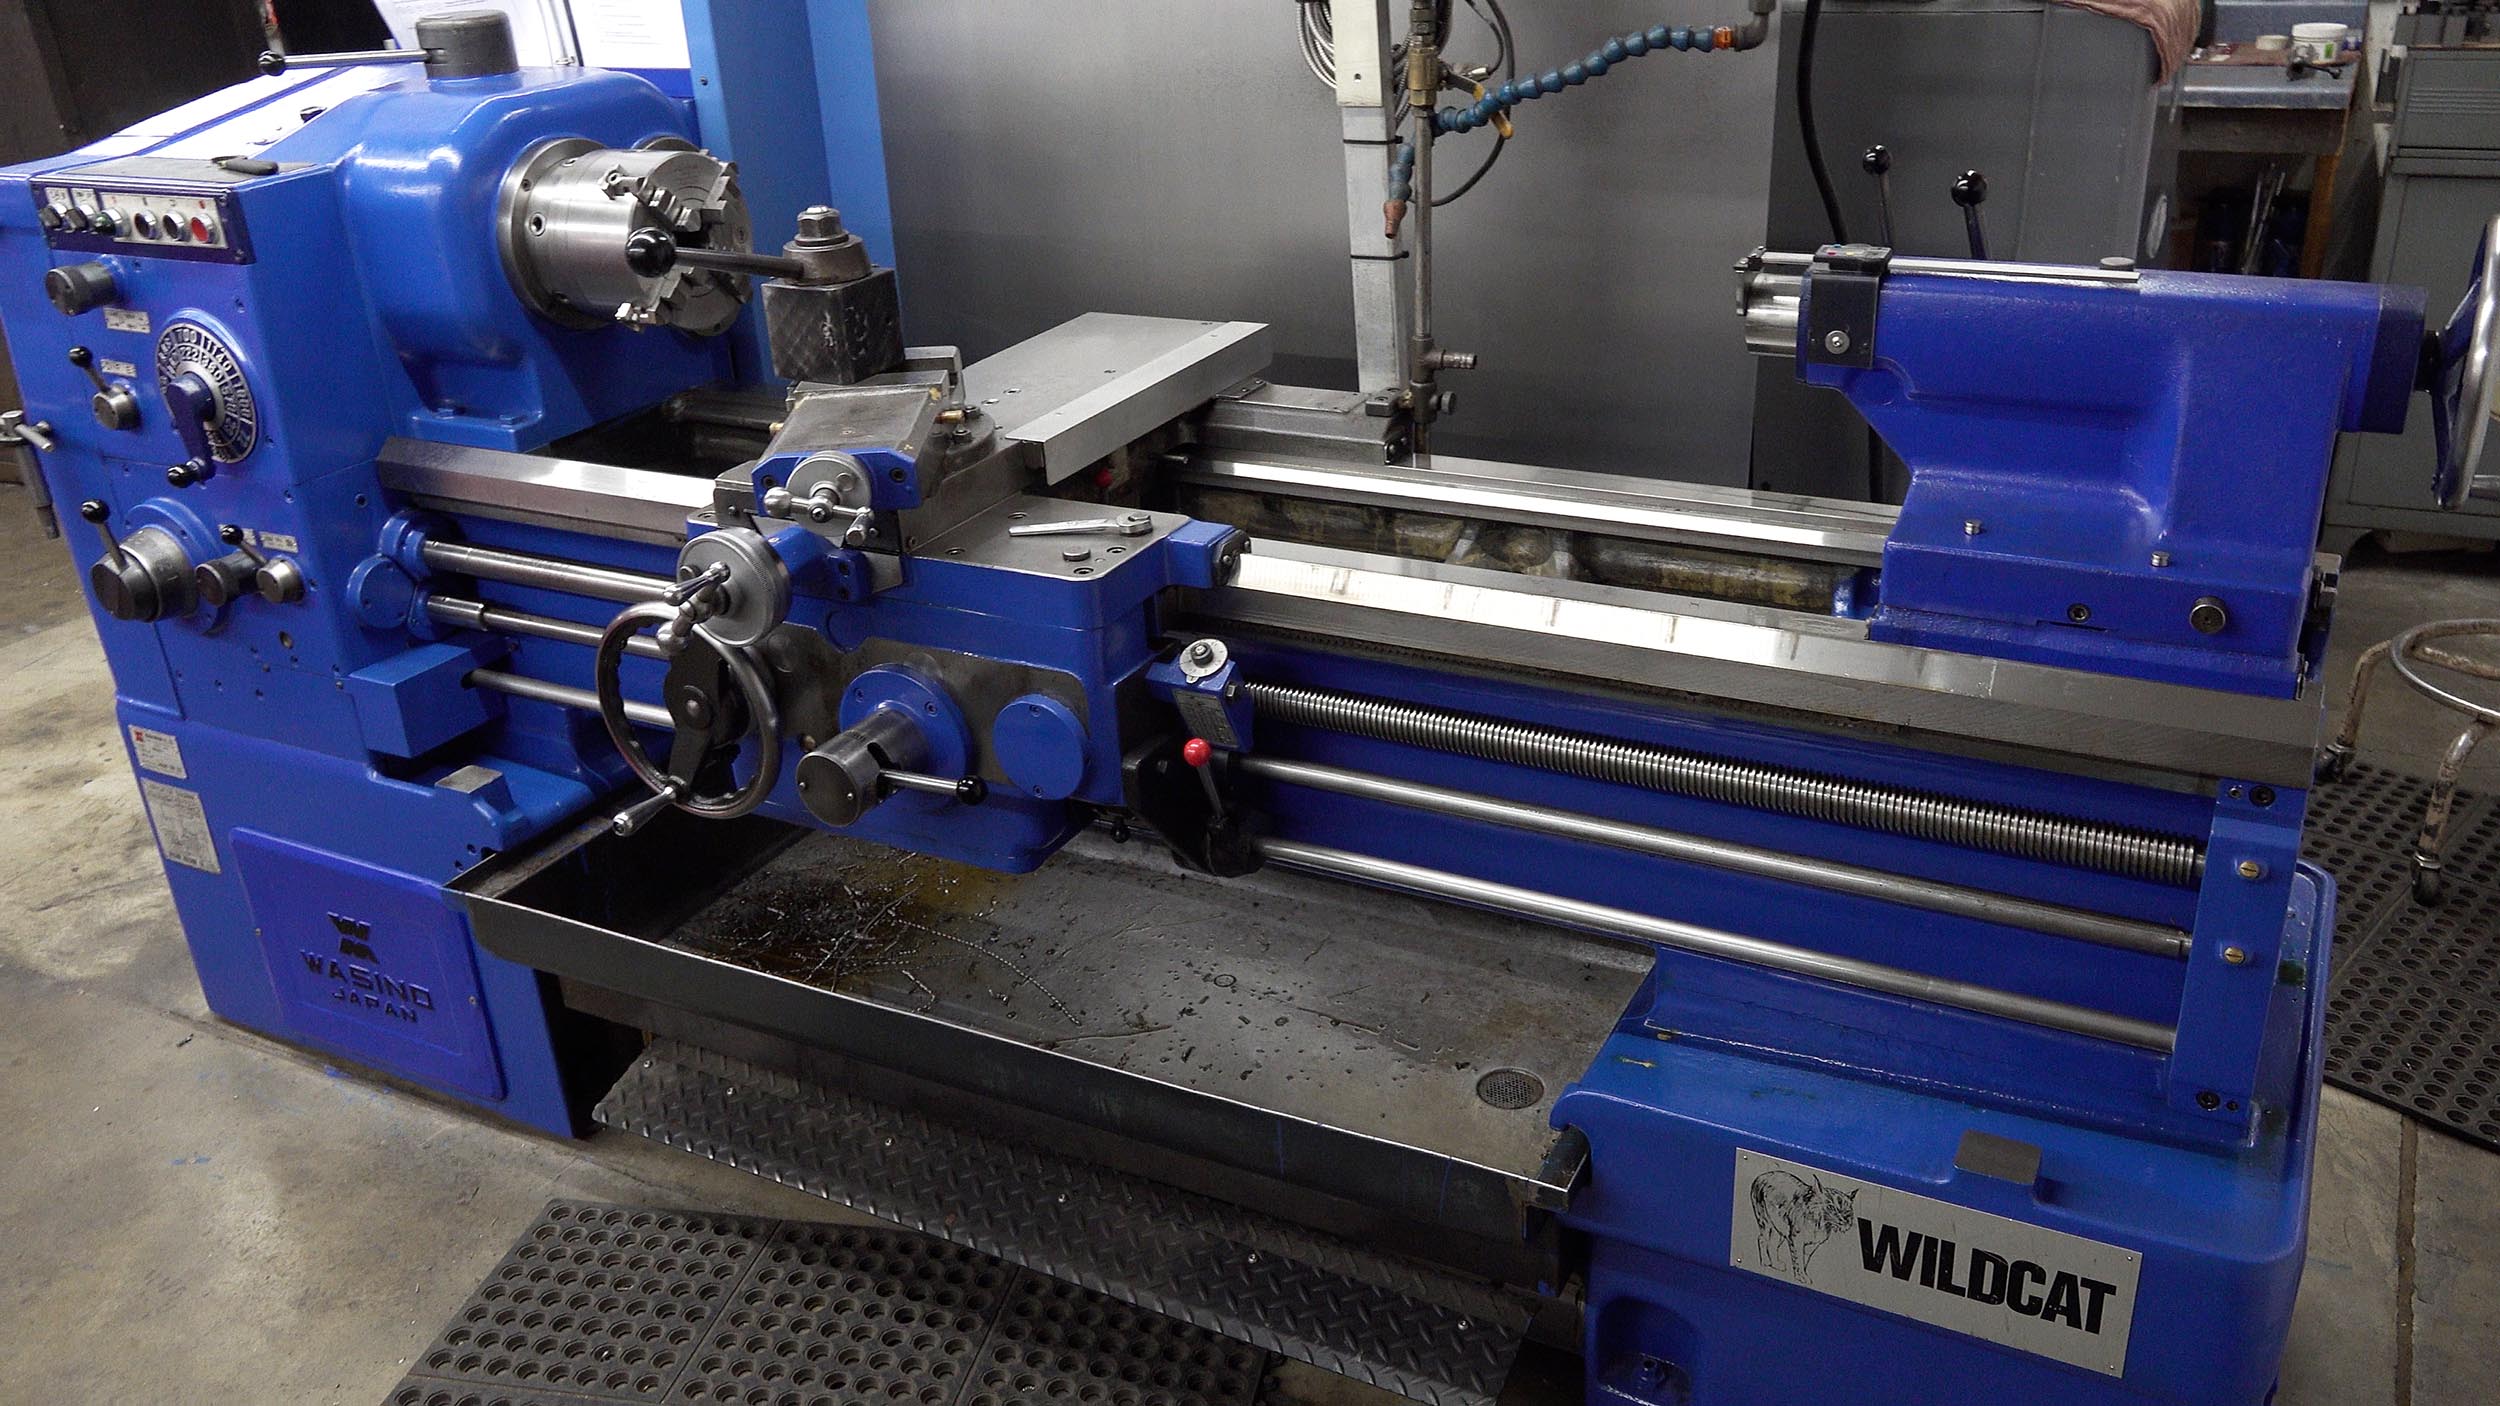
Bruce likes high quality rigid and heavy tooling! He has especially taken a liking to older and heavier Japanese made lathes (1960s, 1970s and similar). The above picture shows Bruce’s primary manual machine for chambering – a 1970s Wasino.
Here are some things Bruce told me about his tooling that I am taking note of (and working on myself for most of these):
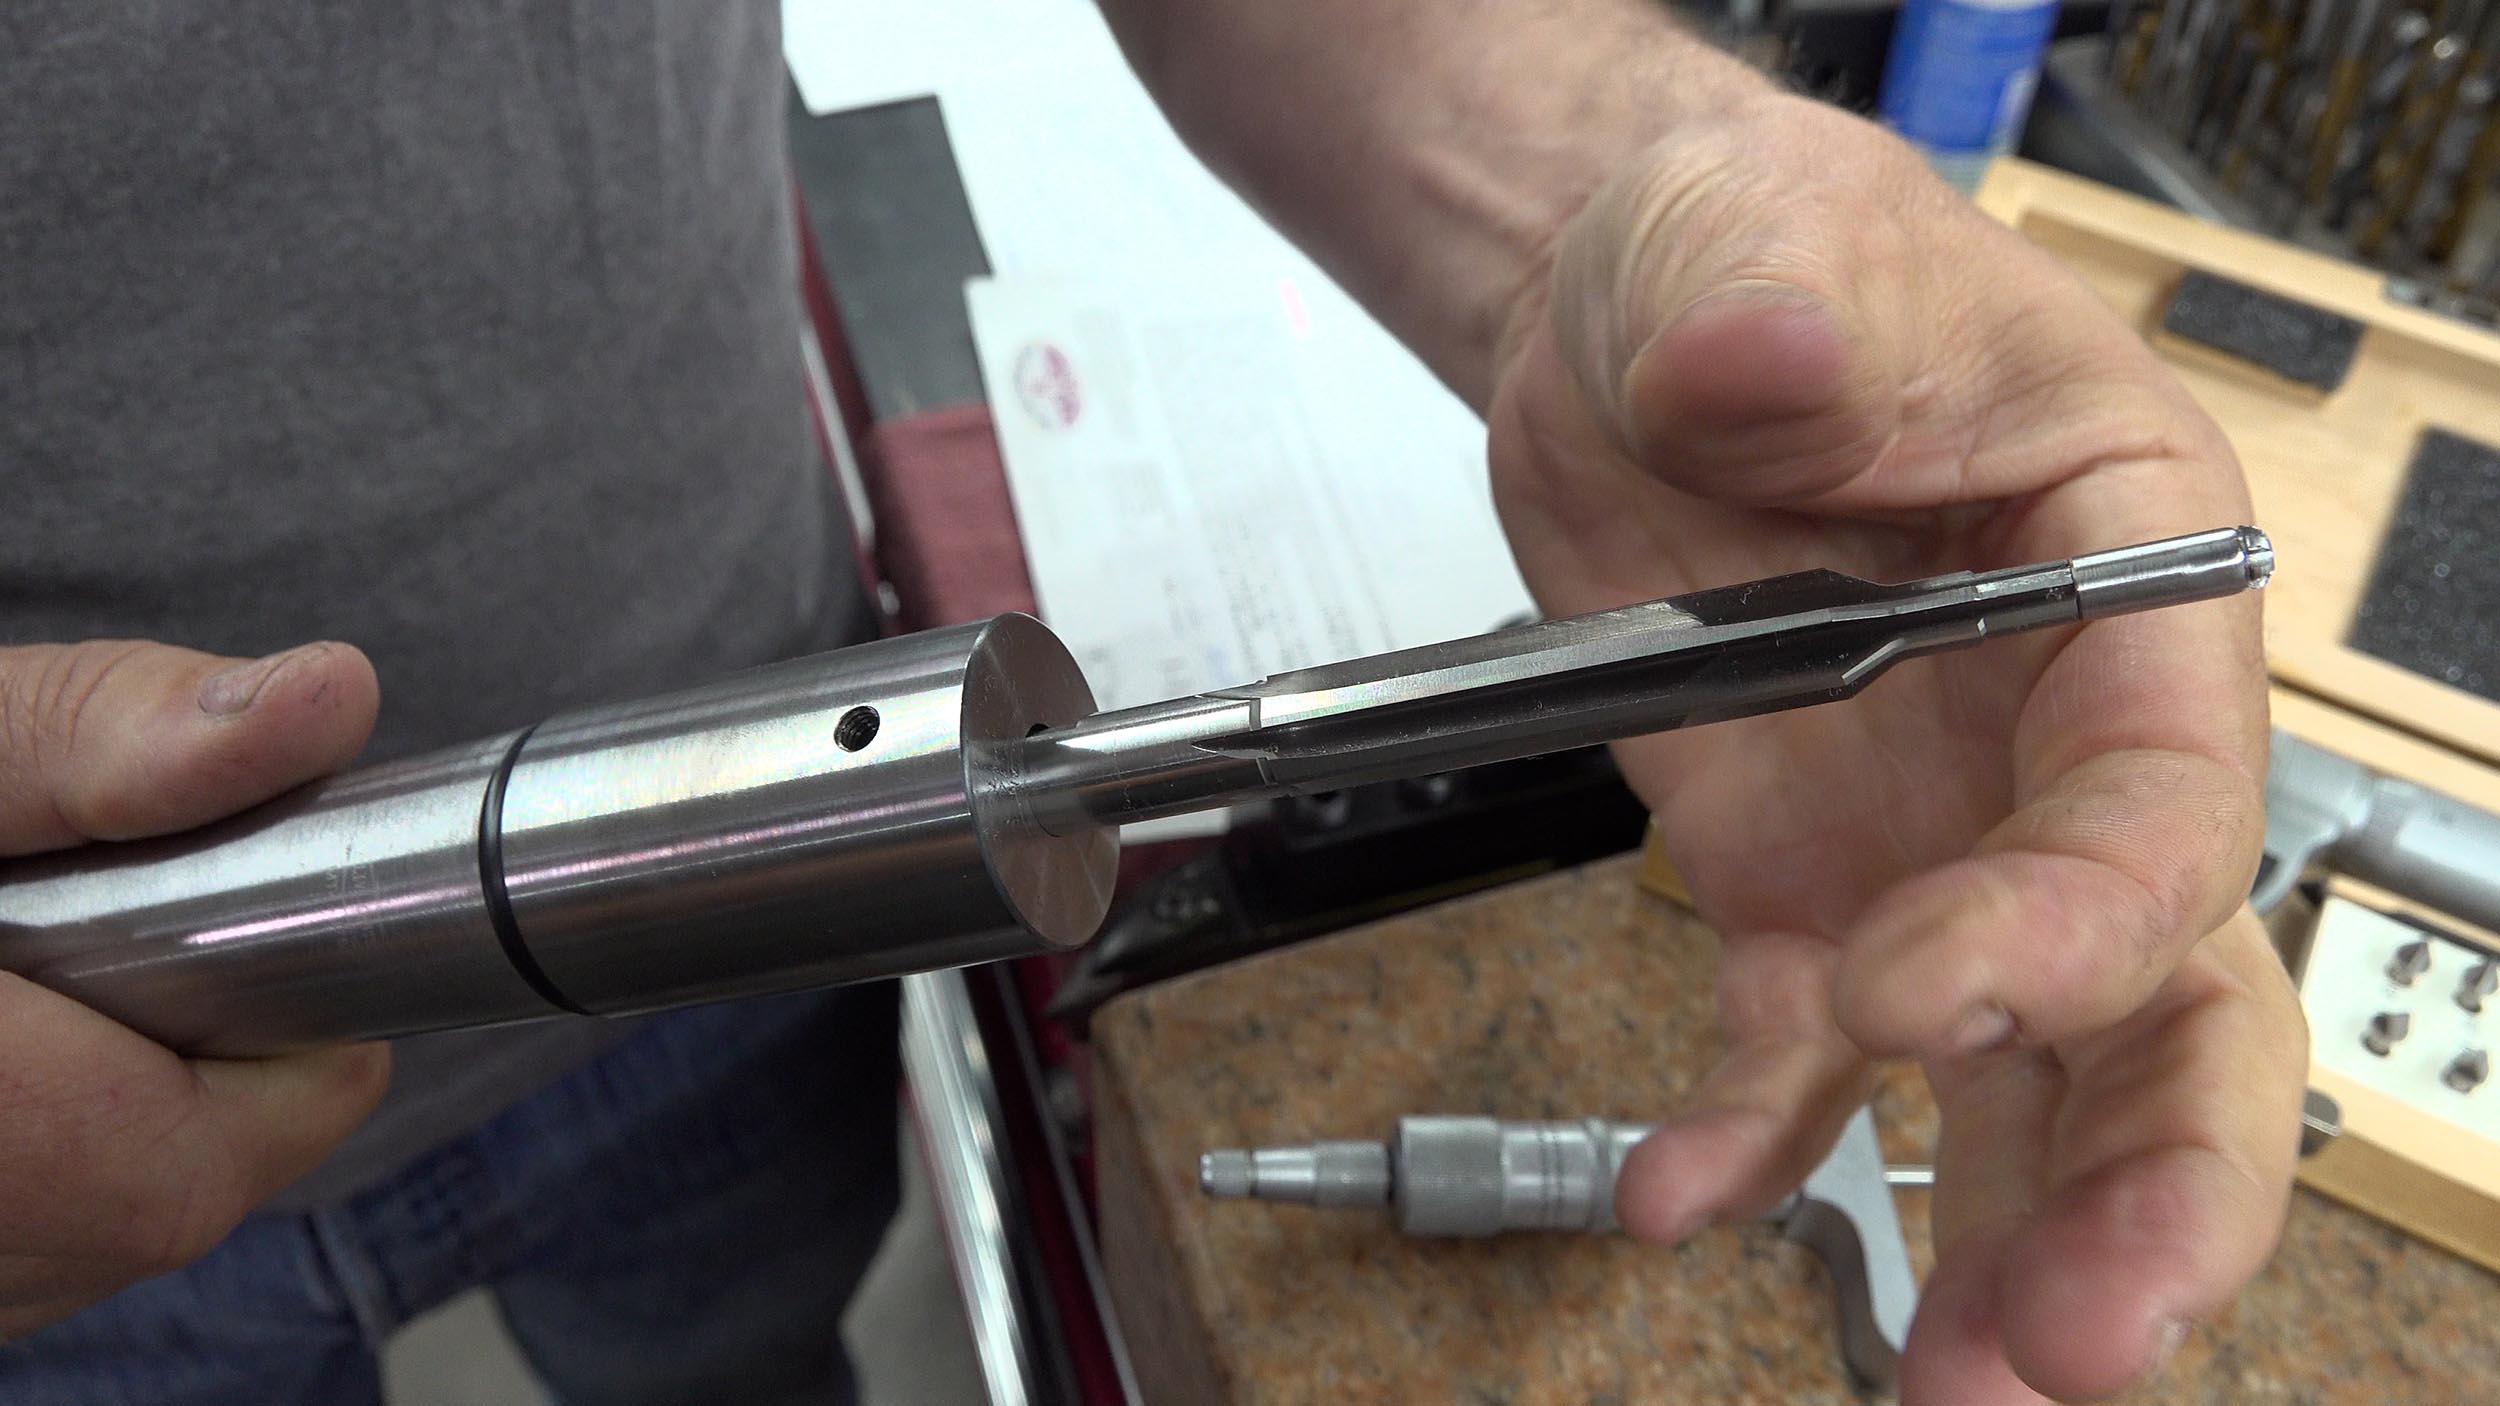
Reamer alignment and a rigid hold on the reamer is critical. Bruce uses Morse taper #4 blanks that fit in the tailstock of his lathe, and proceeds to drill and single-point bore them out using tooling in the headstock/chuck to ensure that the hole for the reamer is perfectly sized, and is perfectly aligned with the headstock. Here’s the reamer holder specifically for Bruce’s Wasino lathe, and a reamer:
For threading, a thread micrometer makes your life a lot easier. I’ve been looking into these for a while, and since my visit, I’ve purchased a set (0-1″, 1-2″).

A sleeve over the tenon can make for more stable depth micrometer checks. Bruce made a sleeve that’s exactly 1.500″ long for easy “mental math” when taking measurements (such as chambering depth using go gauge) while machining.
![]()
Another time saving preparation activity is to enter or check all “tooling offsets” in the lathe DRO. This enables you to change lathe cutters, and to reset your DRO to cut to proper dimensions.
Bruce uses a unique system for supporting barrels and accommodating pressure flush:
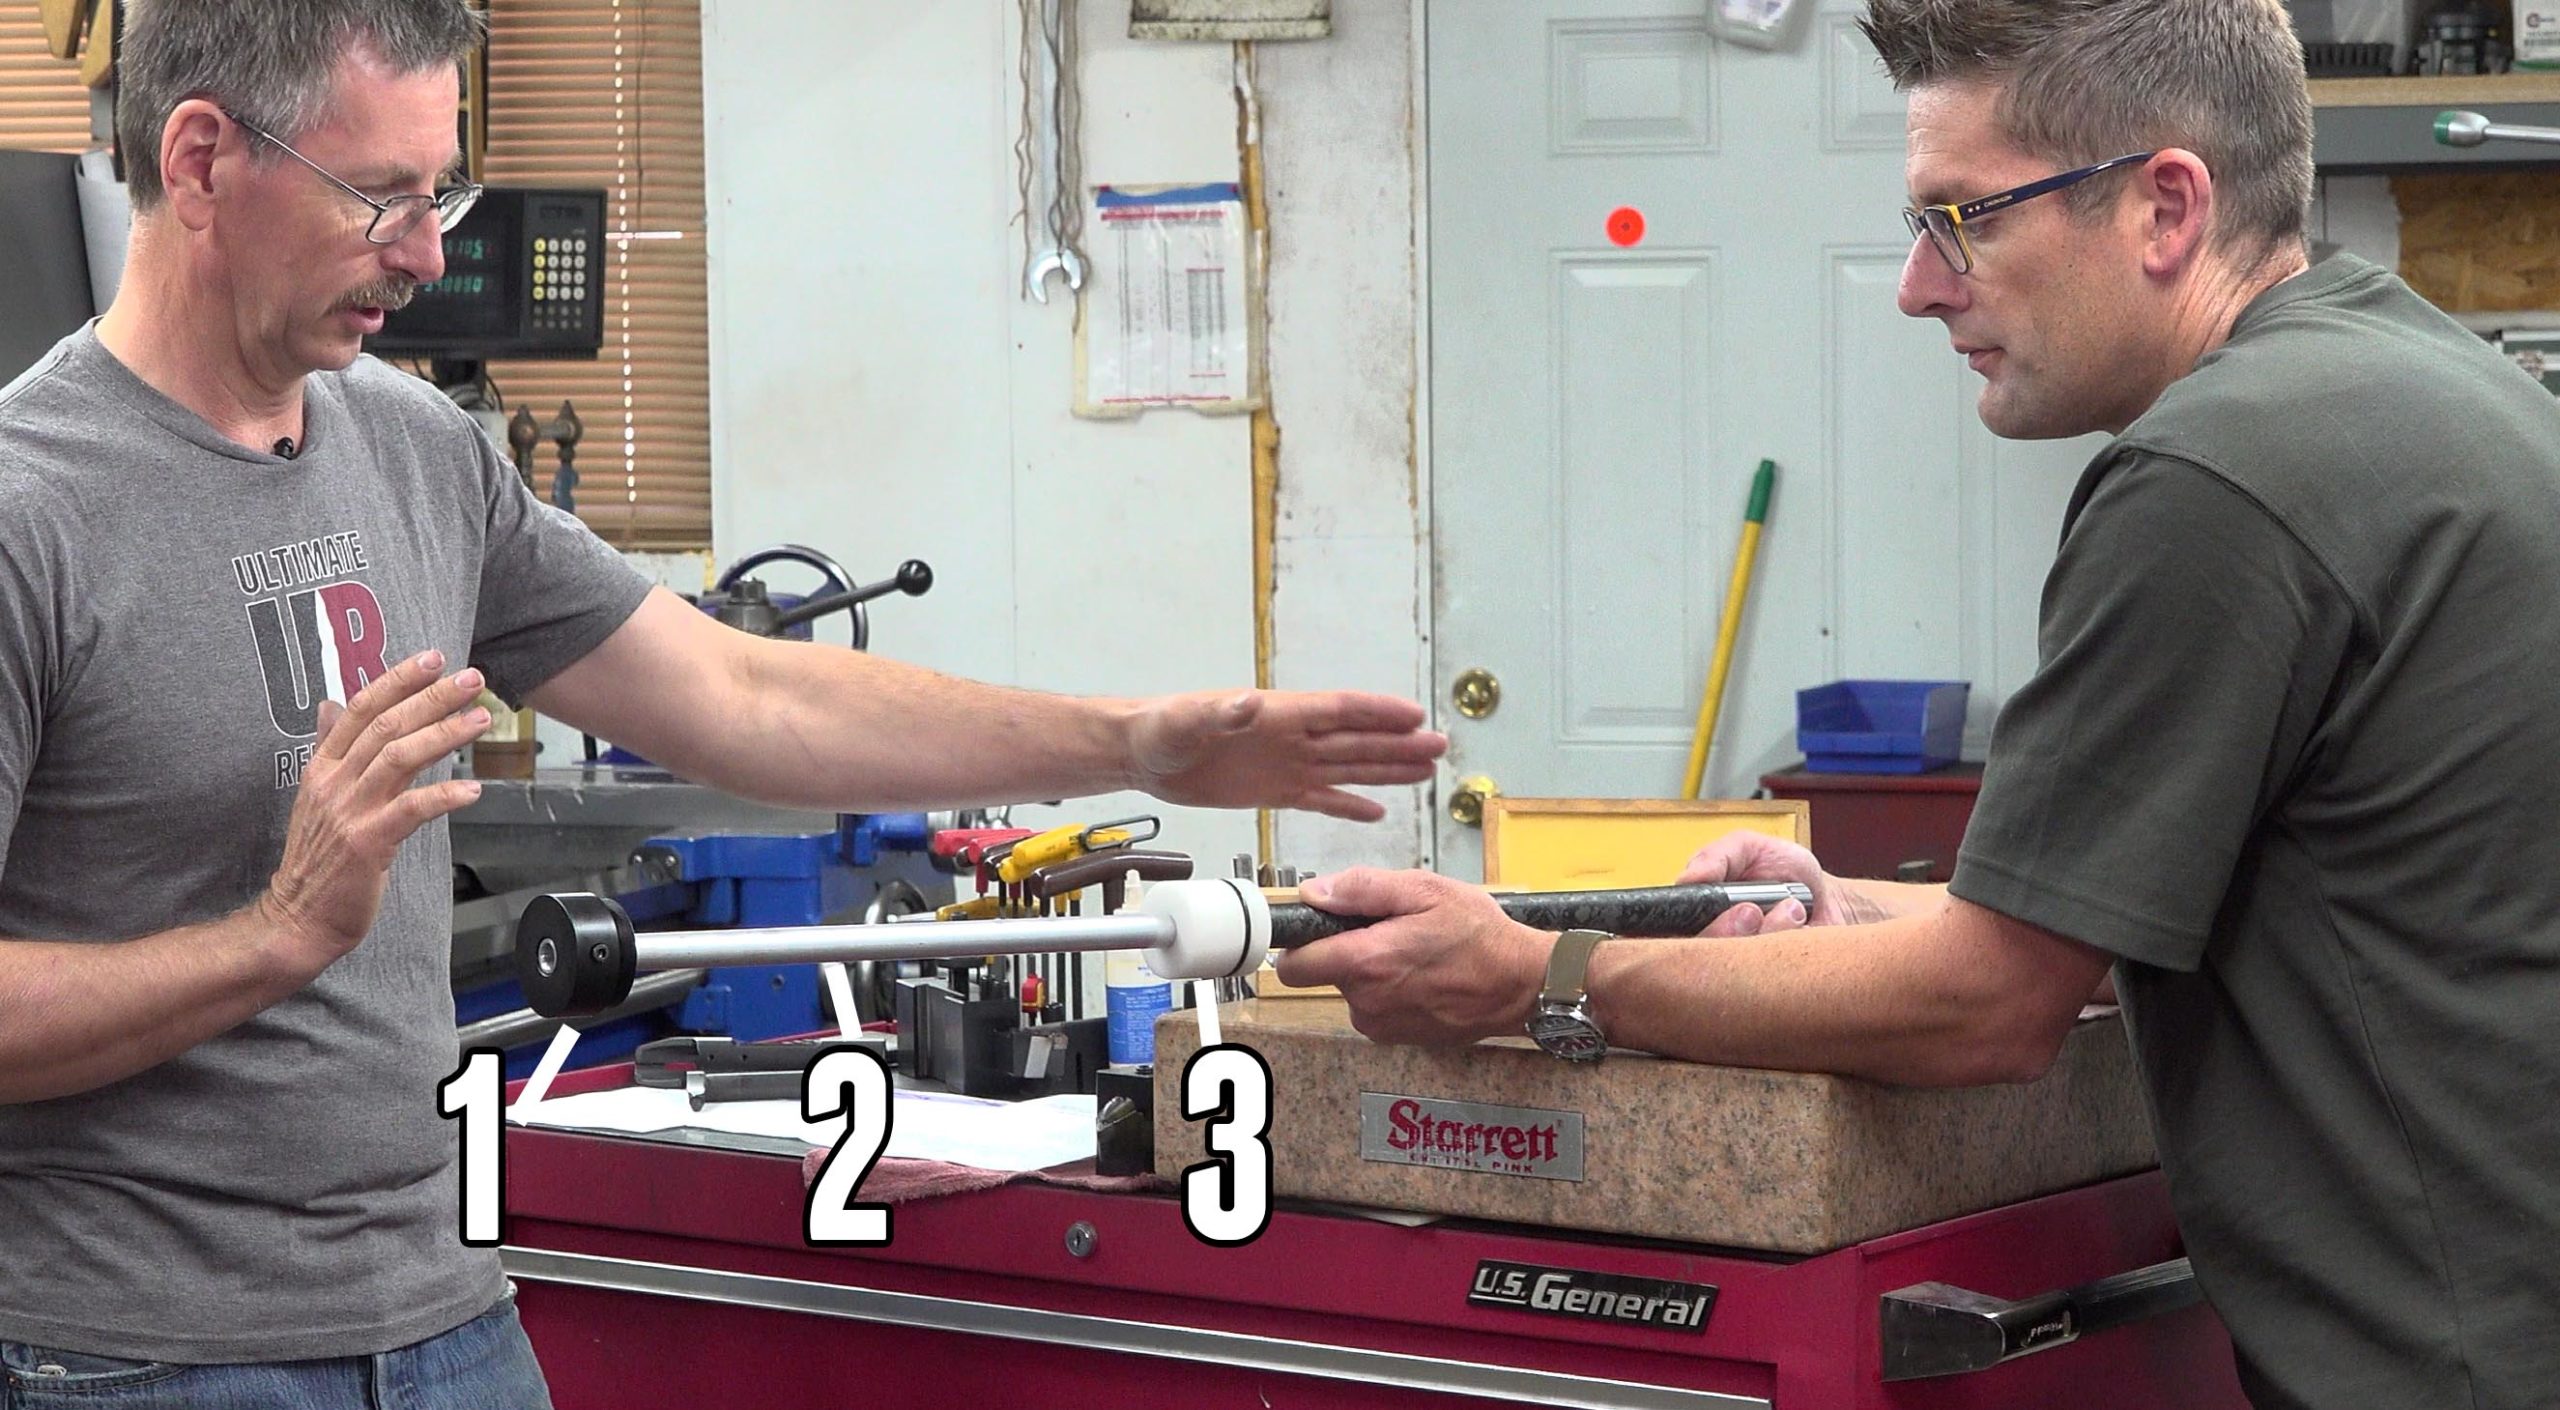
Yes, Bruce looks like a “magician” here 🙂 the parts shown here are:
- Outboard centering plug (screws into end of spindle)
- Pressure flush tube (screws into muzzle centering plug)
- Muzzle centering plug – fits inside spindle
So with this setup, the end of the barrel not being machined is held centered inside the spindle, and the chuck is used to dial in the side being worked on.
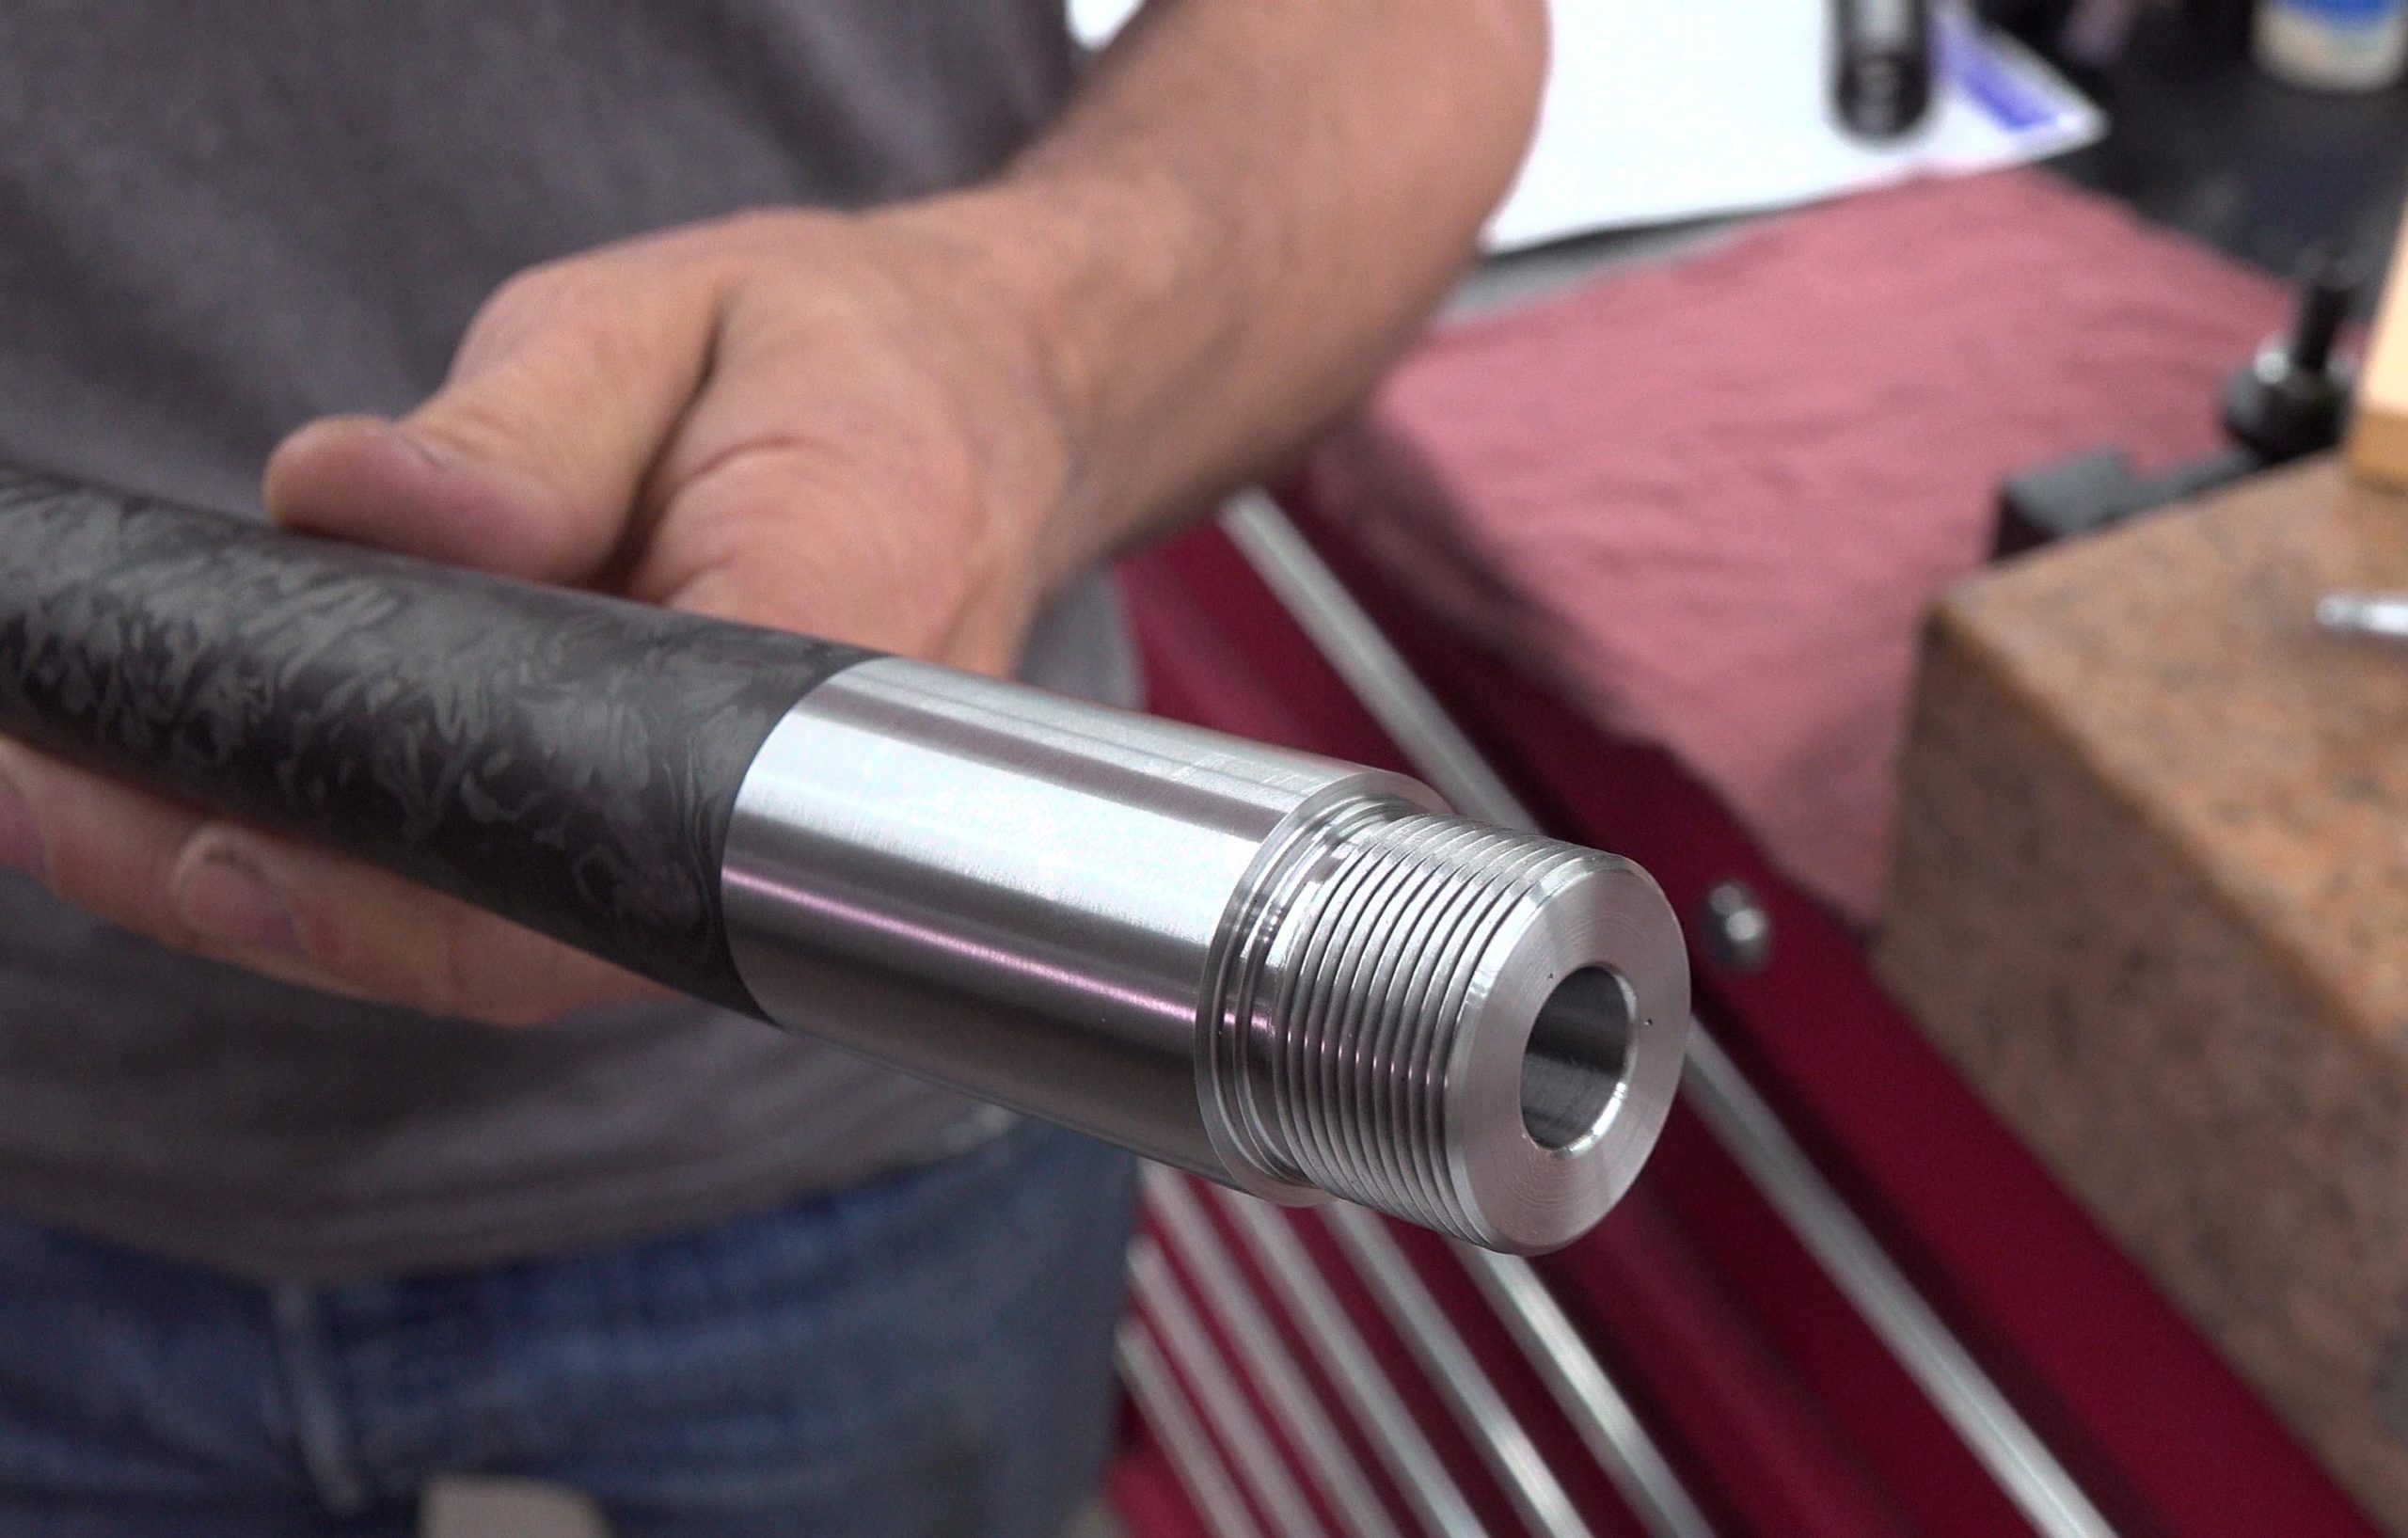
Part 1: Muzzle End Work

Bruce’s muzzle-end work is pretty much the same as what you’ve seen here on Ultimate Reloader:
- Mount barrel blank in lathe, here Bruce used a piece of paper to protect the carbon fiber barrel exterior.
- Part off the end of the barrel blank (as Proof Research directions outlined in this case)
- Indicate barrel to near zero runout
- Turn down tenon to diameter and length, cut thread relief
- Thread the muzzle tenon (Bruce uses lay-down style tooling with pitch specific inserts) – using a 0-1″ threading micrometer to check pitch diameter
- Cut the crown – Bruce uses very sharp solid carbide boring bars for this task
Part 2: Breech-End Work including Chambering
On the breech end, there are some differences with how Bruce does things: (exact order can be somewhat different)
- Check tenon print, capture/calculate/retrieve relevant dimensions
- Part / face end of tenon if needed
- Dial breech end of barrel with long-reach indicator in “throat area” (when chamber is finished)
- Pre-drill chamber to remove bulk of material (Bruce uses ER32 collets to hold drills instead of a conventional drill chuck)
- Single-point bore the pre-drilled area, using “steps” to enable reamer to be inserted to the point where pilot is engaging lands
- Turn down tenon to appropriate diameter, cut thread relief (Bruce leaves a “step” towards shoulder to help center in end of receiver)
- Thread tenon using a 1-2″ threading micrometer to check pitch diameter
- Cut chamber using pressure flush system, 70 rpm speed, and tailstock to plunge reamer
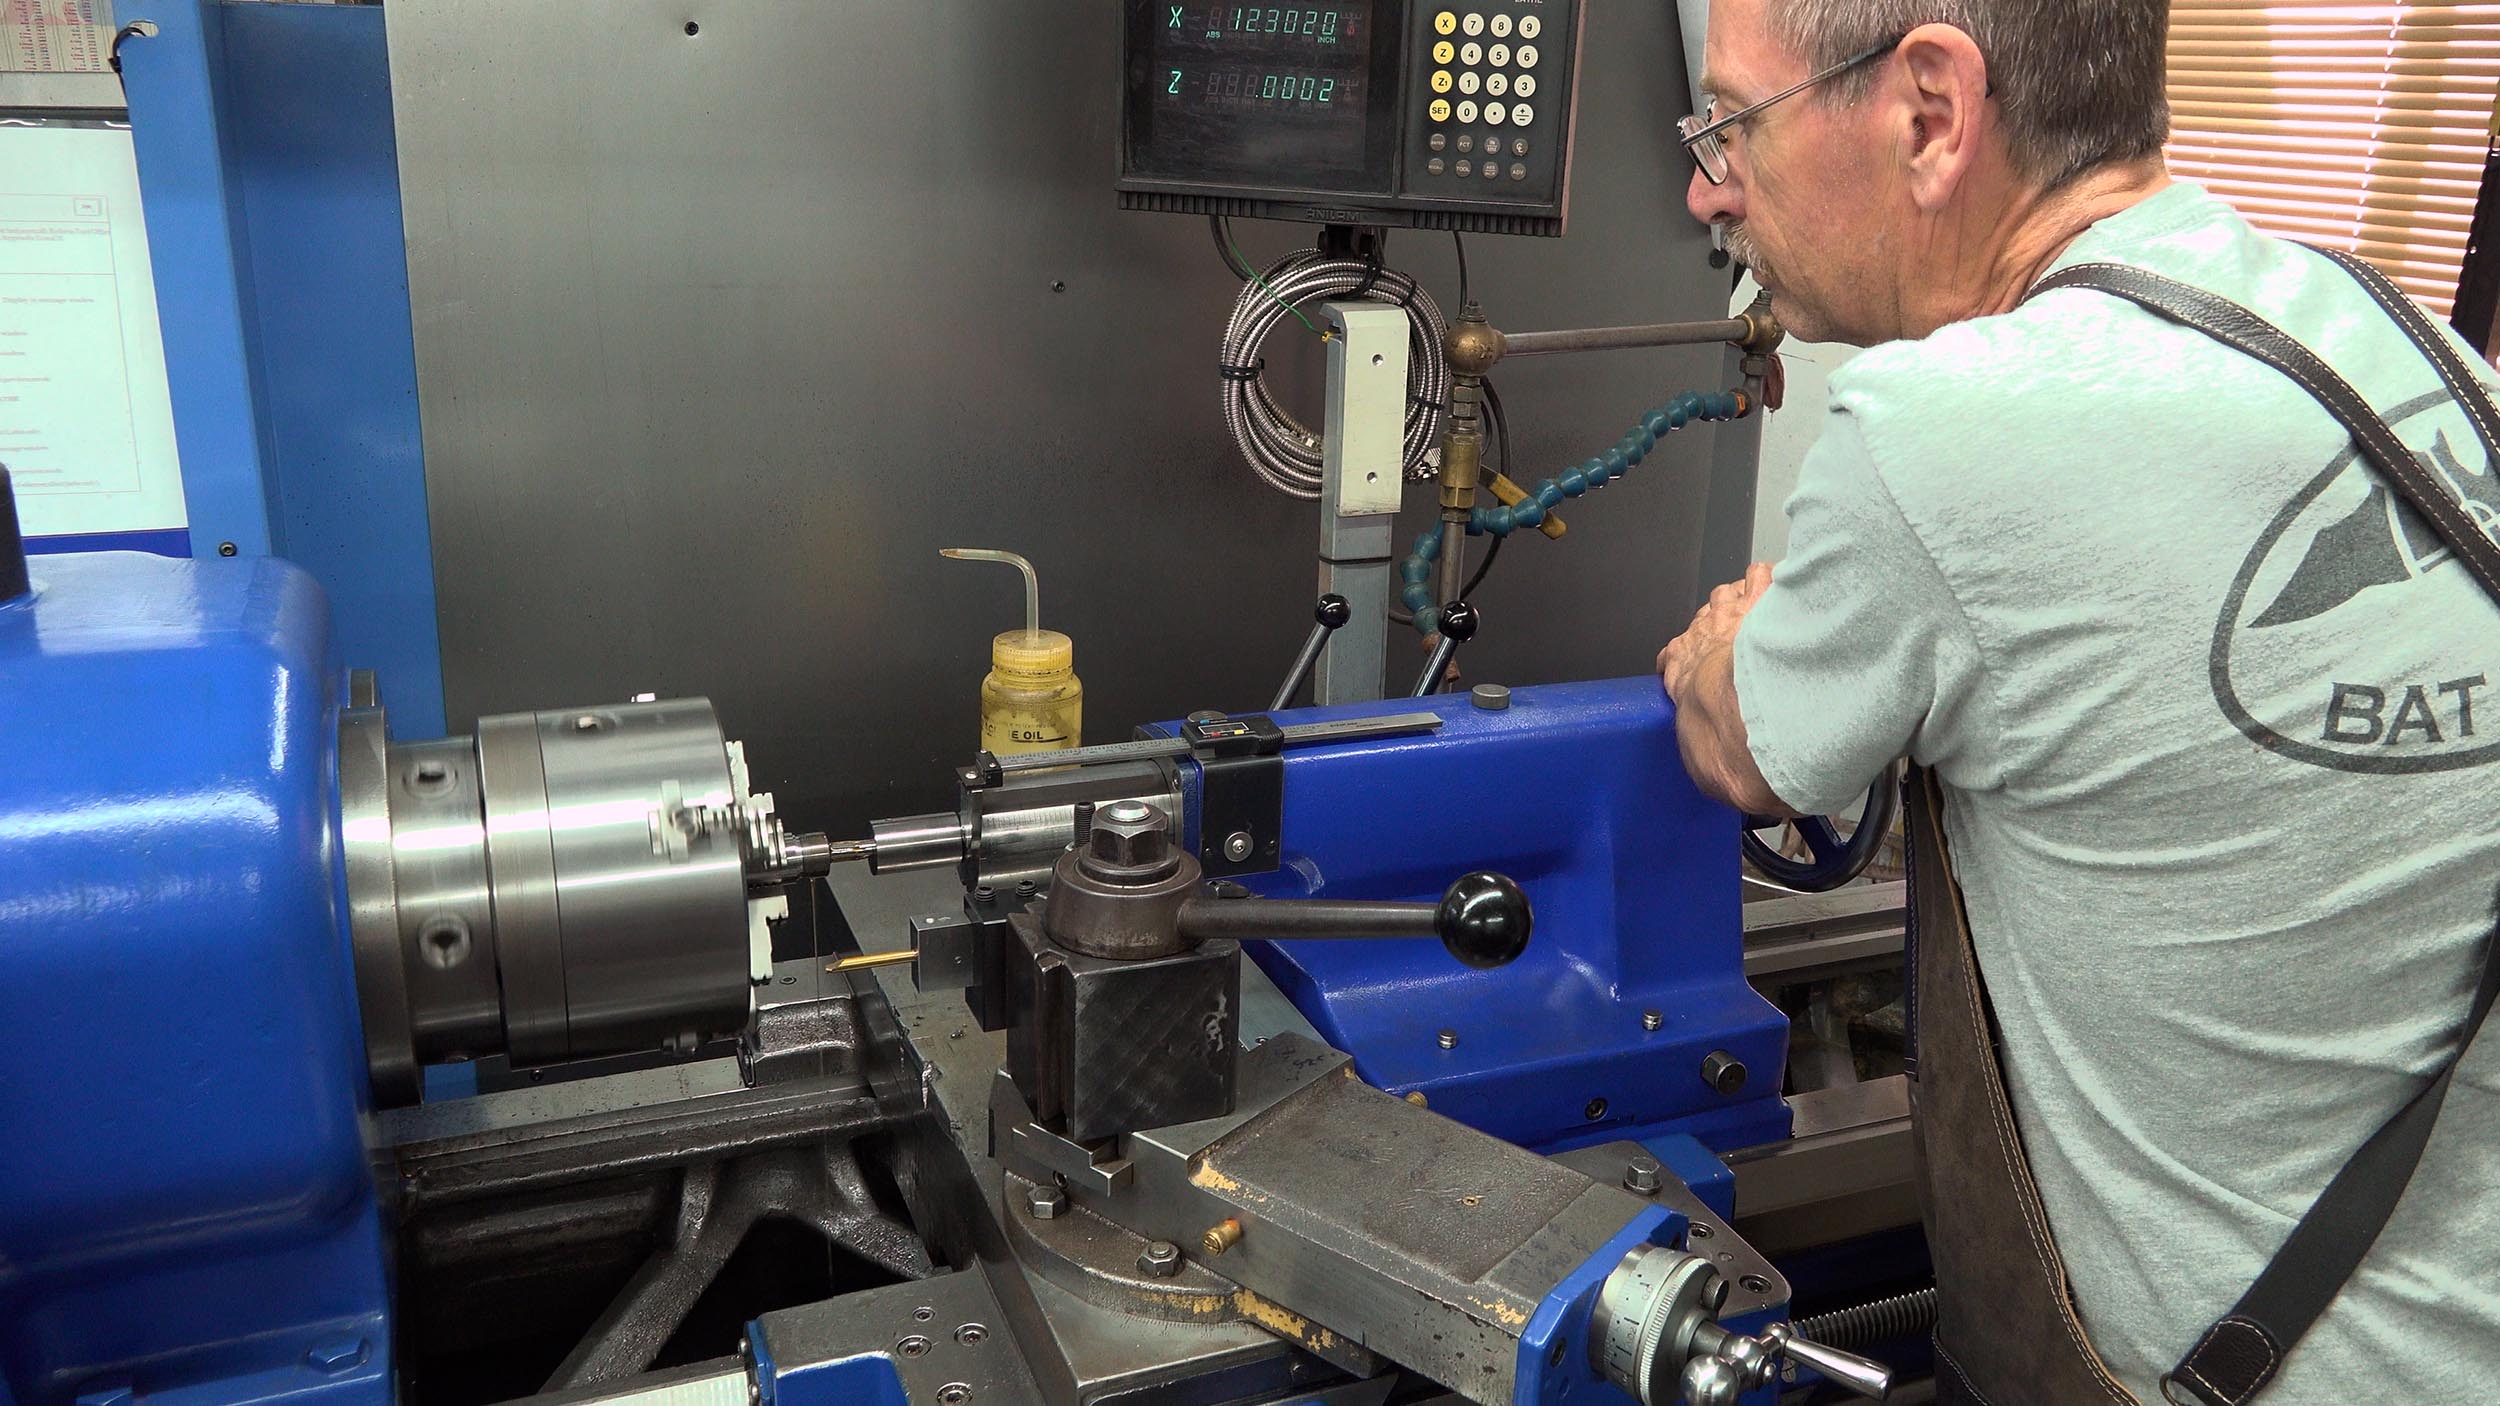
Above you can see the chambering process. Bruce uses the following for monitoring depth while chambering:
- The saddle (carriage, with cross slide and compound) is locked in place close to the spindle, the Z-Axis (left right) on the DRO is zeroed- it should stay at zero during the chambering process. The saddle has a rod pointing towards the tailstock that acts as a depth stop.
- The tailstock has a “DRO” scale that is zeroed with the reamer shoulder transition (largest diameter of shoulder area) exactly at “entrance” of chamber.
- The depth of the shoulder area of the chamber will correspond to the DRO reading on the tailstock
I’m in the process of setting up my Precision Matthews TL-1660 with a very similar setup as we speak!
Conclusion
I hope you learned as much as I did in the process of “taking in” Bruce’s chambering process. I have a lot of things to try and add to my process and lathe, that’s for sure!
If you are interested in Bat actions, please visit batmachine.com!
![]()
Don’t miss out on Ultimate Reloader updates, make sure you’re subscribed!
Thanks,
Gavin


Having issues viewing this video. All other videos work.