I recently showed how to make a rigid reamer holder in preparation for chambering for my 50 BMG. Today, we’re highlighting the barrel work.
Disclaimer
Ultimate Reloader LLC / Making with Metal Disclaimer: (by reading this article and/or watching video content you accept these terms). The content on this website (including videos, articles, ammunition reloading data, technical articles, gunsmithing and other information) is for demonstration purposes only. Do not attempt any of the processes or procedures shown or described on this website. All gunsmithing procedures should be carried out by a qualified and licensed gunsmith at their own risk. Do not attempt to repair or modify any firearms based on information on this website. Ultimate Reloader, LLC and Making With Metal can not be held liable for property or personal damage due to viewers/readers of this website performing activities, procedures, techniques, or practices described in whole or part on this website. By accepting these terms, you agree that you alone are solely responsible for your own safety and property as it pertains to activities, procedures, techniques, or practices described in whole or part on this website.
About the Build
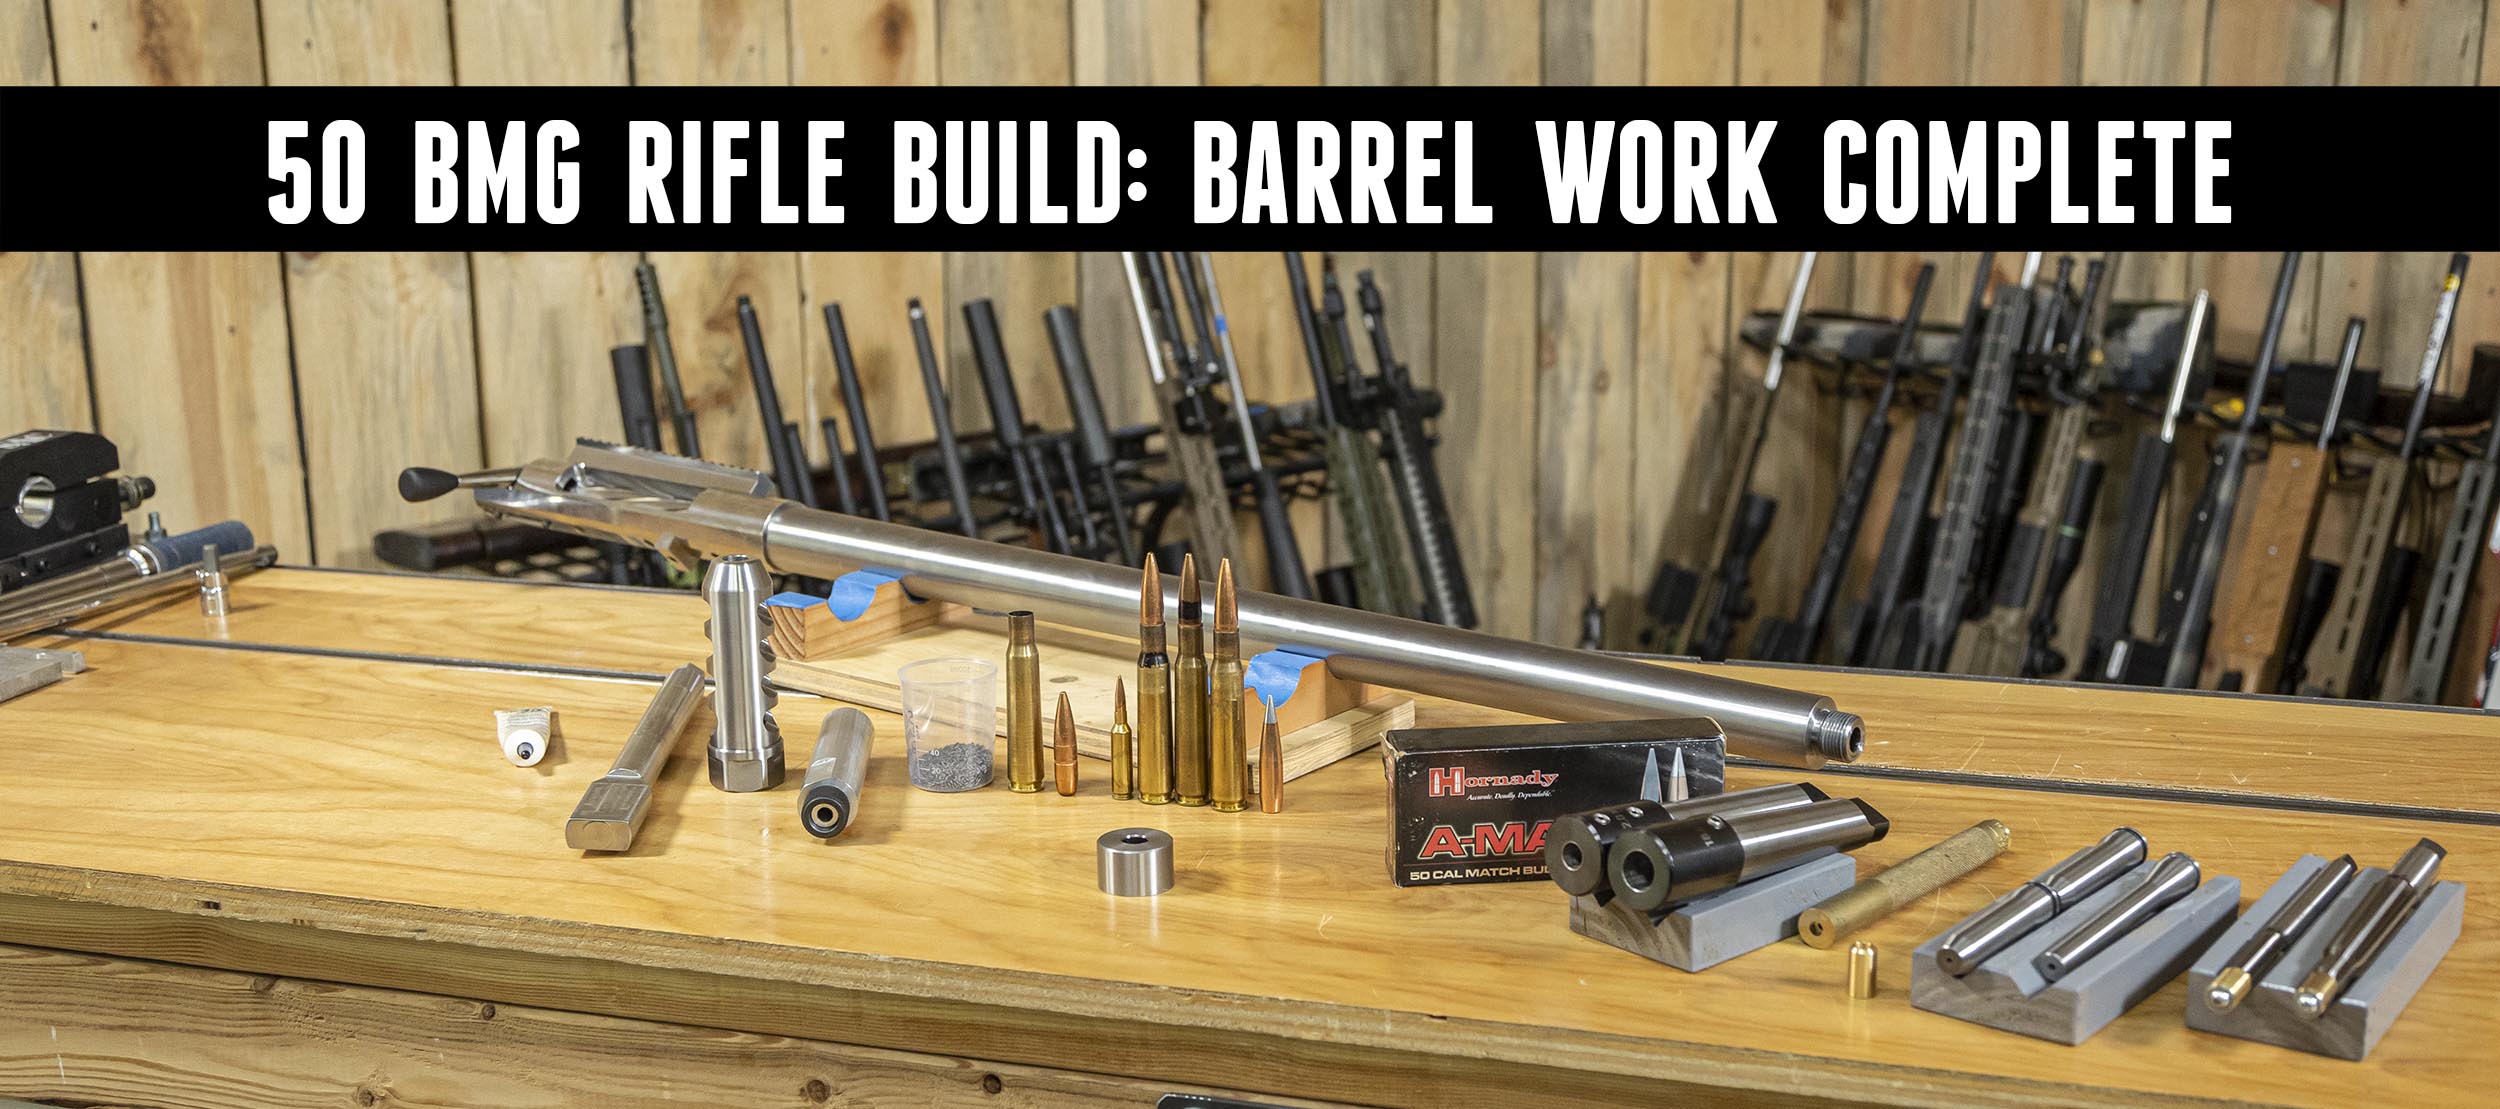
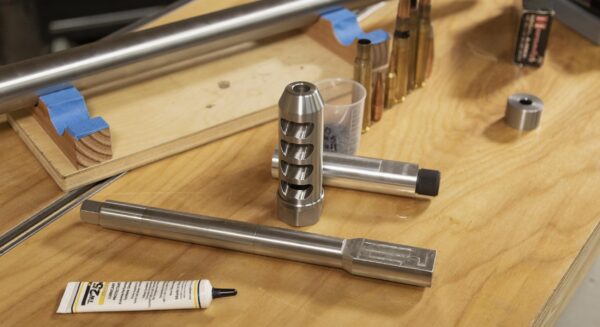
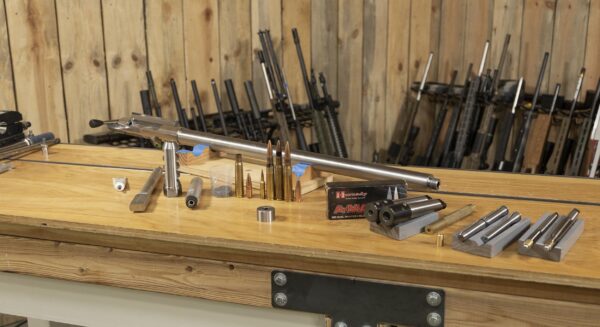
My barreled action is done! This hefty setup is already a beast. Even the action wrench from BAT Machine is of monstrous size.
Coming next is Cerakote, break-in, and extra long shots!
50 BMG Challenges
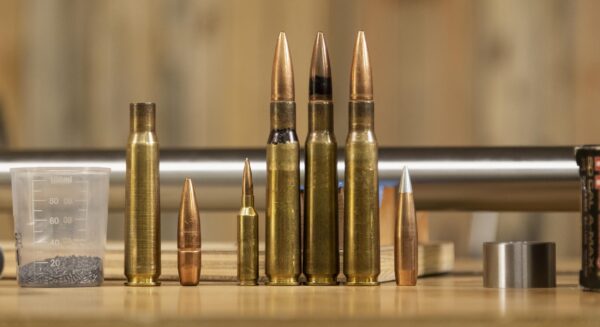
Chambering for 50 BMG presented a few obstacles. Everything is on a mammoth size and scale. It is not a SAAMI cartridge so it requires special tooling and documentation is lacking. I had to secure C.I.P. specifications—the European equivalent of SAAMI—and work from those.
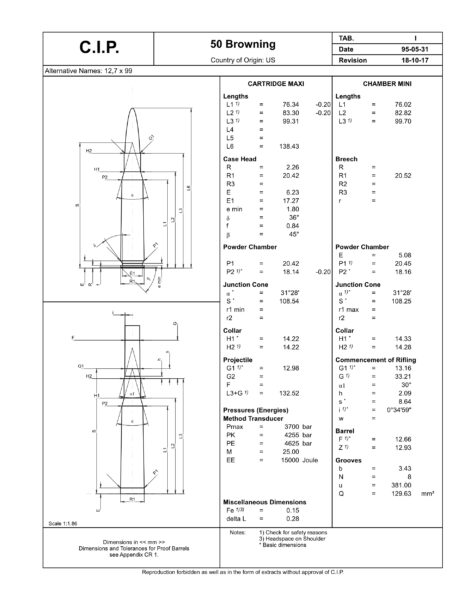
This required some metric to inch conversions and a few decisions. This cartridge has a variety of applications, from machineguns to ELR match shooting. I determined this build will not be a match gun, but for versatility and fun. While I want to adhere to tight specifications, I also want to ensure I can shoot 50 BMG military ammo including armor-piercing rounds and tracers. My plan is to follow up with a 375 Cheytac designed specifically for shooting at over a mile.
Machinery and Tools
For this mammoth job, I turned to my Precision Matthews TL-1660 lathe, the larger of my two lathes.

This lathe is a beast! Here are some of the specs for the Precision Matthews TL-1660:
- Ultra Precision, made in Taiwan
- 16″ swing, 60″ between centers capacity
- D1-6 high precision spindle
- English and Metric threading without gear changes
- One shot lube on the carriage
- 3-Phase 5hp motor
*Note: for most gunsmiths, the TL-1640 would be a great choice. You likely won’t need 60″ between centers like the TL-1660 offers. The TL-1640 can save both space, and significant money on freight! I opted for the larger lathe because I wanted to have a lathe on hand with extended capacity between centers.
Triebel Reamers and Gauges
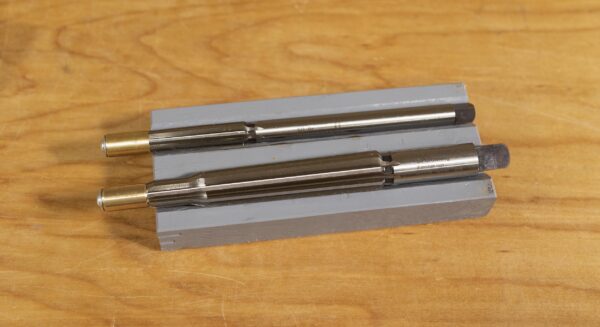
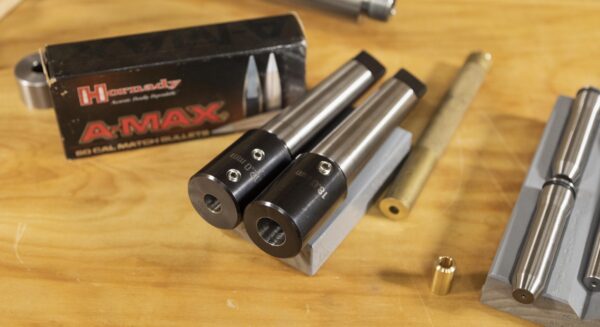
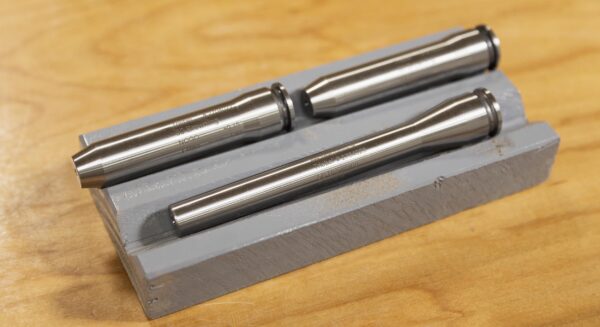
Tooling included my 12mm and 18mm rigid reamer holders for my Triebel body and neck and throater reamers as well as a freebore gauge and go and no-go gauges.
These holders provided such a rigid hold that I actually ran the Triebel body and neck reamer without a pilot bushing.
This gave extra oil flow to help evacuate chips. (I checked runout multiple times. It was practically zero!) I custom-made a bushing for the Triebel throater on the PM-1440GT because the original bushing combined with the barrel would have resulted in about 0.002 clearance. I wanted tighter tolerances, so I made the custom bushing from a brass drift punch.
I also have the outboard spider, which I built on the TL-1660. It screws into the inside of the 2.5” inch spindle. (With the spider installed, the spindle measures approximately 2.3”.) I also upgraded the machine with a tailstock DRO, which provides a real-time indication of reaming depth for greater precision and confidence. Finally, I have my DIY pressure flush system which doesn’t require any modifications to the lathe. This system is especially important when working on such large scales.
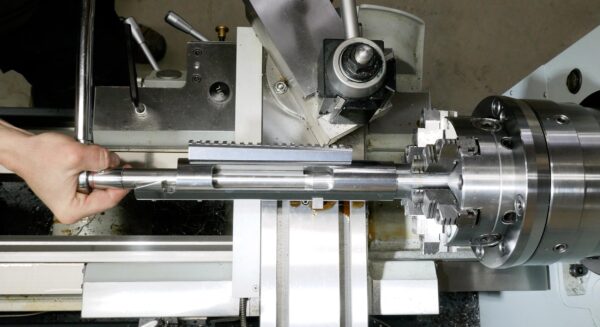
To make all of this work, I needed a barrel extension.
I started with a billet of aluminum, drilled it out and threaded it 1” x 14 female and ⅝” x 24 male, and added wrench flats. This special tooling provided greater stability, allowing the barrel to reach through the long spindle out to the spider. It also allows you to blow compressed air through the barrel to clear out chips and oil and serves as a connection point for the pressure flush system (⅝” x 24). For greater clarity, I laser engraved ends with the thread specifications.
Another piece of special tooling was the chuck bore-out.
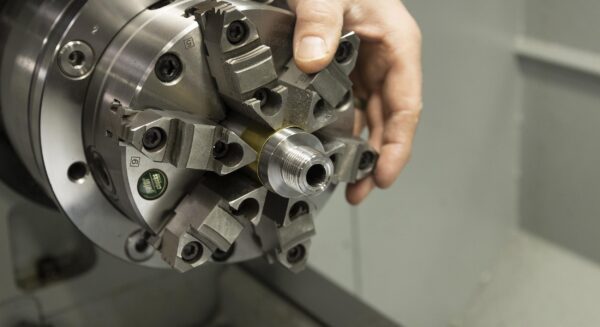
This lathe has 2.5” thru spindle capacity, but the chuck that is part of the true bore alignment system only provided 1.650” thru-chuck capacity. This barrel shank is 1.75” in diameter. To fix this issue, I removed the chuck jaws and took a boring bar to bore it out to 2.050”.

I chose 2.050” as I have a customer job with a 2” diameter barrel, so I wanted to accommodate that with some extra room. This is about as far as I could bore the chuck out. When I had the chuck apart, I noticed some Allan screws holding the chuck together. I was about to bump into the counterbore for where the heads of both screws go… (While I had the chuck apart, I took the time to clean it up, remove the factory grease, and relubricate it.)
BAT EX Tenon Specs
Once I had all the tooling and the C.I.P. specs, I turned to the BAT Machine EX tenon print for more information. BAT Machine supplies tenon prints for all their actions.
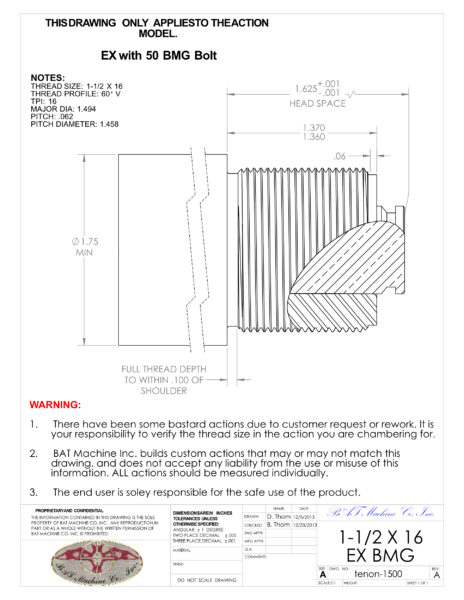
For a 50 BMG bolt face, the print specifies a 1.75” minimum shank diameter (what we have) and 1 ½” x 16 threads. Most of the threading I’ve done has been 1” x 16 or a 1 1/16 x 18. This is a full 1 ½” — much larger than I’m used to. This print also specifies pitch diameter and provides the numbers needed to calculate go gauge stickout (Headspace – Tenon Length = 0.255). It is absolutely critical to have all of your numbers correct before starting machine work.
Muzzle-End Barrel Work
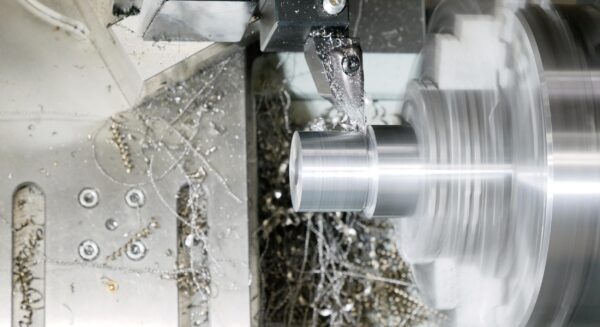
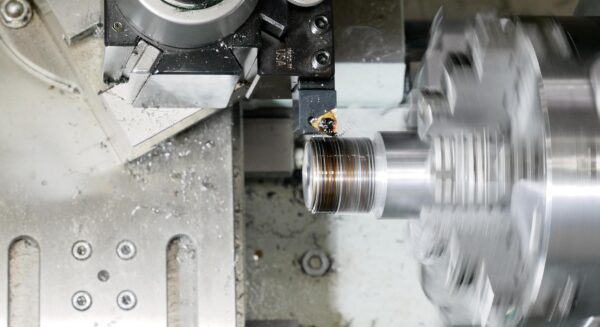
I started with the muzzle-end of the barrel, mounting the barrel in the lathe and doing a pre-dial to get it to about 0.001 of runout. I parted off an inch using an especially rigid cutting tool.
This was especially simple because of the size of the TL-1660. Larger lathes have fewer problems with chatter and breaking parting tools. After parting, I did a final dial on the muzzle end, turned the tenon, threaded the tenon and cut the crown.
For this I used some great equipment from Simtek Boring Bars, recommended by Bruce Thom at BAT Machine and friends over at Salmon River Solutions.
Breech-End Barrel Work
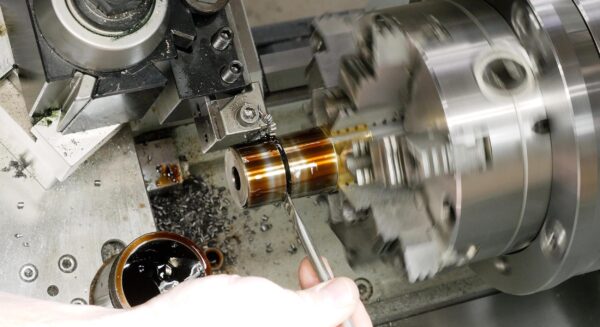
After flipping around the barrel in the lathe, it was time to get to work on the breech. I split this into three parts for simplicity. Part I included dialing in the barrel, facing the breech-end, turning the OD, cutting the thread relief, facing the shoulder and turning the 1 ½” x 16 threads.
It’s the same process as any other barrel, but with a lot more material. The OD of the tenon work turned out well.
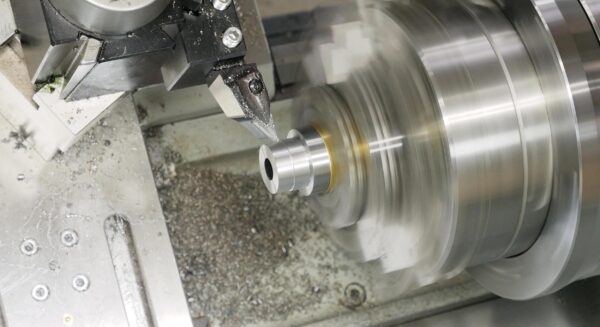
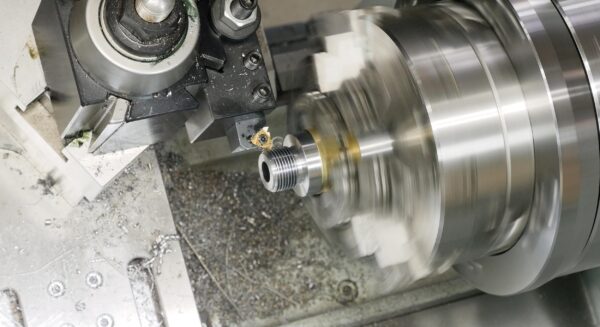
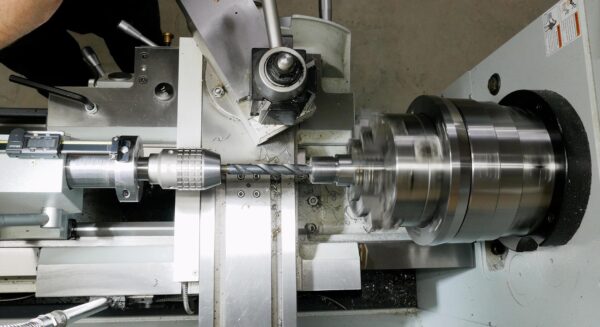
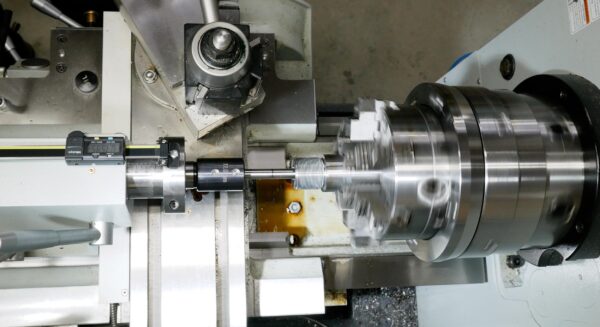
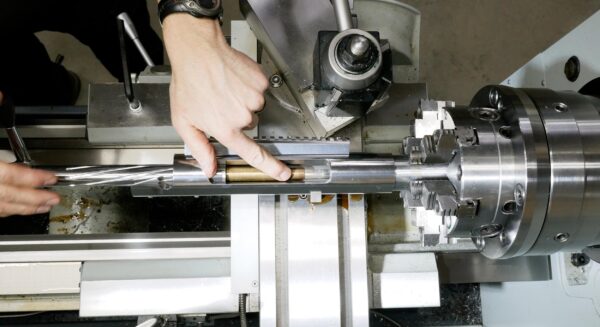
Part II, cutting the chamber, marked the largest chamber I have ever cut. I had to be really sure of my set-up, barrel dial-in and approach, lest greater risk of breaking the reamer.
I began with a 0.100” plunge, considering how the largest part of the shoulder on the head and neck reamer enters the hole we drilled and bored true. Bulk removal started with a drill bit while fine tuning was left to a boring bar.
I zeroed the tailstock DRO right where the reamer started to go into the hole at the upper part of the shoulder. This provides a reaming depth based on the shoulder. (You can find this distance on the C.I.P. specifications.) After this initial plunge, I checked runout with a dial test indicator— 0. This was an especially good sign considering I removed the pilot bushing on the reamer. I then ran three different passes, stopping to check for runout periodically.
Listening to the tool work is especially satisfying. It’s smooth, without any chatter. Occasionally, I’d place my fingers on the rigid reamer holder to feel for extra movement or vibrations—I felt none.
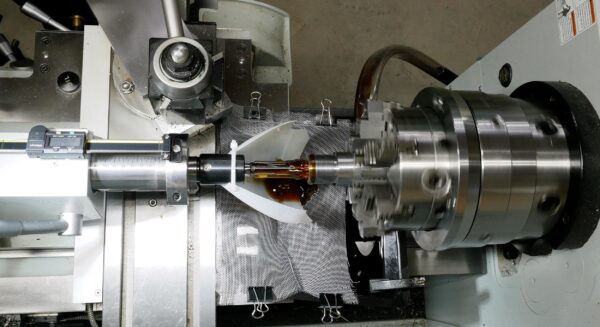
With so much material to remove, pressure flush came especially in handy.
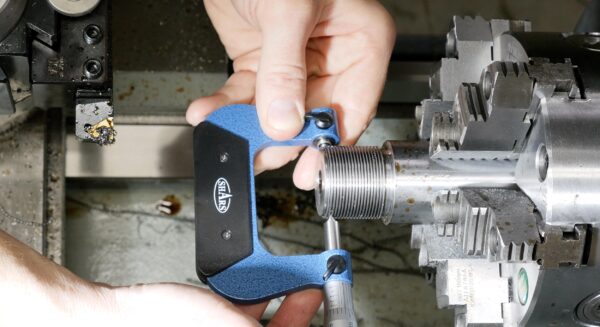
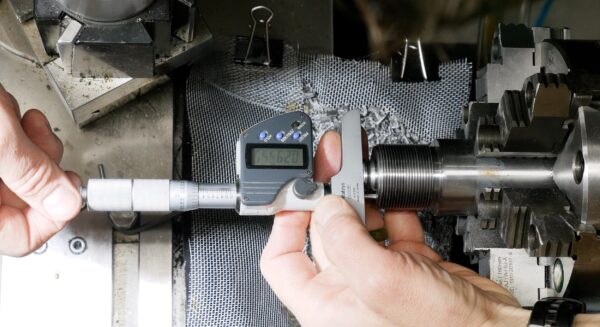
When it was time for final headspace checks, I screwed on the action and used the go and no-go gauges. The go and no-go gauges are about 0.006 apart—quite tight for a 50 BMG.
I got the headspace where I wanted it and went the extra mile, tightening the action onto the barrel while it was still held in the lathe. This is to ensure that when the threads compressed, I would still be within the desired specifications.
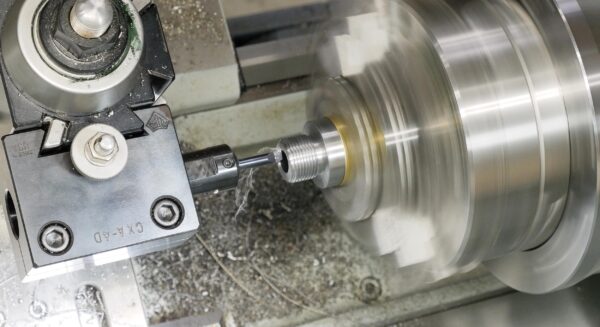
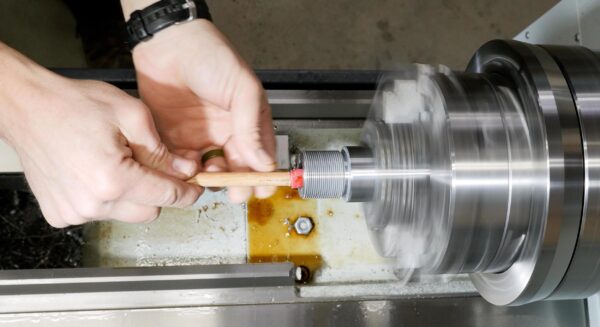
The throater reamer took center stage in Part III of the breech-end work.
Having a separate throater reamer allows for greater customization based on what ammunition you plan to shoot through the gun. I began with a 0.100” cut and measured the stickout with the freebore gauge.
I ran subsequent passes and squirted cutting oil onto the reamer without pressure flush. With so little material to remove, pressure flush wasn’t necessary. I also chambered the ball ammo to check stickout and verified with a Sharpied ogive of the bullet.
This process involved a number of checks. My freebore gauge is a minimum freebore gauge. I went just beyond this with the throater to accommodate the desired bullet jump for the 50 BMG ball ammo. (This ammo is old—manufactured in 1952!)
As part of this process, I pulled one of the bullets from the ball ammo. I had to go to the milling machine, use a ½” collet, tighten it down and use a vise and shellholder to remove the bullet. While looking at the individual components is cool, I could check headspace with an unfired case.
Lacking many of my loading materials (Hornady 50 BMG brass, etc.), I turned to Bruce and Daryle Thom from BAT Machine, Dave Manson, and others I trust for recommendations on how to best optimize the barrel.
To finish up, I cut the chamber transition, polished the inside of the chamber with some approximately 250 grit sandpaper on a dowel, and did some laser engraving.
When I laser engrave barrel details, I like to screw the action on and plan for appropriate clocking.
Conclusion
I invested over two to three times as much time on this chambering job as I do on more traditional chambering jobs. It was an incredibly valuable learning process and resulted in some special tooling. Having a lathe opens up worlds of opportunity for gunsmithing as well as custom-making whatever parts/tools you need. This came especially in handy for this job, as evidenced by the custom throater bushing and metric rigid reamer holders.
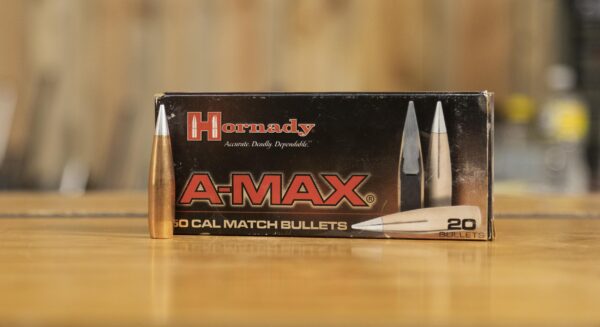
Next is a full Cerkaote job (chassis + barreled action) and bedding and final assembly. When all together, I have some military ball ammunition to run through the gun and have plans to work up a load with Hornady A-Max 50 caliber match bullets.
Get the Gear
Accurate Rifle Systems ELR Chassis
SSG True Bore Alignment System (TBAS)
Precision Matthews TL-1660 Lathe
Don’t miss out on Ultimate Reloader updates, make sure you’re subscribed!
Thanks,
Gavin Gear


