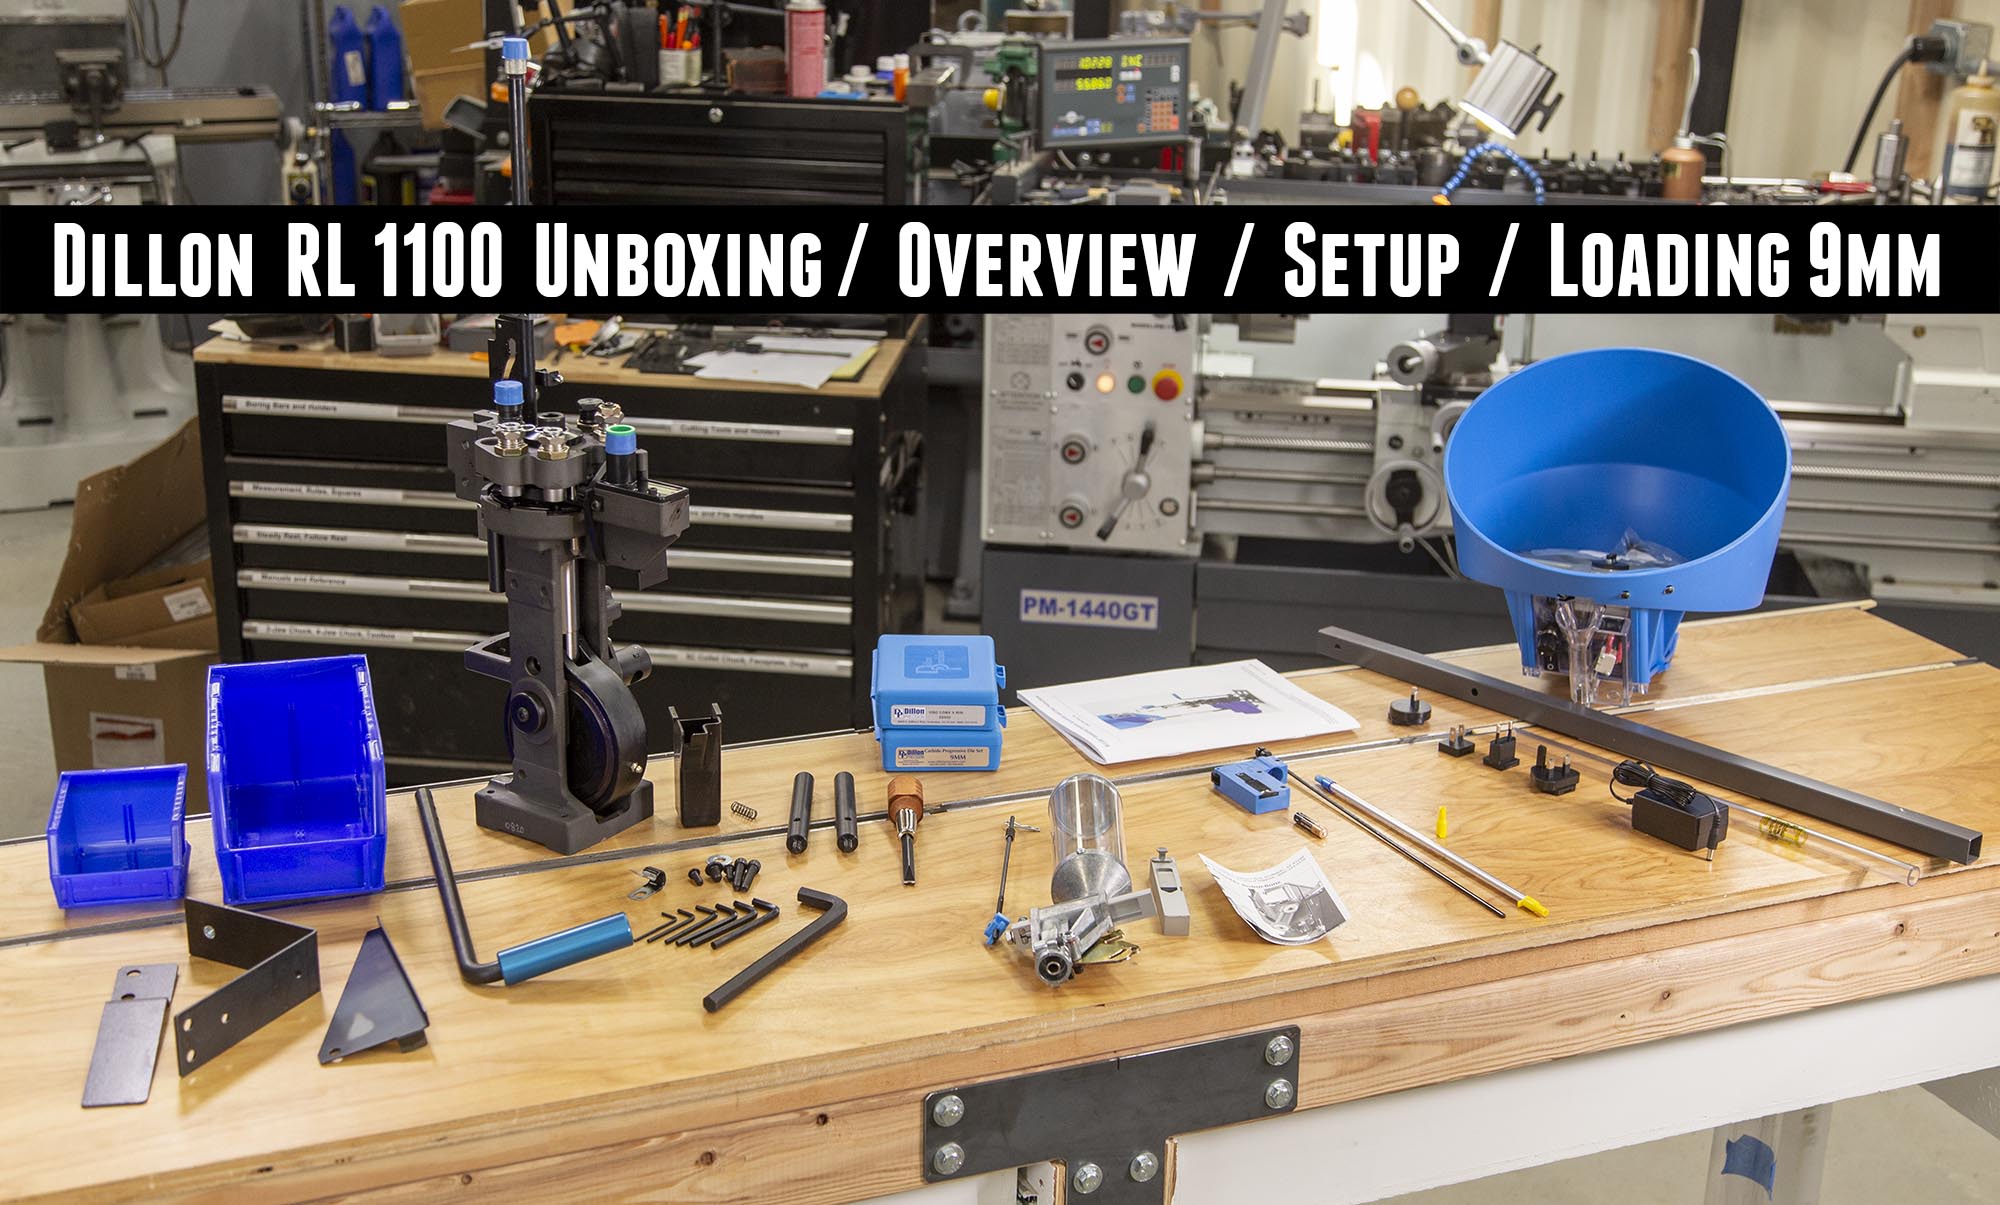
2020 has been a CRAZY year for the reloading industry, and that has caused some shortages and delays for components and equipment. And that was the case with the new Dillon RL 1100 reloading press. It’s taken a while longer to get ahold of compared to what I planned, but it has been worth the wait! In this article I’ll walk through unboxing, overview, setup, and loading 9mm with this awesome new press!
About the Dillon Precision RL 1100
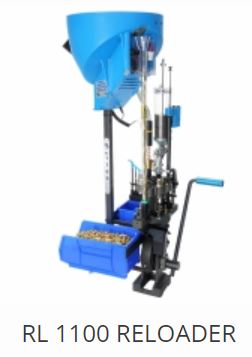
The RL 1100 replaces the ubiquitous “Super 1050” which has been a super-popular choice for high-volume and light commercial loading applications for YEARS. Here’s the information from the Dillon RL 1100 page:
The Dillon RL1100 is the newest reloading machine in the Dillon Precision Products line. It will accommodate common cartridges from 32 ACP up through 308 Winchester, up to 2.75″ overall length. The 1100 features a variable speed case feeder (included) that allows you to infinitely regulate the speed from 0 to 8 RPM. The motor has a universal power supply for both domestic and foreign voltages – 110 or 220 Volt, 60 or 50 hz, you simply swap out the plug to the style appropriate to your region. The bowl has an adjustable window cuff and cases deflector, for a larger range of cartridge capability.
The Dillon Precision RL 1100 features include the following :
-
- Eccentric Roller Bearing Drive System
- Smoother Operation, Less Effort
- Heavier Frame for Greater Rigidity
- Upgraded Primer Pocket Swager
- User-Replaceable Swage Rod Tip
- Spring-Loaded Priming Station Locator
- Reinforced Toolhead Bolt & Washer
- Improved Shellplate Indexing System
- 1050 Caliber-Conversion Compatible
- Two Year Warranty
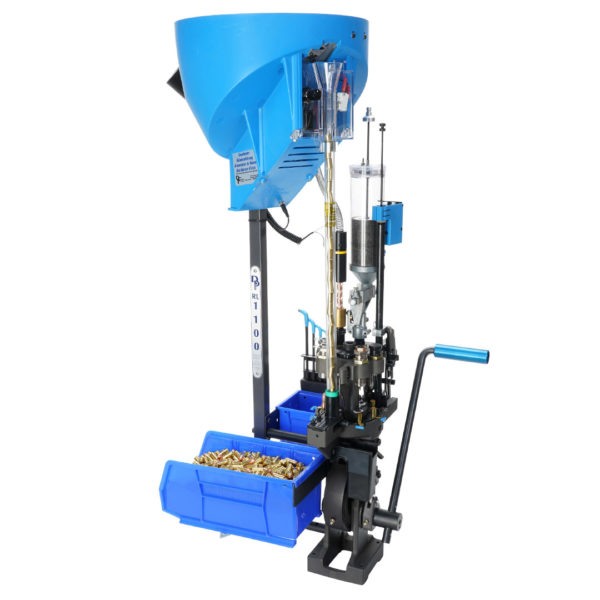
What’s In the Box
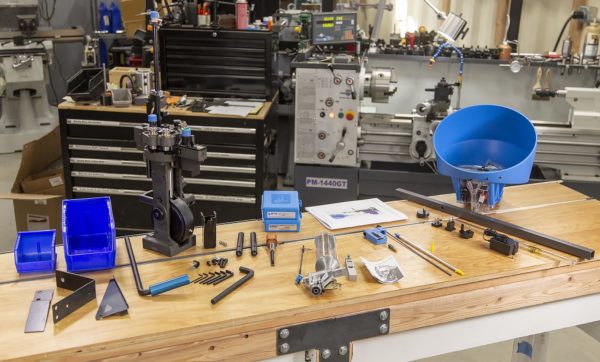
The Dillon RL 1100 comes setup to load a specific caliber (9mm in my case). It comes with everything you’ll need to load ammunition except components and common reloading tools like calipers and case gauges.
In the box you’ll find (clockwise in picture above from press):
- Press assembly
- Primer catcher bin
- Case feed stand-offs
- Boxes: 9mm die set, RL 1100 caliber conversion kit (these components are mostly installed on press at the factory)
- Owner’s manual (see PDF copy HERE)
- Case feed bowl (motorized), case feed mounting pole, case feed power supply
- Priming components including low primer buzzer
- Powder measure (includes both bars, rifle + pistol with one pre-installed) and fail-safe rod
- Primer size change special tool (notched straight-slot screwdriver)
- Allen key set (for all allen keys on press)
- Roller hanels
- Brackets and Akro bins (large and small)
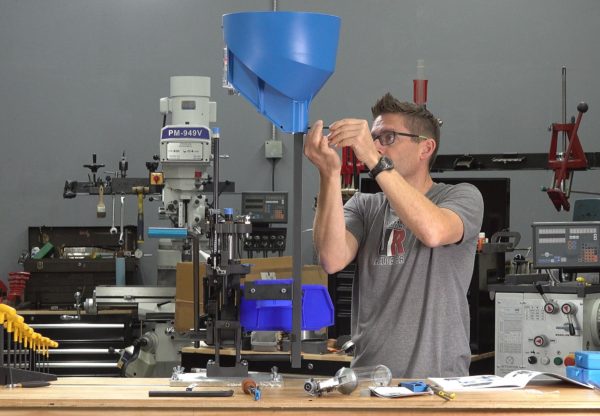
Assembling the Press
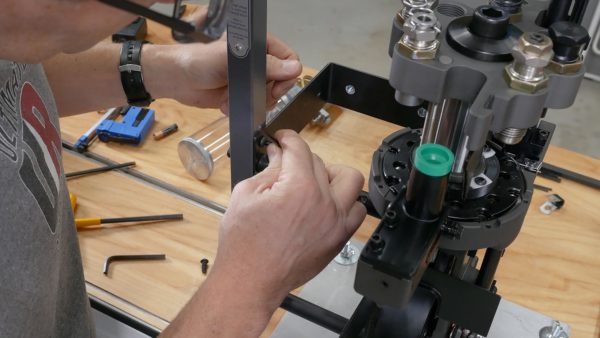
I started press assembly the way the owner’s manual outlined the install with some small changes (order of handle install):
- Mount press to bench (fabricated custom bench plate for Ultimate Reloader Bench System as seen in video)
- Install case feed pole stand-offs, brackets, and pole
- Install large and small bins (completed cartridge bin, bullet bin)
- Install primer catcher
- Install press handle
- Install locator buttons and tabs
I then moved on to the case feed system, powder measure, and final details!
Here’s the order for those installation activities:
- Install case feed bowl (secured by allen screw as seen in picture above)
- Plug power adapter into wall powder, connect to case feed bowl (you’ll need to install the plug adapter for your region)
- Install powder measure and fail safe rod
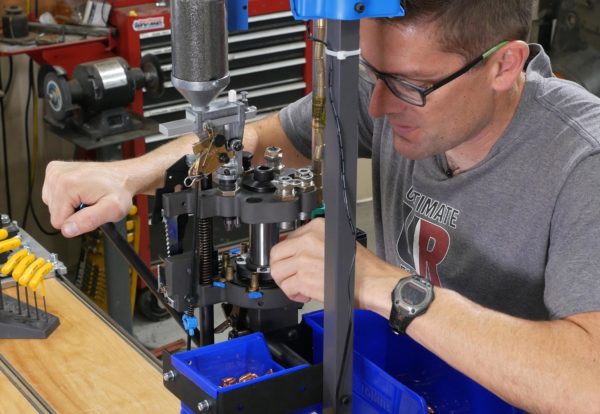
Next it was time to validate the setup. I ran some cases through the press and adjusted the following:
- Primer seat depth (increased)
- Powder charge (decreased to 4.2 grains per load data)
- Powder die height (case flare), lessened
- Fine-tuned case feed motor speed

Above: adjusting primer seat depth
9mm “Magic Load”
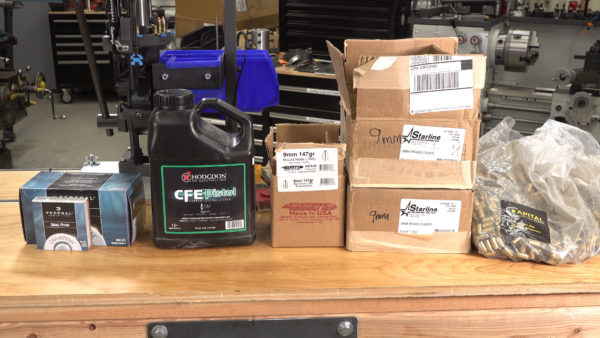
For this loading session, I’m using the same load data from my “Magic Load” article– a great performing subsonic 9mm load.
Use load data at your own risk. Ultimate Reloader is not responsible for errors in load data on this website. Always cross-reference load data with manufacturer’s published data.
- Bullet: Berry’s 147 grain plated 9mm Round Nose
- Powder: Hodgdon CFE-Pistol, 4.2 grains
- Primer: Federal Small Pistol Primers
- New brass: Starline 9mm (new)
- Once fired brass: Capital Cartridge 9mm
- COL: 1.150″
Note: If you are shopping at Capital Cartridge, be sure to use the “ULTIMATE” code to save 10%

Man Your Die Stations!
You could consider the Dillon RL 1100 either a 7-station press, or an 8-station press, depending on whether you count the “dieless case inserter station”. I’ll label them all here!
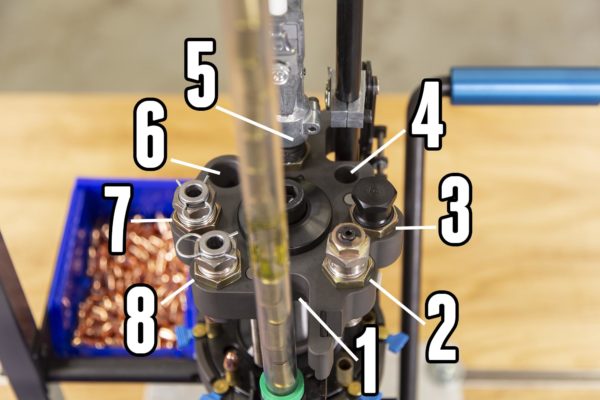
Here are the die stations shown above:
- Case inserter
- Sizer/De-Primer
- Swager (with hold-down)
- Priming (no die)
- Powder charge and expansion (expansion for pistol cartridges only)
- Not used in my setup (can use powder check, or bullet feed)
- Bullet seating
- Crimping
Full Progressive Loading
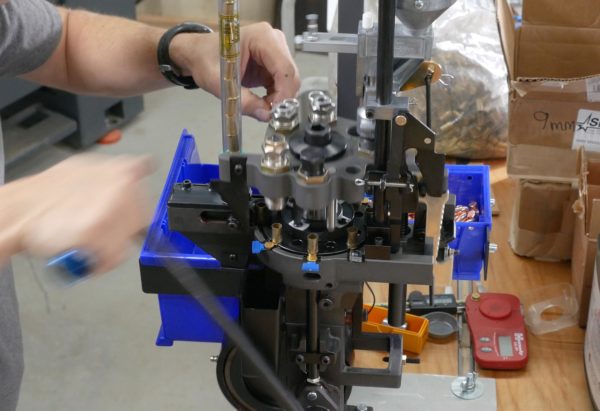
To get setup for full progressive loading, you’ll want to perform the following “pre-flight” steps:
- Confirm/adjust powder charge and case flare
- Confirm bullet seating depth and adjust as needed
- Confirm primer seating depth and adjust as needed
- Fill case feeder with cases, turn on case feeder
- Fill primer tube
- Fill bullet tray with bullets
- Run a case through the press to confirm functioning
You can now “rock and roll” by filling up the stations and loading progressively!
I was able to load trouble-free with the RL-1100 with both new Starline 9mm cases, and with once-fired 9mm cases from Capital Cartridge. My limitation on speed came from how long it took to grab/orient/place bullets on cases! I loaded 600 rounds on the press in no time.
The Dillon RL 1100 is for serious reloaders such as competitive shooters, smaller ammunition manufacturing shops, and other high-volume applications. Everything on this press is top-notch quality, and it’s really setup for high-speed loading, especially if you add a power check system and bullet feeder! (I plan to).
Get Yours
You can buy a Dillon RL 1100 directly from dillonprecision.com!
There, you’ll also find all of the parts and pieces you’ll need for various calibers that you want to load with your RL 1100. Of specific note is that the “Super 1050” caliber conversion parts/kits are fully compatible with the RL 1100, so if you want to add an RL 1100 to a “Super 1050 Shop” you’ll have no problems!
Don’t miss out on Ultimate Reloader updates, make sure you’re subscribed!
Thanks,
Gavin


Thanks for a very interesting review as always.
Are you able to judge how the different crank/bearing system used in the 1100 & the revised indexing feels relative to the 1050?
You mentioned the 1100 is a replacement for the 1050 whereas Dillon have said it’s to run alongside the 1050 as the 1050 is able to load longer cartridges.
Gavin
Where are you finding primers? Or are they what you have on hand?
New to reloading.
With the 1100 coming out do you thing the 750s will drop in price a little ?
It’s incredible but than again it unaffordable Dillon. My last progressive press was a Hornady Lock in Load. Now that I’m retired on disability I’ve come to realize that I’m no longer in the game. I appreciate all these advances but I think I’ll stick with my Forster Co Ax, LEE Classic for de-priming and maybe add a high quality Turret press for pistol. As the shooting community continues to get squeezed thing will continue to become increasingly expensive.
How does the Dillon stack up against the Mark 7? I have heard the 1050 was way more complex caliber conversion wise than the 650 (which I own). Did the 1100 make strides there?
hi i would like to see 10mm and 45 acp done on the dillon 1100 thanks