I’ve mentioned rigid reamer holders many times, most recently in my 50 BMG build kickoff. Today, I’m showing you how to make your own!
Disclaimer
Ultimate Reloader LLC / Making with Metal Disclaimer: (by reading this article and/or watching video content you accept these terms). The content on this website (including videos, articles, ammunition reloading data, technical articles, gunsmithing and other information) is for demonstration purposes only. Do not attempt any of the processes or procedures shown or described on this website. All gunsmithing procedures should be carried out by a qualified and licensed gunsmith at their own risk. Do not attempt to repair or modify any firearms based on information on this website. Ultimate Reloader, LLC and Making With Metal can not be held liable for property or personal damage due to viewers/readers of this website performing activities, procedures, techniques, or practices described in whole or part on this website. By accepting these terms, you agree that you alone are solely responsible for your own safety and property as it pertains to activities, procedures, techniques, or practices described in whole or part on this website.
About Rigid Reamer Holders
Bruce Thom, owner of BAT Machine, introduced me to rigid reamer holders at his personal shop. I’ve used multiple types of reamer holders over the years, but I have fully transitioned over to Thom’s tool-holding methodology.
Rigid tool holding is good tool holding. This statement rests at the heart of Thom’s strategy. The more rigid, the better it is. Rigid tool holding also helps solve another issue. If the tailstock on your lathe isn’t perfectly aligned with the spindle in the headstock (wrong angle, height, etc.), making your own rigid reamer holder will eliminate the problem, providing perfect, rigid tool-holding characteristics. This reduces chatter and is very accurate.
Making Your Own
Making your own rigid reamer holder is very affordable. They are also very flexible. 7/16” is the U.S. standard for reamers. The standard for Triebel reamers is generally 12 mm for standard cartridges. It’s just as easy to make a metric rigid reamer holder as it is to make an SAE one.
Start with Morse Taper #4 blanks with a tang. I bought them online for approximately $17. This is minimal compared to the $500 to $800 costs of high-end tool-holding equipment from Europe. Another benefit of the rigid reamer holder is it is perfectly aligned to your specific machine. (You still need to align your lathe before you cut the tooling.)

Begin by putting the Morse taper blank into the tailstock and getting the tailstock into position. Place a drill bit in the chuck in the headstock and get the appropriate speed going. Feed the tailstock in and pre-drill the bulk of the material. Next, put a boring head in the headstock.
As I’ve gone through this process, I have learned a few things. When I first placed my boring head in the headstock, I chucked up on the straight shank, resulting in a ton of chatter. I determined this wasn’t a very rigid tool, and channeling my inner Bruce Thom, I decided to chuck up on the body instead. I was sure to leave access to the adjustment screw. This was a huge improvement.

It’s critical not to over-cut your hole. I zeroed the dial indicator on the back side with the boring head intact before loosening the locking clamp screws. I watched the indicator intently as I loosened the screws, stopping when the dial matched the amount I wanted to remove in terms of radius. (The cut will be twice the radius, aka the diameter.) I took a few passes to be extra careful. You can take away material, but you can’t add.
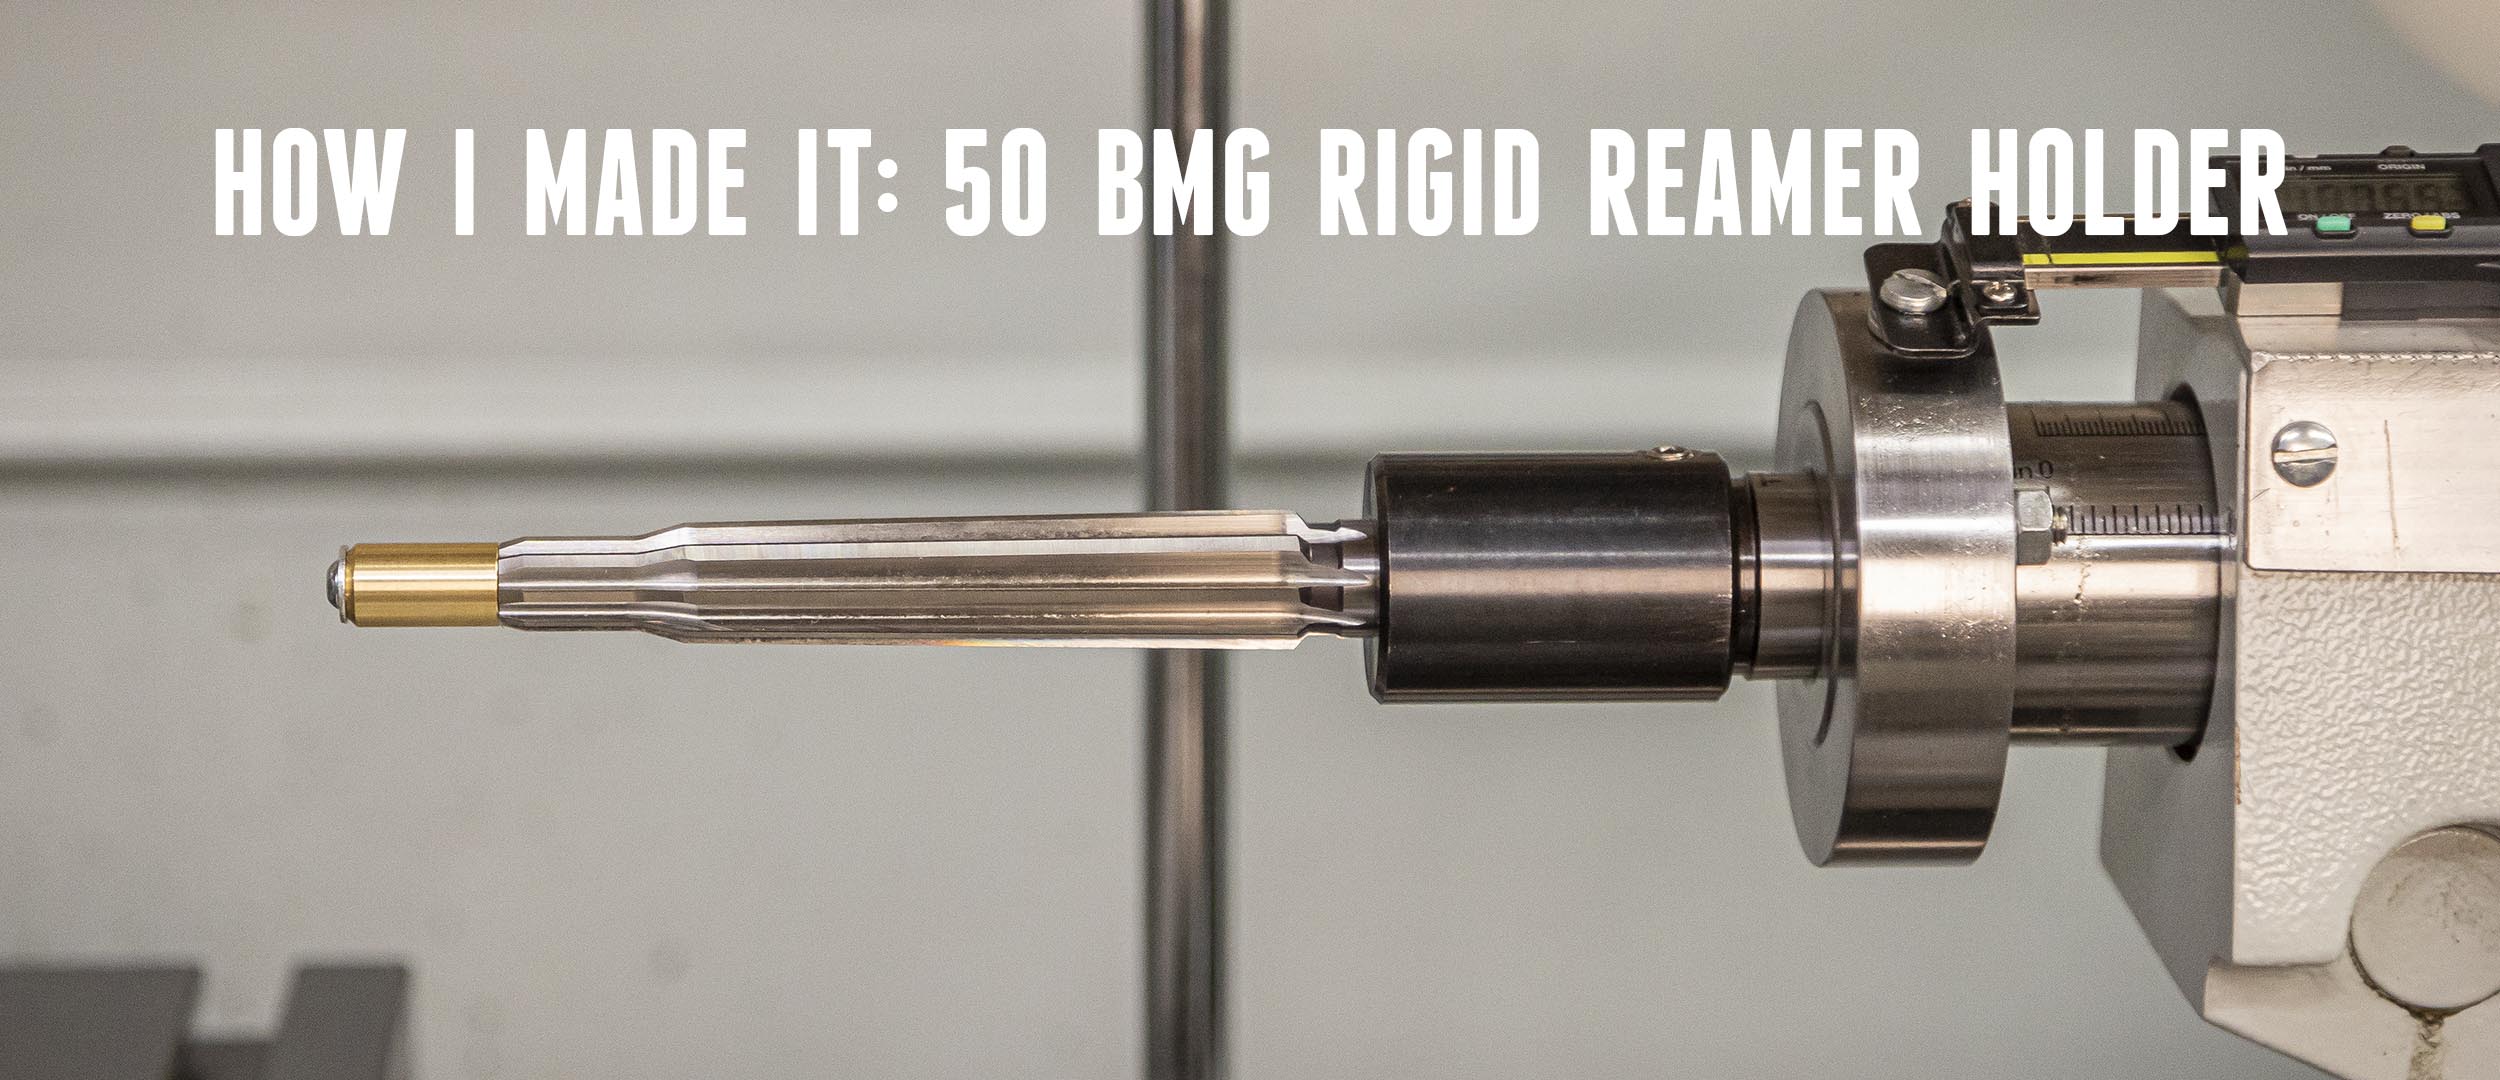
I completed my most recent holder, my 18 mm rigid reamer holder for my 50 BMG build, in two different drilling steps. They don’t make pin holders for this size, so I had to take approximate measurements with digital calipers and use the reamer as a reference. (Take a close look at the reamer and you’ll find a small ground surface on the flats that is the same diameter as the shank body itself.) Turning at a fairly fast spindle speed, I carefully worked up to the desired numbers. Using this method, everything is cut perfectly straight and true, perfectly coaxial with respect to the spindle. Before you remove the Morse taper from the tailstock, mark the top of it with a silver Sharpie or some other marker. It’s important to do this to ensure it indexes properly. (If you forget to do this, you have to use a dial indicator and remark it.)
Clamp the rigid reamer holder you just cut the hole for in the headstock and hone it to the final shape. This step doesn’t change the dimensions, but improves the surface finish. I used some sandpaper on a wooden dowel through a split cut on the end for this process along with some machine oil. I test-fit the reamer until I got the perfect fit with an airtight seal (no O-ring required!).

I then drilled and tapped (5/16”-18) the holder for a set screw and inserted the reamer to the proper depth. When I felt the set screw hit the flat as I twisted the reamer in, I knew it was ready to go. There is no give in a reamer. At this point it will either cut perfectly or snap off.
Sidebar: Triebel Gun Tools
The reason for making my 18mm rigid reamer holder was for my 50 BMG body/neck reamer from Triebel Gun Tools! Here’s an overview of the reamers and gauges they manufacture:
If you are wanting to check out these tools, go to the Triebel Guntools Website.
Conclusion

I’ve made 7/16”, 12 mm and 18 mm rigid reamer holders. All have worked very well for me. The evidence is in the cut. You can hear the chips curling inside the reamer flutes—a completely different sound than you hear with a floating reamer holder. Making your own rigid reamer holder is a completely custom, perfectly aligned and affordable alternative to expensive, specialty tooling.
Don’t miss out on Ultimate Reloader updates, make sure you’re subscribed!
Thanks,
Gavin Gear