
In order to trim perfect brass, the cutter head adjustment is critical.In this story I’m going to show you 2 ways to adjust the Henderson V3 Cutter Head for the caliber you want to trim for!
Disclaimer
Ultimate Reloader LLC / Making with Metal Disclaimer: (by reading this article and/or watching video content you accept these terms). The content on this website (including videos, articles, ammunition reloading data, technical articles, gunsmithing and other information) is for demonstration purposes only. Do not attempt any of the processes or procedures shown or described on this website. All gunsmithing procedures should be carried out by a qualified and licensed gunsmith at their own risk. Do not attempt to repair or modify any firearms based on information on this website. Ultimate Reloader, LLC and Making With Metal can not be held liable for property or personal damage due to viewers/readers of this website performing activities, procedures, techniques, or practices described in whole or part on this website. By accepting these terms, you agree that you alone are solely responsible for your own safety and property as it pertains to activities, procedures, techniques, or practices described in whole or part on this website.
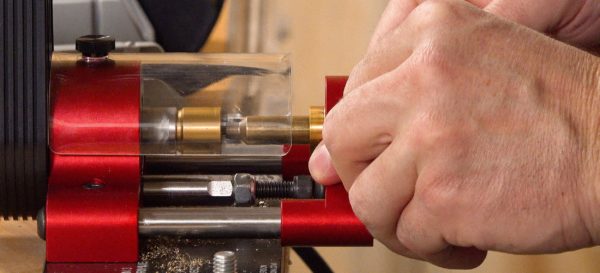
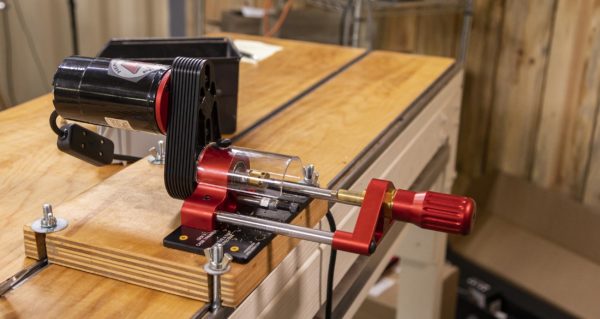
In the last story we took the Henderson V3 Powered Case Trimmer out of the box.
We set it up, and mounted it to the bench. We put it to the test trimming some 6 Dasher Brass, and accomplished a really nice trim.
In that story, the only adjustment we made to the machine was the depth stop, controlling the length of the cut. But what if you want to switch calibers on your cutter head? Let’s get into it.
To start, I would recommend that you get dedicated cutter heads for each caliber that you want to trim for on a regular basis. Here’s a rundown on the “anatomy” of the Henderson Cutter Heads (which by the way, are compatible with Forster Pilots).
The Cutter Head
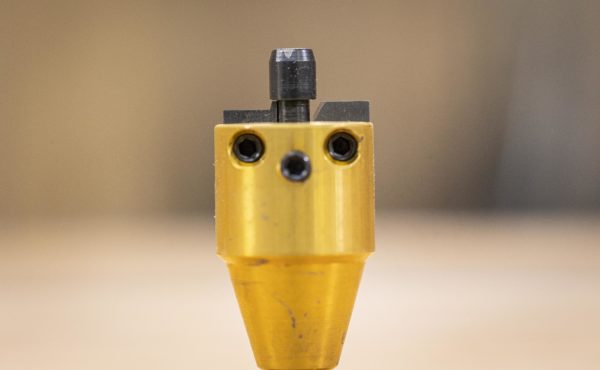
The Henderson cutter head has 3 set screws for adjustments, and carbide blades.
Here’s a breakdown of the set screws as viewed in the image below:
- Left Set Screw: Secures the Left Blade – Blade cuts case to length, ramp performs inside diameter chamfer
- Middle Set Screw: Secures the Pilot
- Right Set Screw: Secures the Right Blade, controls outside diameter Chamfer
Let’s get into the first method for adjusting the blades for your desired caliber.

Method 1: No Special Tools
To start each method you will need a sized case, and we will begin with the set screws loosened and the blades retracted from the center.
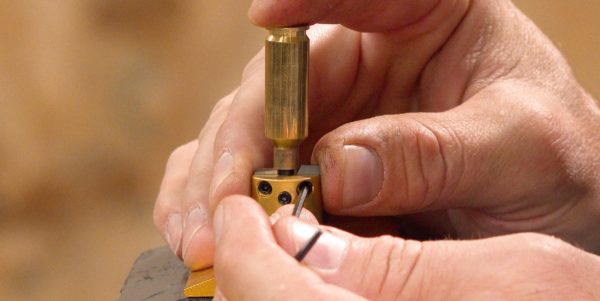
Part 1: Left Blade
- Install the Pilot, and tighten the set screw.
- Loosen the left set screw.
- Slip the sized case over the pilot.
- Push down on the left blade, and pull away from the pilot (with gentle pressure)
- Lock down the left set screw
The goal is to engage the blade with the inside portion of the case neck, and push down as you tighten the set screw. The blade must be parallel with the top of the cutter body. Your left blade is set.
Part 2: Right Blade
- Loosen the right hand set screw.
- Push the blade inward towards the case
- Lock down the right set screw.
Your blade is now set!
Repeat Part 1 and Part 2 above as many times as needed, re-adjusting each time as needed.
Perform a test trim. You should see a slight outside diameter & slight inside diameter chamfer, with a nice flat finish on the case mouth.
Method 2: A More Efficient Method Utilizing Some Special Tools
A couple tools will help with this method:
- .156 Pin Gauge Available on Amazon HERE
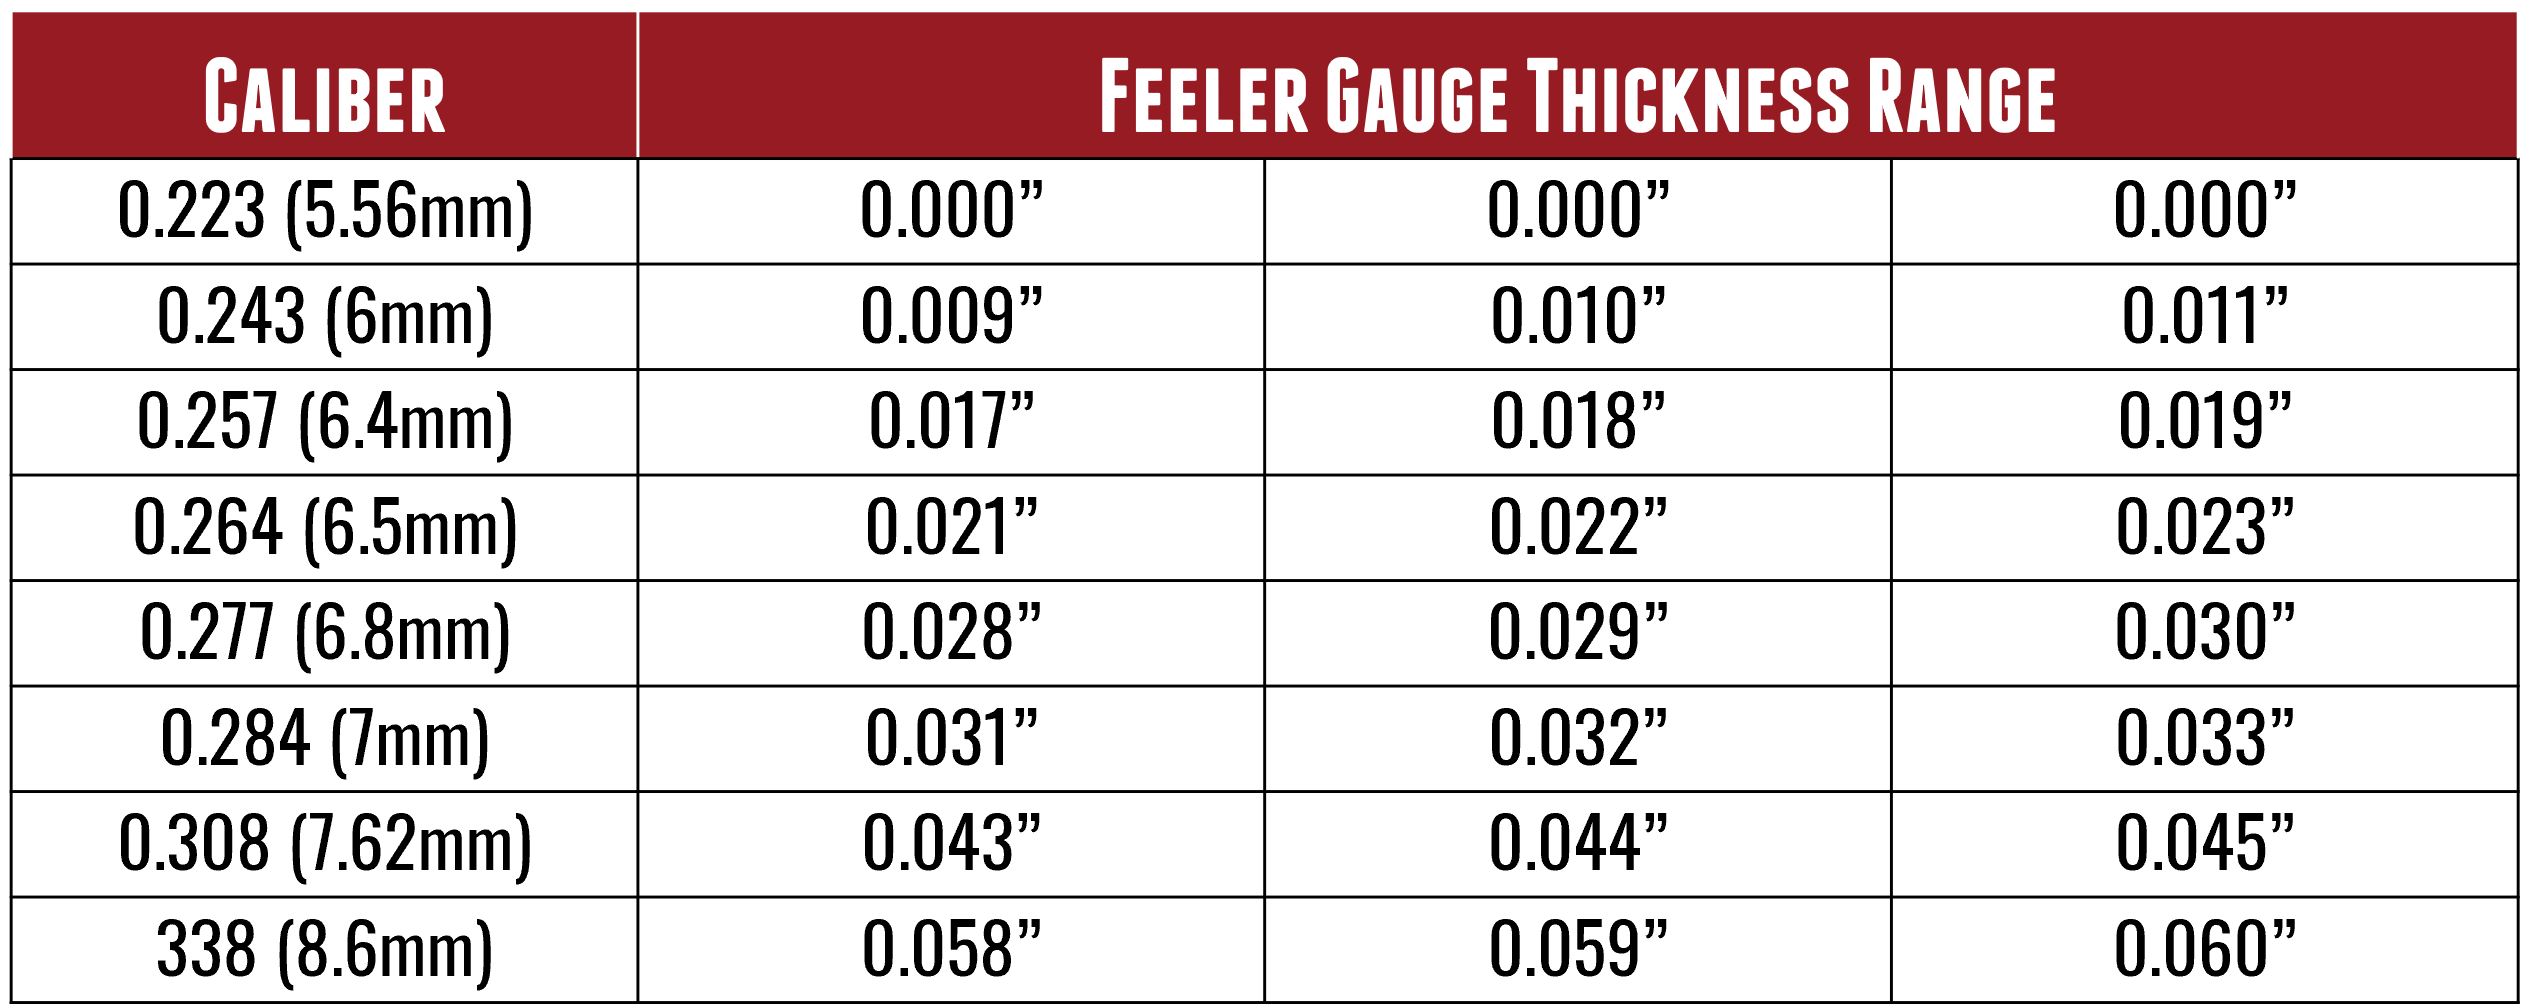
- Feeler Gauge (size will vary depending on your caliber) Feeler Gauge Set Available on Amazon HERE
Please note that you will need to use the correct feeler gauge for the caliber you are choosing to size. Increasing thickness will increase the inside chamfer. Decreasing thickness will decrease the inside chamfer. In this case, I am using a .0013 feeler gauge.
The chart below will help you determine the size of your gauge:
Also, for this method I held the cutter head in some soft jaws on my bench vise. This made the adjustment easier, as well as served better for demonstration. If you do this, make sure you have padded jaws *and* do not overtighten your vice jaws!
As stated before, start the adjustment process with the blades secured in a retracted position, and with the pilot not in place.
Part 1: Left Blade
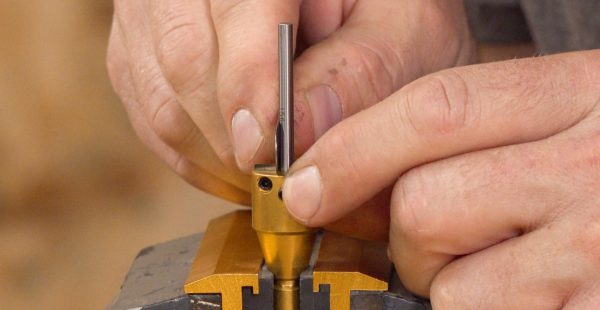
- Install the .156 pin gauge into the pilot hole on the cutter head.
- Loosen the set screw for the left blade, and prepare to adjust.
- Put the feeler gauge between the pin gauge and the left blade, pushing it towards the middle and down.
- Once you obtain a “slip fit” fit, lock down your set screw and check your setting! You should be able to re-insert the feeler gauge, and move it between the blade and pin gauge with slight tension. The blade should be parallel to the top of the cutter head!
- Remove the pin gauge and install the pilot
Part 2: Right Blade
- Loosen the right hand set screw.
- Push the blade inward towards the case
- Lock down the right set screw.
Repeat Part 1 and Part 2 above as many times as needed, re-adjusting each time as needed.
Now you can perform a test trim. Again we are looking for a slight outside chamfer, slight inside chamfer, and a nice flat face on the front of the case mouth.
At this point, you are ready for some bulk trimming!
Get the Gear
So there you have it: two different methods to adjust the cutter head for the Henderson V3 Powered Trimmer. If you’ve made it this far and have not checked out my previous video on the Henderson Trimmer, go ahead and check it out!
Henderson V3 Powered Case Trimmer
Don’t miss out on Ultimate Reloader updates, make sure you’re subscribed!
Thanks,
Gavin Gear


