
In my last post, outlined some ideas and goals for talking the slop out of the fit between the upper and lower receivers on the AR-MPR rifle. The first step is to remove the gaps between the sides of the upper receiver lugs, and the channels at the front and back of the lower receiver. With approximately .017″ of total slop (front gap + rear gap), that would equate to approximately 8″ of hypothetical variation in point of impact (if the receiver could twist fully in each direction). .
While I contemplated bedding the lugs with the receiver with epoxy, I decided that since the lugs are bearing surfaces when the upper and lower are opened/closed, this could cause wear with a “softer” material like epoxy. I am looking for a more long-term fix.
The experiment:
Based on the goals, and the tools that I have on hand, I decided to remove the hard coating and weld the lug holes shut, leaving excess aluminum “raised up” that could be milled down to the proper dimensions. While not as ideal as hard coating, the aluminum should prove reasonably resistant to wear and tear.
Step 1: Prep the Surfaces
I did two things to remove the hardcoat (anodizing) from the lug surfaces where welding would take place. First, I filed down the sides of the lugs. I was amazed at just how hard the hardcoat treatment is. It felt more difficult than filing mild steel by far! Second, I drilled out the holes to remove the hardcoat from the insides of the holes. Again, I was amazed at how hard the harcoat treatment was to drill – in fact, I had to sharpen the HSS drill bit a couple times to get the job done. Drill Doctor to the rescue!
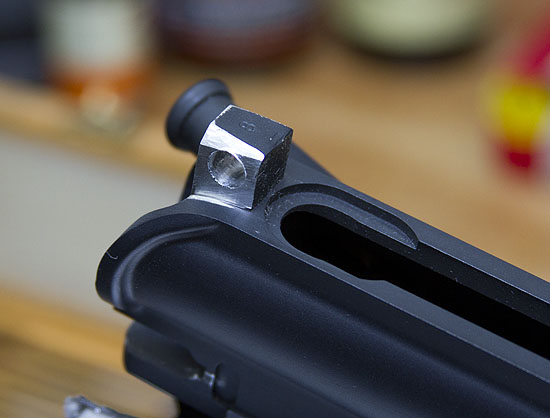
Step 2: Weld the Lugs
I’ll admit- using my Lincoln Powermig 200 for this job was a bit of overkill – in fact, I would have preferred using a TIG welder (something I’ve yet to try) – but I thought this would be worth a try.
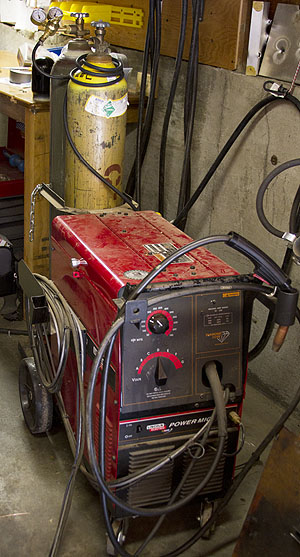
MIG welding aluminum? Don’t forget your spool gun! I used 100% argon gas and my spoolgun for this welding job. I don’t weld aluminum frequently, so I had to experiment on a test piece, and put on a split tip. Once I got things setup, it was time to go.
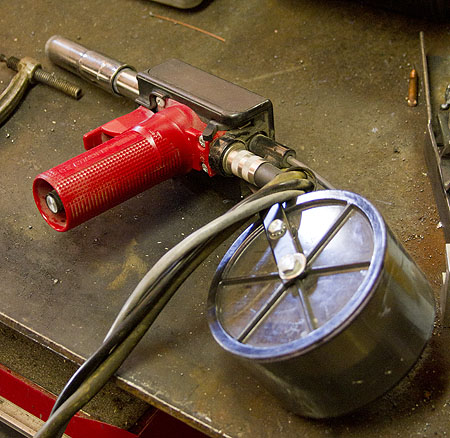
Welding aluminum is very exacting- it’s not like welding steel where you have a high degree of flexibility on temperature, and can see the temperature by examining the color of the weld puddle (Red = Cold, Yellow = Hot). With aluminum, you have a response more like microwaving butter. All solid one second, melted through the next second. You really have to watch the shininess of the edges of the puddle, and practice a lot.
Overall, the welding went well using quick “blasts”. As I expected, the corners rounded off a bit due to the high intensity of heat.
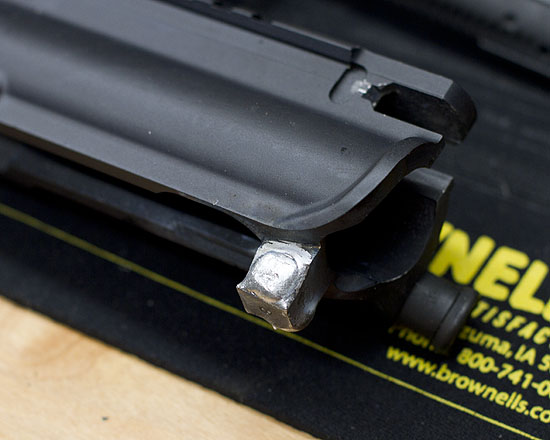
- Lug after welding – Image Copyright 2011 Ultimate Reloader
The result was not perfect, but given the tools at hand, and the experimental nature of this project, I felt the outcome was acceptable. Next, we’ll cover milling the sides of the lugs, and re-drilling the holes.






What…..why are you doing this? The mating of the lower receiver to the lower receiver is not a critical point in achieving higher down-range precision. All you are doing is compromising the hardness of the upper receiver. You were better off (if still convinced it was anything worth your time) drilling and tapping the shelf area at the rear of the lower receiver and fitting a hardened allen screw like featured on some higher priced lower receivers.
Well, this is an experiment 🙂 I wanted to constrain the mods to the upper receiver if possible- we’ll see if this changes anything at the range!
Well more power to you. I hope it works out. I’ve honestly never seen anyone attempt to do it this way.
Hey, it’s just a toy right? I understand the desire to tweak and modify, what can it hurt? At the worst you will trash an upper receiver, if so it’s a simple swap out to fix. Now, with that being said, I will bet that you will see absolutely zero improvement in accuracy. You will probably experience some degradation in fit-up over time, since you have essentially changed your hard anodized 7075 T-6 forged lugs into 4043 castings. (weld deposits are fundamentally castings) Still, it’s good to just try things, someone has to be the first.
It does improve your accuracy. I just bed mine with Devicon.
Just buy a matched billet upper and lower… end of problem…
I’ve “bedded” upper receivers to a specific lower using JB Weld. Just the mating surface on the upper is where the JB Weld is applied. The lower receiver is waxed with ordinary paste wax like Johnson’s and allowed to dry.
The upper’s mating surfaces are degreased with acetone, then a very thin layer of mixed JB Weld is applied using a razor blade. You can always add more, removing squeeze-out can be messy. If you didn’t do so well in art class, you can always apply masking tape to the outside. Let the JB Weld set up for an hour before assembling, this reduces the mess. Put the receivers together and let cure for 8 hours, then disassemble and clean up the internal squeeze out with a sharpened case mouth, the brass is softer than the aluminum but harder than partially cured JB Weld.
It lasts forever. And it is an issue to remove if you ever switch lowers, a little heat can work wonders. Just not over 300 F, this can draw the temper of the heat treated receiver. Which is an issue with actual welding.