
Have you ever wondered how a custom rifle action is machined and assembled? I certainly have, and in this article (and video) I’ll take you on a tour of the shop at Bat Machine in Post Falls Idaho and in the process show you how they build world record setting rifle actions!
About Bat Machine
![]()
Back in 1991, Bruce Thom started BAT Machine which was later incorporated in 1996. Bat stared with manual machines, quickly moving to CNC machines later in the 1990s. Bat Machine quickly achieved a following in benchrest circles- the most demanding scenario for rifle accuracy. Bat now makes rifle actions targeted at benchrest, hunting, and tactical competition.
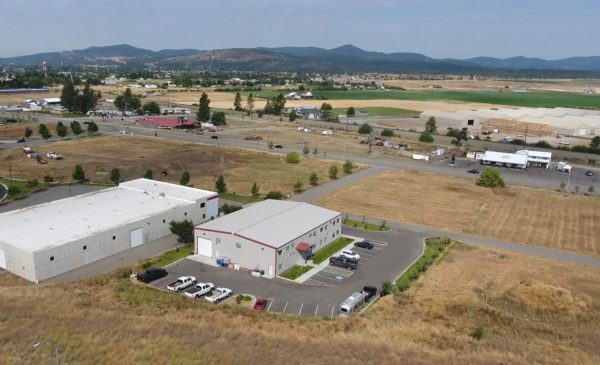
Above: Bat Machine facility in Post Falls Idaho
Here are links to the top-level product category pages on the Bat Website:
2-Lug Repeater and Single Shot Remington 700 Size Actions
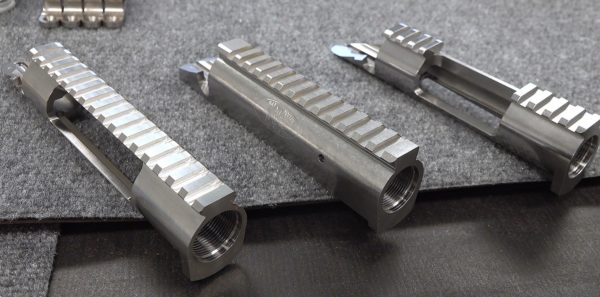
Finished Product
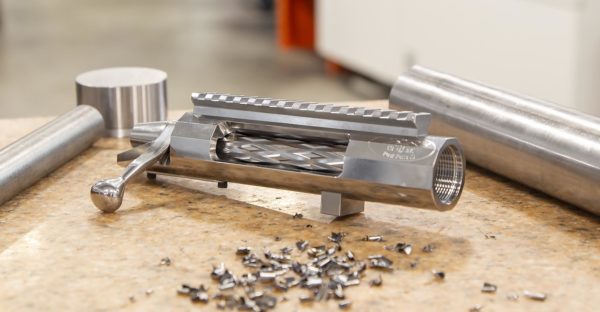
In the image above, you can see what a finished Bat action looks like. In this article, we’ll look at the two primary components that make up the action:
- Receiver body
- Bolt assembly
Machining the Receiver Body
As shown in the video, the following are the major stages for the fabrication of a Bat receiver body:
- Start: raw 17-4 stainless round bar (higher toughness than typical barrel/receiver steel)
- Heat treat
- Bore central hole (for EDM wire), face ends
- EDM machining (cut bore and raceways)
- True OD, cut receiver threads and lug seats
- Cut tang and related features
- Finish machining including body OD, integral lug (if equipped)
Above: Bruce Thom describing the process of machining the receiver tang and recoil lug
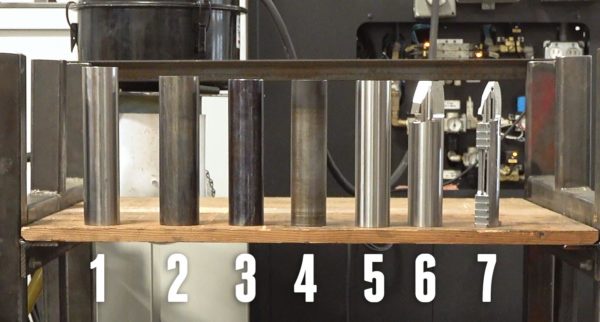
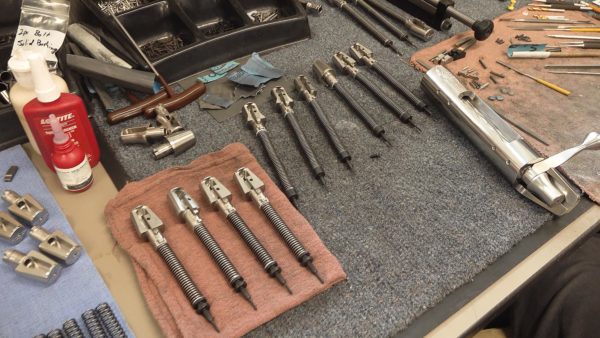
Machining the Bolt
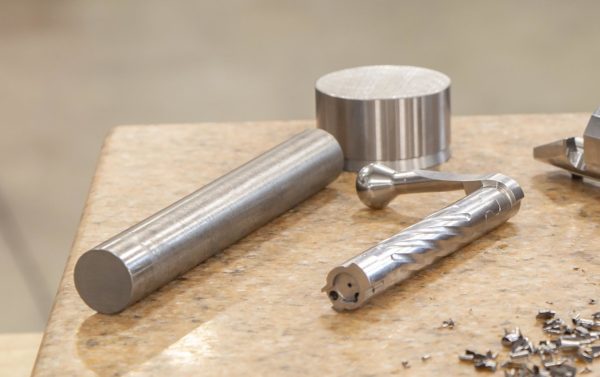
Above: Raw steel and finished modular bolt assembly
Bat makes two styles of bolts: one-piece, and two-piece modular style. for production, these will start out as one large section of round bar (one-piece bolt), or two pieces as shown above (modular bolt).
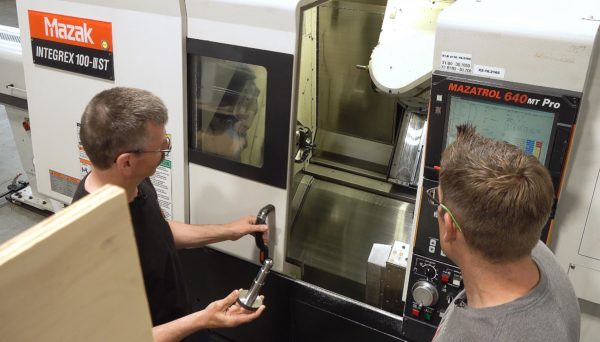
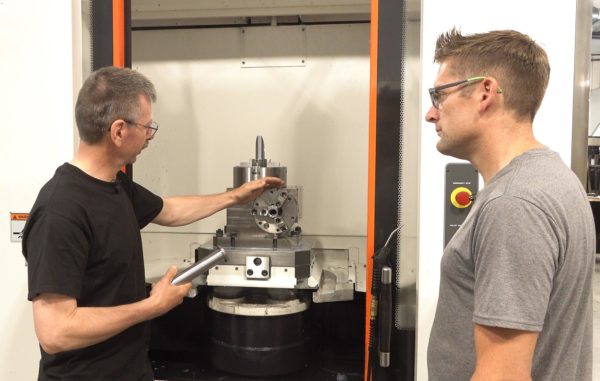
Above: Bruce preparing to load a one-piece bolt (initial turning completed) into a CNC machining center which will machine the bolt handle
The processes are similar, but here we’ll cover the steps for the one-piece bolt as covered in the video by Bruce:
- Bolt is turned down from heat treated round bar
- Bolt handle is machined from “ring” of material at one end of turned stock
- Front of bolt (lugs, etc) are machined
- Bolt is fluted and final machining steps performed.
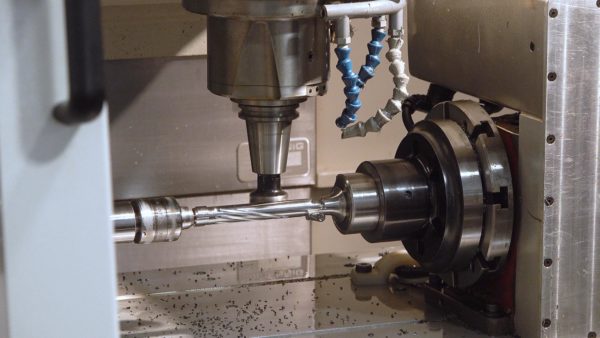
Above: Bolt body being fluted
Polish and Deburr
After the receiver body and bolt are machined, they go through a deburring and polishing process.
In the image above you can see the stages: (similar between receiver bodies and bolts)
- Left: receiver body straight from machining. Some hand work is typically performed to break interior edges that are sharp from machining
- Center, Initial polish: machining marks are removed by the first (coarse) polishing stage. For parts that will be nitrided, this is where the process stops
- Right, Final polish: for actions that aren’t nitrided, a final polish brings the parts up to a high lustre
Final Assembly, QC, Shipping
After polish (and nit riding if that applies) the bolts and receivers get a finish assembly, and testing for proper smooth functioning. The receivers are registered with the ATF (the receiver “is the firearm” from the ATF’s perspective), and shipped to the customer. That’s it!
Special Thanks to the Bat Team
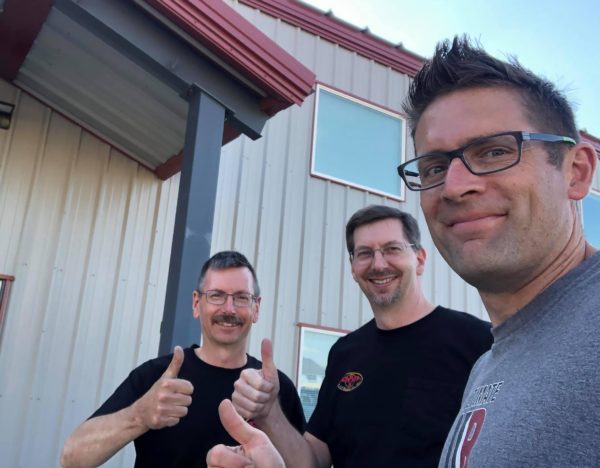
Above: Left, Bruce Thom: Center, Daryle Thom, Right: Me
Special thanks go out to the entire team at Bat Machine. We spent a couple days discussing the rifle action business, deep-diving on the Bat Machine product lineup, touring the facility, and filming the story. Daryle Thom did a GREAT job with the camera work (I sprung that on him last minute 🙂 ). I learned a lot talking with the machinists, and had a great time (it went by too quickly!).
More Bat Machine content will be coming up shortly (more builds, etc). Stay tuned!
Don’t miss out on Ultimate Reloader updates, make sure you’re subscribed!
Thanks,
Gavin


Gavin,
Excellent video. My first introduction into CNC machining.
M.Bryn / Missoula, MT
Gavin,
Thanks for the great walk through of BAT Actions machining processes. It was educational. It’s amazing how far machining tolerances, fit and finish has improved in the last 50 years.