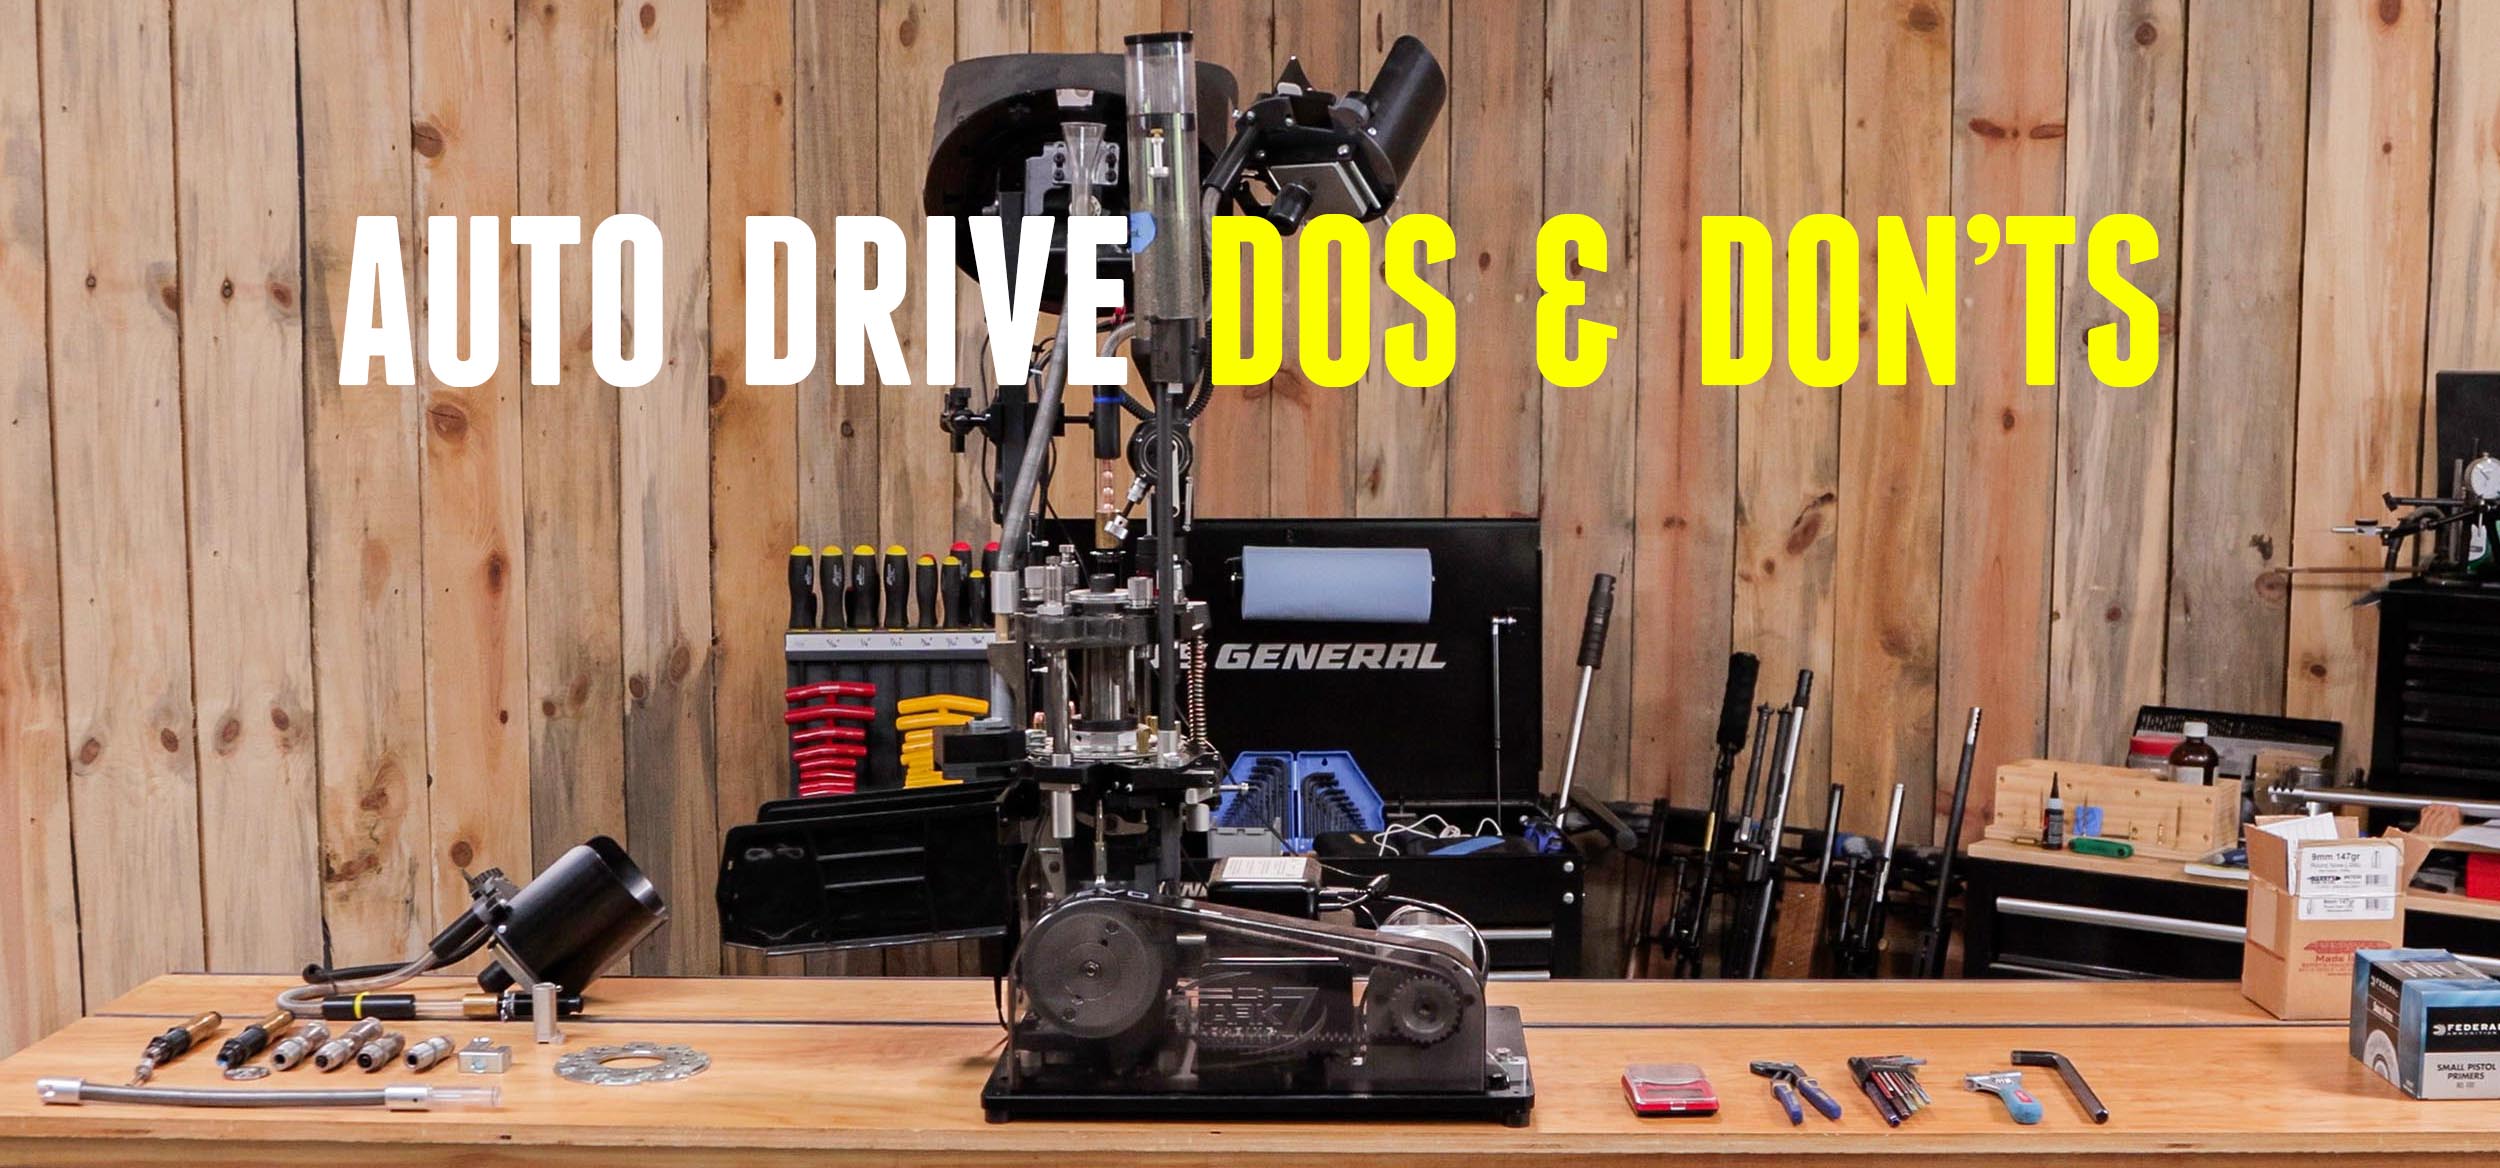
John Vlieger is one of the top technicians for Mark 7 Reloading. He helps users get their machines running, and keep them running. In this story, we take a look at the Do’s and Don’ts for the Mark 7 AutoDrive.
Disclaimer
Ultimate Reloader LLC / Making with Metal Disclaimer: (by reading this article and/or watching video content you accept these terms). The content on this website (including videos, articles, ammunition reloading data, technical articles, gunsmithing and other information) is for demonstration purposes only. Do not attempt any of the processes or procedures shown or described on this website. All gunsmithing procedures should be carried out by a qualified and licensed gunsmith at their own risk. Do not attempt to repair or modify any firearms based on information on this website. Ultimate Reloader, LLC and Making With Metal can not be held liable for property or personal damage due to viewers/readers of this website performing activities, procedures, techniques, or practices described in whole or part on this website. By accepting these terms, you agree that you alone are solely responsible for your own safety and property as it pertains to activities, procedures, techniques, or practices described in whole or part on this website.
If this is your first time hearing about the Mark 7 AutoDrive, you probably haven’t seen my overview video – Check out my previous story on the Apex 10 Auto Drive Above.
Keeping Your Auto Drive Up to Speed
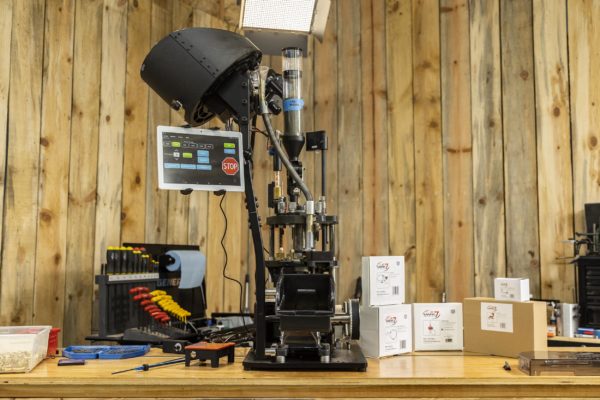
When I think of an auto drive, I think about riding a Motorcycle at a high speed. Everything is moving much faster. Mark 7’s Auto Drive for the Apex has taken my reloading to the next level. However, this increase in efficiency comes with some change in workflow if you are used to hand loading.
As I was going over the Auto Drive with John, he noted that you lose the haptic feedback you normally receive when hand loading. So what has Mark 7 done to address this? The AutoDrive is a modular system. We will be adding Mark 7 Compatible sensors in future stories such as Decap Sense, Swage Sense, Primer Orientation, Bullet Sense, and Powder Check. These sensors and the universal plug and play tablet Interface bring you on the fly feedback and adjustments.
With all that in mind, a set of general Dos and Don’ts will help keep our machine running in top top shape.
These Dos and Don’ts fall into two main categories: General Considerations during operation, and using the Mark 7 Tablet Interface.
General Considerations
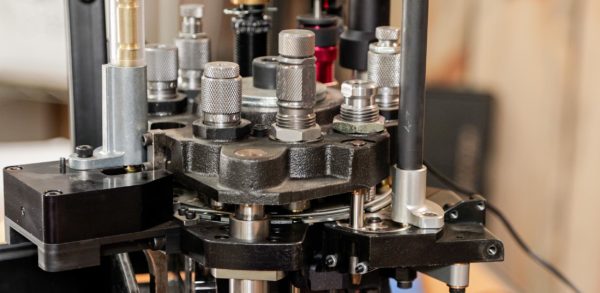
Calibration
If correctly calibrated, the Auto Drive knows where it’s at in a stroke at any given time, as well as how much force is being applied. In order to properly calibrate, it needs to find its bottom and top of stroke, and set those limits. The consideration here is to keep your machine calibrated correctly at all times. You want to calibrate any time you have lost communication. This means if you have unplugged or shut the machine down, you should recalibrate. You do not have to recalibrate if you’ve had a stoppage. Simply clear the stoppage, take a pause to ensure all your components are good, and load on.
Another note here, be sure to adjust both your top and bottom dwell settings based on your own components. Mainly, depending on your powder charge.
Cable Management
This one is simple. You can manage your cables however you want, with one consideration.
Do not zip tie your USB cables to a power cable. If you do this, you run the risk of EMI (Electro-Magnetic Interference).
Lock it Down
When in doubt, lock it down. If you are going away and may not be returning to loading for some time, give yourself some Index Marks. When you return, make sure your machine is the way you left it. Check for your shell plate, dies, etc. Do your Due Diligence.
Clearing a Stoppage
The number one source of accidents or damage occurring is due to user error. Any time you have a stoppage give yourself a moment to check everything out. You are no longer in a rush.
Get to a point where you can work with the machine (jog down or up for example & remove the stoppage) and pause to ensure all your settings and components are looking good. Do you have powder, projectiles, etc.
These are some great guidelines to live by when thinking about the mechanical operation of your drive. Next, let’s take a look at some of the digital aspects within the Mark 7 User Interface.
User Interface
As noted before, many of these adjustments can be made on the fly to adjust to your workflow as you are loading. Here are a few things to think about when you’re loading.
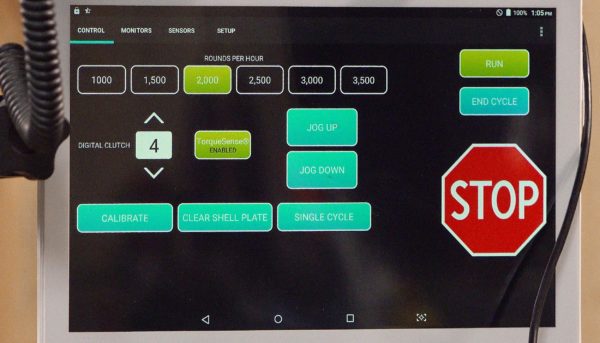
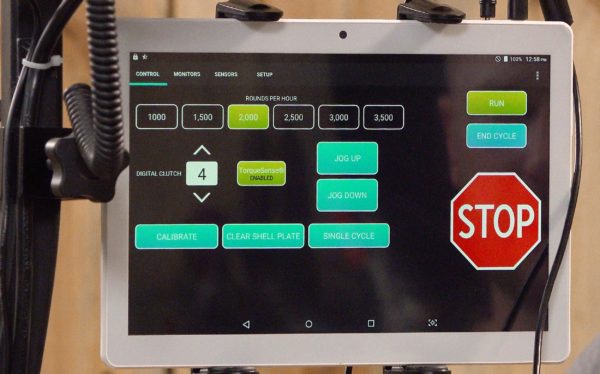
Speed Setting:
Right out the gate, if you are going to run your auto drive at its max speed (3500 rph), you may find yourself in a battle with centrifugal force. If you are running lightweight components with large powder charges at the max speed for example, you may get some spillage, or lose some bullets. You need to find a speed that is correct for your components.
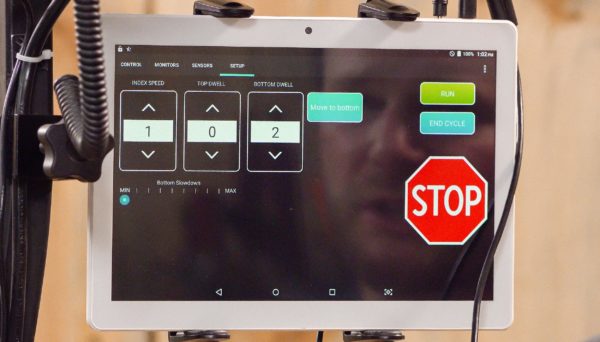
Adjust Index & Dwells:
This is a pretty cool setting – you can adjust your index on the fly.
You can incrementally up the index number to slow down the index, or vice versa, as you are running your machine to tweak your workflow while you are moving. If you find you need a little more time on the index to get that crimp just right, you might want to up your index number.
You can do the same for your top and bottom dwell, to compensate for your powder charge. For a larger charge, you want to increase your dwell time at the bottom of the stroke, and so on.
Bottom Slow Down:
If you are trimming, you may want to adjust the bottom end of your stroke on the way down. You can get a feel for how much time you need at the bottom of the stroke to complete a clean trim on the fly. So you can inspect as you load, and keep loading.
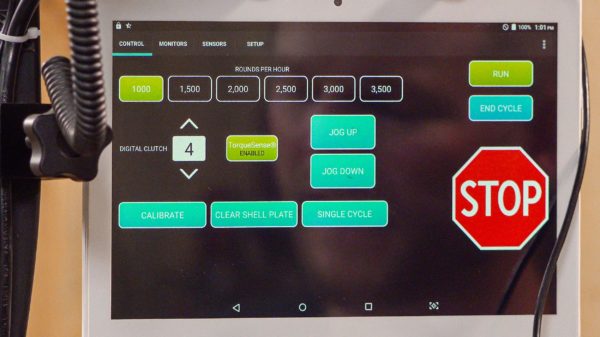
Digital Clutch & Torque Sense
You will want to set your digital clutch to the lowest number possible. The digital clutch is going to respond to any friction it senses, such as a crushed case on the way down. You want to ensure that your drive isn’t stopping for no reason, but at the first sense of an obstruction, you get to take a time out, clear the stoppage, adjust, and move on.
While your clutch is tracking your force on the downstroke, Torque sense is working on the upstroke. If there is something stopping the index, it will stop so you don’t damage a component.
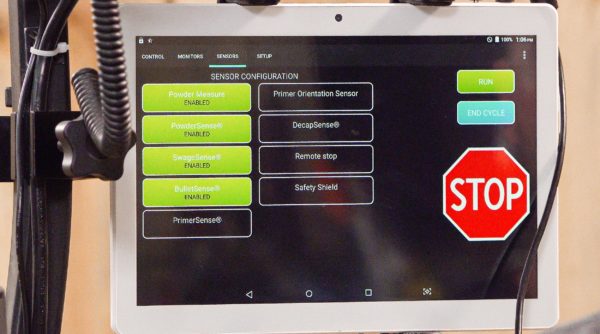
Sensor Configuration Screen
Always make sure that you have your sensors set to on when in use.
Quality Components give you a good reloading session!
Get the Gear
Mark 7 Dillon Compatible Auto Drives
Don’t miss out on Ultimate Reloader updates, make sure you’re subscribed!
Thanks,
Gavin Gear


