If you’re interested in the Mark 7 Evolution 10-station progressive reloading press, you’re probably wondering: “How difficult are the caliber changeovers?”. In this post, I’ll cover that in detail by looking at a 9mm to 223 caliber changeover with my Mark 7 Evolution.
Evolution Caliber Change: What You’ll Need
Just like with any progressive press, you have multiple options for caliber changeover setups spanning “minimal” to “optimal”. The most optimal solution is to have a press dedicated to each caliber you load, but that’s not practical for most shooters/reloaders!
Here’s what you’ll need for a smooth caliber changeover with the Mark 7 Evolution:
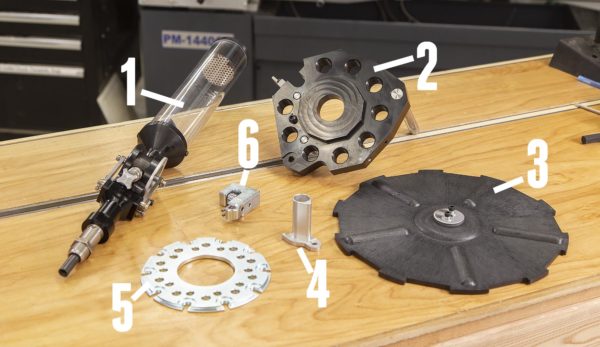
In the above image we have:
- Case-activated Powder measure
- Evolution/Revolution toolhead
- Case Feed Plate (see case feed conversion kit)
- Case feed adapter (see caliber conversion kit)
- Shellplate (see caliber conversion kit)
- Case feed ram (see caliber conversion kit)
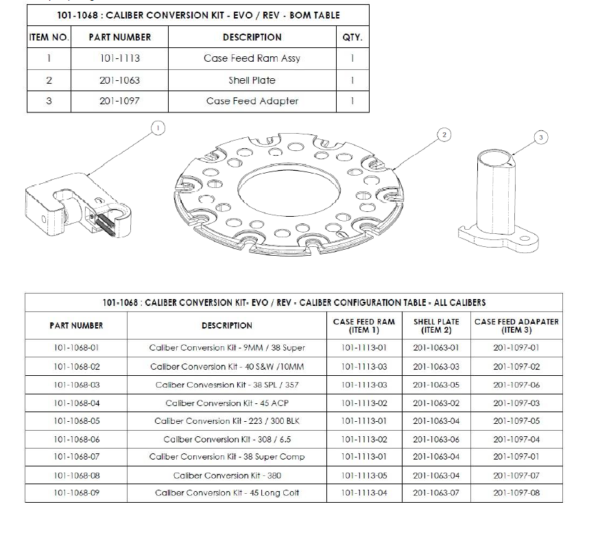
Here’s a reference table that outlines the necessary caliber-specifc parts for the cartridges supported by the Mark 7 Evolution/Revolution:
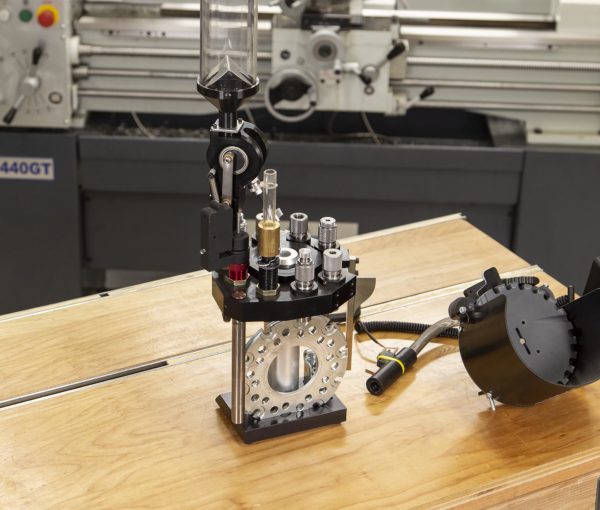
Another item you’ll most likely want is the Toolhead Stand for the Evolution/Revolution, you can see here how it organizes and stores the parts needed for a caliber change:
Caliber Change Part 1: Tear-down
When you go to perform a caliber changeover for the Evolution, the first think you’ll do is to remove the components for the caliber you’re changing from: (assumes you have bullet feeder installed, see video for detailed instructions)
- Remove bullets from feed tube
- Disconnect and remove bullet collator bowl, empty
- Empty case feed bowl, remove case feed plate
- Remove/empty powder measure
- Empty priming system (optionally swap parts if changing sizes)
- Remove case feed drop tube
- Remove toolhead retention nut (careful to not drop handle)
- Remove toolhead and return spring
- Remove return spring guide rod and mount
- Remove and split case feed ram assembly (if changing ram #s)
- Remove shellplate case retention spring and clamps
- Loosen shellplate nut set screws, unscrew and remove shellplate nut
- Remove and clean shellplate
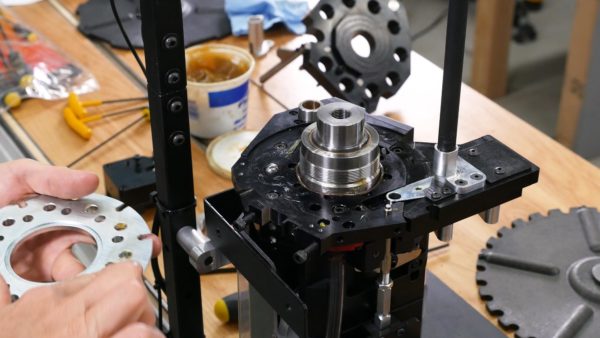
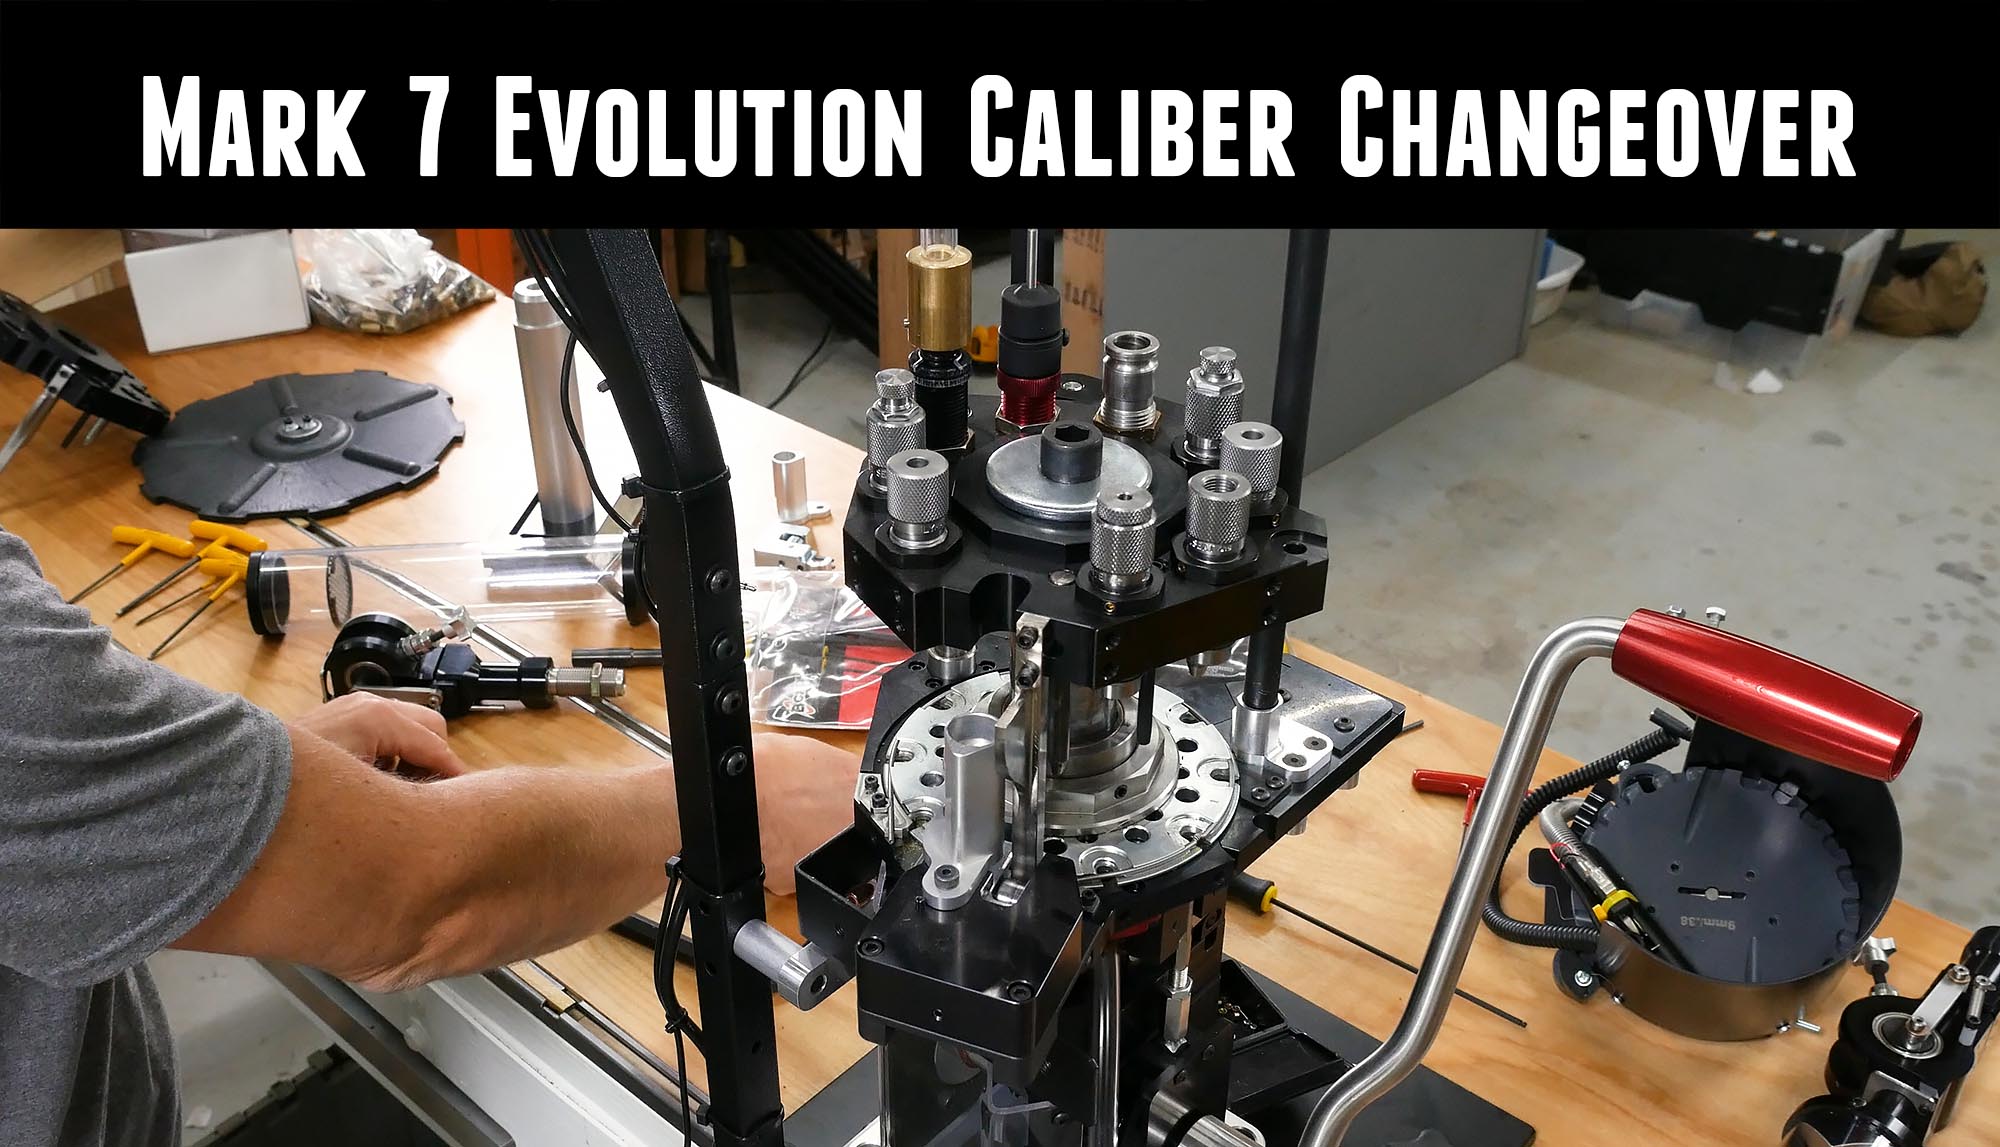
Here’s what the Mark 7 Evolution will look like when you’re done with tear-down:
Caliber Change Part 2: Installing Components
Starting with the “blank slate” we have following the tear-down, the following steps are performed to configure the press for the caliber we are switching to: (see video for detailed instructions)
- Clean and grease the sub-plate (below shellplate)
- Swap priming parts (slider, punch) if changing primer sizes
- Install shellplate
- Install shellplate nut (tighten down on shellplate, back off 1/8 turn, tighten set screws)
- Reinstall case retention spring and clamps
- Install case feed assembly
- Install return spring guide rod and mount on toolhead
- Lower toolhead onto press
- Tighten toolhead retention washer and nut with toolhead in bottom (lowered) position, tighten securely
- Install case feed adapter and drop tube
- Install case feed plate
- Install bullet feed bowl, connect to power
- Install and adjust dies (if not installed in toolhead)
- Check/adjust primer seating depth
- Add primers and powder
- Run cartridge through all stages to validate setup
- Fill case feed bowl with cases
- Fill bullet feed bowl with bullets
You should now be ready to load! If you already have the dies, powder measure, and bullet feeder bowl setup for the cartridge you are switching to, this entire process will take about 30-45 minutes.
Get Your Own Mark 7 Evolution
If you want to buy your own Mark 7 Evolution, you can do so directly from Mark 7 here:
Mark 7 Evolution Press
Stay Tuned
In the next Mark 7 Evolution story, I’ll cover the rest of the details for my 223 loading setup on the Evolution, and do some full-progressive 223 loading with a Mr. Bullet Feeder installed. Don’t miss out on Ultimate Reloader updates, make sure you’re subscribed!
Thanks,
Gavin






Hi Gavin,
Do you by chance have the total in cost for the change over in calibers?
Thank you,
Adam