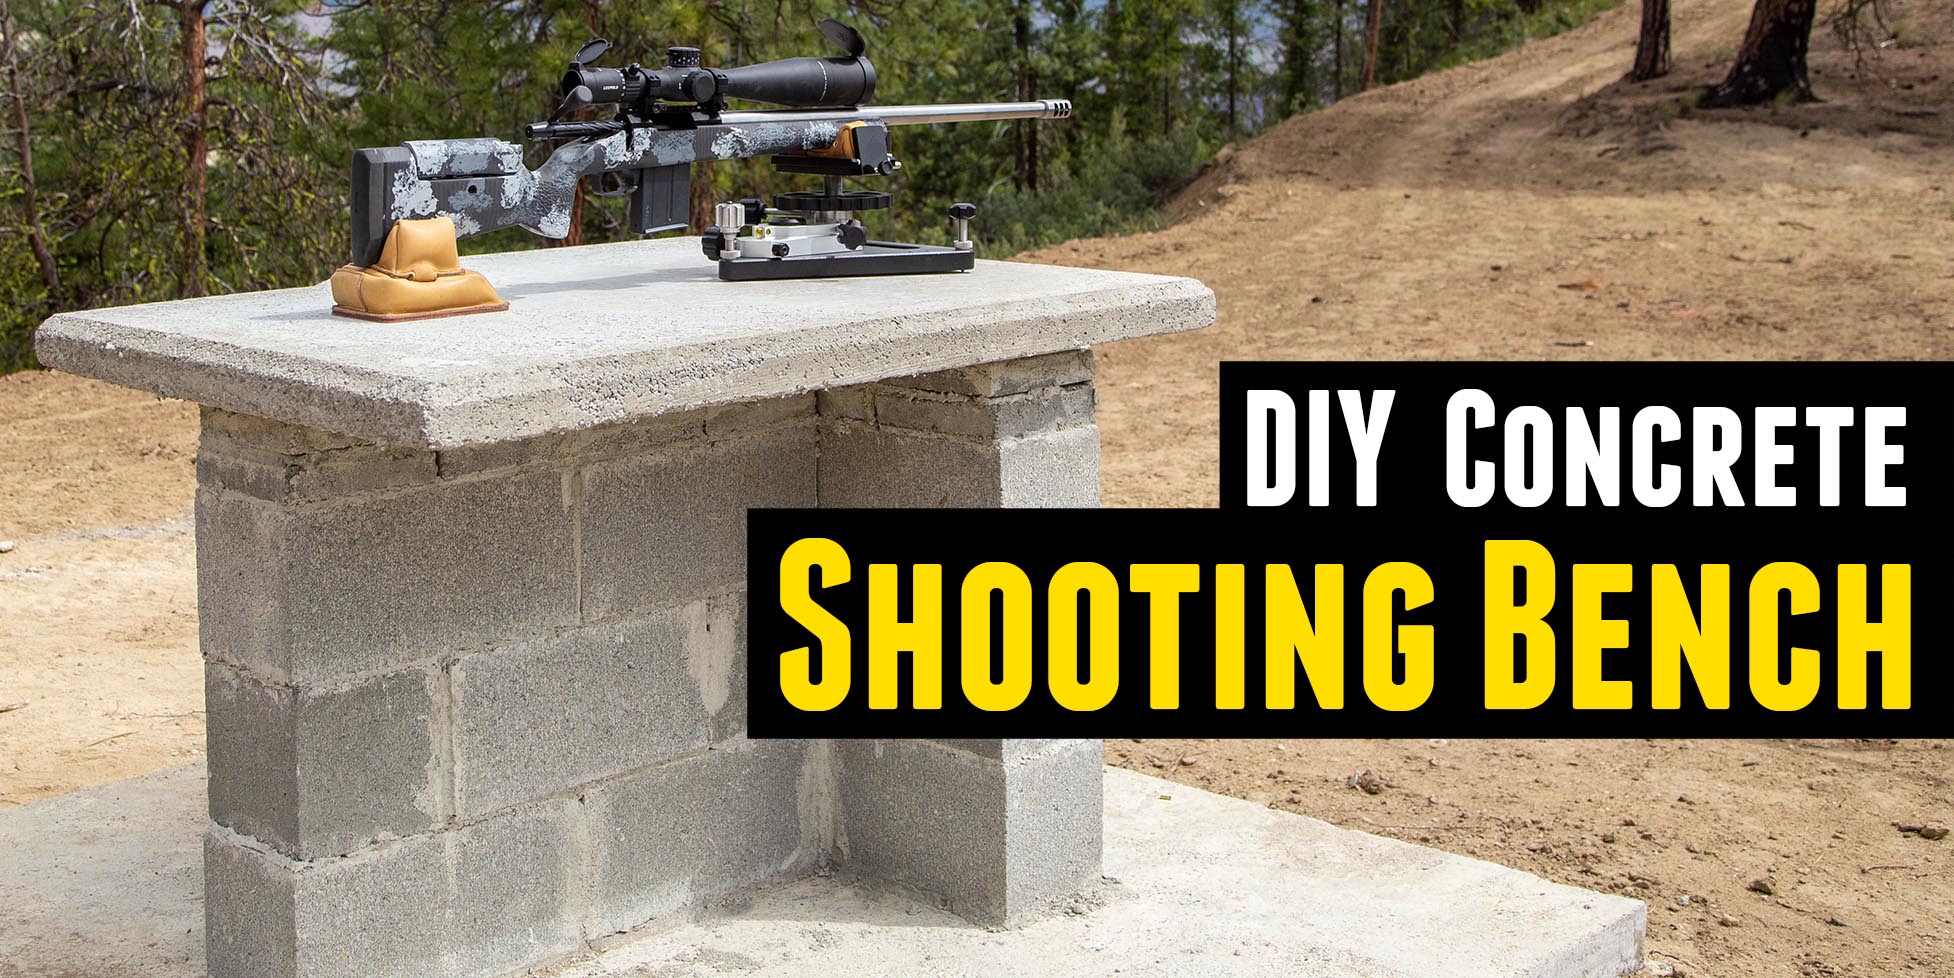
A concrete shooting bench has been high on my list of priorities for a while, and I’ve finally completed my first such installment. This has already made a huge difference in the quality of data and results I’ve observed when testing rifles and ammunition, so I feel like I’ve accomplished my “mission”. In this post I’ll summarize my experience building this bench, provide rough plans for my bench design, and talk about what I’ll do different next time.
Bench Plans
During my “research phase”, I took a look at quite a few articles and resources. My main questions were:
- What are the overall dimensions/proportions that work for other people
- How are people constructing their benches
- What materials are people using
Here are a couple of the articles I read:
How to Build Your Own Concrete Shooting Bench (Accurate Shooter)
How to Build the Ultimate Shooting Range Bench (Rifle Shooter Mag)
One of my special considerations was the fact that I’d be building this bench at the top of a mountain ridge. And that meant I had to think strategically about what materials I would use, and how I would haul materials to the building site.
So I decided on the following:
- 6’x6′ concrete slab: foundation for bench, good surface for chairs
- Concrete block base: Modular, easy to build
- 3″ solid concrete top: poured off-site, and hauled/set in place
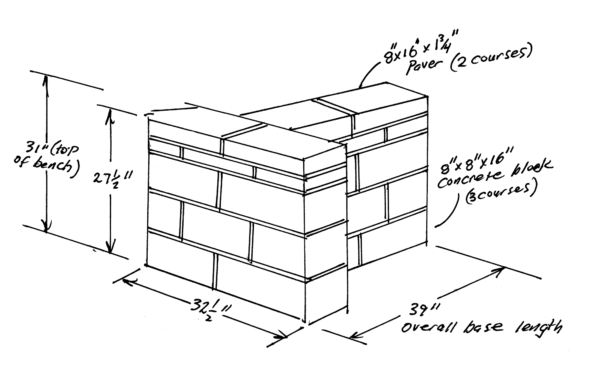
Plans: Concrete Block Base
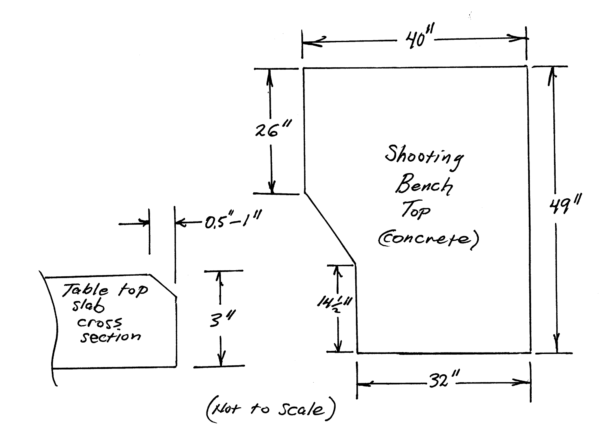
Plans: Concrete Bench Top
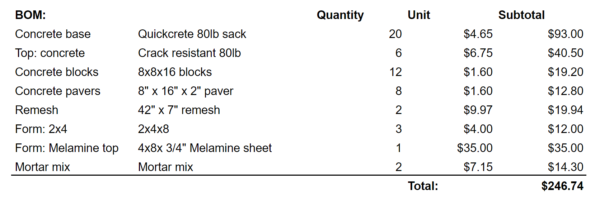
Bill of Materials
Not including the tools I already had on hand, here is the breakdown of supplies and materials I used to build this bench:
Building the Bench
I consider this concrete bench a prototype: a design I wanted to try, and the construction process felt like prototyping as well. Sorry for the lack of pictures here!
Concrete Slab
The slab is the foundation for the bench, and therefore is an important structural element. Here’s the rough breakdown of that process
- Level the ground where the slab would sit
- Wet and compact the dirt in the leveled area
- Build a 2×4 form (6′ x ‘6 on the inside), staked in place
- Cut and set remesh to reinforce the slab (close to bottom of form)
- Mix/pour concrete
- Use 8′ 2×4 as “screed board” to level top surface
I did not finish the slab top, partially due to the fact that a rain storm came in right at the end of the pour. Also- I wanted a natural appearance more so than a man-made appearance.
Building the Base
Three courses of concrete blocks were set in place (see plans above) followed by two courses of 1 3/4″ thick pavers. This brought the base up to the appropriate height for the shooting bench top. The big issue I had with this process was the “mortar repair” mix I used- it set up too fast and was difficult to mix to the appropriate consistency. This (setting concrete blocks) was a new experience for me, and I’d really like to have someone that knows what they are doing “show me how to do it”.
Building the Top Form
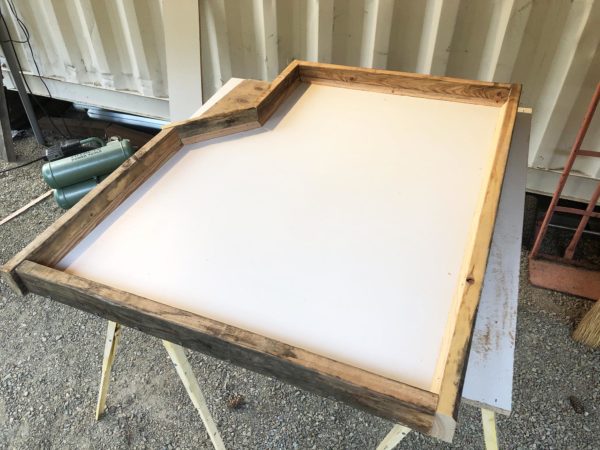
The top form was built as follows:
- The 3/4″ melamine sheet was cut down to the appropriate size/profile
- The 2×4 form “walls” were screwed in place
- Chamfered “moulding” was ripped on the table saw, and nailed in place in the corners
Poring the Bench Top
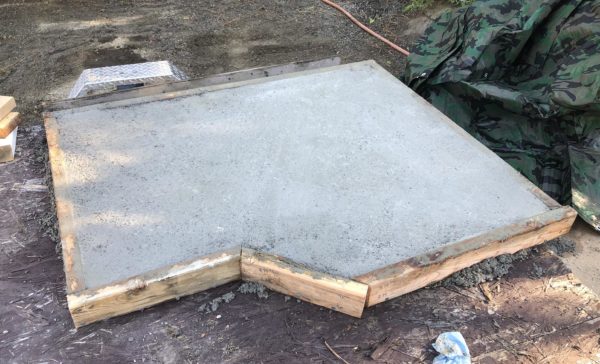
I used a concrete mixer to mix and pour the fiber-reinforced concrete for the bench top. I mixed the concrete “slightly wet” in the hopes that it would conform to the form better, and create a smooth bench top surface. This worked for the most part. After letting the concrete cure for 5 days, I was ready to set the bench top on the base.
Setting the Bench Top
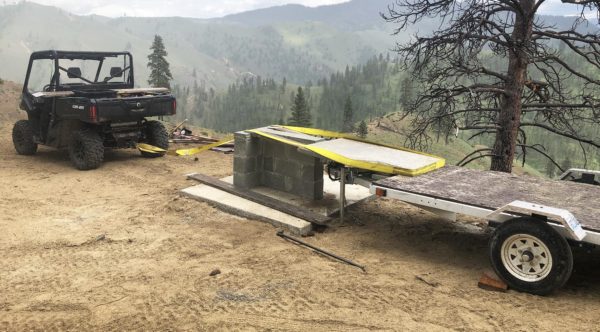
I used a 4’x8′ utility trailer pulled behind my side-by-side to haul the bench top up to the building site. At about 450-500lb, lifting this bench top was out of scope for one person. So I used ramps and straps to “pull” the bench top onto the bench base (with some jockeying and shifting by hand). I can’t say I would try this again. I had propped up the bench top with 2×4 material, and had a “violent shift/set-down” which resulted in a large crack. This was fine, as I was able to support the top (level) and mortar it in place. Not elegant, but I got the job done.
What I Like About this Bench
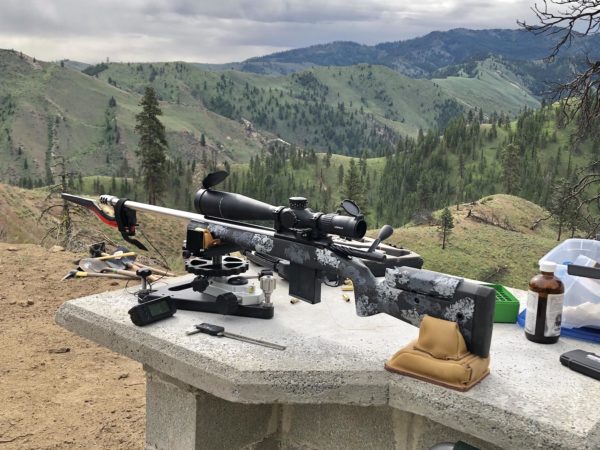
The finished bench is GREAT! Here’s what I like about it:
- The proportions and dimensions work great for me- I have room to set another rifle next to the one I’m shooting
- The chamfered edges on the bench top prevent sharp surfaces from abrading your arms and look nice
- It is VERY solid
- The slab provides a great “sweepable” surface to set a chair on, set your feet on
What I’ll Do Differently Next Time
For my next concrete bench (I need at least one more) I’ll consider doing the following:
- Using a different bench top reinforcement method (remesh?). I’m not totally confident with the fiber reinforced top
- Use the correct mortar, get more training on laying bricks
- Make the slab 8′ wide instead of 6′ wide
I’d be curious to hear your thoughts on my bench! Have you built one? Please leave a comment to share your experiences/thoughts.
Don’t miss out on Ultimate Reloader updates, make sure you’re subscribed!
Thanks,
Gavin


Hi Gavin, I like your bench but also see improvements. I am new to reloading and really like the way you explain and communicate. I did look at a website called the ultimate sniper shooting bench which is portable but very expensive. With your bench I would pretty much do everything the way you did it except I do use the granite table top, I would Epoxy everything for cleanliness except the top. Most people don’t have room or distance shooting like you do.
There’s so much to learn and I have a Dillon XL 750 with all the bells and whistle‘s.
I’m having a lot of trouble with the primers either not seating going in sideways damaged. I bought the loader from a gun shop in Reno Nevada because you’re in California there’s nothing left. But from the very beginning that said trouble and I’ve talked to Dillon many many times I finally got so fed up I sent it back so they can fix. Have you had any issues with the loading of primers? I definitely rework the shell and make sure all the specs are right including the primer hole. I just hope I haven’t made a mistake with this loader? Scott Drescher