Master gunsmith and author Fred Zeglin joins us to share everything you ever wanted to know about reamers.
Disclaimer
Ultimate Reloader LLC / Making with Metal Disclaimer: (by reading this article and/or watching video content you accept these terms). The content on this website (including videos, articles, ammunition reloading data, technical articles, gunsmithing and other information) is for demonstration purposes only. Do not attempt any of the processes or procedures shown or described on this website. All gunsmithing procedures should be carried out by a qualified and licensed gunsmith at their own risk. Do not attempt to repair or modify any firearms based on information on this website. Ultimate Reloader, LLC and Making With Metal can not be held liable for property or personal damage due to viewers/readers of this website performing activities, procedures, techniques, or practices described in whole or part on this website. By accepting these terms, you agree that you alone are solely responsible for your own safety and property as it pertains to activities, procedures, techniques, or practices described in whole or part on this website.
Who is Fred Zeglin?
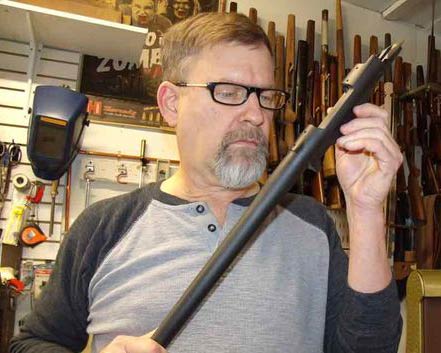
Author and master gunsmith Fred Zeglin has been building custom rifles for over three decades. He also runs 4D Reamer Rentals.
From FredZeglin.com:
Fred Zeglin has taught classes for the NRA Short Term Gunsmithing program at three separate colleges and is the Coordinator/Instructor for the Firearms Technology Program at Flathead Valley Community College.
He has published two books; Hawk Cartridges Manual and Wildcat Cartridges, Reloader’s Handbook of Wildcat Cartridge Design he has also contributed to numerous publications.
Fred has worked with American Gunsmithing Institute to produce two instructional DVDs, Taming Wildcats and Reloading A to Z.
You can get 50% off the Gunsmith Tools, Cutters & Gauges Book he edited with code URPrime.
About 4D Reamer Rentals
Sometimes you need a special tool quickly. In cases like these, 4D Reamer Rentals has a solution. We’ve previously tested this service with great results. Ultimate Reloader subscribers can also get 10% off a reamer rental with the discount code UR10!
From the 4D Reamer Rentals Website:
YOUR EXCLUSIVE SOURCE FOR CHAMBER REAMERS AND GUNSMITHING TOOL RENTALS!
We have over 1600 chamber reamer rentals in stock and ready to ship. We also rent headspace gauges and many other gunsmithing tools. Our tools are well maintained and inspected before and after each rental to assure you receive the highest quality gunsmithing tools. Our staff has over 35 years of professional gunsmithing experience, setting us apart from the competition.
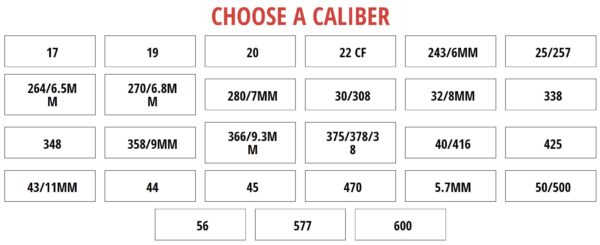
To locate items that interest you click on the headings in the menu at the top of the page. When you find a Chamber Reamer or Gunsmithing tool that suits your needs, just click directly on the listing. Or search by keyword in the window above.
Headspace gauges are rented by selecting the combination of reamers and/or gauges you need from the dropdown list in the red box that reads “Add Reamers/Gauges” when you’re looking at a specific caliber reamer. We aim to keep it simple.
All rentals are for seven (7) days in your hands. With shipping time, tools are expected back in our facility in seventeen (17) calendar days. If you request overnight shipping, the tools should be back in 14 calendar days.
Bottleneck Rifle Chamber Anatomy
The first step is to look at the SAAMI specs for your desired cartridge.
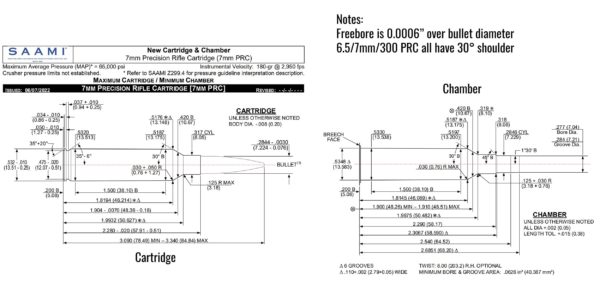
These specs contain diagrams of and specific info for both the chamber and ammunition. Many people don’t fully recognize the difference between the two. (Check out our 223 vs 5.56 video as an example!) Chamber dimensions have to be larger than the ammunition in order for it to feed and function. During the firing process, the brass expands to match the chamber and shrinks back just enough for the case to be extracted. Understanding this process and the reason for different tolerances between the chamber and reamer is critical.
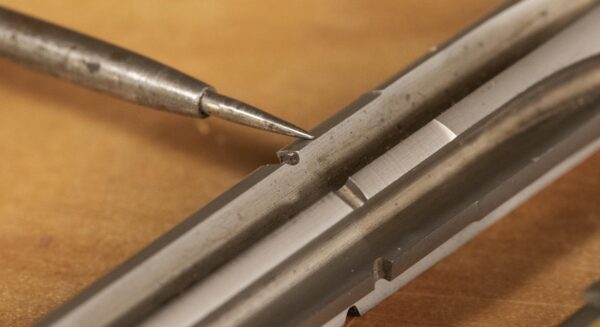
Both provide valuable information. Cartridge dimensions can help with rifle-specific decisions about what bullet to use, how much freebore is needed, etc. Another important dimension is the case rim diameter. This directly relates to the bolt face diameter. To better illustrate chamber anatomy, we have a collection of 6mm Creedmoor tooling and parts including part of a Howa 1500 6mm Creedmoor factory barrel I sectioned, Hornady 6mm Creedmoor ammunition, a custom reamer I had ground with a specific freebore and a go gauge. I have a 6.5 Creedmoor go gauge on the bench, but it works for 6mm Creedmoor as well.
The cutaway barrel section is an especially useful educational tool as it allows you to see what isn’t normally visible. Starting from the left is the body, shoulder, and neck area followed by the freebore area. This small cylindrical area provides a place for the bullet to sit. Next comes the tapered lead at the very end of the throat. Zeglin noted that standard finish reamers have all of these features. The exception is custom gun shops. Some choose to have a custom reamer ground with little to no throat to allow for custom throating.
Placing a loaded Hornady factory round in the cutaway, Zeglin pointed out a small gap at the end of the chamber near the case mouth. This gap is to accommodate brass with a slightly longer neck without creating pressure problems. This particular round features a very long bullet with a long contact area, hence why I had a longer freebore cut in this barrel.
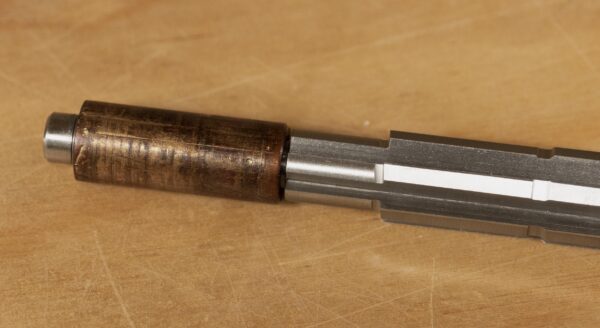
Headspace is also worth a look. Headspace is on a datum line on the shoulder (see SAAMI spec). SAAMI specs define an allowable range for headspace for each cartridge. You can check headspace with a go gauge, which is at the minimum dimension. The critical points are the shoulder diameter and the breech face, which set the length of the chamber for correct headspace. Ammunition also has headspace, measured from where the ammunition “stops” when it’s chambered (headspace datum point) to the bolt/breech face. This is a key consideration when resizing brass.
While it may make some cringe, another interesting experiment with these props is to see how the reamer fits into the sectioned chamber. Whatever your reamer geometry is becomes your chamber geometry. To sum up, the relationships between the reamer geometry, chamber geometry, and reloading geometry all need to be coordinated.
The Chambering Process
The chambering process begins with a barrel blank, a tapered or cylindrical section of steel that has a hole pre-drilled and rifling in place. A barrel blank is typically longer than the intended finish barrel length and can be cut down at one or both ends.
Example video showing chambering start to finish:
The chamber is cut on the breech end of the barrel by use of a finisher reamer, as detailed above. This results in a barrel that can be installed on a receiver and accept a loaded round.
There are a few different ways to get from blank to chambered round.
One option is to pre-drill the chamber. Using a roughing reamer (smaller than finish reamer) to do this is most common in production situations as it is faster, though individual gunsmiths may use this method as well. It is simpler for some, but also more expensive as it requires an extra reamer. To cut costs, Zeglin explained some use a drill bit to remove bulk material and come back with a boring bar to clean it up so it’s concentric to the bore. “Concentricity,” Zeglin said, “is a big part of where our accuracy comes from.” Another way I’ve seen gunsmiths remove material from the bore is with a CNC machine. This allows you to pre-cut an undersized profile (like with a roughing reamer) with a boring bar for a really true cut.
Another option is to use the finish reamer itself to finish the entire chamber. It takes some extra time and pauses to clear out steel chips, but is also a perfectly viable method. An advantage to using just the finish reamer is it allows for greater quality control. Zeglin mentioned that every gunsmith has his/her particular methods. Gordy Gritters, for example, takes measurements throughout the process whether he is using a roughing reamer or just a finish reamer.
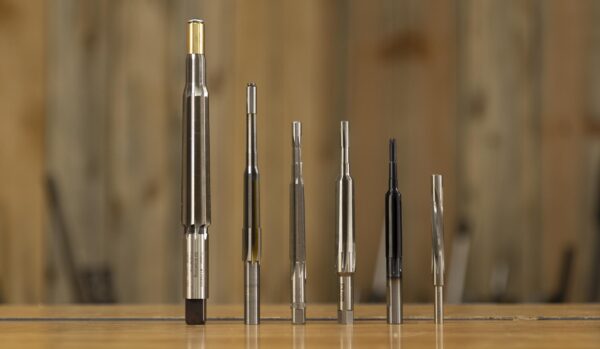
Tooling
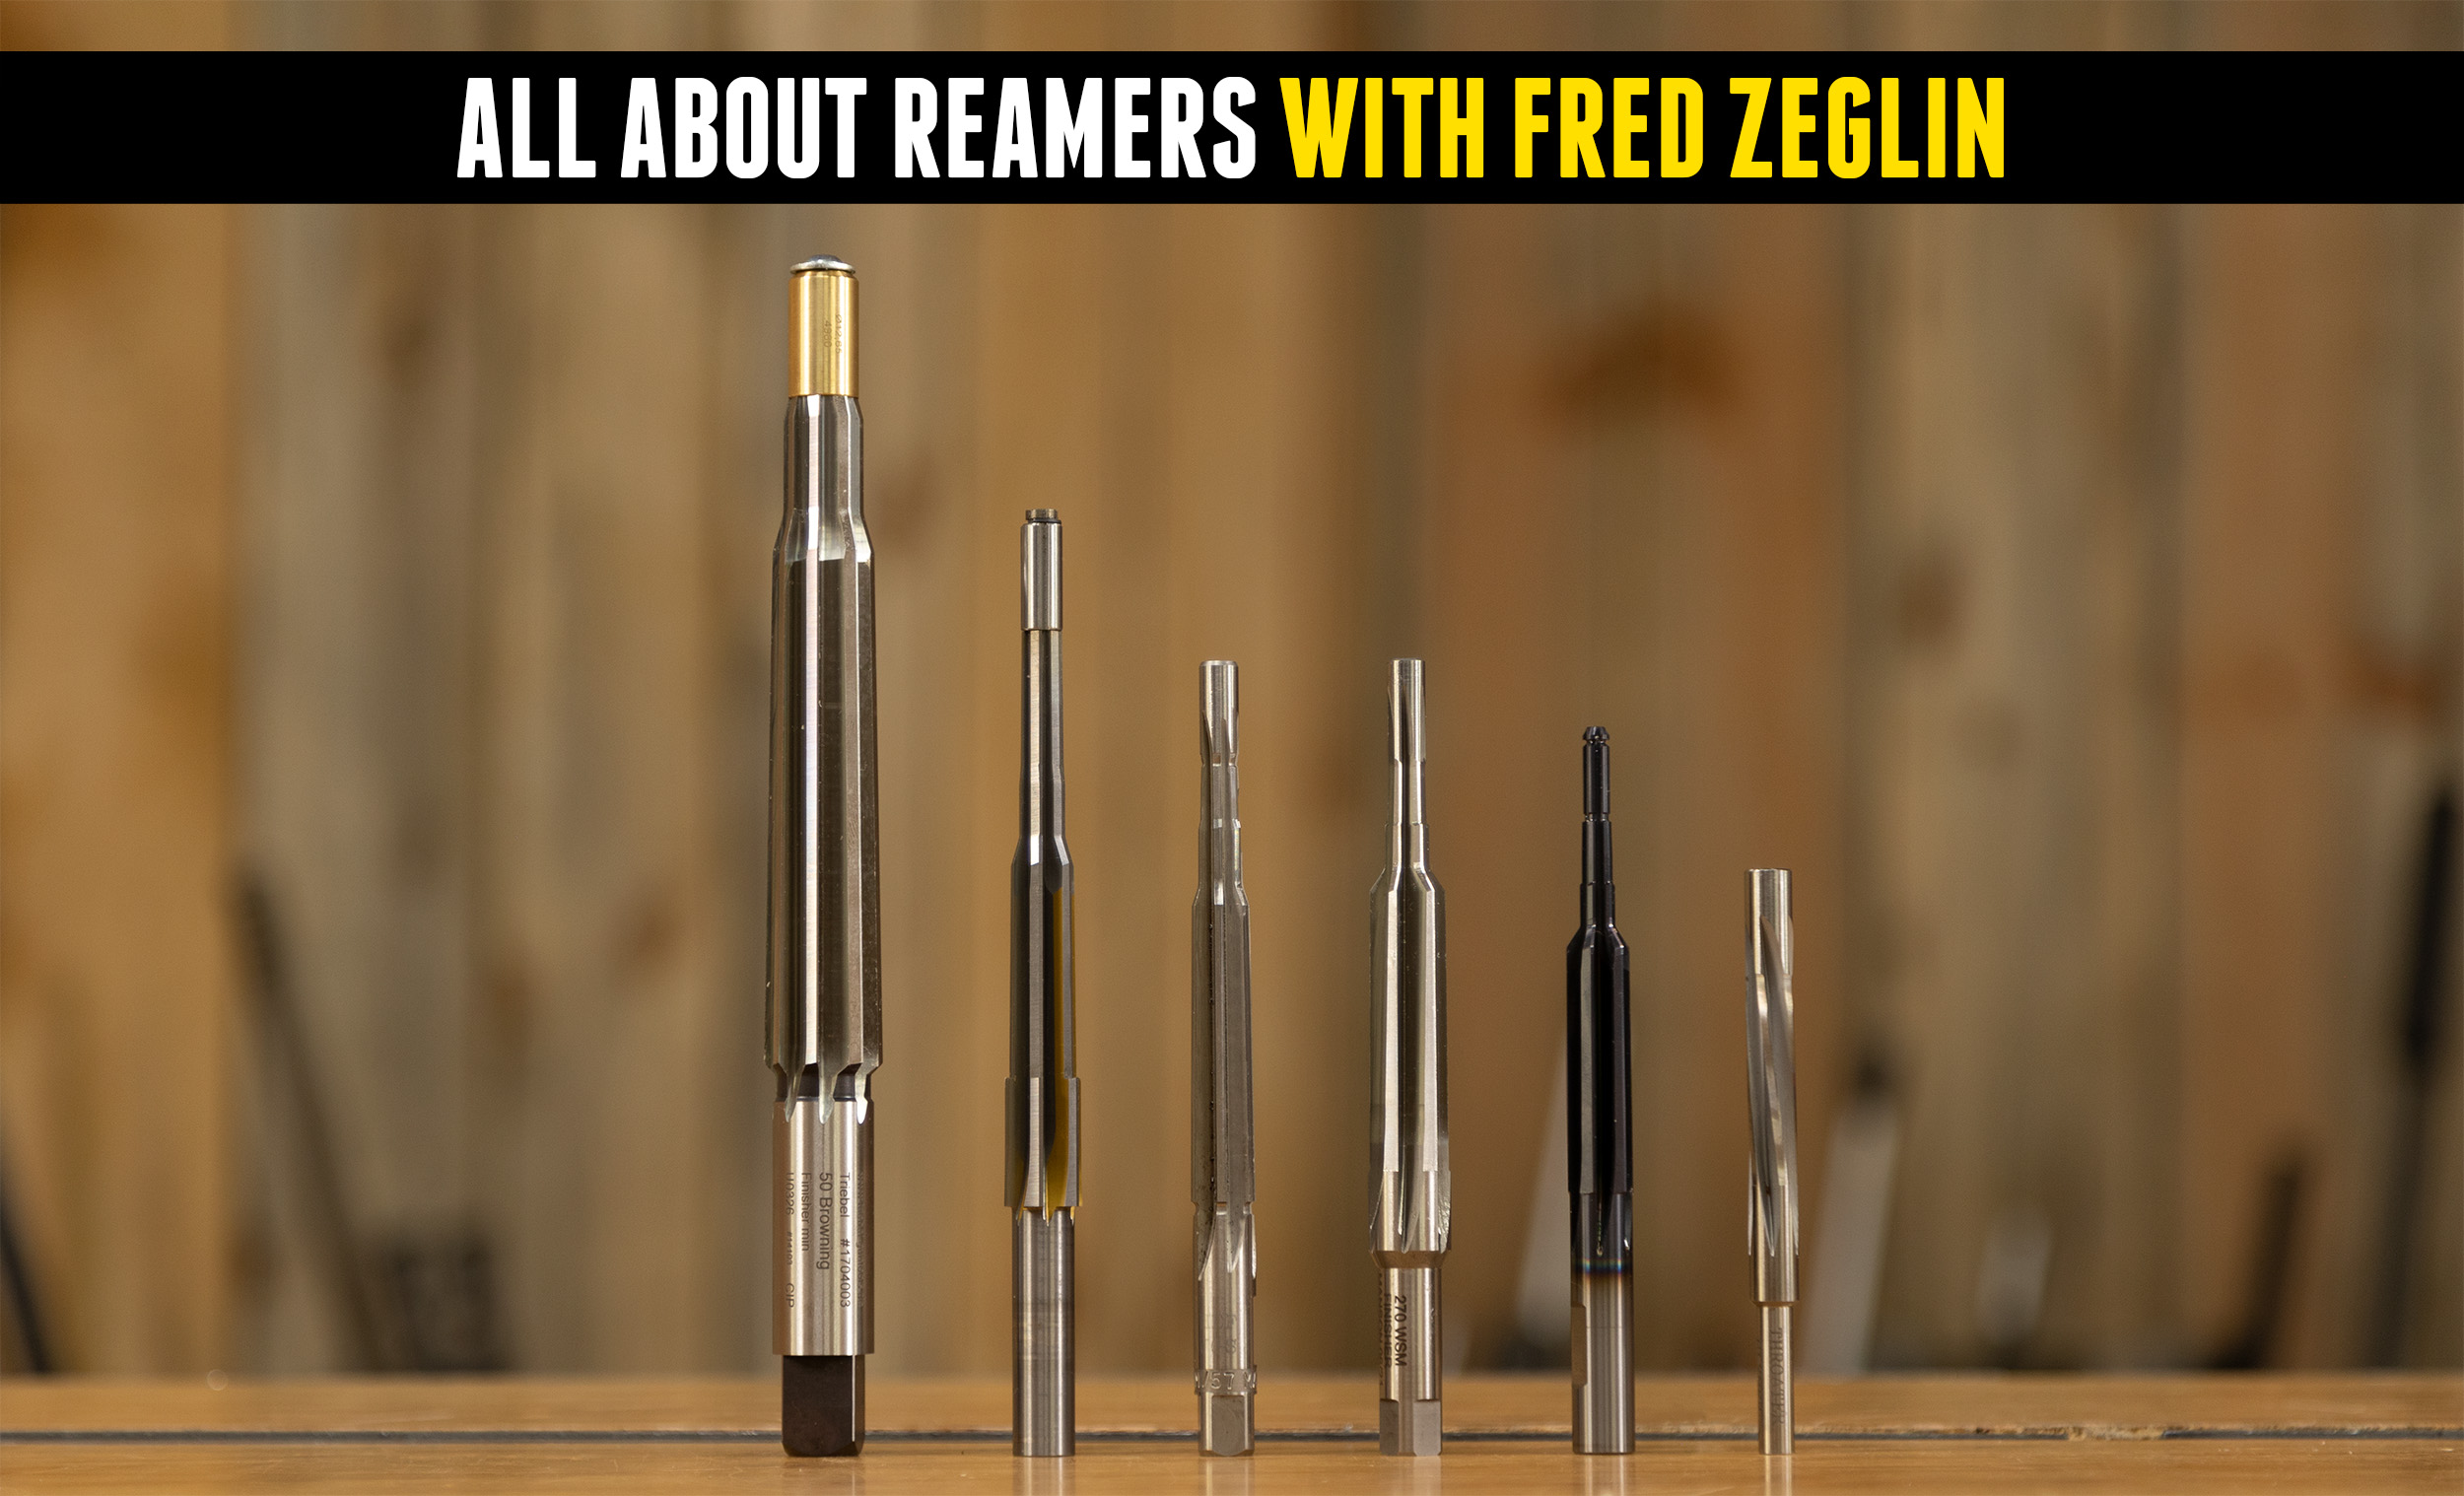
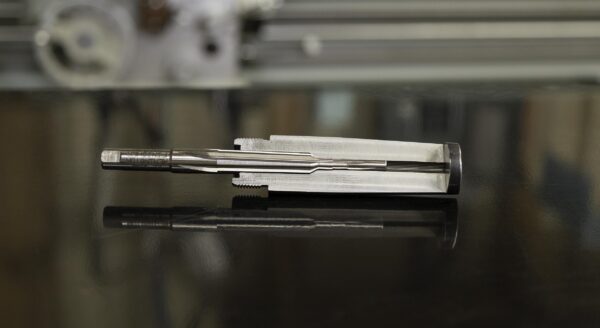
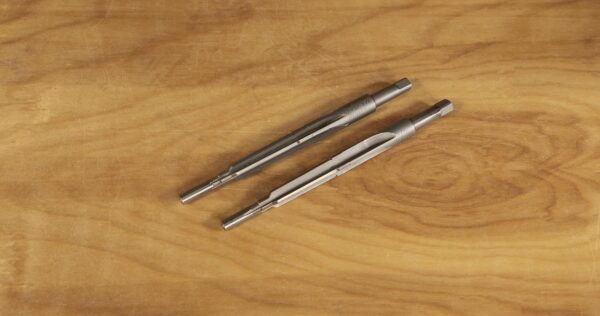
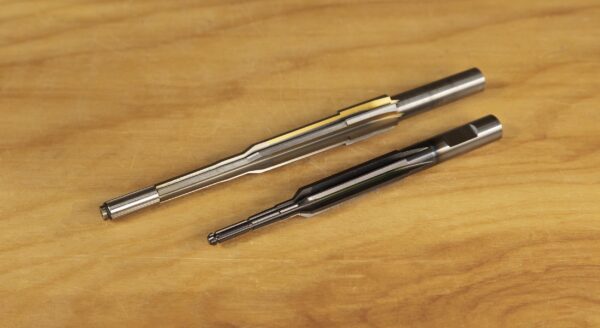
There is often very little visual difference between a rougher reamer and finish reamer for the same cartridge, but a rougher reamer is always smaller along all dimensions and doesn’t have a throat. The idea is to remove excess material before fine-tuning the cut with the finish reamer. Rougher reamers vary by manufacturer, but often have fewer flutes than finish reamers to more quickly move away material.
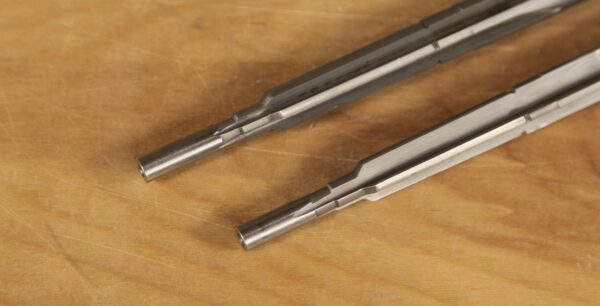
Reamers vary in flute count and profile. Four flutes are common for rougher reamers, rimfire and 17 caliber reamers. Six-flute reamers are common for finish reamers, but five-flute reamers are also an option. (Gordy Gritters made five-flute reamers popular for 5R rifling.) In preparation for my 50 BMG build, I’ve been discussing reamers with Triebel, who believe a six-flute reamer is preferable for 5R rifling in terms of chatter.
Another consideration is spiral vs. straight flute reamers. Straight flute reamers are traditional and most common. The idea behind spiral reamers is to achieve a better finish with less chatter. Zeglin has used both spiral and straight flute reamers, and doesn’t think there’s a considerable difference in the end product with either one.
Reamers also have different pilot types – live (aka floating) pilots or solid pilots. Considerable debate surrounds which is better, but there are advantages and disadvantages to each.

Solid pilots have no tolerance stacking. Live pilots have a bushing riding on a solid pilot. There has to be a tolerance there for the bushing to be able to move on top of a tolerance between the pilot itself and riding on the lands. Some say the extra tolerance stacking is detrimental, but others keep pilots in every two-tenths of a diameter to best match to whatever bore diameter they are working with. (Surprise! Barrelmakers don’t all make bores exactly the same.)
Some naysayers argue pilots are not needed at all. Zeglin said the downside to this is that a reamer may wander if not made with perfect geometry or if a machine isn’t properly set.
I’m personally experimenting with this idea, using a rigid (not a floating) setup in collaboration with Alpha Munitions.
Rather than the fully integrated reamer geometry detailed above (body, shoulder, neck area, throat), some gunsmiths who want greater control choose different reamer tooling for each operation. This tooling includes body and neck reamers, throater reamers, body-only reamers, neck-area reamers, and neck and throater reamers. This provides considerable flexibility and opportunity for customization to whatever ammunition you or your customer plan on loading. Separating operations also eliminates the need for a fully custom fully integrated reamer you may only use for one rifle.
How Reamers Cut
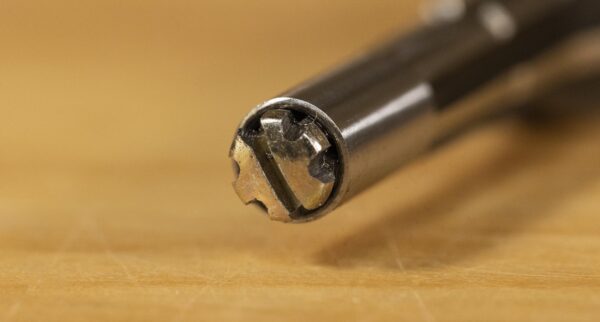
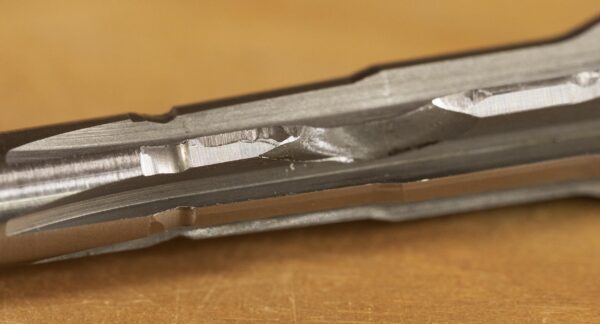
Reamers have multiple cutting edges that are cleaving metal apart into chips. The chips roll off the reamer flute, hit the inner part of the chamber wall, roll upon themselves and break into smaller pieces. This allows them to slowly migrate down the flute.
The cutting edge on a finish reamer has a cutting edge almost 90 degrees to the centerline of the reamer. This flat cutting edge aids in breaking the chips into especially small pieces. Off of this flat edge are two relief grinds, the primary and secondary. The primary relief grind is also called the margin. It’s a very small grind at a shallow angle. Inside a cylinder (the barrel), you need relief along the curve to prevent sticking chips or tearing extra material out of the cylinder. The secondary grind is much steeper and intended to prevent chips from getting caught, giving them a greater opportunity to travel down the flute. The flutes are off-center to aid in cutting and prevent chatter. Reamer-makers actually allow flutes to slightly vary to prevent chatter as well. Having everything perfectly symmetrical promotes harmonics and causes problems.
Materials and Coatings
Most people are familiar with high-speed steel reamers, the most common type. They work very well for most situations.
Carbide is another option and especially popular in production situations as it lasts longer and can be used in CNC. Zeglin commented he doesn’t rent carbide reamers as it’s especially easy to accidentally chip a flute as it’s significantly harder than high-speed steel. This same quality is also one of carbide’s advantages, making it a great choice for harder than average barrels (ex. chrome-washed or above 40 Rockwell).
Special Cases
We’ve concentrated primarily on standard bottleneck cartridges. Some reamers have specialty applications. A rimmed reamer has an integrated rim cutter. You can choose to get a separate rim cutter, but it’s generally most convenient and economical to have it all in one. It’s also important to remember rim thickness sets the headspace for rimmed cartridges. On belted cartridges, the headspace is measured belt to bolt face. Belted reamers also have a nicking cut to leave a small straight section ahead of the belt.
These differences in measurement make a special reamer a necessity. Also on the bench we have a reamer for 410 screw in chokes standing in as an example of what a reamer for a straight wall case would look like.
These straight wall cartridges typically have a 45 degree or 30 degree bevel at the end of the chamber rather than a freebore and typical chamber.
Another specialty feature is making provisions for oil flow for pressure flush. If you watch my chambering video with Bruce Thom, he discusses this method. In order to get the oil to flow under the bushing, you tighten the bushing screw in place then notch it so it looks like a star pattern.
This gives the oil a place to go under the bushing and all the way down. There are several ways to do this with various types of bushings. More oil flow on the reamer means better chip flow!
Custom Reamers

SAAMI provides the specifications you are likely to use with your reamers, but you can have a custom chamber reamer made for your purposes. Doing this doesn’t change the world, it just allows you to fine-tune your rifle and ammunition combo. For example, contrary to popular belief, not all reamers are made to SAAMI minimum standards. Most are in the middle to provide some wiggle room in a production environment. With a custom reamer, you still work within a standard, but you make adjustments to various parts (neck, freebore, etc.). Make sure to label your custom reamer if the manufacturer doesn’t do it for you. JGS labeled my custom 6mm Creedmoor reamer.
Reamer Manufacturers
There are a number of reamer manufacturers, but there are several we specially work with. In the USA, we work with Manson Reamers, JGS Precision, Pacific Tool and Gauge and Clymer. Triebel Gun Tools is also a favorite, but hails from Germany. Who you work with depends on your needs and also on product availability.
Reamer Troubleshooting, Sharpening, Maintenance
Chatter is a common issue. Zeglin says he has seen it all throughout the chambering process, but if it starts early, as soon as the shoulder engages, it’s an easy fix. Slow things down and you can likely eliminate the chatter.
I have personally noted differences between gunsmith and manufacturer practices. JGS Precision, for example, recommends a fast speed, 150-300 RPM, and aggressive feed. When I worked with Bruce Thom, I noticed he uses a very slow speed, 60-70 RPM.
Speed isn’t the only thing that affects chatter. The type of machine you’re using, among other things, can make a difference.
Chambering, like shooting, is a process where many things can go wrong or cause changes. Many gunsmiths blame their tooling as shooters blame their equipment, but it’s important to really investigate the issue in question. Zeglin believes a good gunsmith is a problem solver.
There are a number of ways to solve common issues. One solution I’ve found (from the Manson website) is to cut a slot in a patch and place it over the shoulder area. Apply cutting oil and send it in with the reamer. The patch has a centering and dampening effect, reducing chatter. This method may require several patches and passes. Zeglin mentioned it’s important to eliminate chatter before returning to a “naked” reamer. Packing the reamer with beeswax or heavy gear grease are other, messier options. Zeglin’s preferred method is wrapping a ½ inch wide strip of wax paper in a spiral around the reamer along with some oil.
Reamers, like knives, need to be sharpened occasionally. Dull reamers do not cut well, leaving irregularly shaped chips. It’s easy to tell by looking at the shoulder area, which will look chewed up on a dull reamer. You will also feel more pressure on the tailstock.
It is important to maintain your reamers. Some gunsmiths will use a loupe or microscope for a closer look. Zeglin walked through his process. He first checks to ensure the form is complete and undamaged. Chip welding (steel sticking to reamer) is the second thing he looks for, which is pretty common. The way to avoid chip welding is to use good cutting fluid, but it still happens. Large chip welds can act like dull reamers. Luckily, it’s easy to clean off the chips with a copper penny, stone, or diamond lap. You shouldn’t ever stone on the periphery of a reamer, only on the inside flats of the flute. This is to keep the diameter intact.
Properly maintained reamers can last for hundreds of chambers with some minor sharpening.
Conclusion
It’s important to understand the connection between SAAMI specs, a finished round, reamers and chambers. There are many small things as well as tips and tricks to chambering, but we’ve covered an in-depth overview. Also key to note is that many reamer manufacturers also make dies!
Get the Gear
Rather than buy every reamer you may need, 4D Reamer Rentals provides an affordable solution. They have an extensive inventory of approximately 2,000 reamers and gauges for pistols, rifles and shotguns.
Get 10% off your reamer rental with the discount code UR10!
Looking to learn more? Get 50% off the Gunsmith Tools, Cutters & Gauges Book with code URPrime. There are a number of other books available as well, including Chambering Rifles for Accuracy (with Gordy Gritters) and The Bolt Action by Stuart Otteson.
Don’t miss out on Ultimate Reloader updates, make sure you’re subscribed!
Thanks,
Gavin Gear


