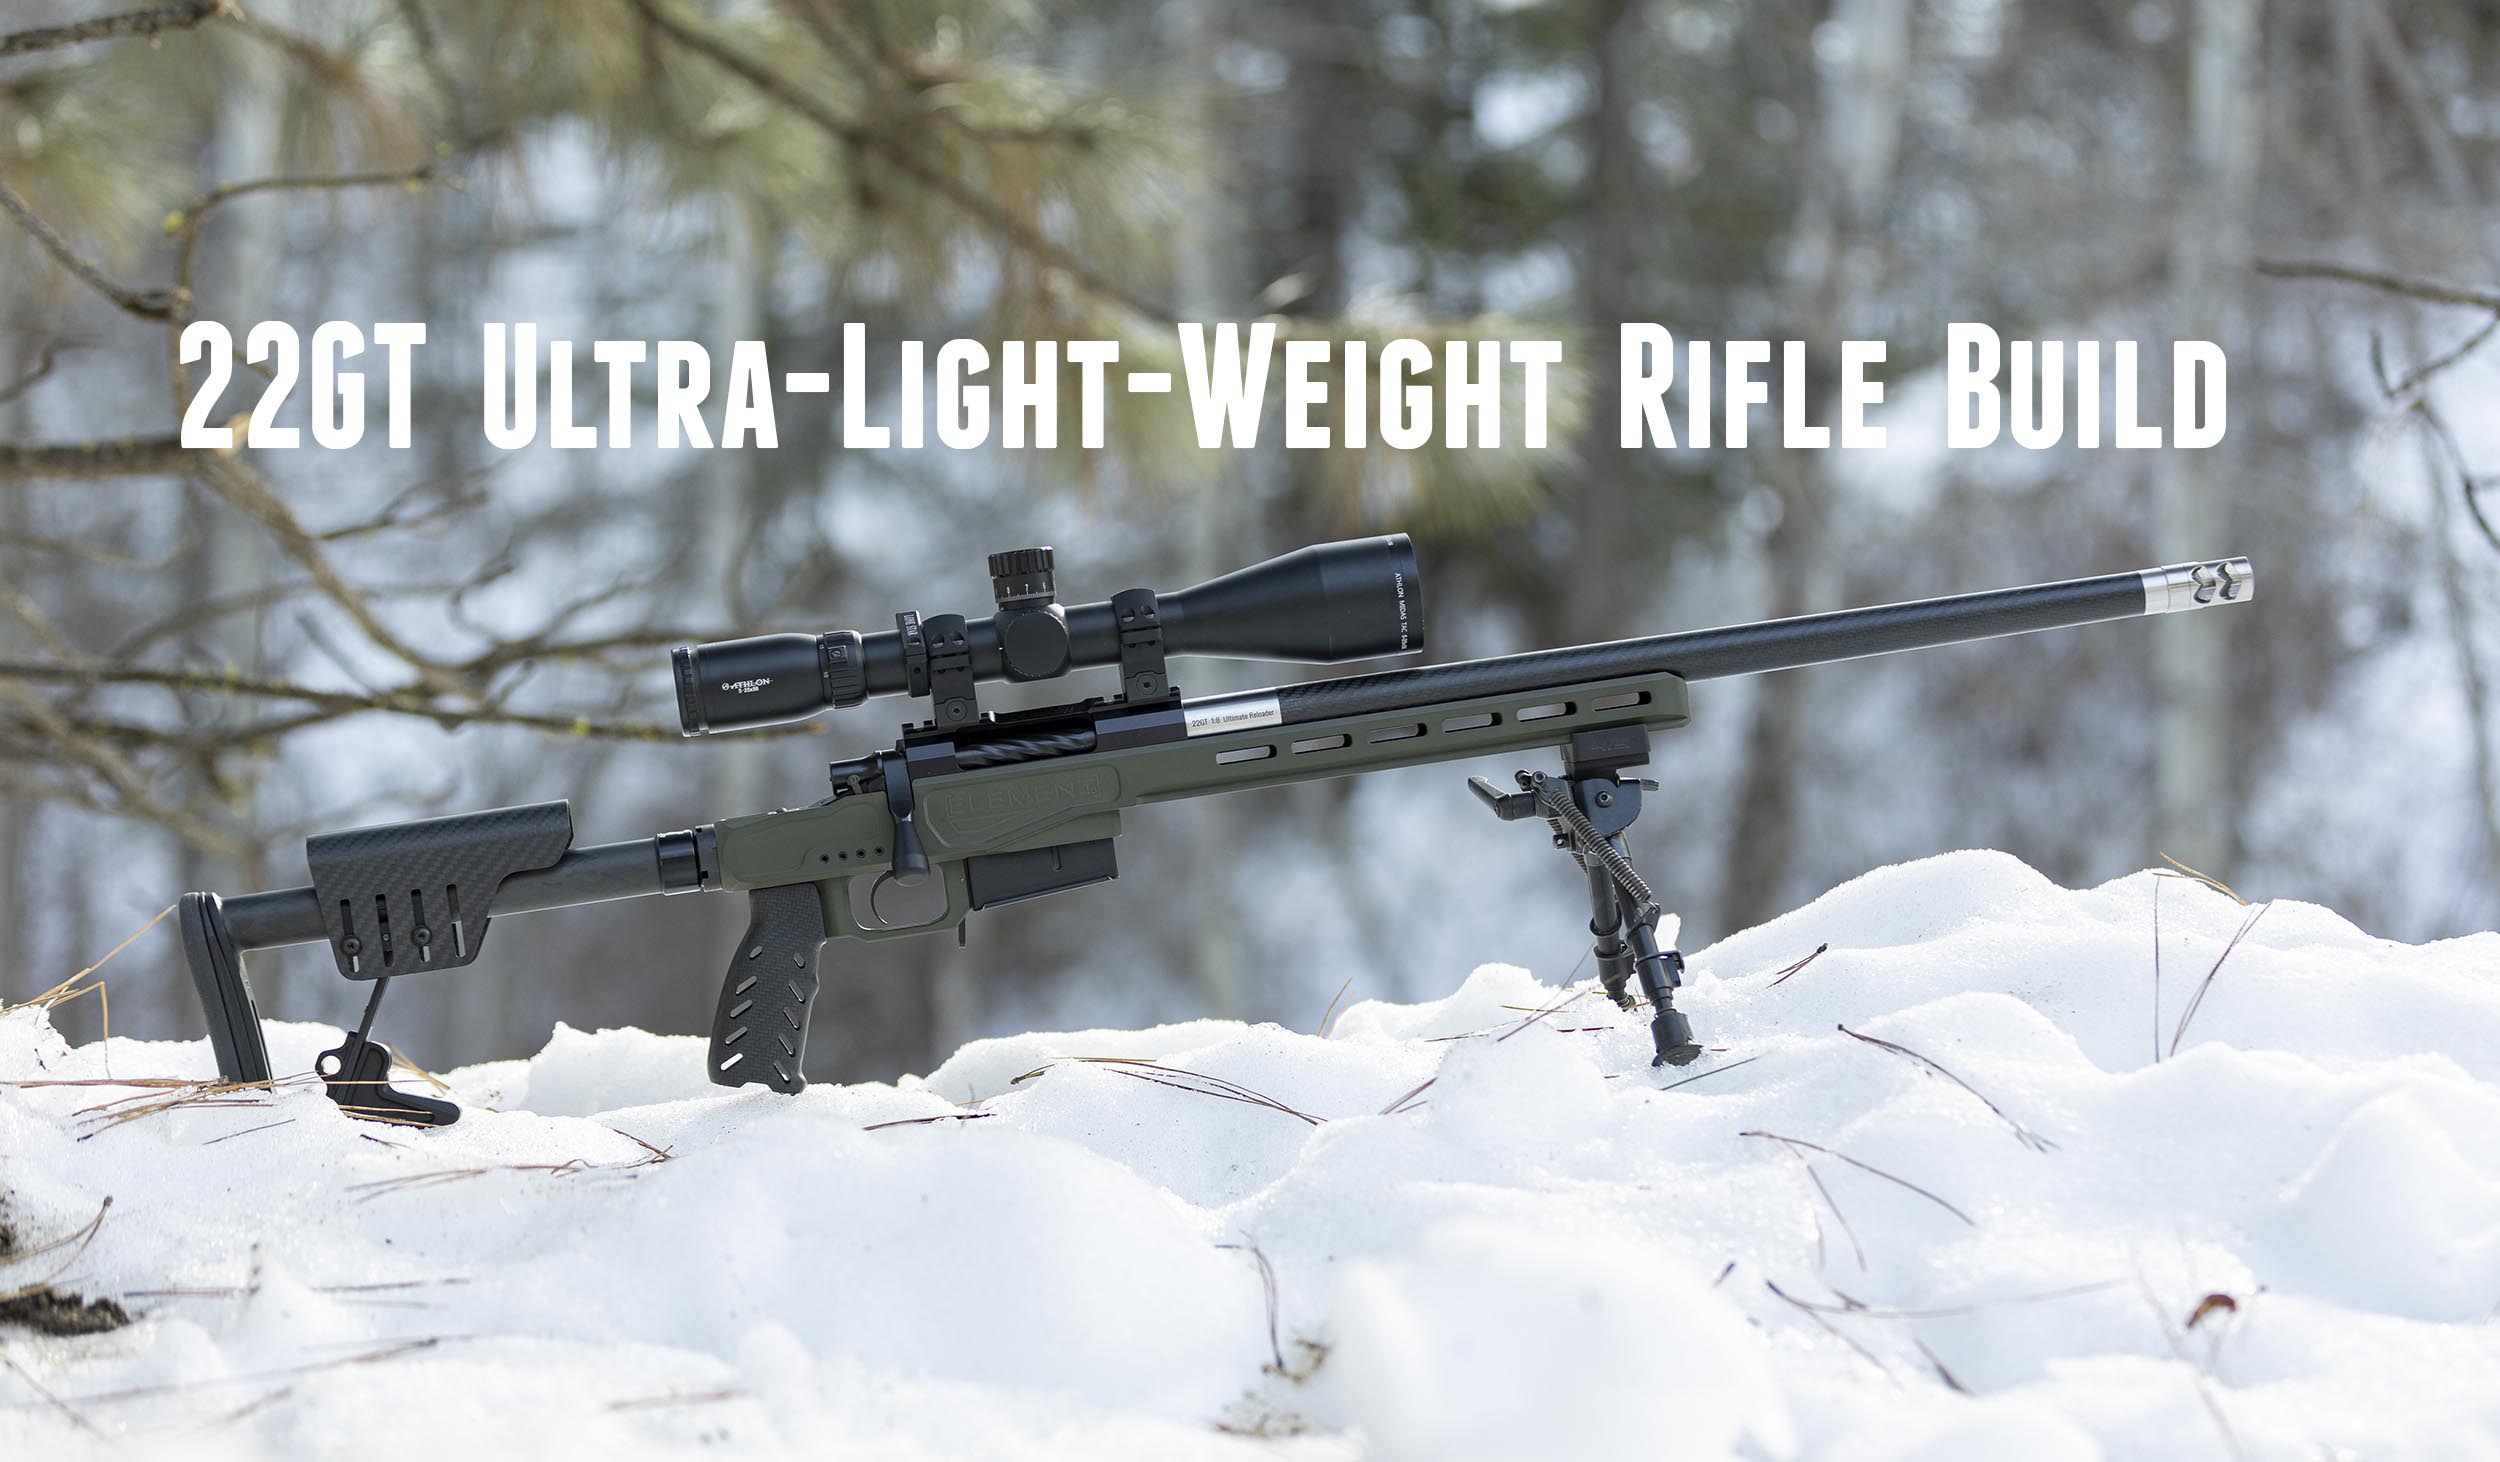
Ever since I heard about the 22GT I thought to myself: I need to build one of these! And that’s exactly what I’m going to cover in this story- my ultra-light-weight 22GT build start to finish.
Disclaimer
Ultimate Reloader LLC / Making with Metal Disclaimer: (by reading this article and/or watching video content you accept these terms)
- The content on this website (including videos, articles, ammunition reloading data, technical articles, gunsmithing and other information) is for demonstration purposes only.
- Do not attempt any of the processes or procedures shown or described on this website.
- All gunsmithing procedures should be carried out by a qualified and licensed gunsmith at their own risk.
- Do not attempt to repair or modify any firearms based on information on this website
- Ultimate Reloader, LLC and Making With Metal can not be held liable for property or personal damage due to viewers/readers of this website performing activities, procedures, techniques, or practices described in whole or part on this website.
- By accepting these terms, you agree that you alone are solely responsible for your own safety and property as it pertains to activities, procedures, techniques, or practices described in whole or part on this website.
About the 22GT
The 22GT is essentially a 6GT (now SAAMI certified) necked down for 22 caliber bullets. Capable of pushing 80-90 grains in excess of 3300 fps, this cartridge adds some performance compared to cartridges like the 224 Valkyrie, and also uses a 308 case rim (an advantage when finding a suitable rifle action and also for reloading equipment). This is the basic idea for the 22GT, I’ll have more data to share at a later date!
Parts for the Build
This build is about top quality parts and components end-to-end, here’s the bill of materials:

Build parts shown above:
- BAT Bumblebee light-weight Aluminum action (short action)
- XLR Element 4.0 Magnesium Chassis with Carbon Buttstock and Bag Rider
- Benchmark Barrels carbon wrap 22″ finished length 5 groove 22 caliber barrel blank, 1:8 twist
- TriggerTech Diamond Two-Stage Remington 700 trigger
- Salmon River Solutions 2-port self-timing titanium brake (about 1.5oz!)
Tools and components shown above:
- Bat bolt disassembly tool and modular bolt sleeve removal tool
- Alpha Munitions Legacy 22GT solid carbide piloted reamer
- Dave Manson 6GT go gauge (works for 22GT)
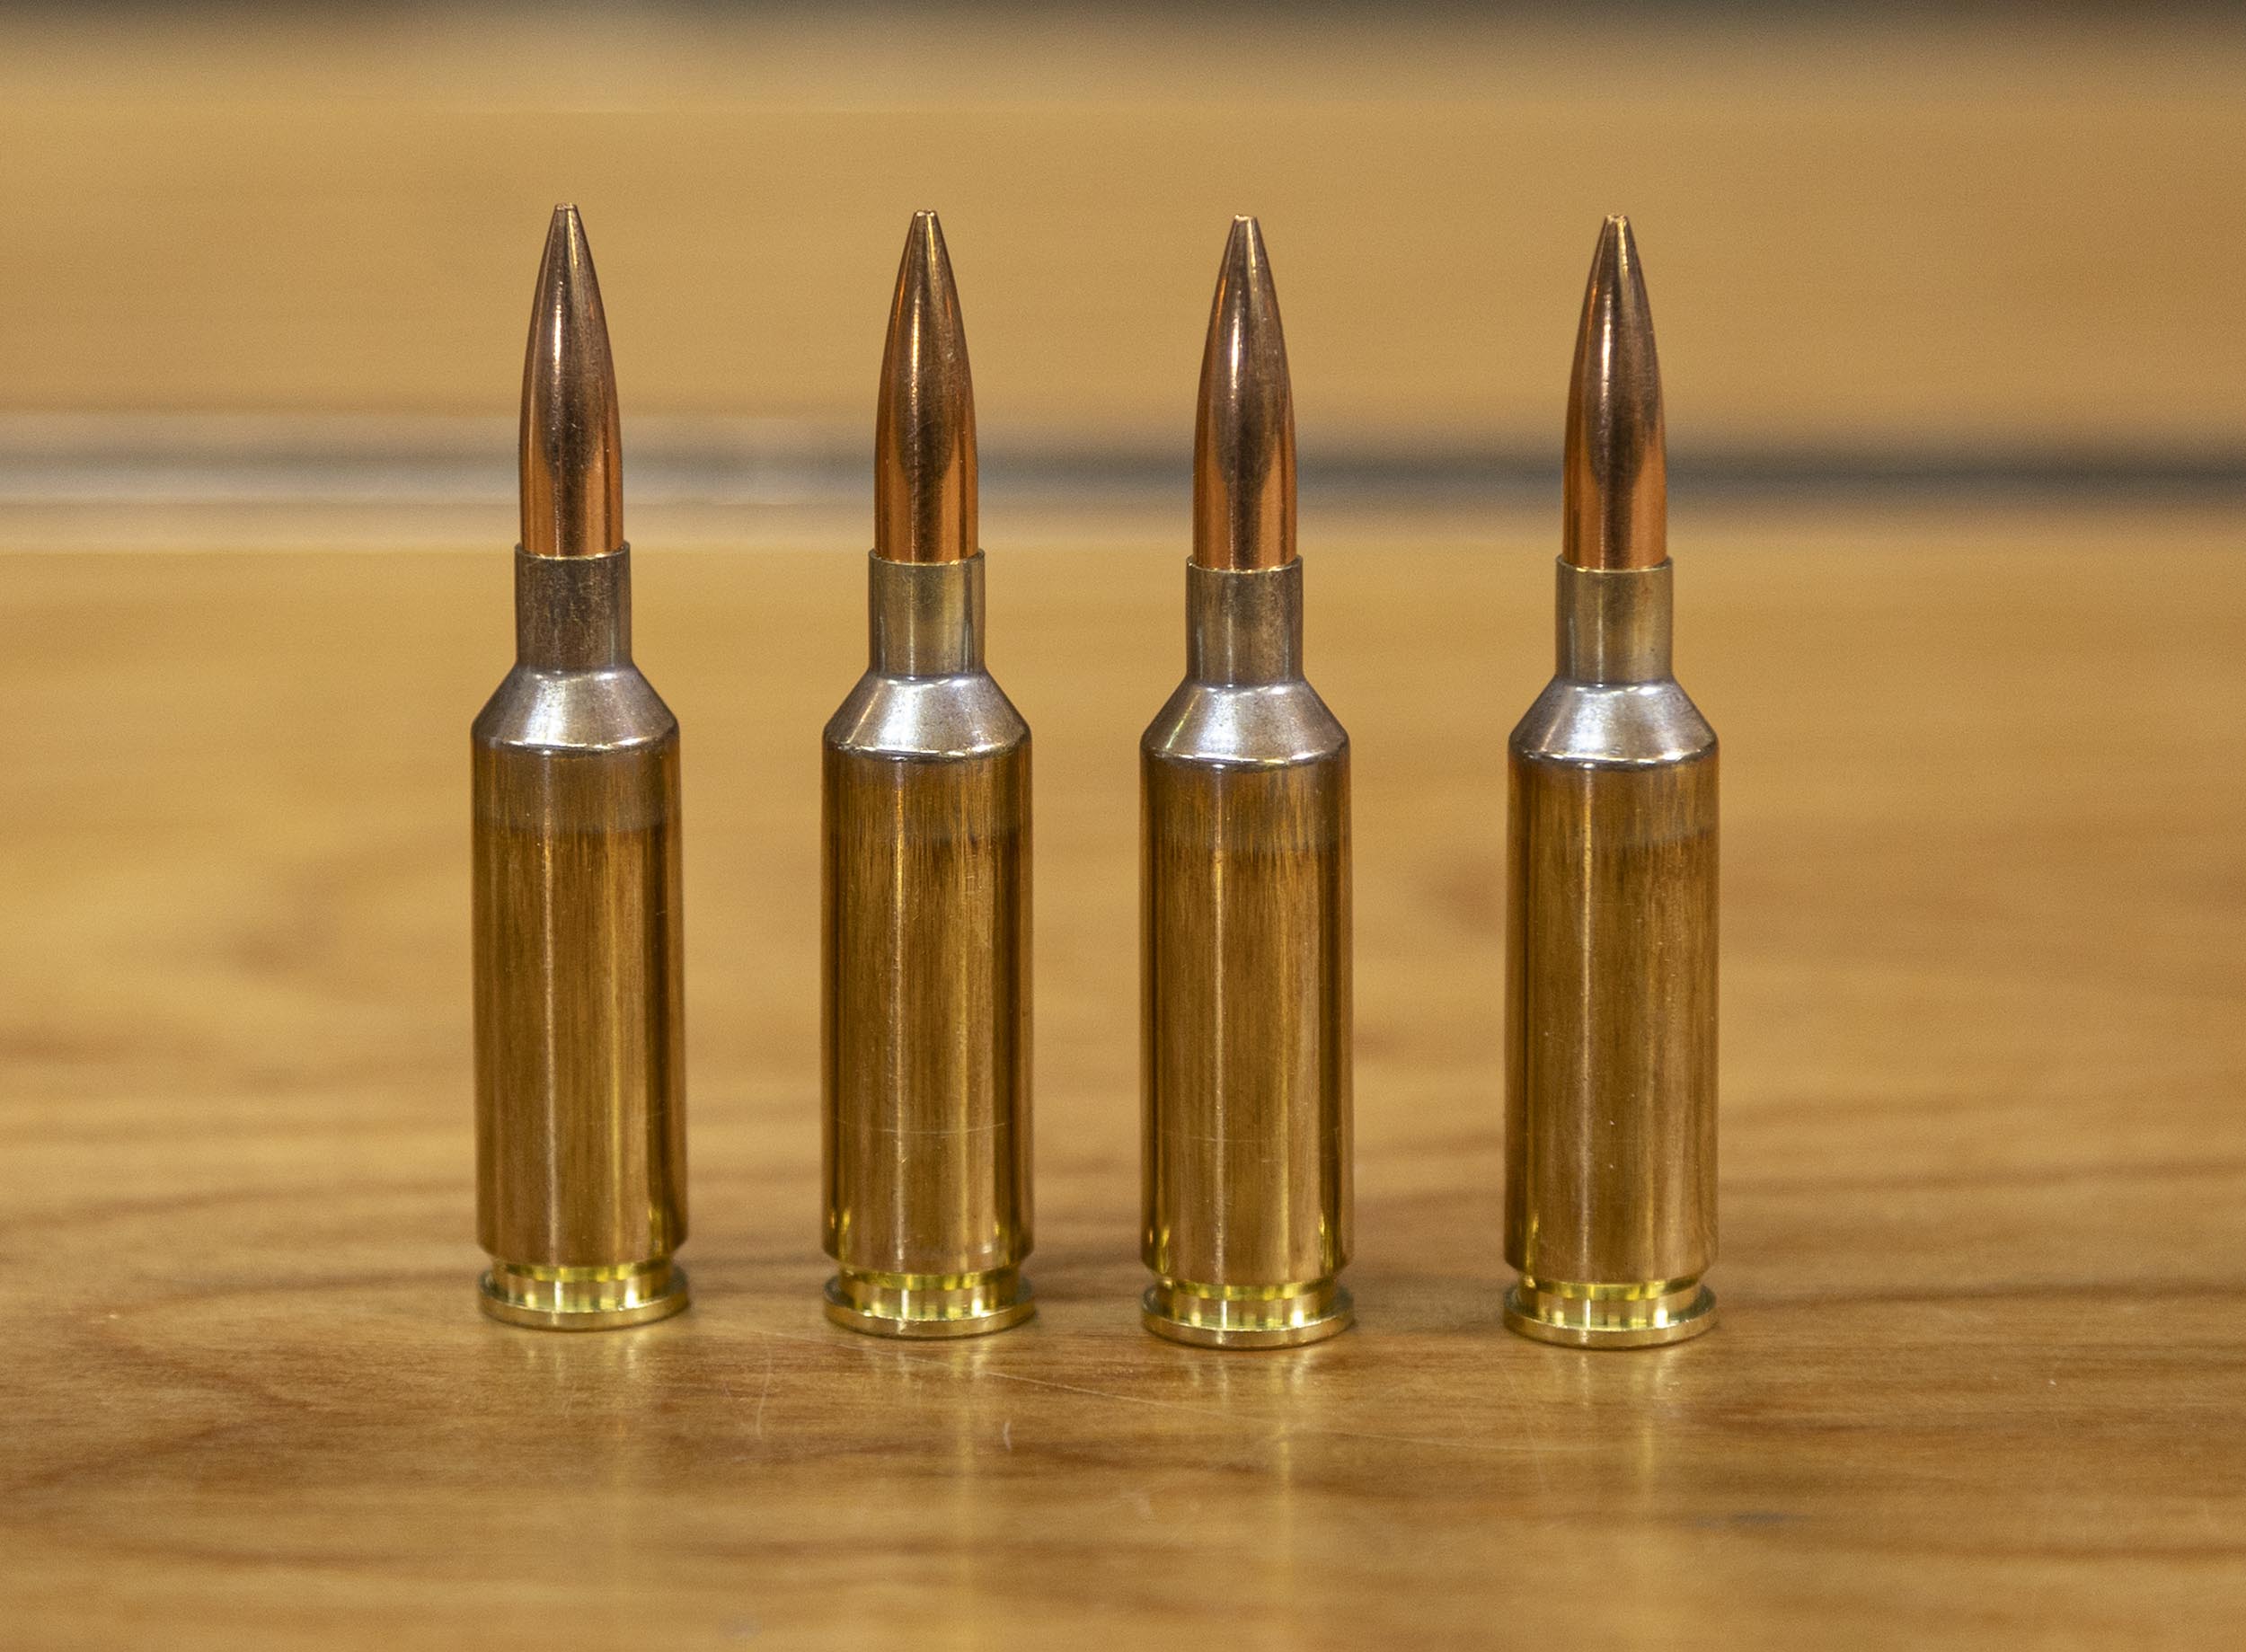
- Alpha Munitions 22GT brass with OCD
- LE Wilson 6GT Case Gauge (works for 22GT)
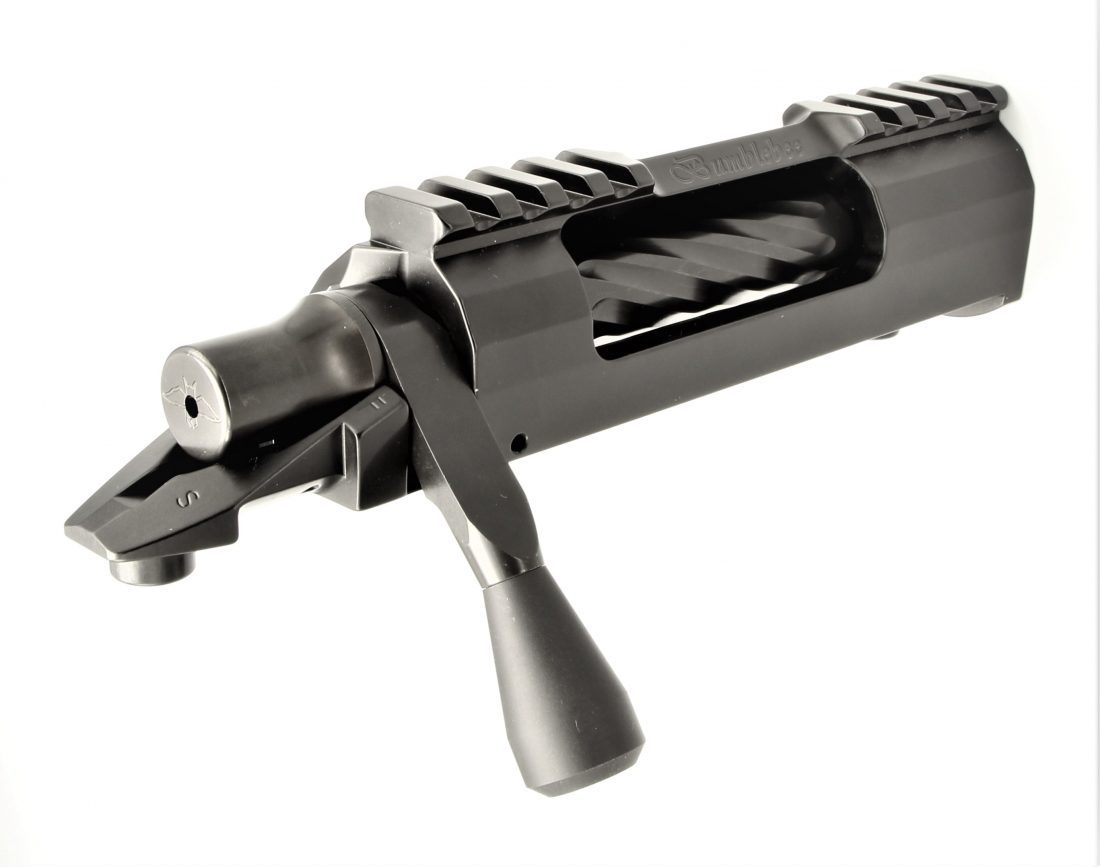
About the Bat Bumblebee Action
From the Bat Machine product page:
We are excited to offer the ultimate solution for all shooters that need a Light weight, Premium quality action!
The Bumblebee is designed to use 700 Short Action bottom metal.
Features include:
-
- 11.4 oz lighter than our VR/TR action!
- The weight is 23.8 oz as configured in photos. You will find the weight to be very comparable to Titanium actions after you add for Picatinny rails, recoil lugs and the hardware required to mount them!
- 31%-42% stiffer than light weight steel actions and over 130% stiffer than round Titanium actions!
- Action body is made with a combination of Aircraft grade billet 7075-T6 Aluminum and hardened 4140 Chromoly Steel to gain the best combination of light weight and high strength .
- Integral 20 MOA picatinny rail comes standard this allows easy 100 yard zero and gains the maximum capability of your scope for the long shots. Also you can sleep at night knowing your bases won’t be coming loose.
- Multiple scope mounting positions to accommodate most all scope configurations and eye relief.
- Modular bolt for lower cost bolt face changes.
- Has our proven .070 firing pin diameter for maximum accuracy and reliable ignition.
- Comes with a medium size aluminum knob. The handle has a 5/16-24 thread.
- LiFe (Melonite) treated firing pin, bolt and shroud for extremely smooth bolt movement and low maintenance.
- Extended extraction cam for smooth bolt opening.
- Allows use of most Remington 700 SA components including the ability to run extended Wyatt’s Outdoor boxes.
- Right and left hand versions.
- Barrel tenon is 1.062 x 18 tpi. Click here for print
- Comes with our made in house LiFe treated Deep hex 1/4-28 action screws.
Most most major stock companies inlet for this action and we have select number of XLR Element Magnesium stocks available for shipment today, call for pricing and color options available!
Tooling
Precision Matthews TL-1660 Ultra-Precision Lathe

This lathe is a beast! Here are some of the specs for the Precision Matthews TL-1660:
- Ultra Precision, made in Taiwan
- 16″ swing, 60″ between centers capacity
- D1-6 high precision spindle
- English and Metric threading without gear changes
- One shot lube on the carriage
- 3-Phase 5hp motor
*Note: for most gunsmiths, the TL-1640 would be a great choice. You likely won’t need 60″ between centers like the TL-1660 offers. The TL-1640 can save both space, and significant money on freight! I opted for the larger lathe because I wanted to have a lathe on hand with extended capacity between centers.
Straight Shot Gunsmithing “True Bore Alignment System” and Range Rod
Recently I’ve become a huge fan of the SSG True Bore Alignment System (TBAS). This unique articulating chuck system allows you to dial in your barrel with both radial and axial adjustments.
Above you can also see the SSG Range Rod (see bottom of page HERE) which is used in conjunction with the TBAS system to indicate barrels (I used this on both the breech and and the muzzle end of the barrel.
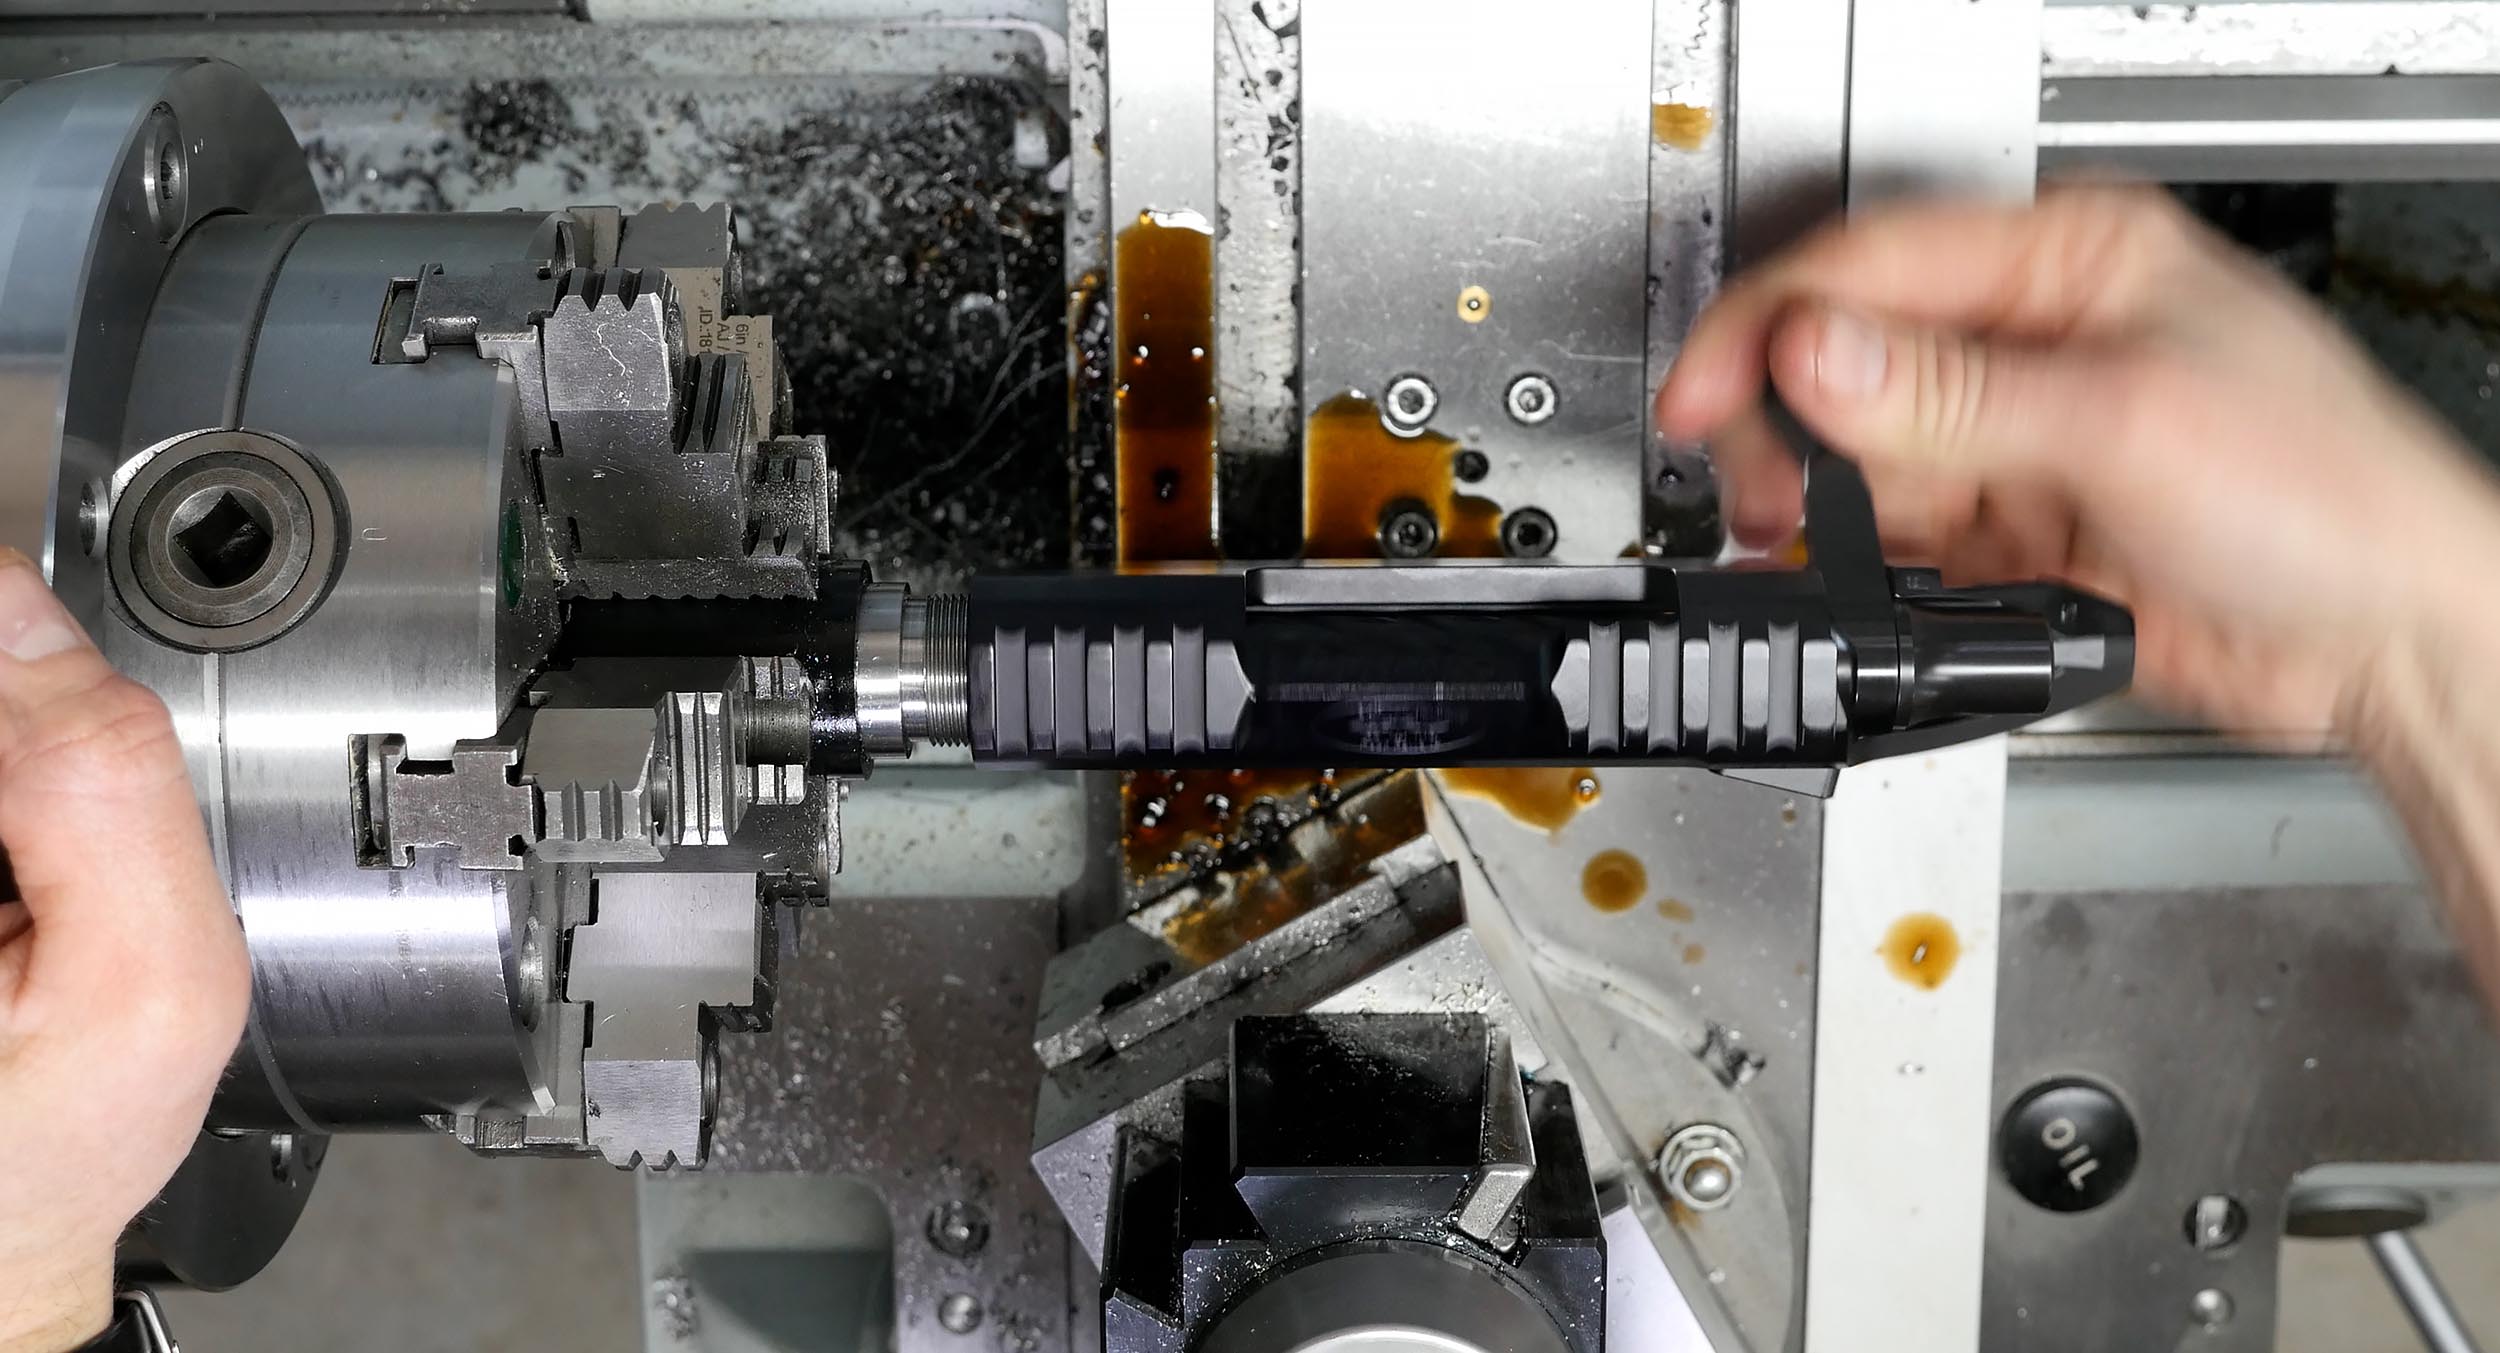
NEW: Custom Outboard Spider for TL-1660
For this build, I decided to build an outboard for this lathe, along with a barrel extension. Here’s the finished spider (I machined from solid aluminum billet on the TL-1660):
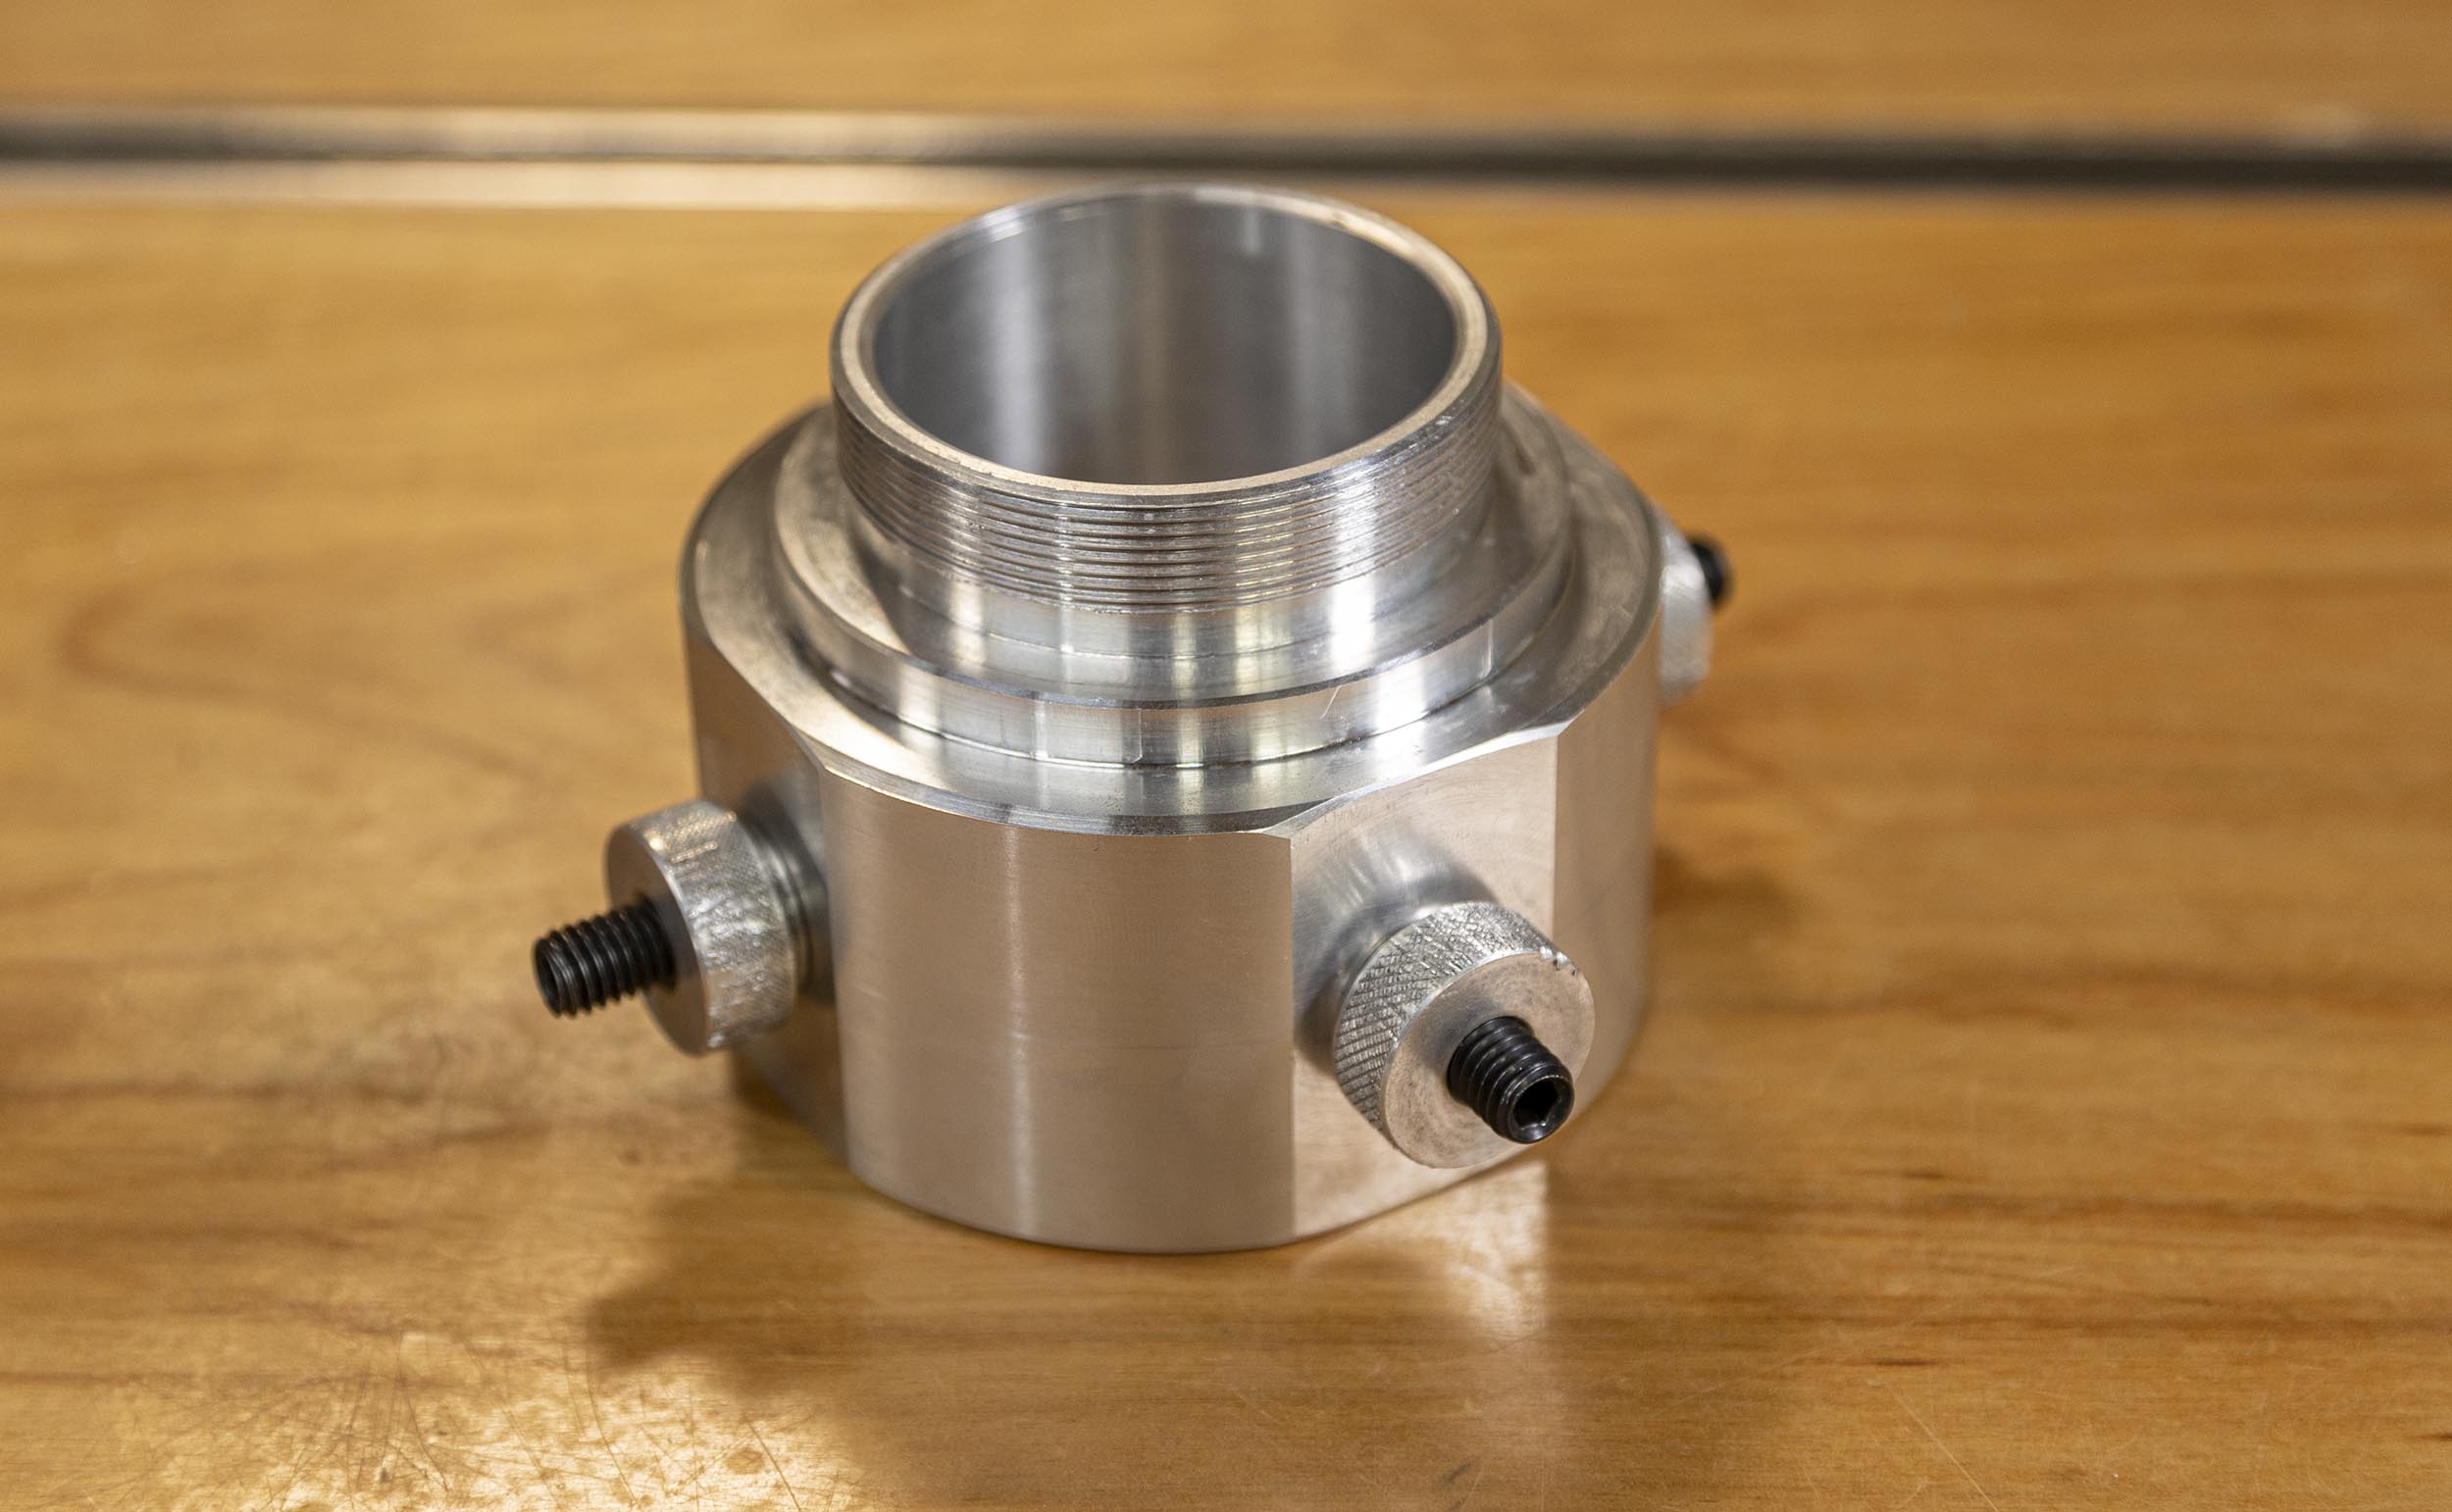
The barrel extension was made from a 300 Remington Ultra Magnum barrel take-off that I had laying around:
The muzzle was already threaded 5/8×24, which was just what I was looking for! I cut the barrel down to 16″ and then drilled, faced, and tapped the opposite end for 5/8×24 internal threads. Ready to roll!
The final tooling upgrade was a couple of delrin plastic split sleeves to protect the carbon wrapped barrel from the chuck jaws:
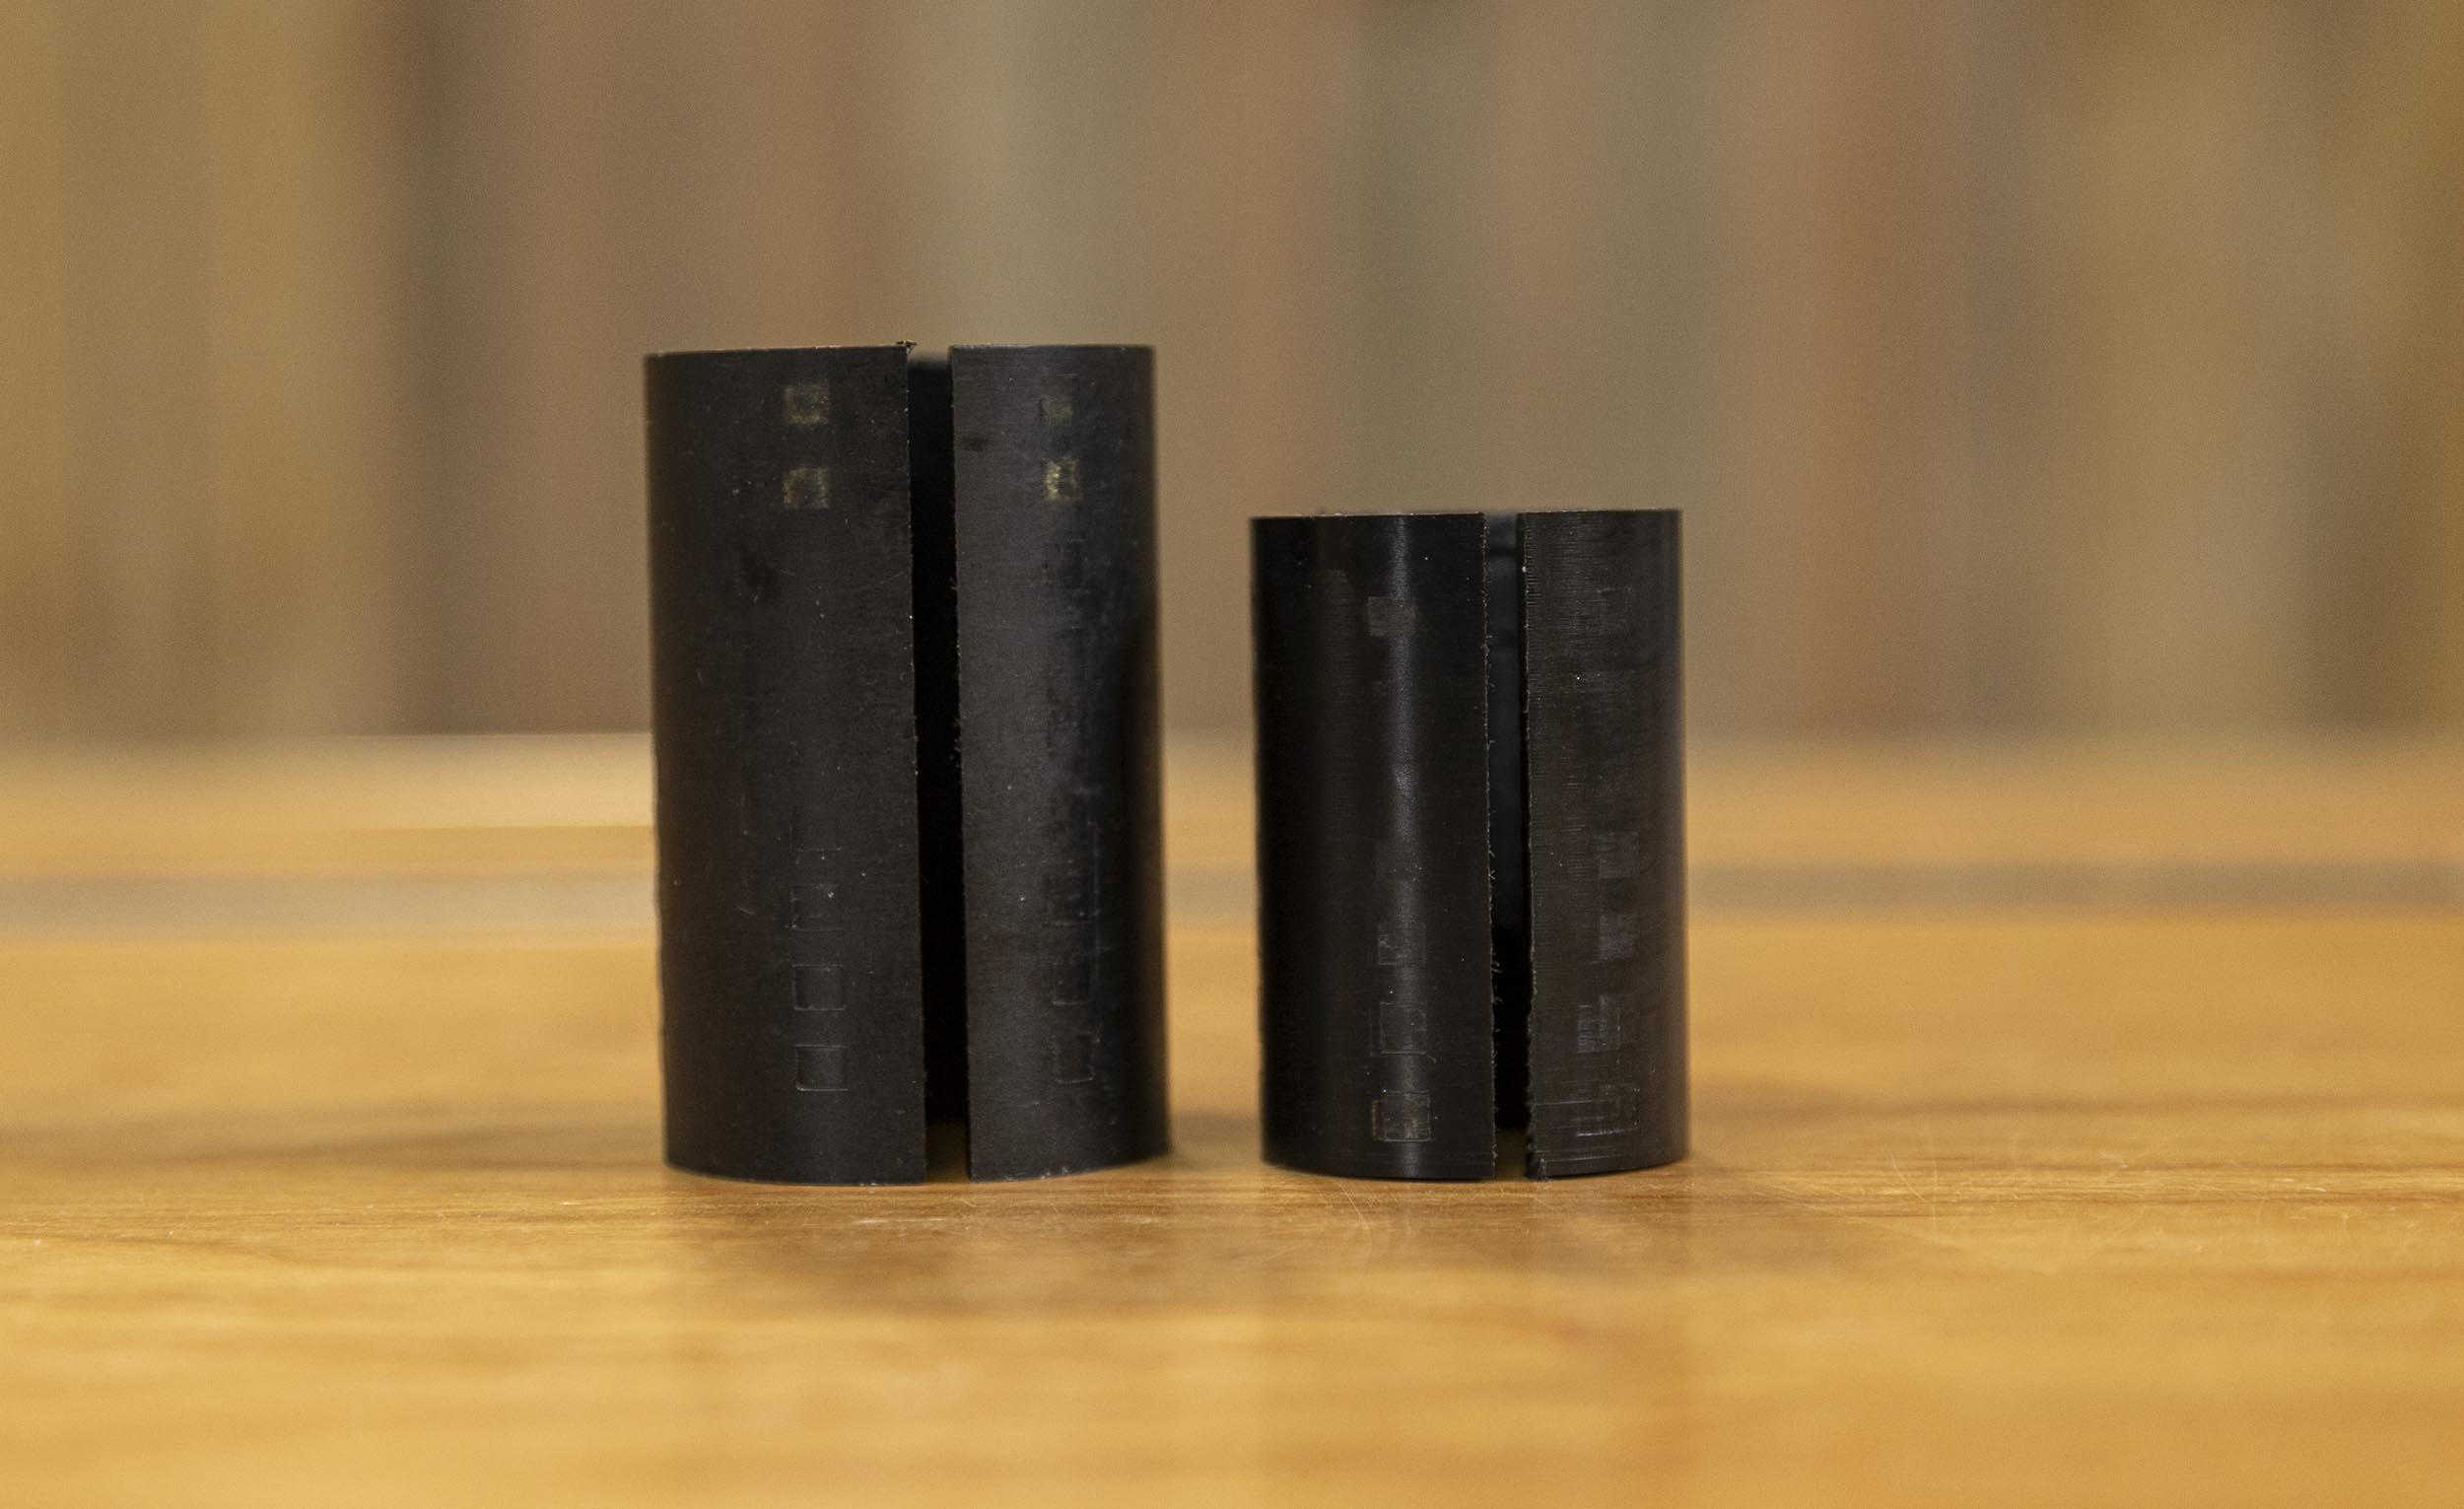
The larger sleeve is for the breech end, and the smaller sleeve is for the muzzle end. These worked out great! Here’s a picture of the muzzle end with sleeve:

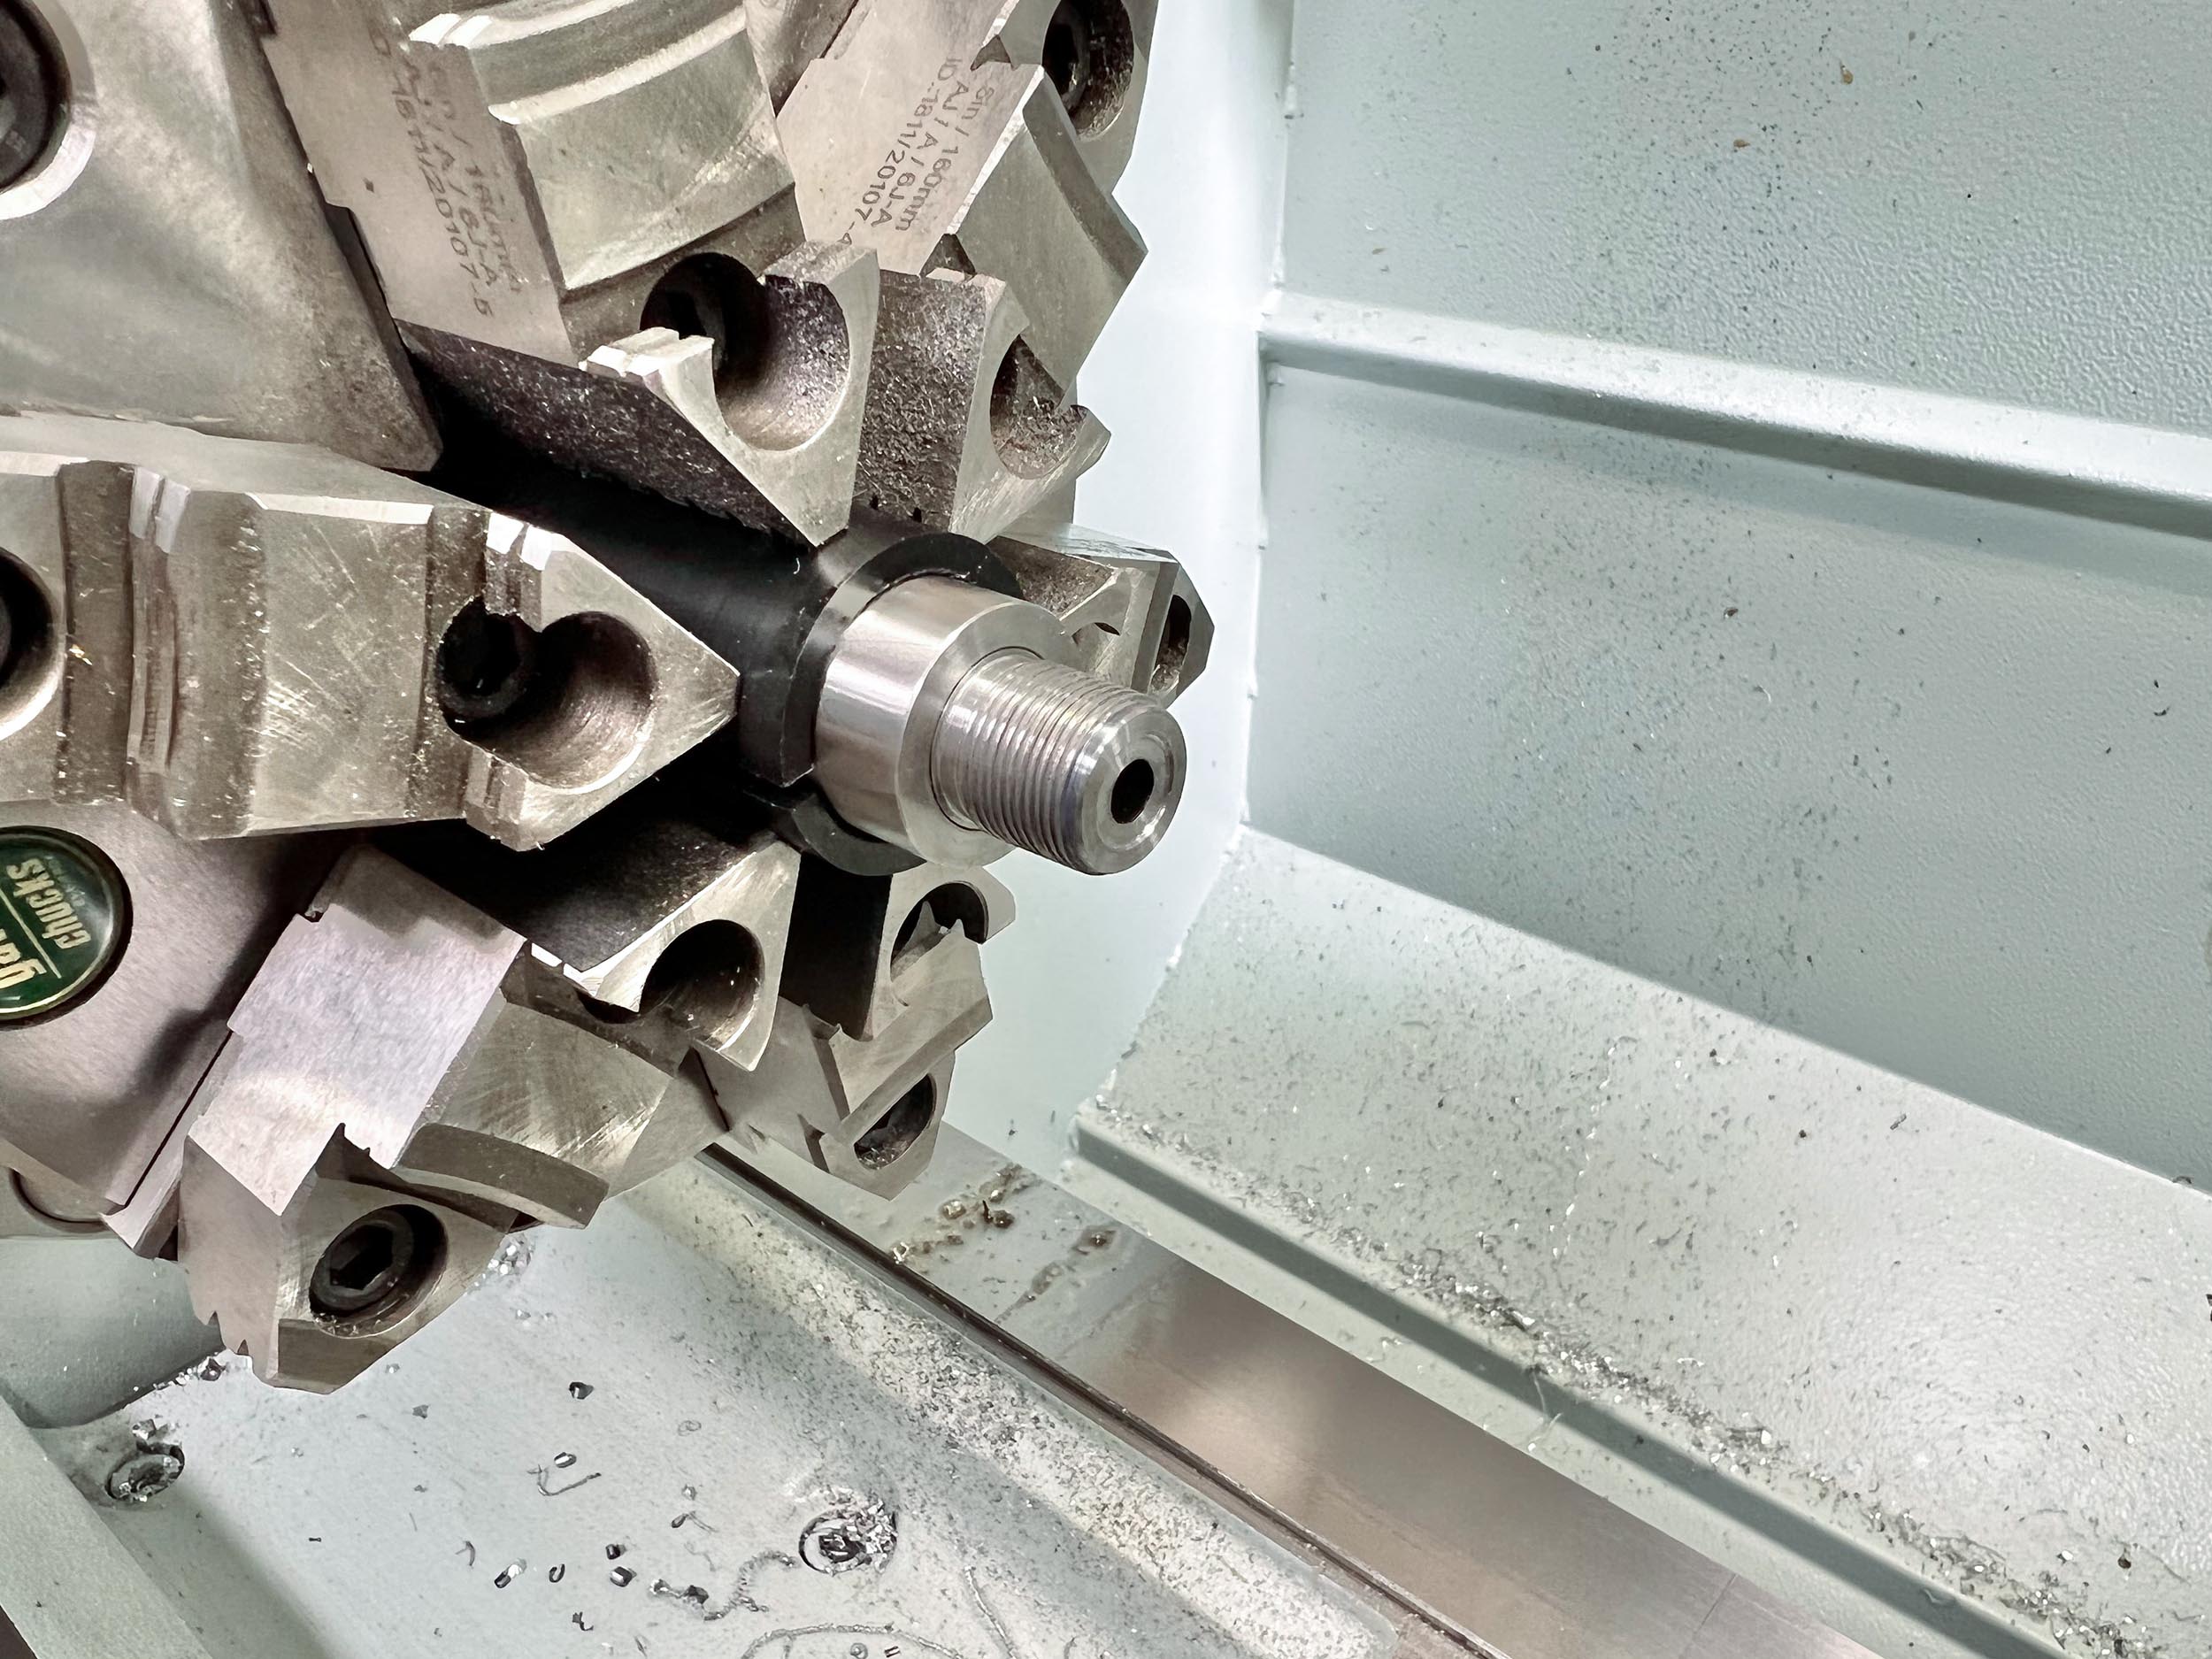
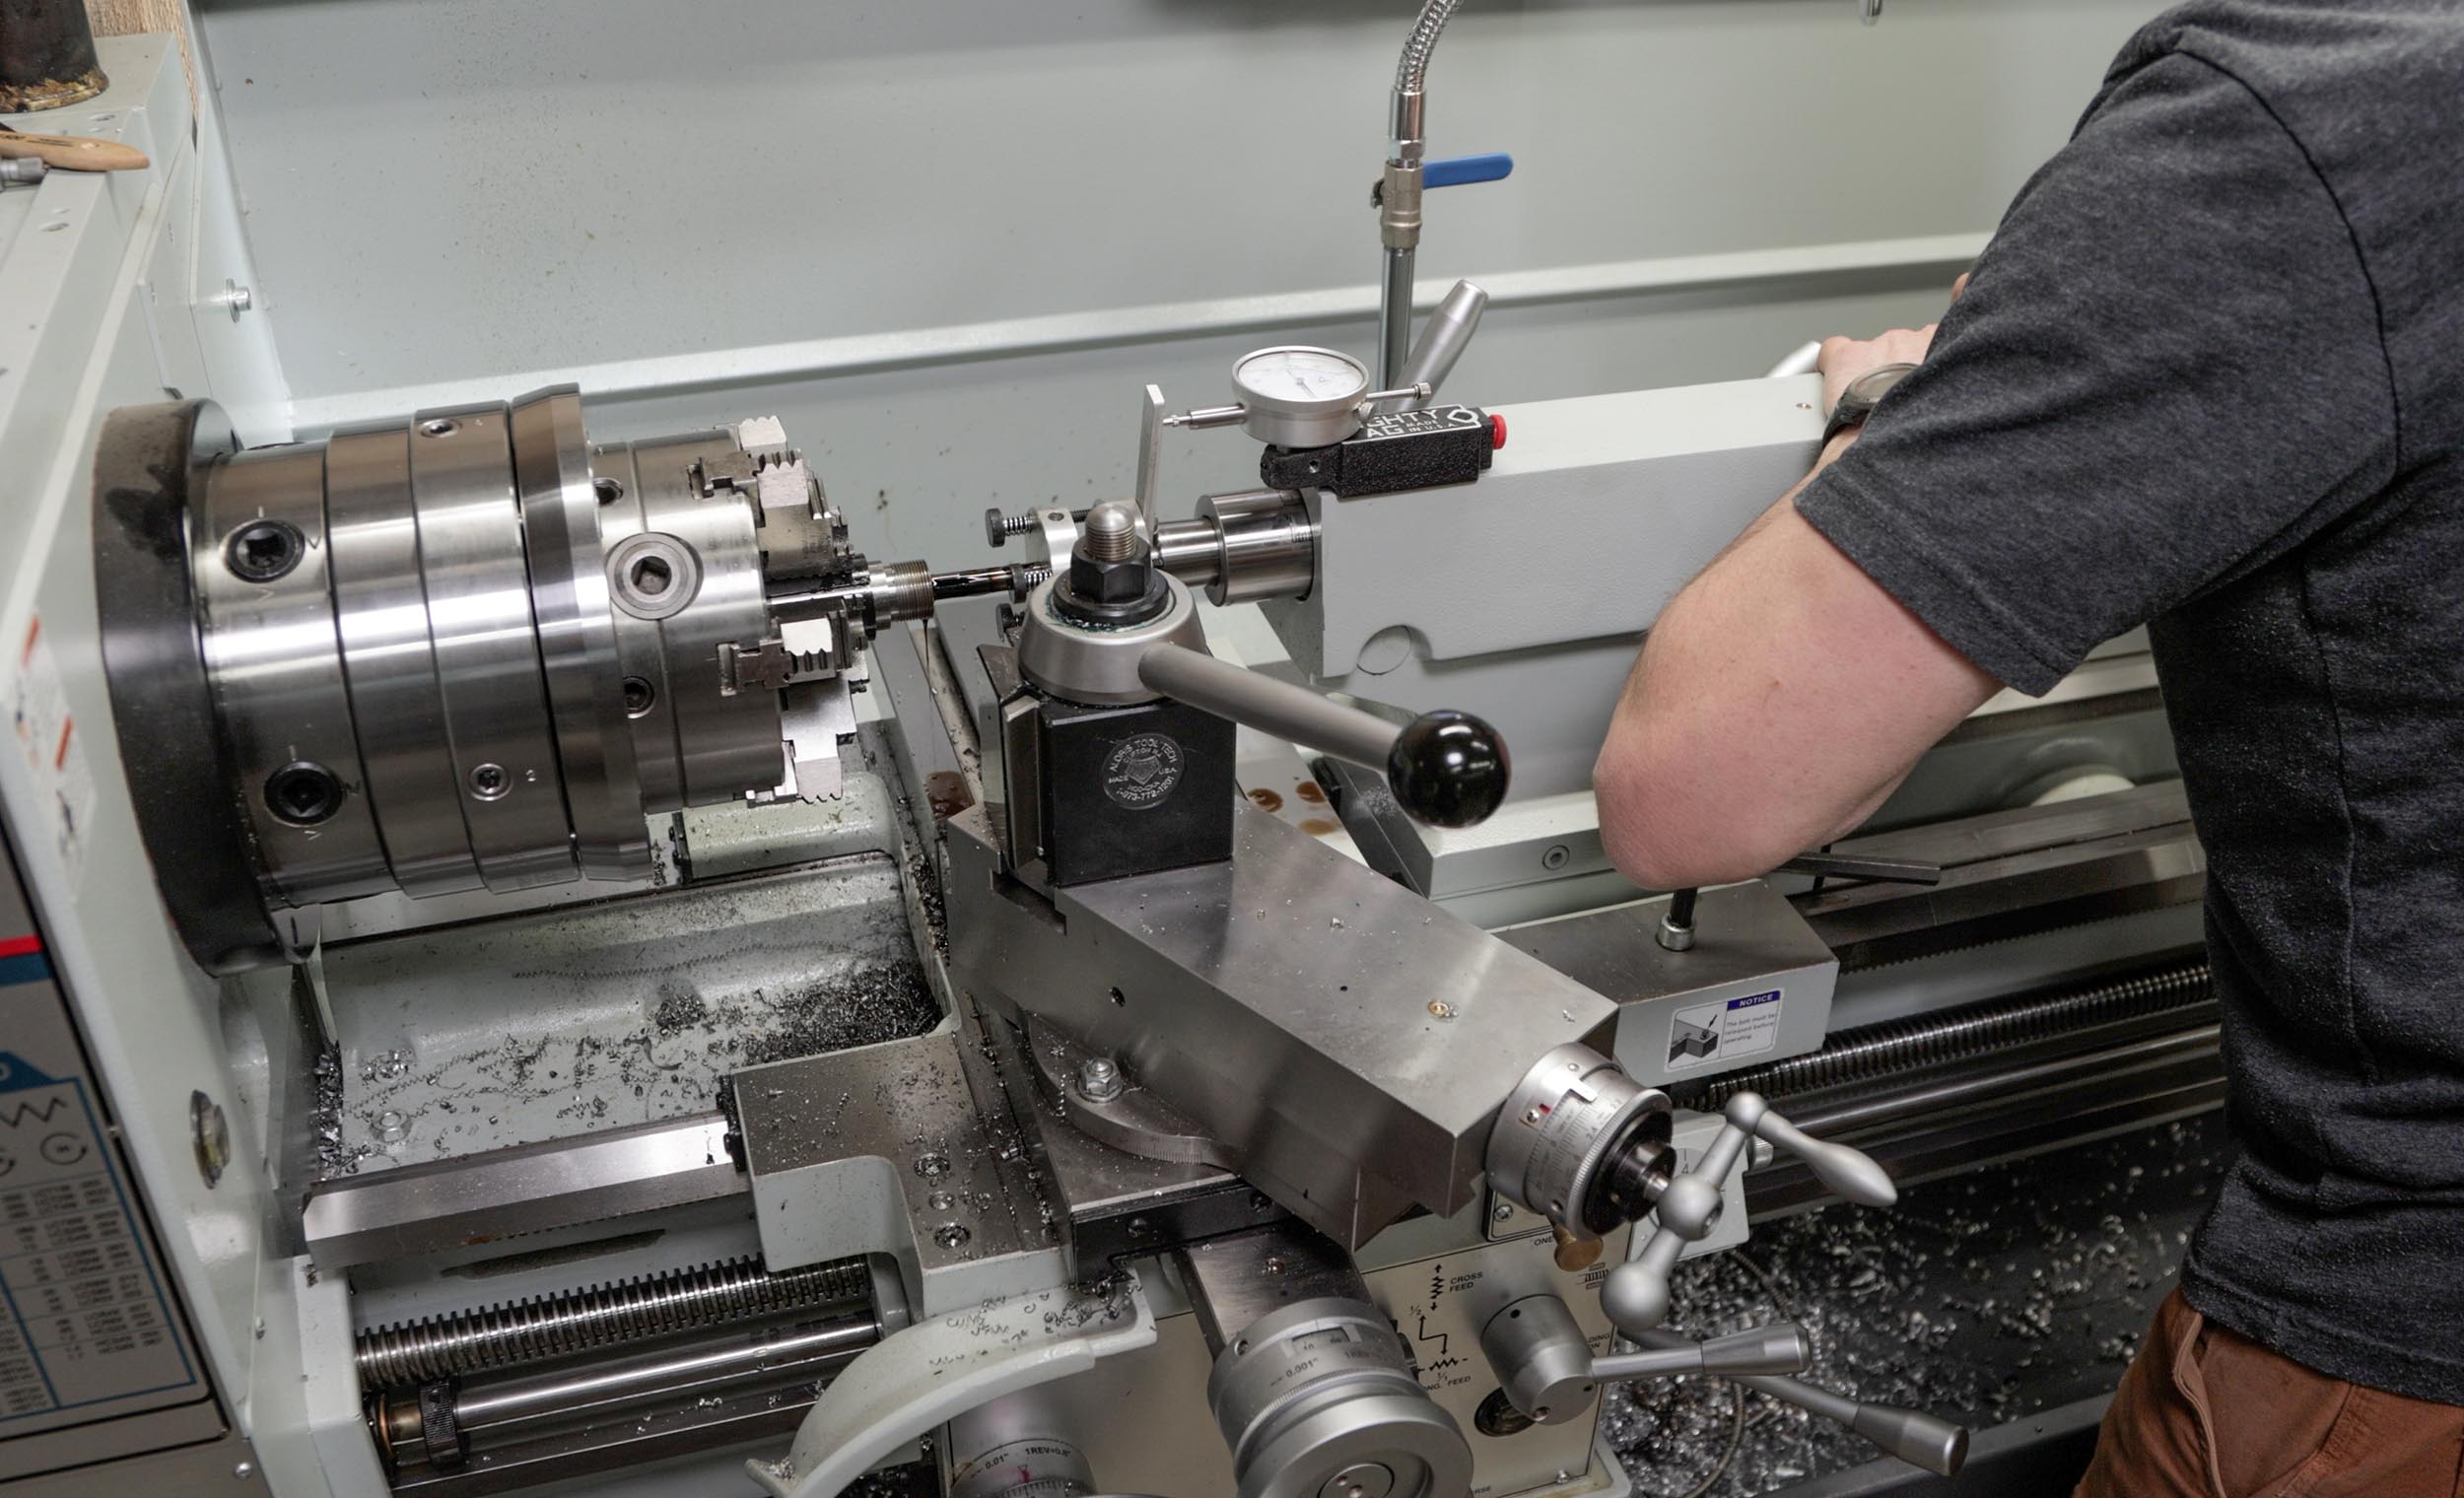
Threading the Muzzle
Jumping from my personal convention, I threaded the muzzle first this time. This was so that I could screw on the barrel extension in preparation for machining the breech end.

Here I used my standard profile for the threaded muzzle with thread relief, flat recessed crown, and 0.610″ overall length.
Here’s the finished product:
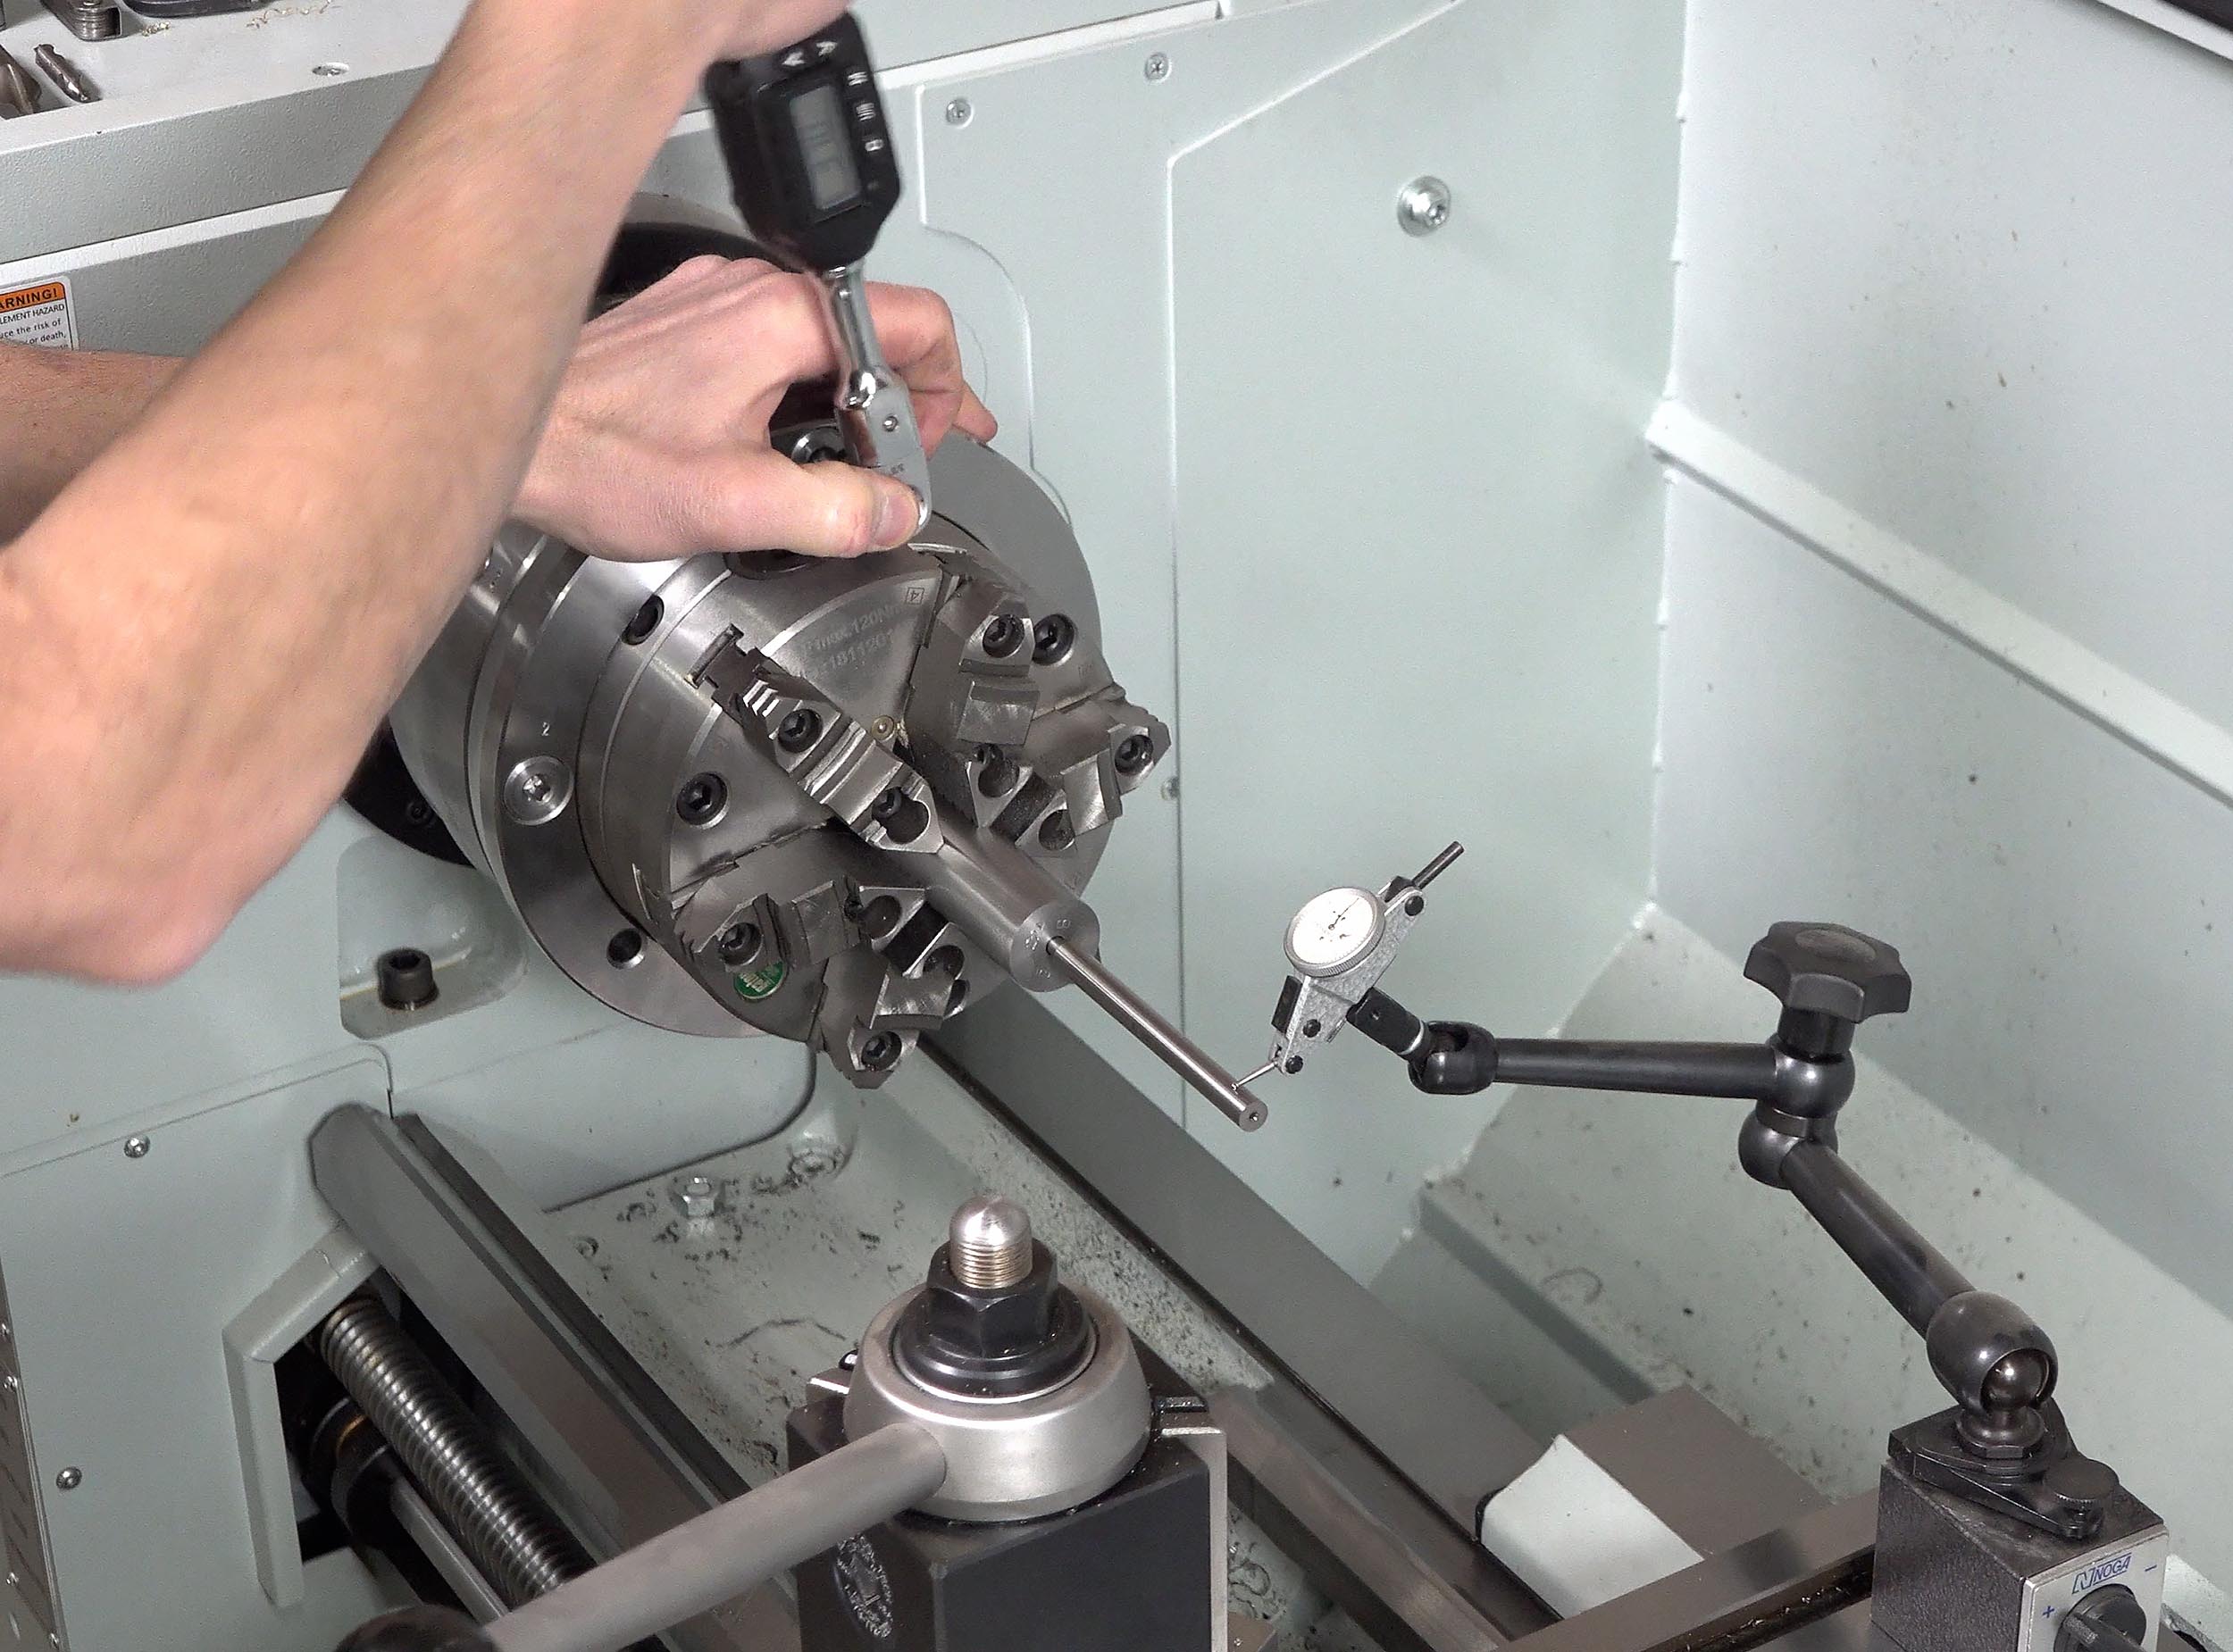
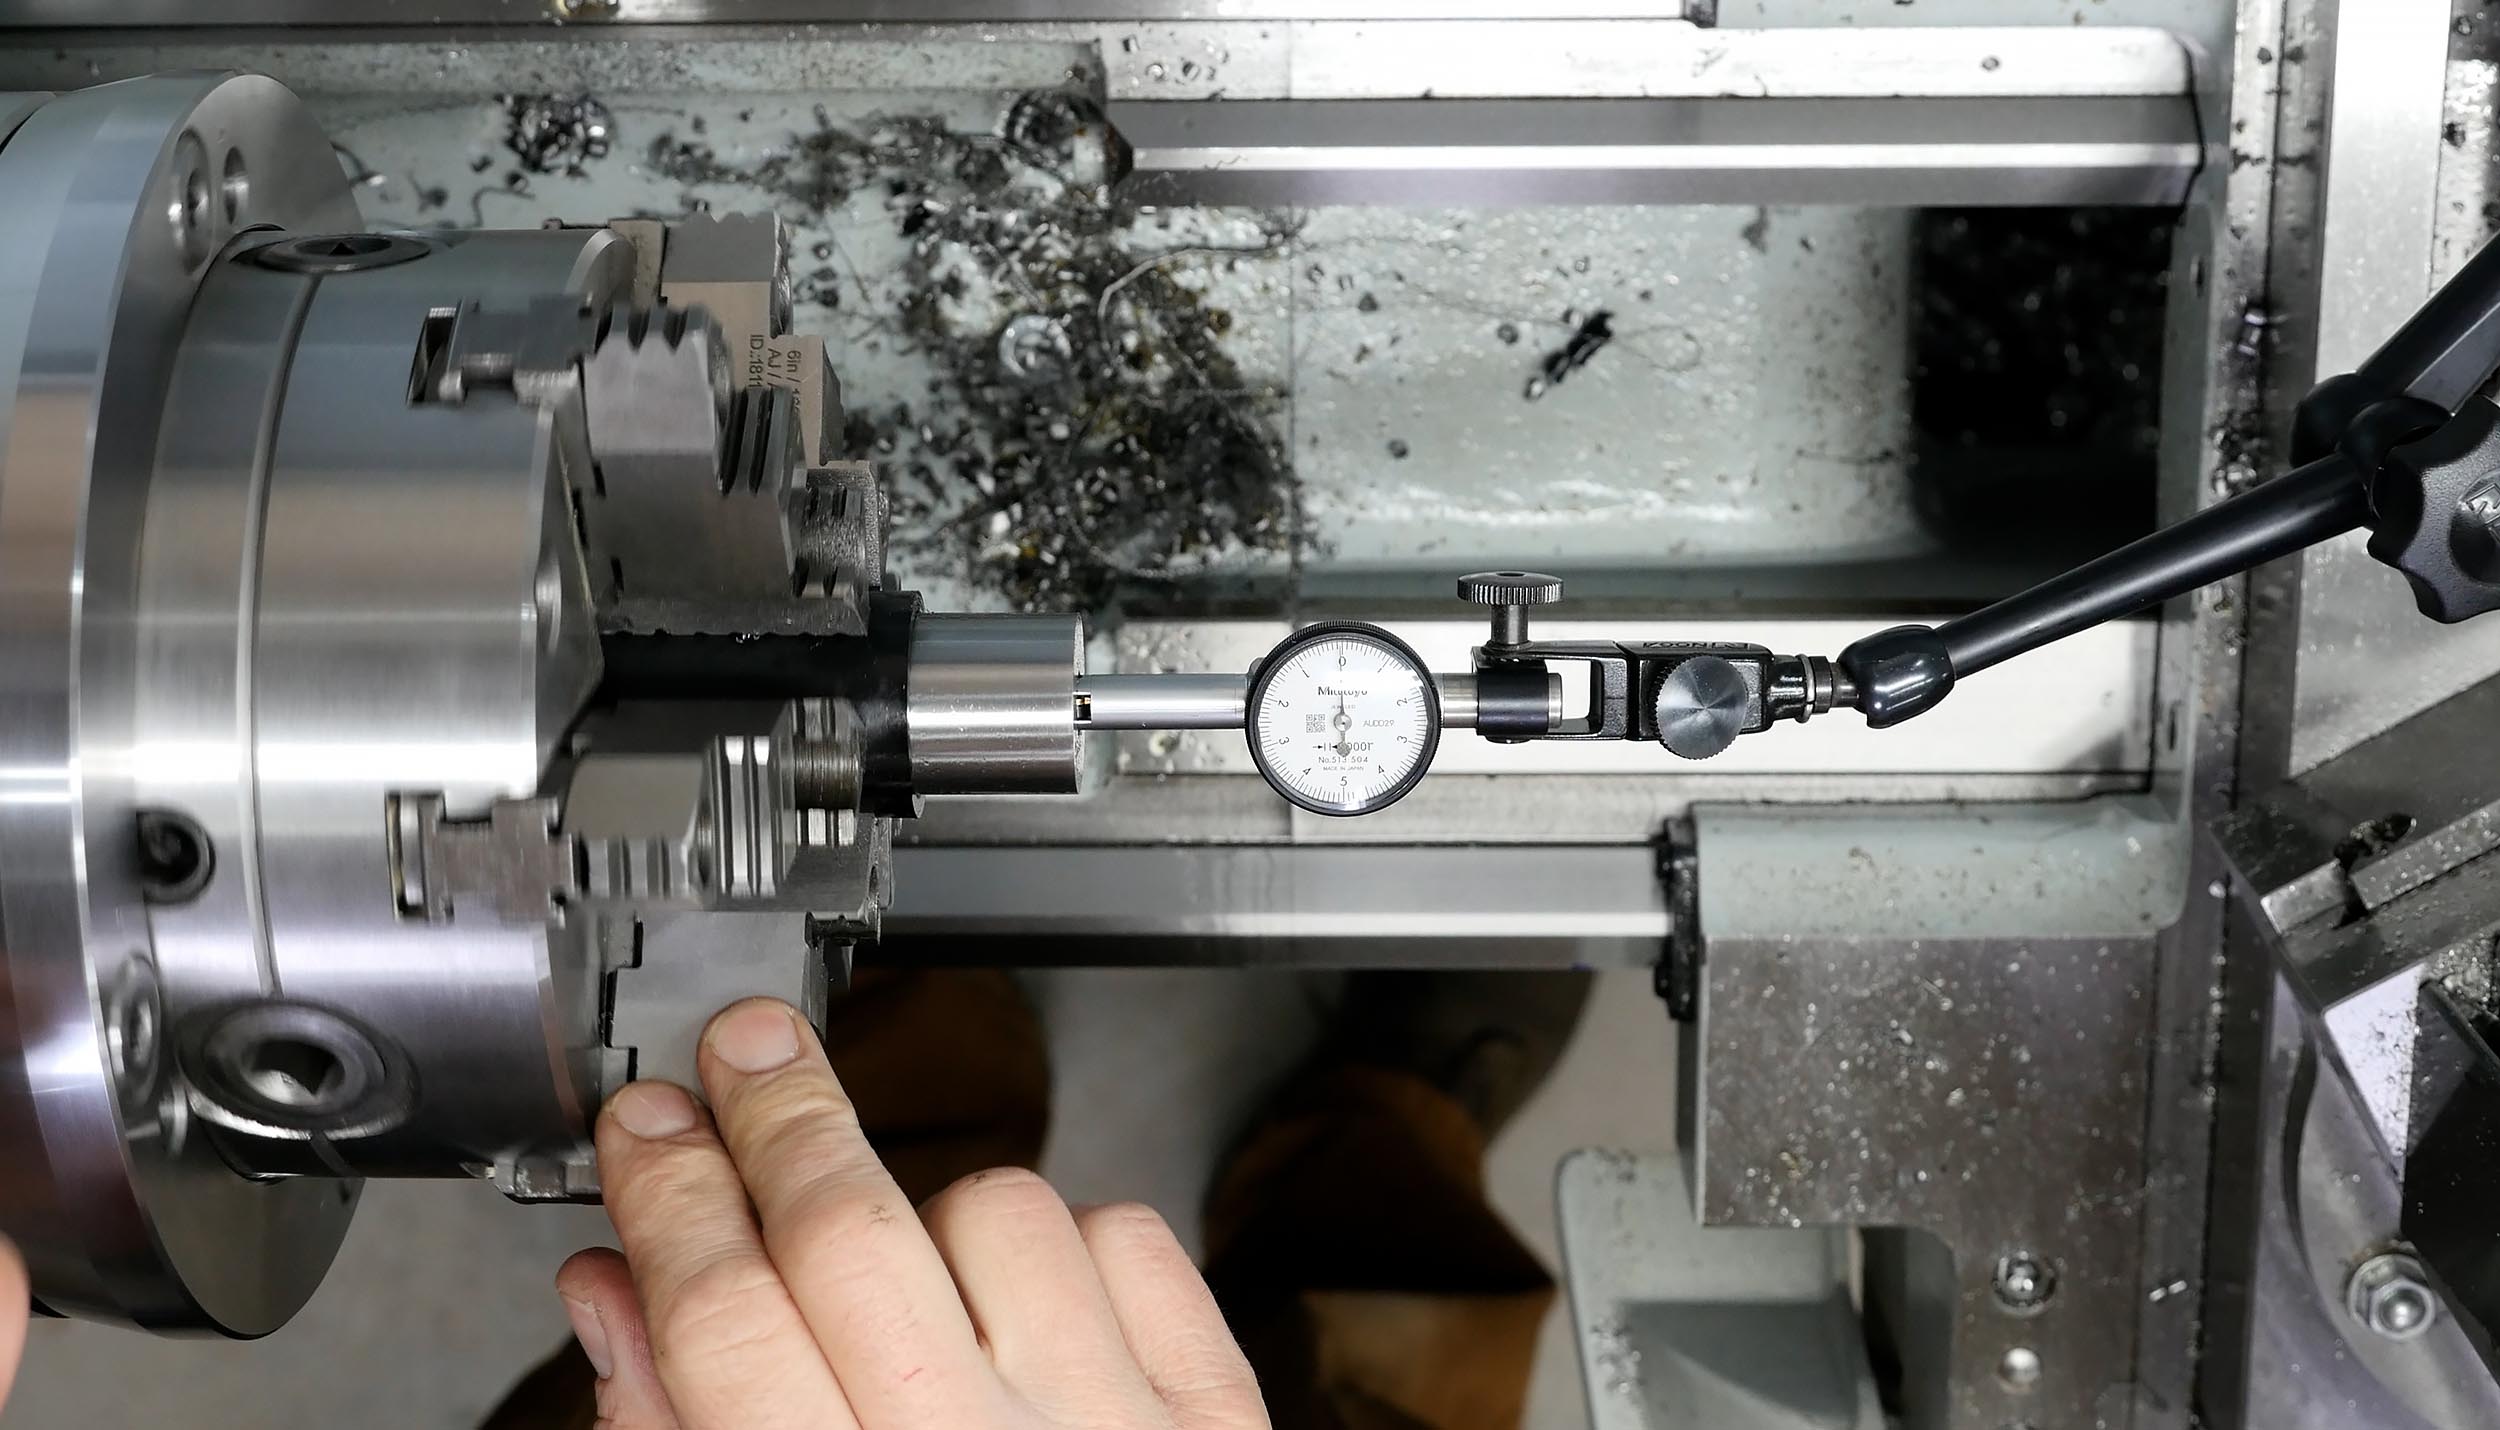
Machining the Tenon
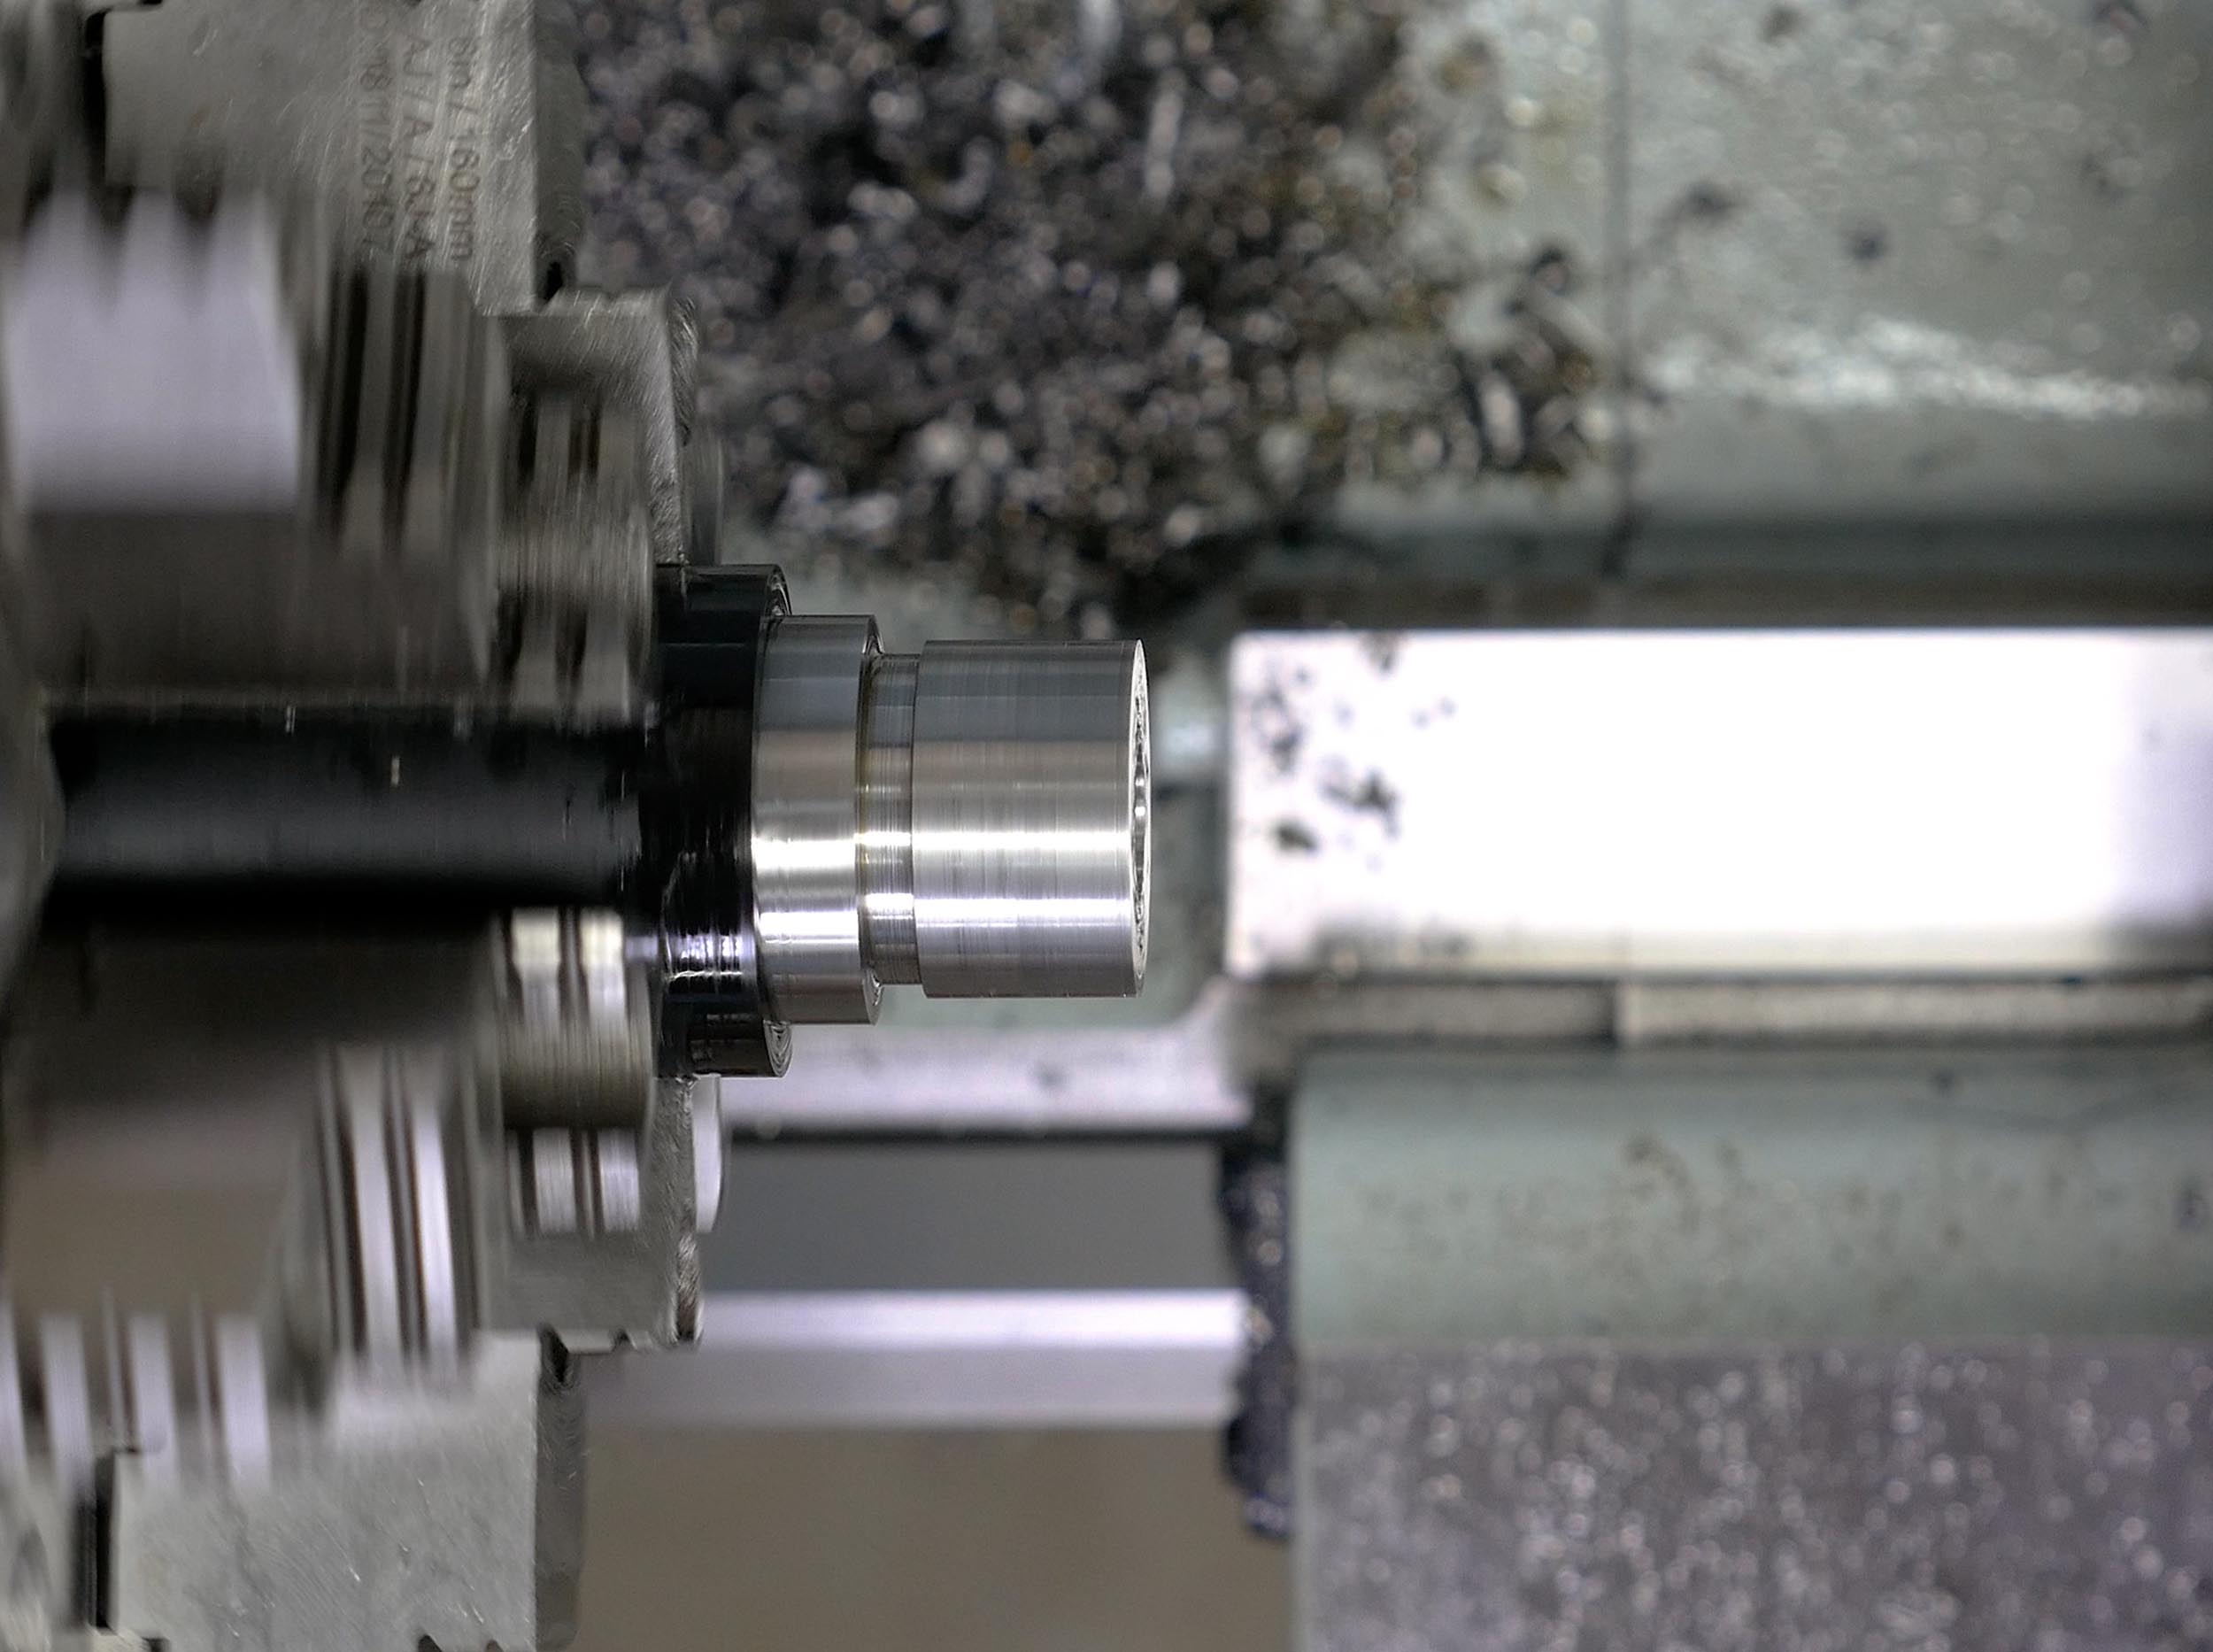
After indicating the barrel, the following was performed (see above picture):
- End of barrel parted (about 1/2″ total) off
- Barrel pre-drilled (to shoulder length minus 0.200″, to shoulder diameter minus 0.030″)
- Checking barrel alignment in throat area of bore (see picture below). This must be done after pre-drilling chamber due for indicator body clearance.
After the bore was re-aligned (ever so slightly) the following was performed:
- Boring pre-drill hole true
- Facing tenon
- Turning tenon down to diameter and length
- Cutting thread relief
Now the 1 1/16″ x 18 threads can be cut! Here’s the first pass just before checking thread pitch:

Following threading, the action fit was excellent, just a small bit of thread clearance: (shown here during chambering)
Chambering with the Alpha Legacy Carbide Reamer
I was curious to try a carbide reamer, and the 22GT Alpha Legacy reamer was my opportunity! Starting with short plunges of 0.050″, I did a quick check for chatter near the beginning of the chambering job- none! The chamber wall was running perfectly true, just what you want to see. So I started a series of 0.100″ plunges, using Viper’s Venom for cutting oil.
When setting up the reamer in the Gretan fixed reamer holder, I decided to run the set screw on the shank of the reamer, not on the flat that’s ground on the side. This was to prevent breakage of the reamer in case things got hung up (carbide is more brittle compared to high speed steel, so I thought caution would be a good thing). I did spin the reamer in the holder one time after starting up the lathe with typical “starting pressure” that use with high speed steel reamers. I learned that the reamer can grab differently. I tightened the set screw a bit more, backed off on my initial thrust on the reamer for the remainder of the cuts, and all went well!
The throat transition area was PERFECT – nice clean transition lines, and when the spindle was spun, running dead true.
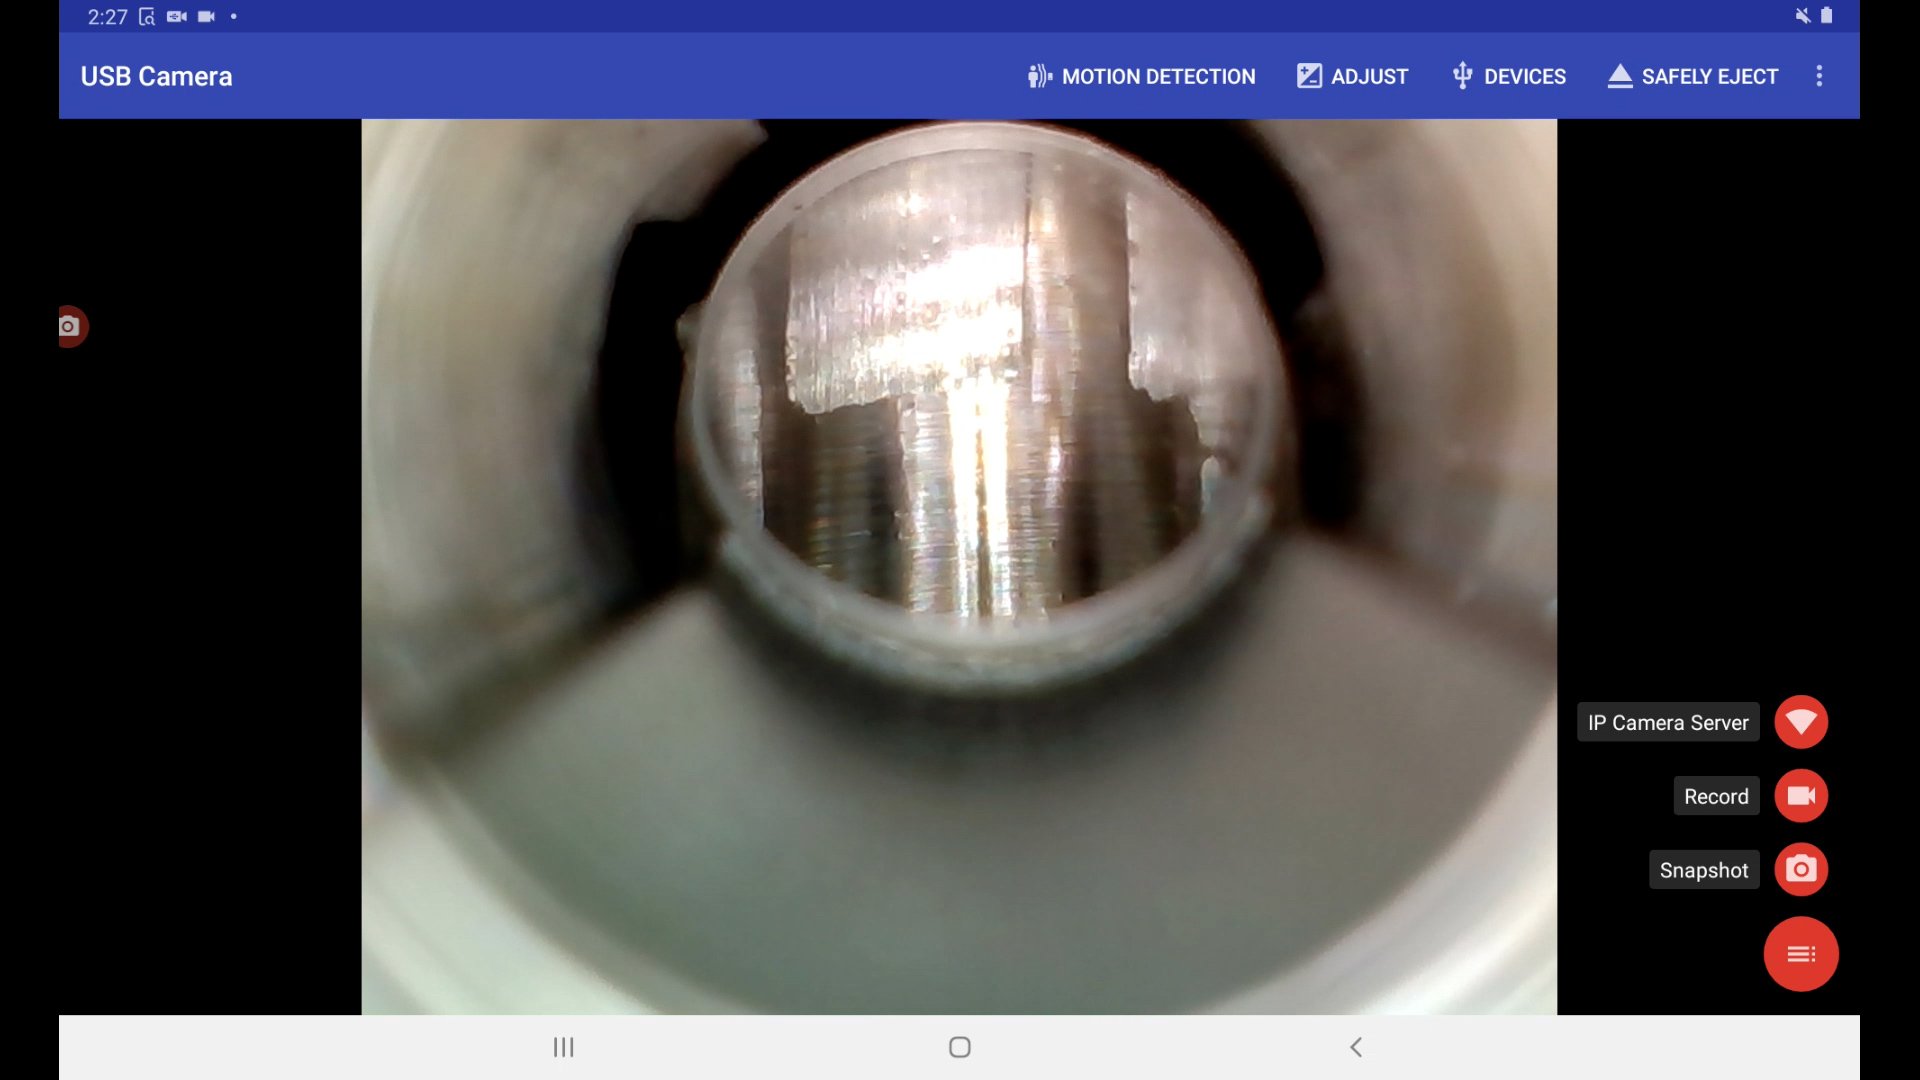
On-Lathe TESLONG Borescope Inspection
As seen in the video, for this chambering job I tried out a new setup on the TL-1660- a TESLONG NGT-100P pistol borescope mounted to a quick change toolholder. With this setup, I can send the borescope down the bore, and perform a complete inspection (including critical throat transition) while the barrel is in the lathe. This is a GREAT way to inspect your work while chambering.
Here’s a still from the video footage showing the throat transition:
Final Assembly, Completed Rifle
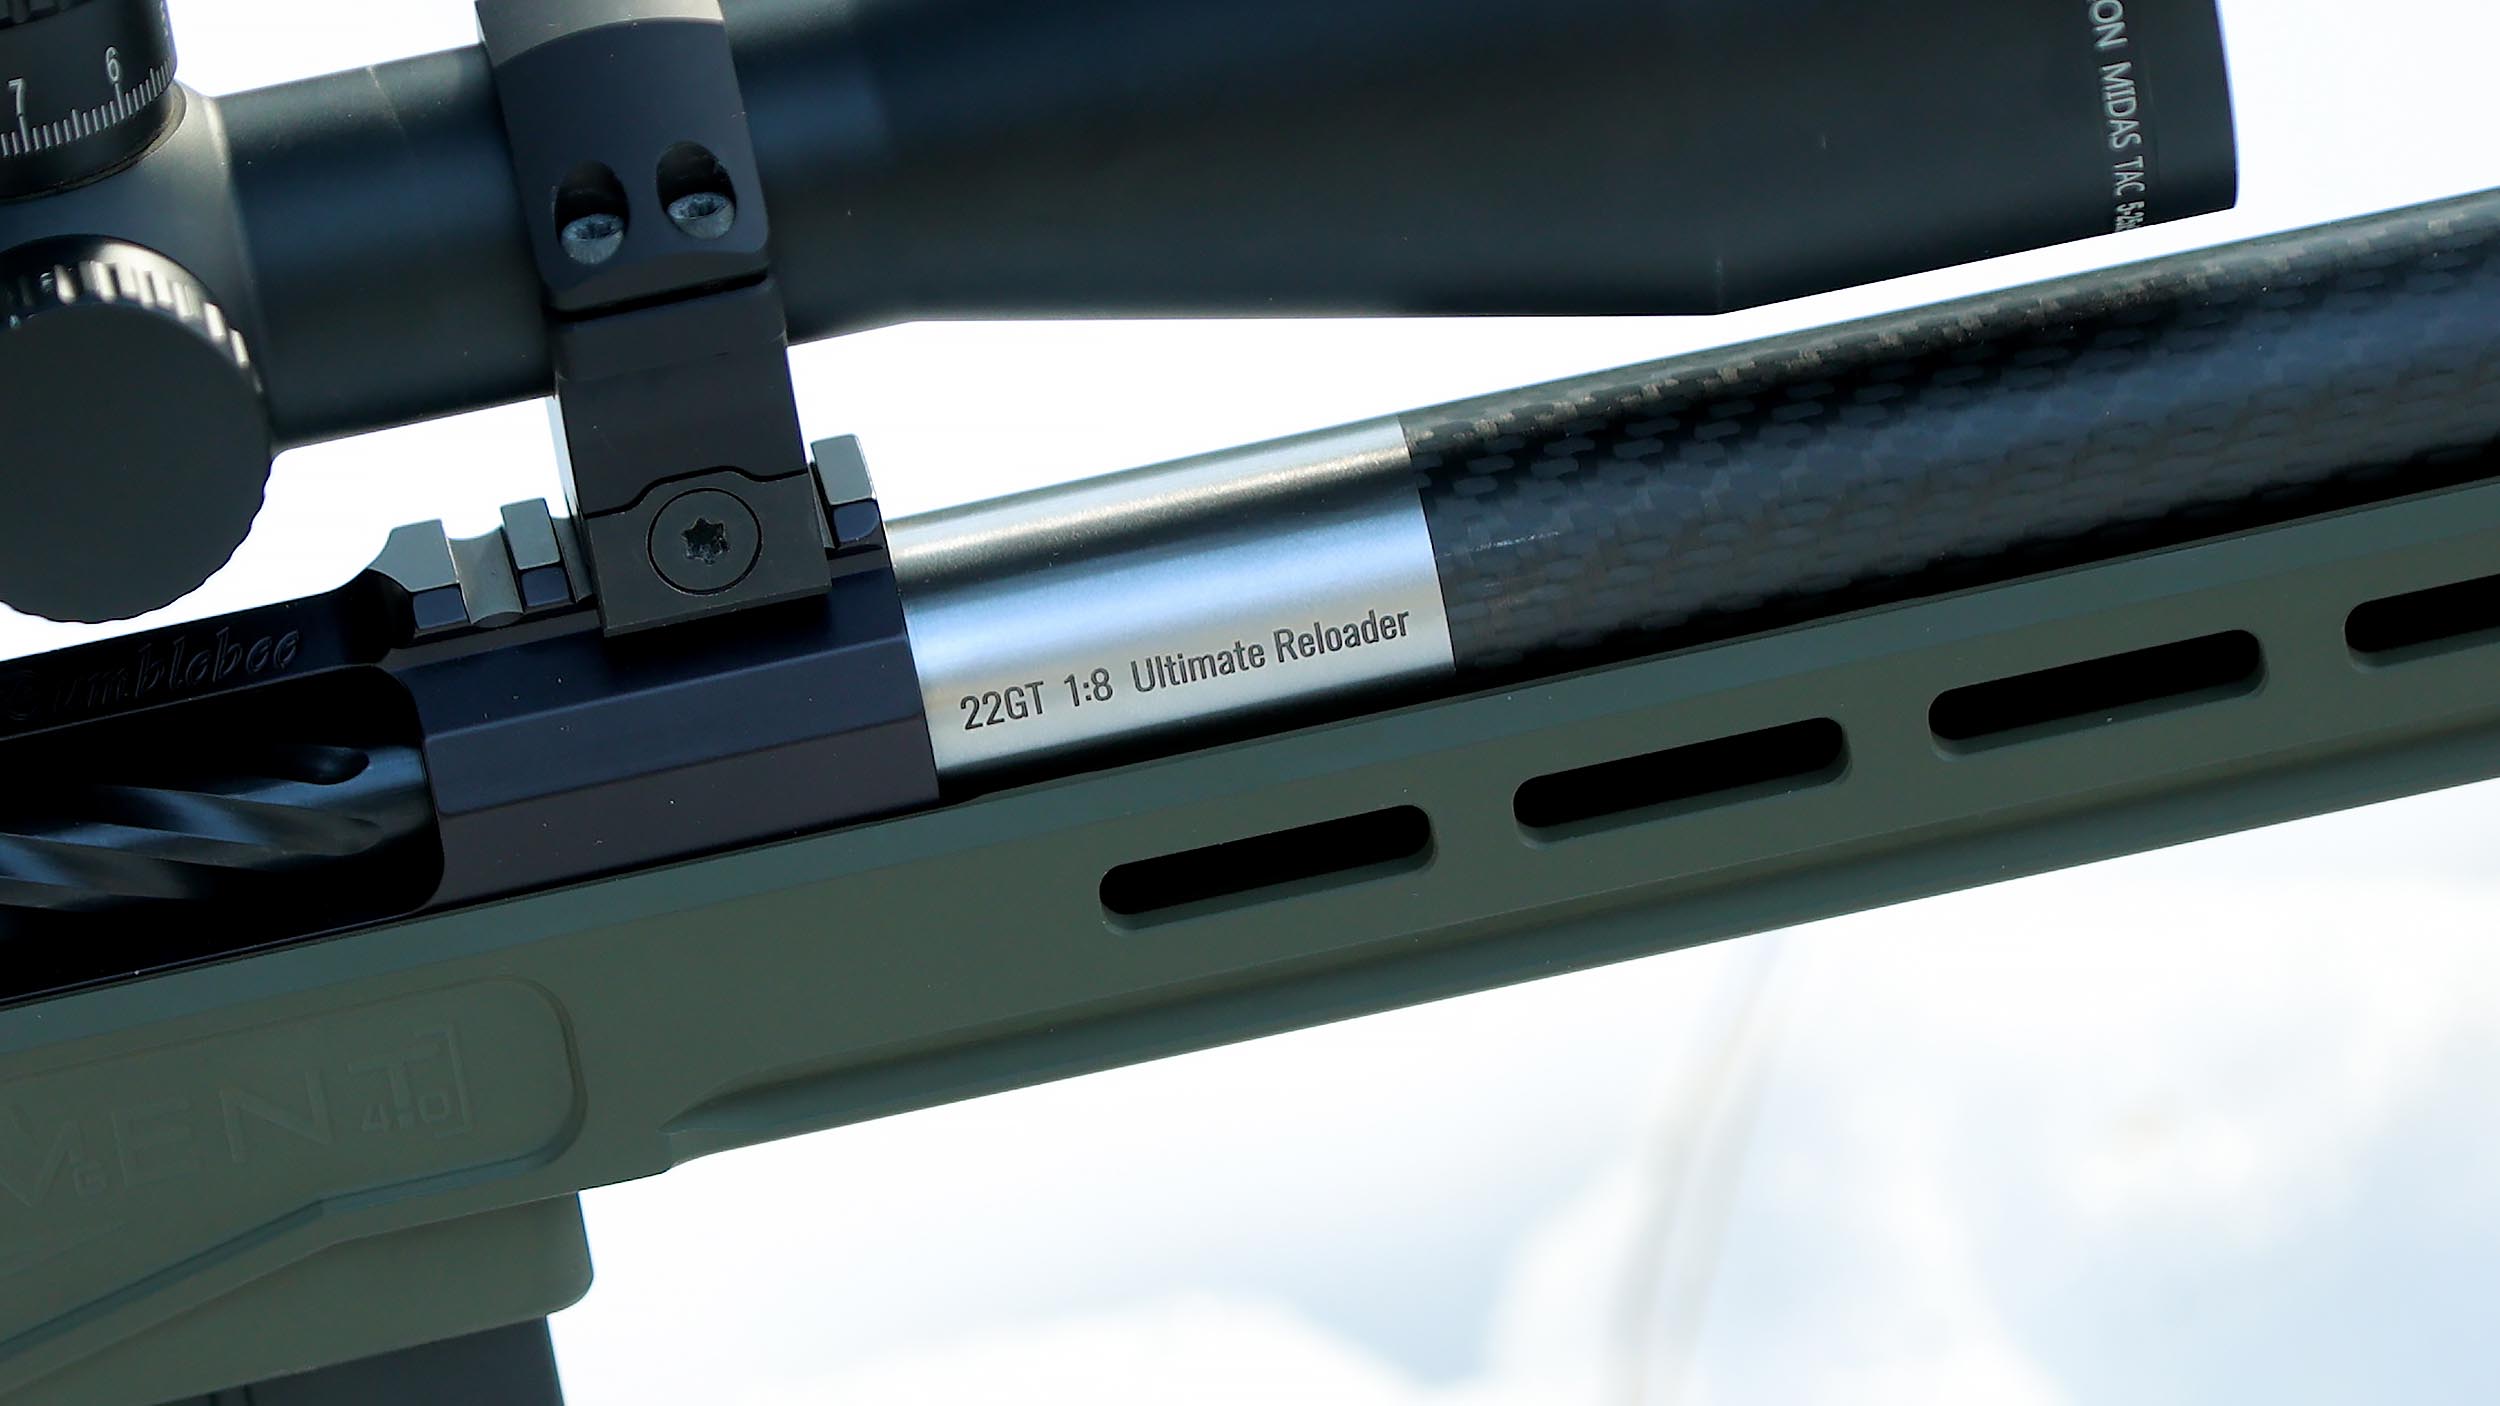
After the barrel work was done, I torqued the barrel onto the action (100 ft-lb), installed the barreled action into the stock, and then proceeded to engrave the barrel with my 50w Fiber Laser engraver:
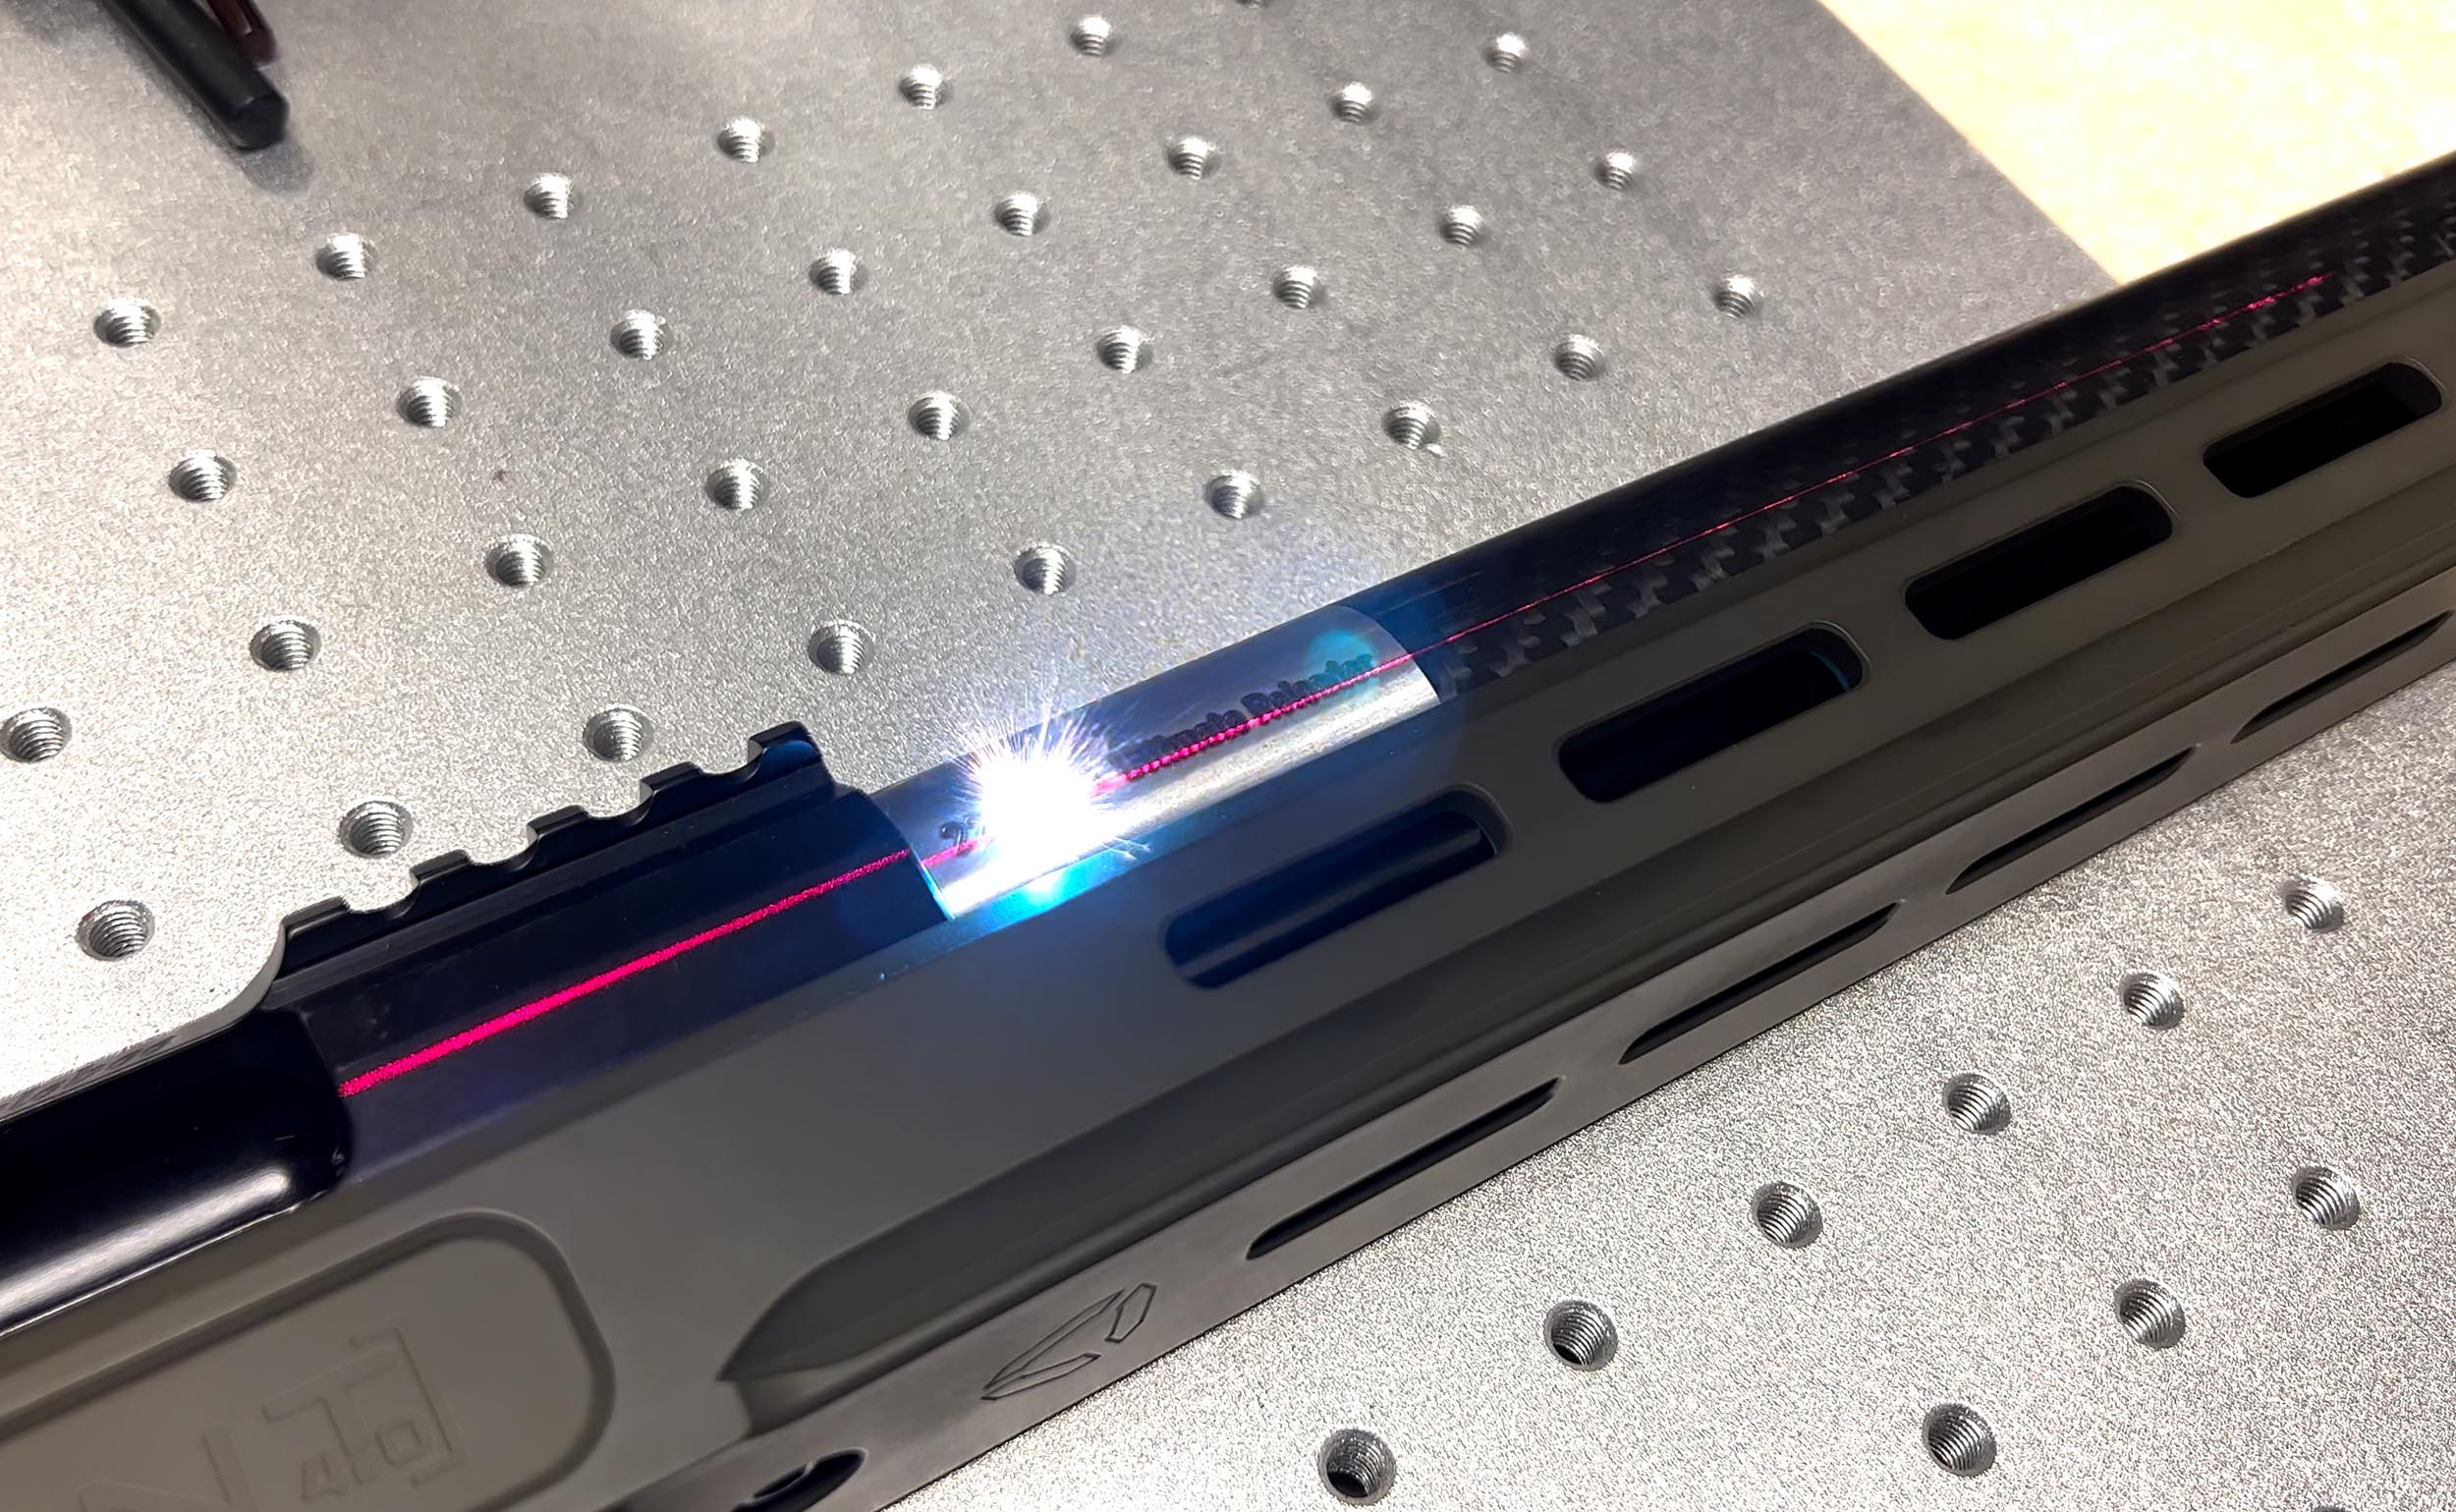
This turned out pretty nice!
I then put on some finishing touches:
- Installed the Athlon Midas TAC 5-25x56mm scope using XLR 34mm medium height rings
- Installed the TriggerTech Diamond Two-Stage Remington 700 trigger
- Installed the Salmon River Solutions 2-port self-timing titanium brake using the a level and comparing the picatinny rail (on rifle action) with the wrench flats on the brake to get it clocked correctly
- Installed the XLR Carbon Buttstock Bag Rider
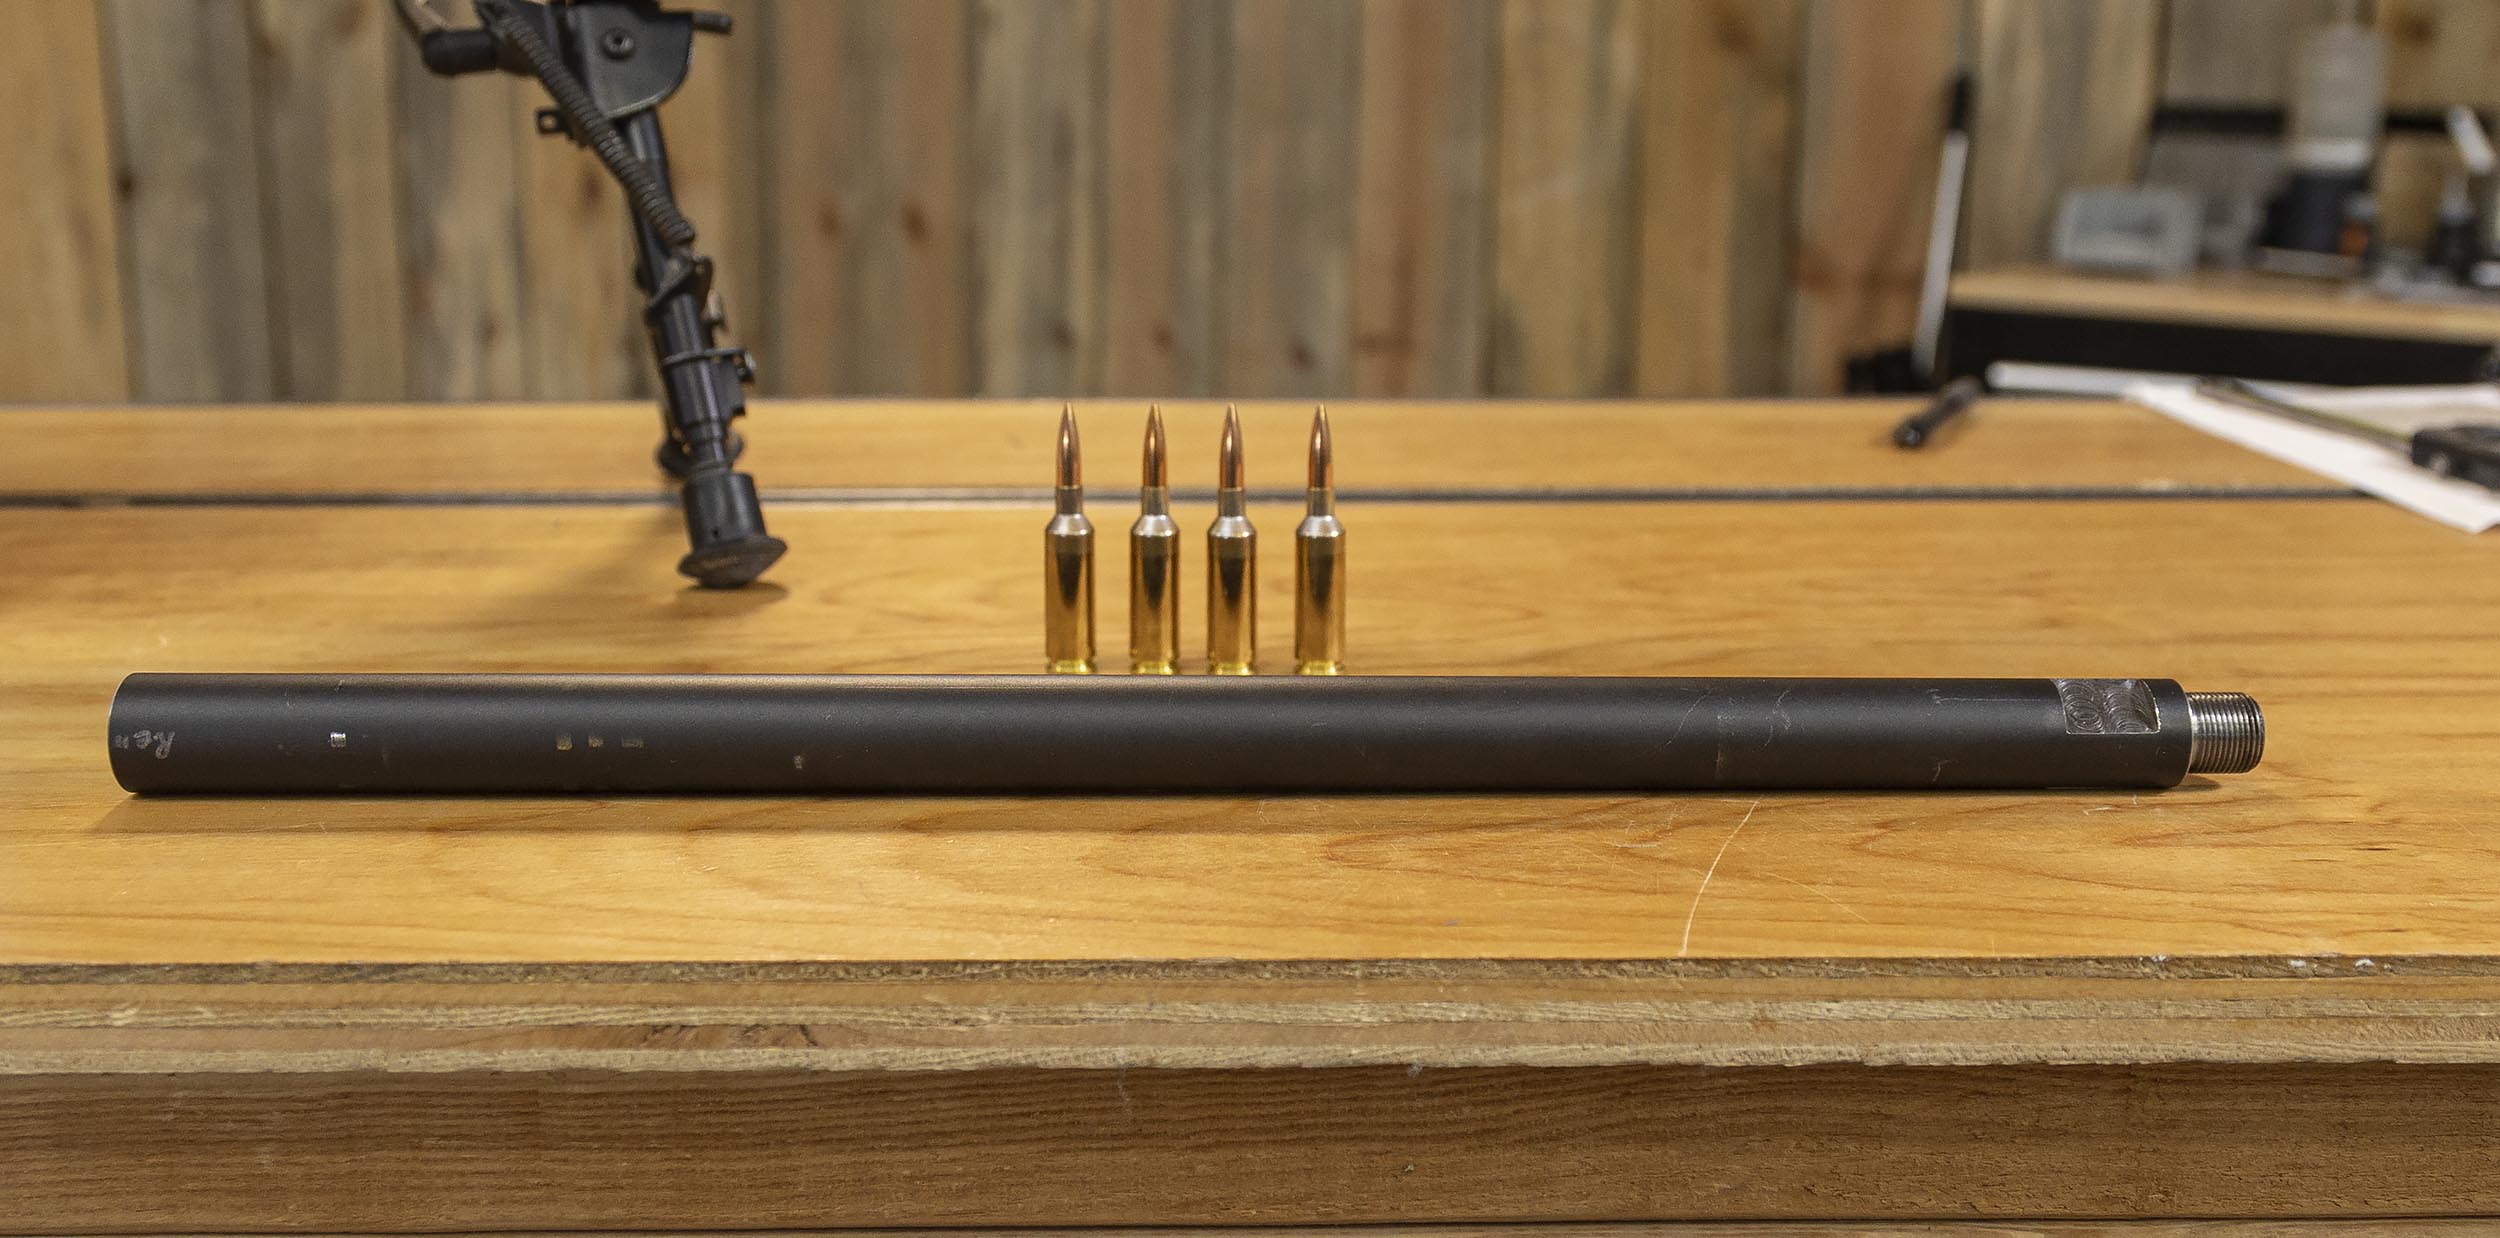
Loading Break-In Ammunition
For break-in loads, I used some data provided by Jim Kauber at Alpha Munitions: this was super-helpful!
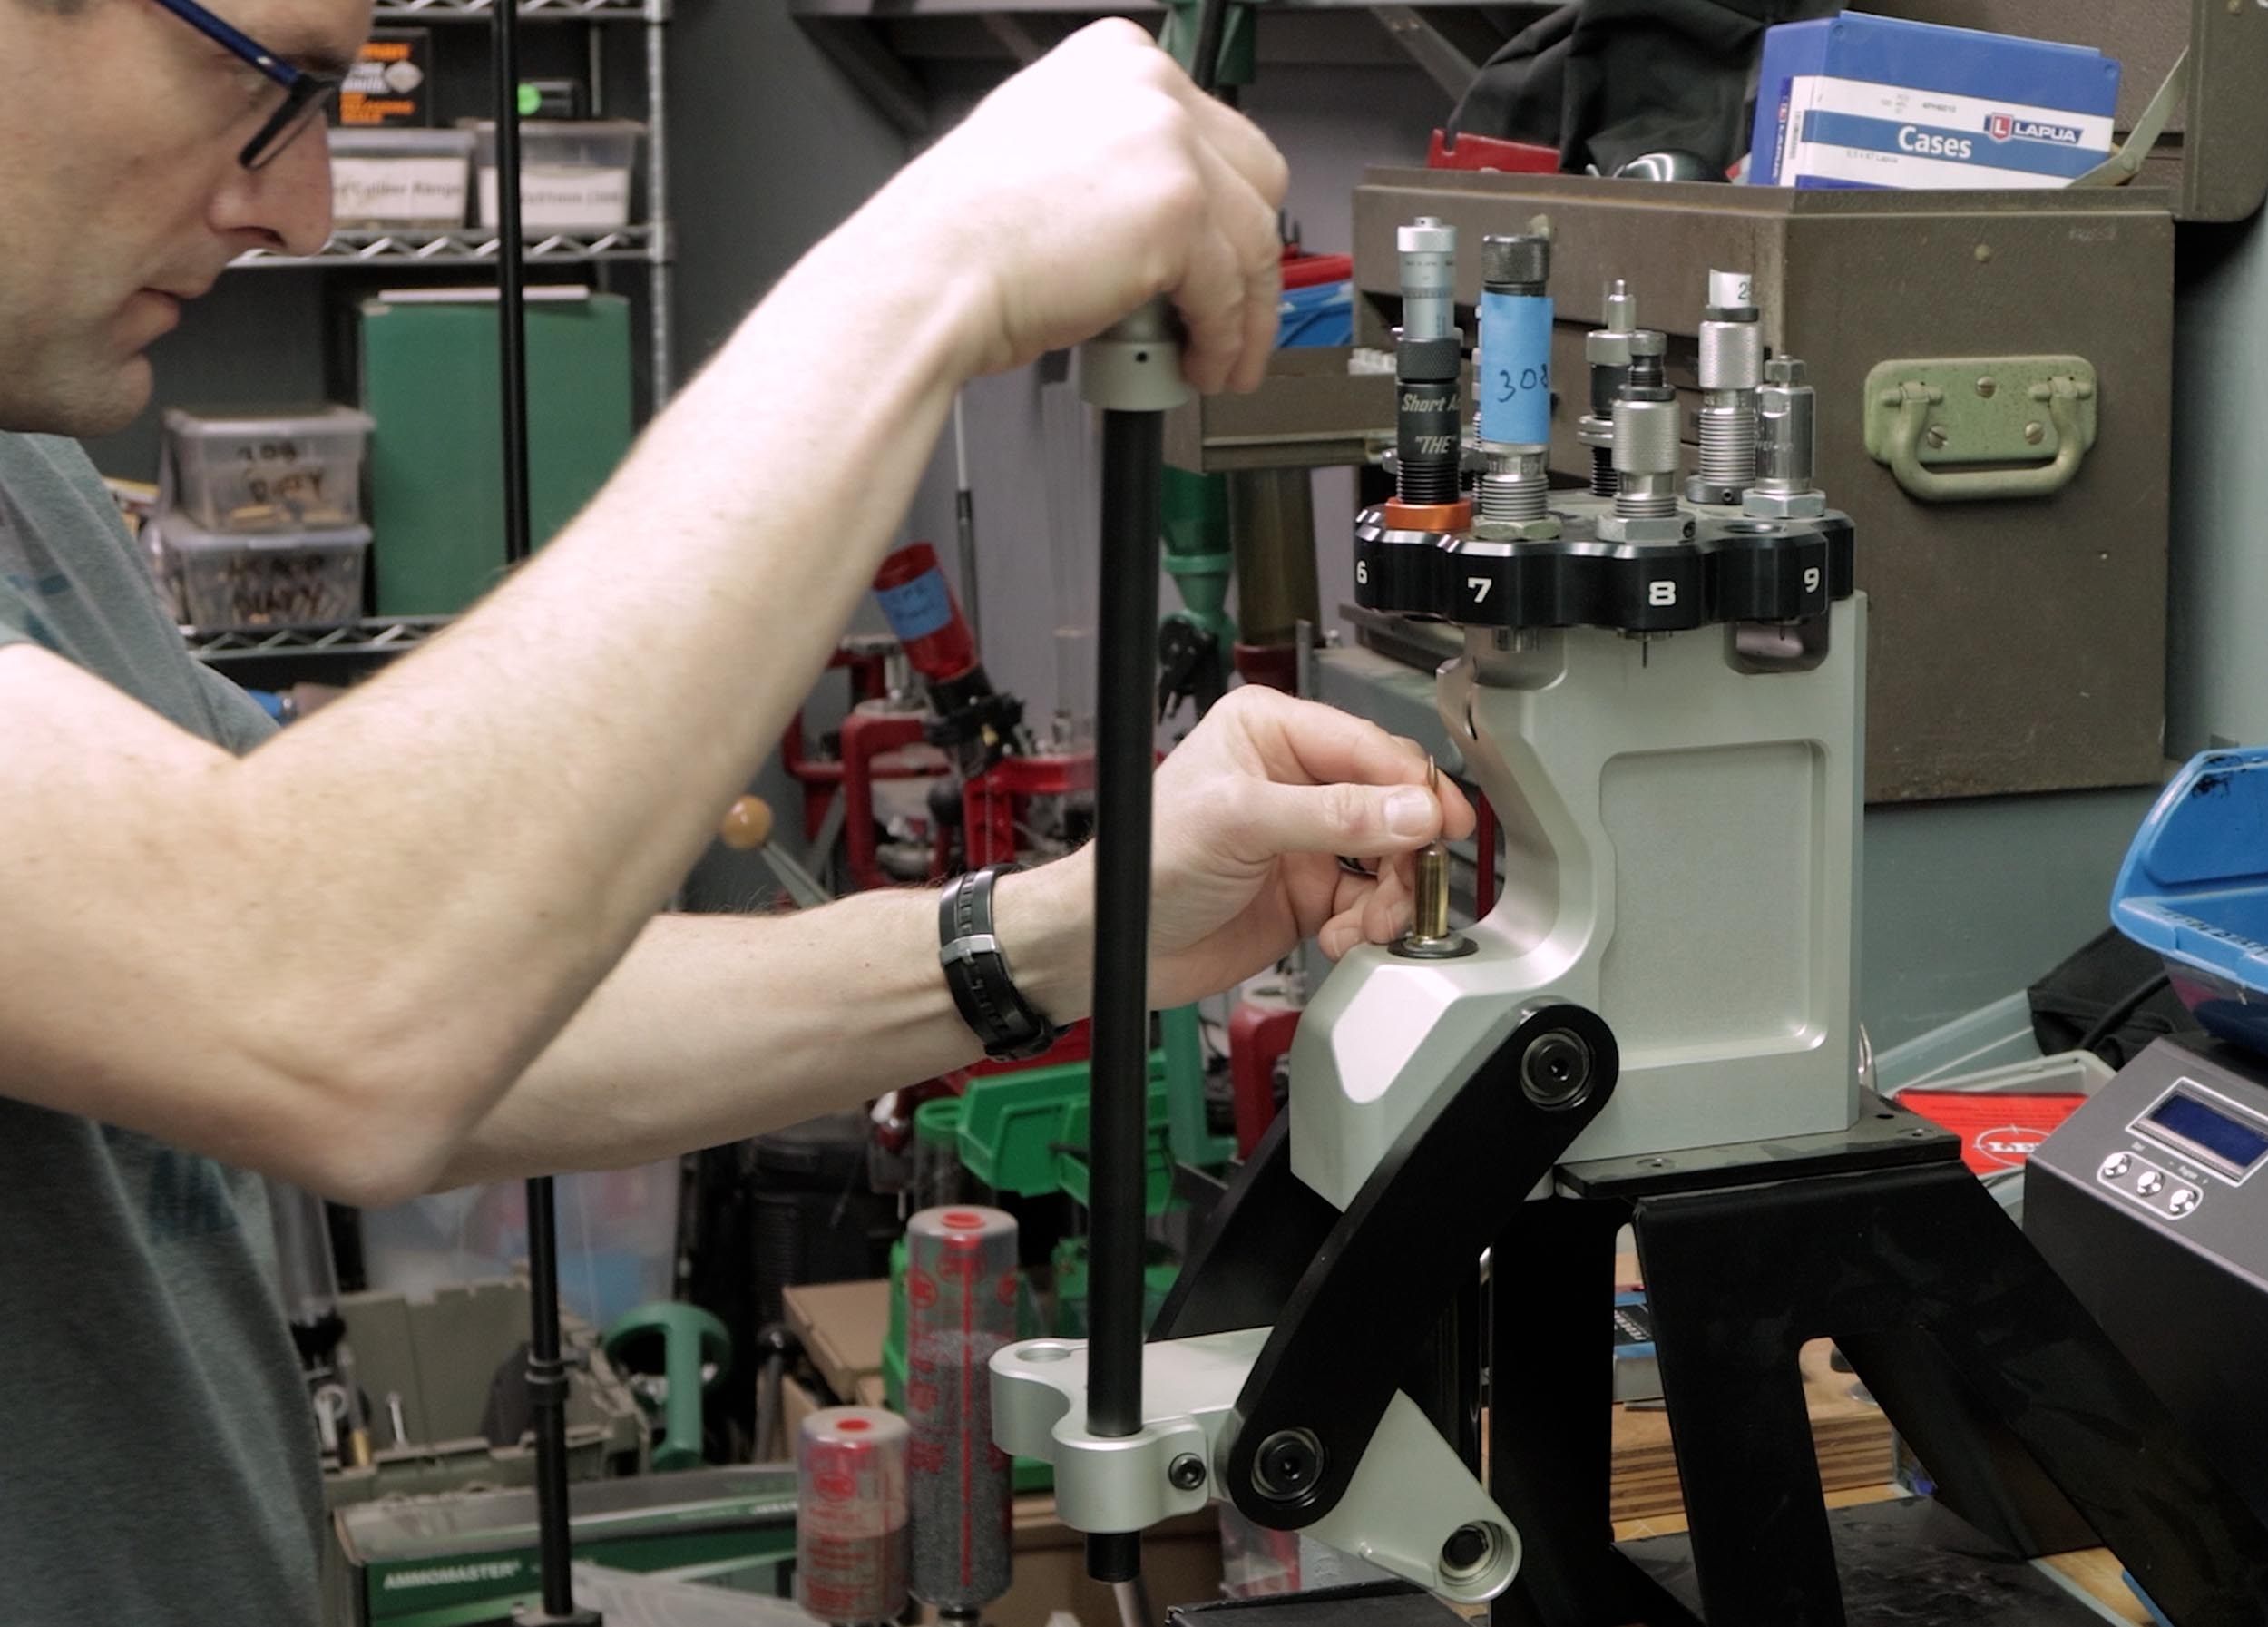
Using the Area 419 Zero press and my Short Action Customs “THE SEATING DIE” I loaded using the following specs/data:
EXPERIMENTAL DATA, DO NOT USE
- Brass: New Alpha Munitions 22GT brass with OCD
- Bullets: Berger 80.5 grain Fullbore 22 caliber bullets
- Powder: Hodgdon H-4350 (37.0 grains)
- 2.448″ COL (approx 1.980″ cartridge base to ogive)
Break-In Results
For this break-in session, I kept things simple:
- Shot 1 (went off target) – cleaned
- Shot 2, clean
- Shot 3, clean
- Shot 4, clean (produced first 3-shot group)
- Shots 5-7, clean
- Shots 8-10, clean
- Shots 11-15, clean
- Shots 16-20, clean
Here’s what my 100 yard target looked like:
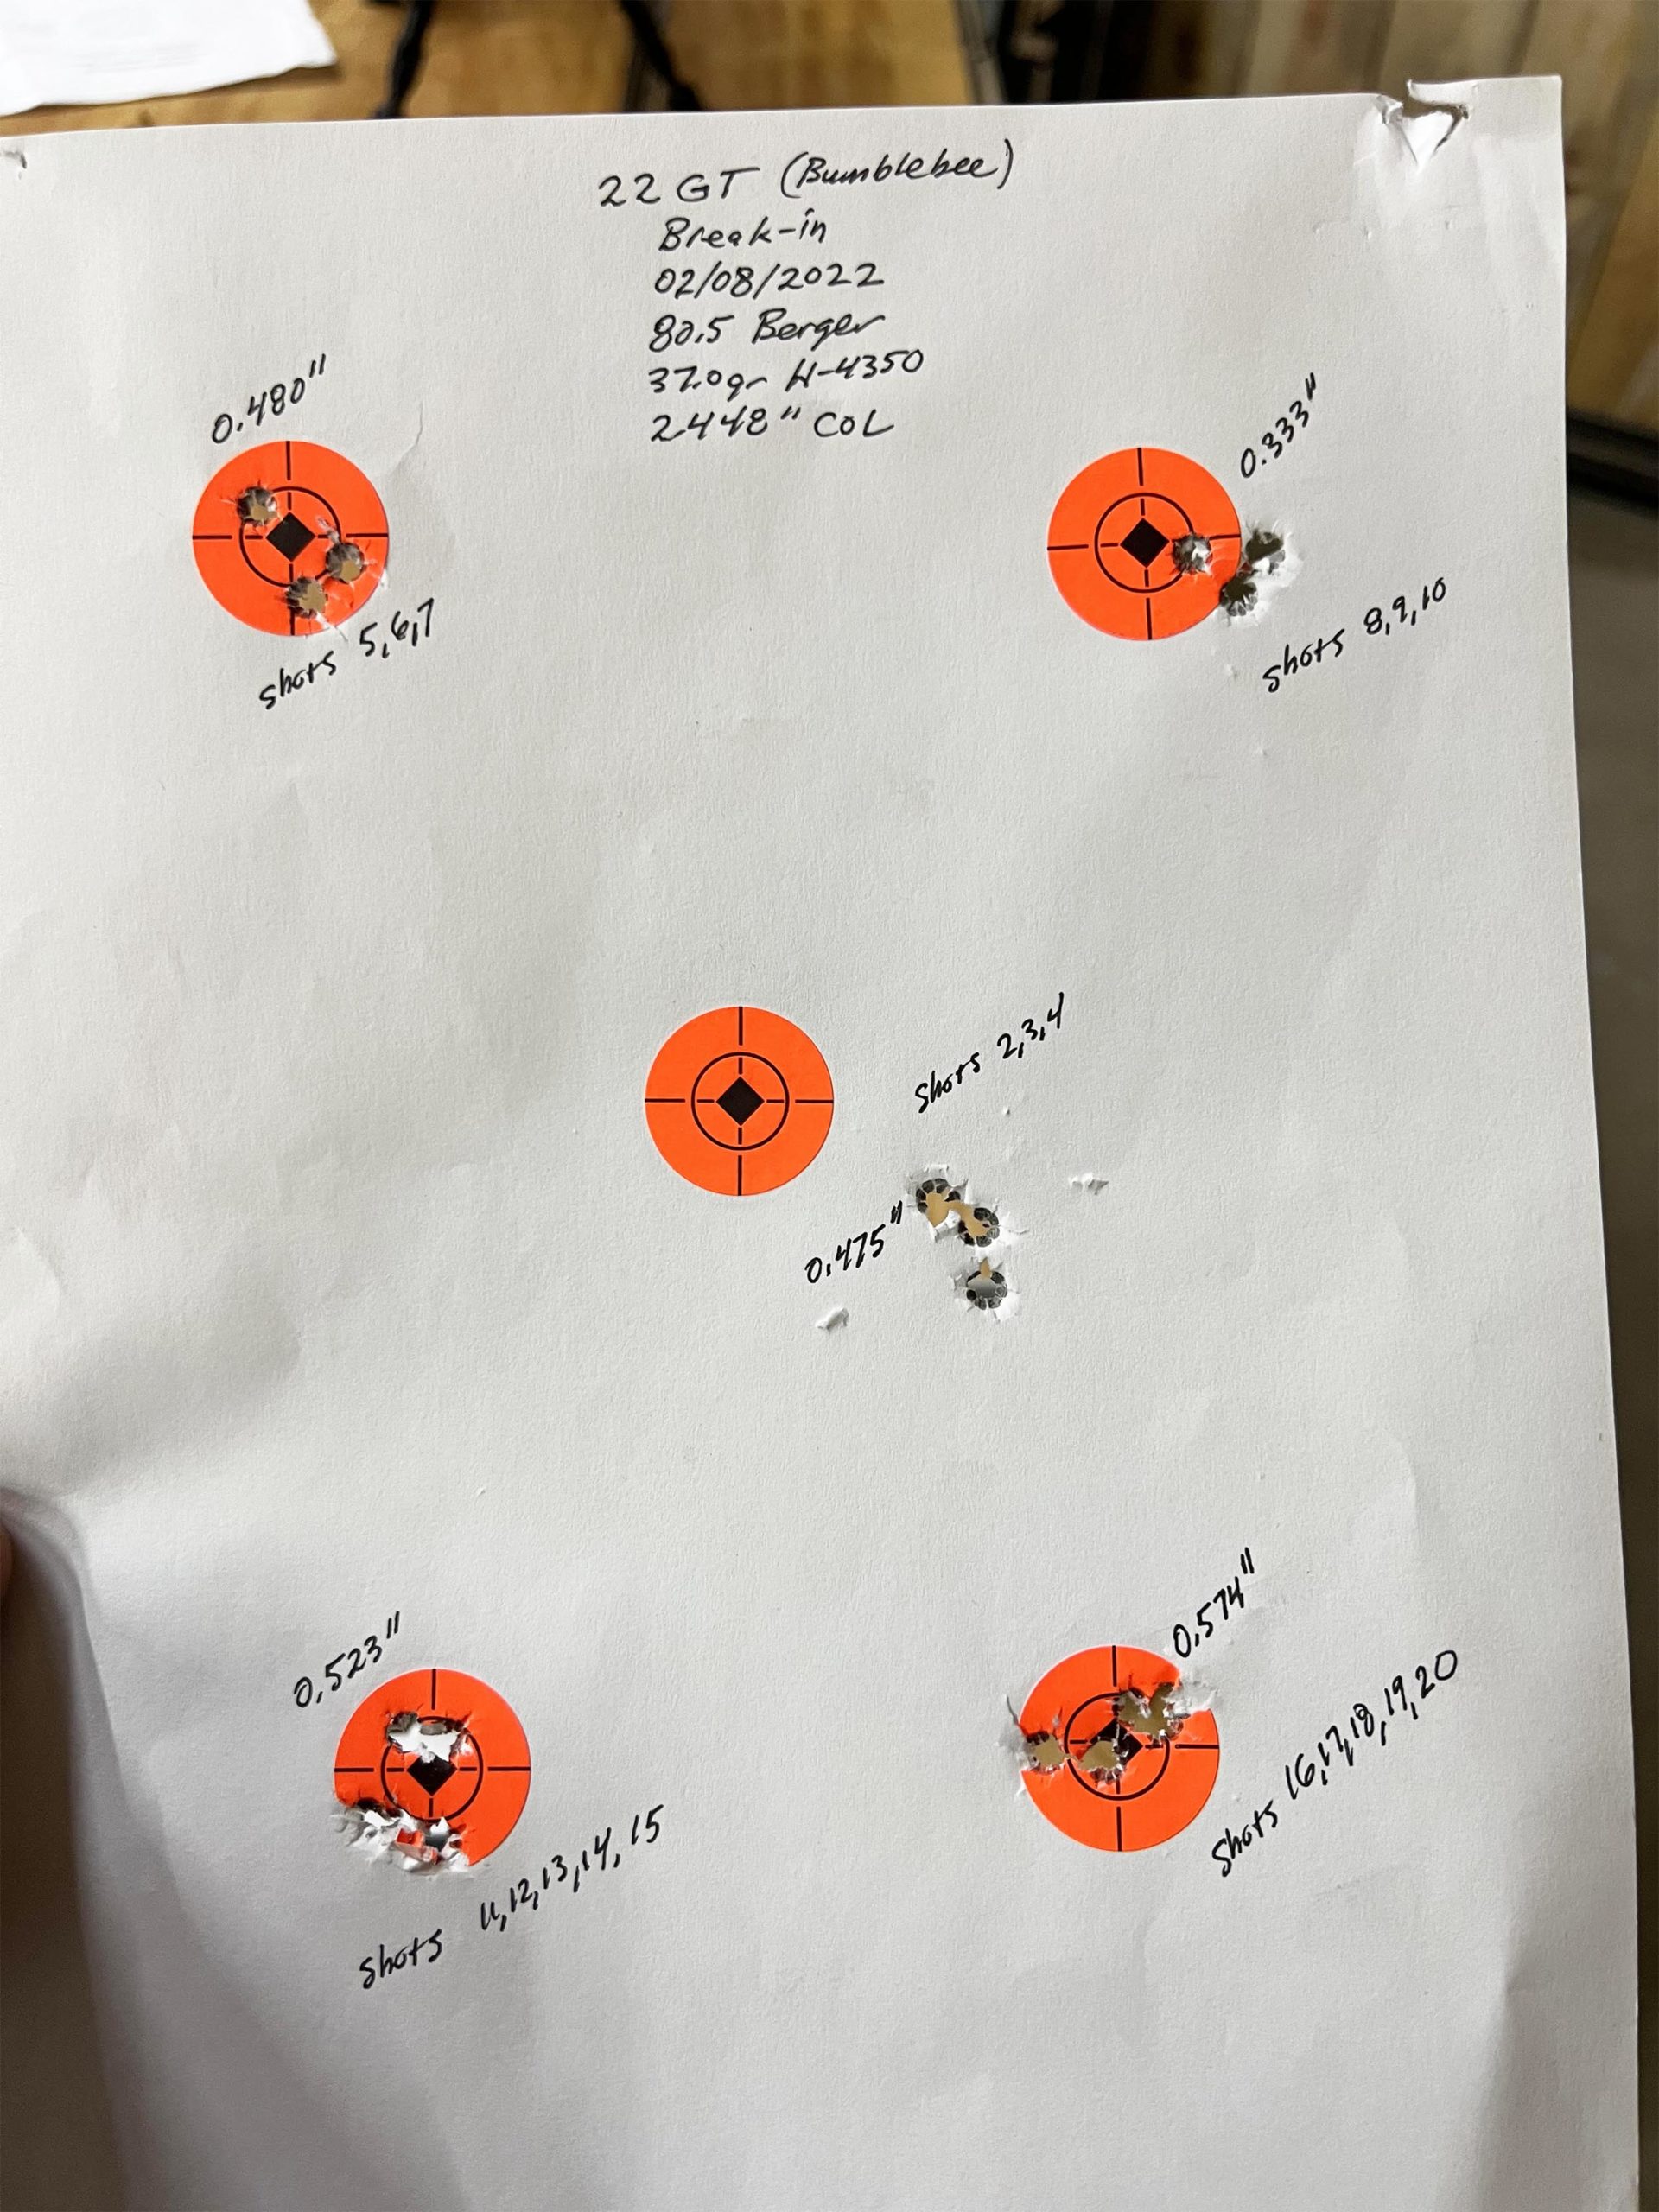
These are great results considering I haven’t done my load development yet, and was “guessing” at my initial load data. I can’t wait to do more shooting and see how good this rifle can do.
SUCCESS! This rifle is amazing. More to follow with a weight breakdown, will look at ultralight optics, load development, suppressed shooting, and hunting. Can’t wait!
Ultimate Reloader Custom Rifles
If you are interested in having Ultimate Reloader build you a custom rifle, we are now opening a waitlist:
Ultimate Reloader Custom Rifles Waitlist
Don’t miss out on Ultimate Reloader updates, make sure you’re subscribed!
Thanks,
Gavin


