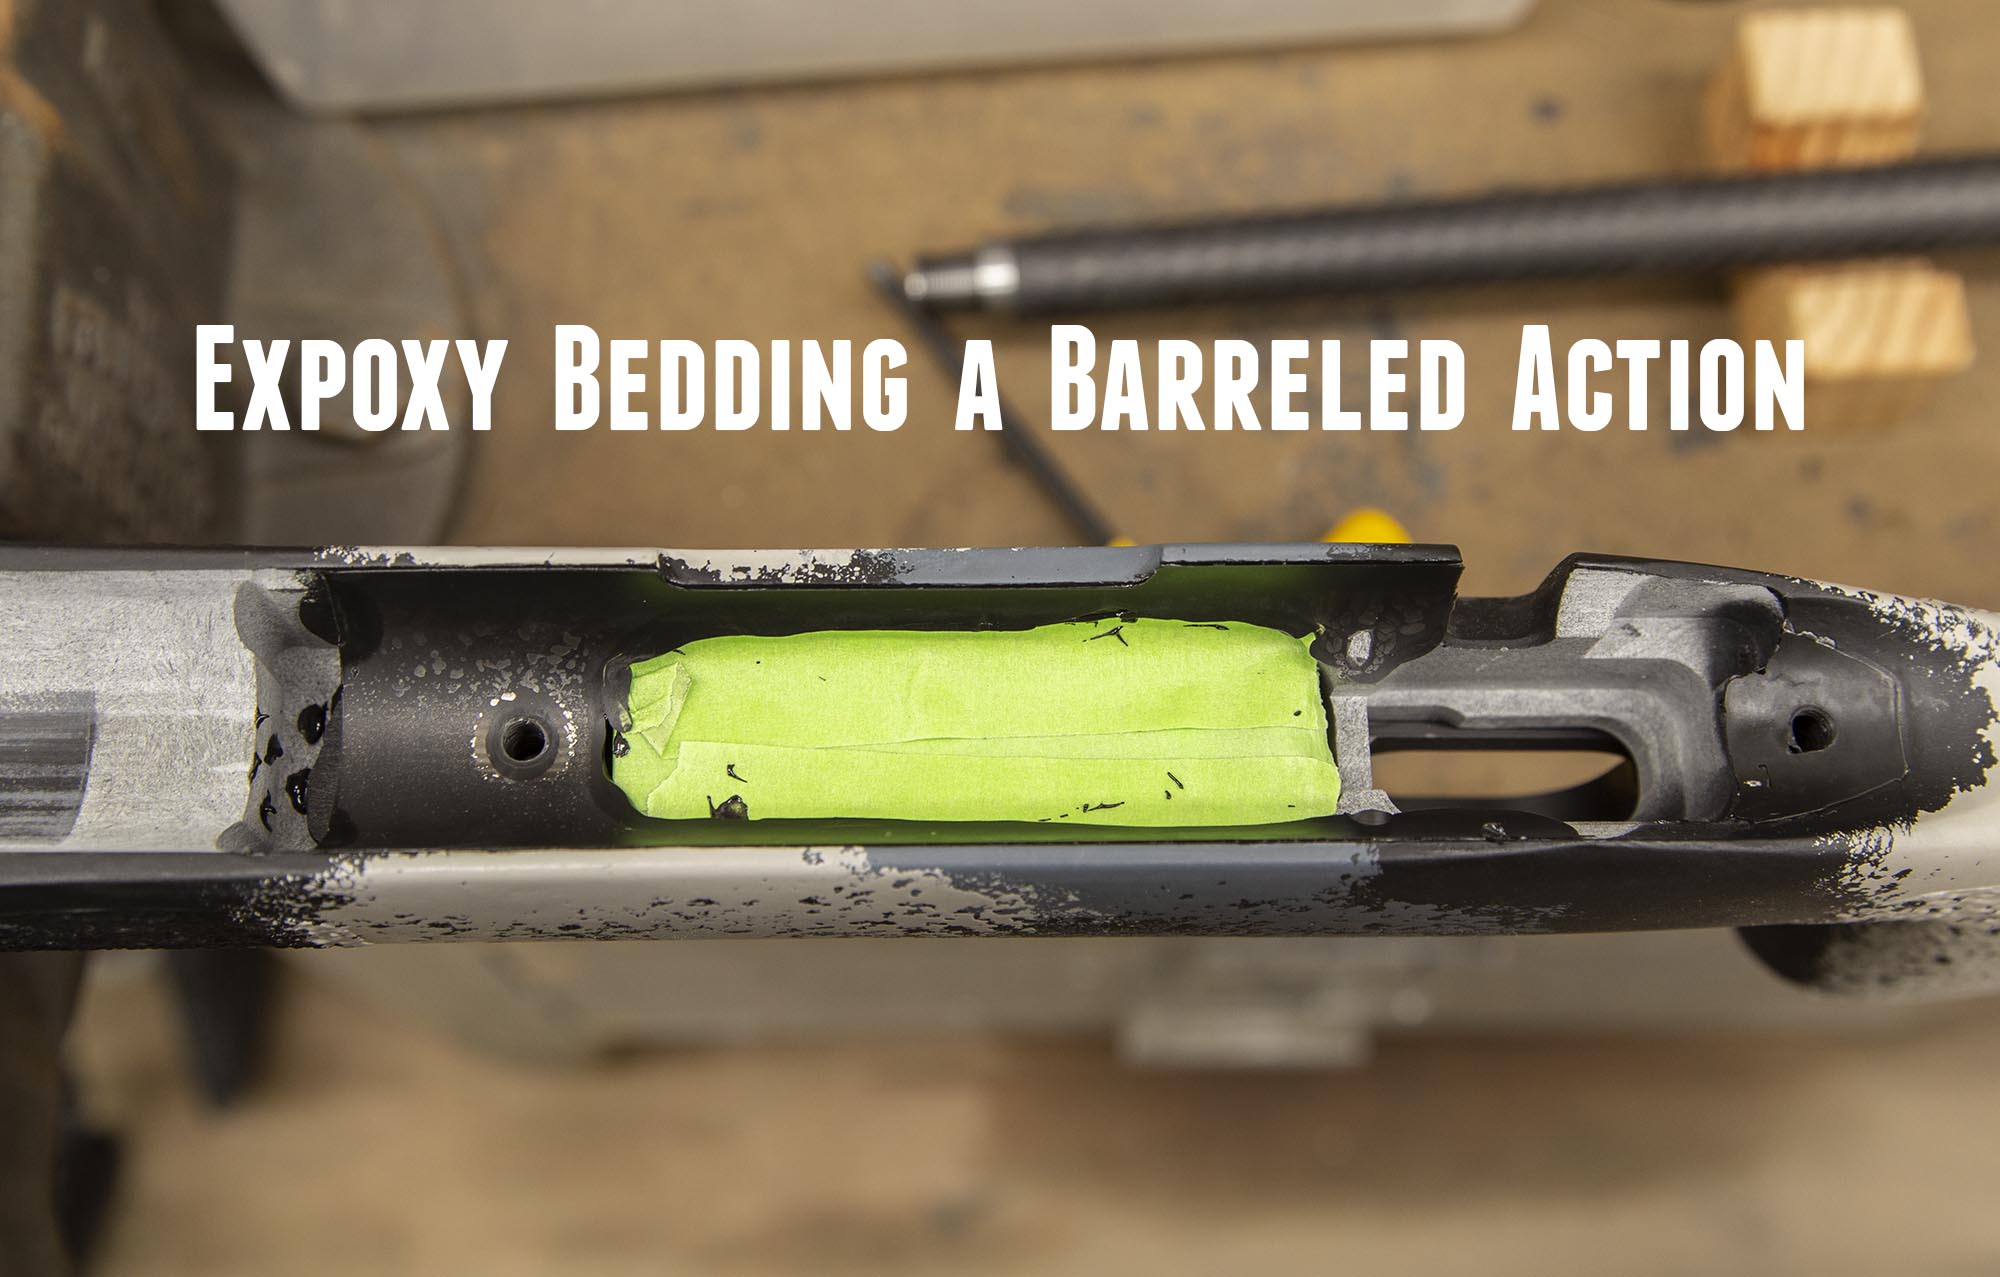
The 6.5 PRC light-weight build is all done except some cosmetic finishing touches, and it’s shooting AWESOME! (see this post from the first range trip). In this post, I’ll pick up where we left off at the end of the barrel work and stock fitting article/video, and I’ll cover epoxy bedding the barreled action to the stock. Let’s get to it!
The goal of a bedding job is to provide a perfect set of mating surfaces between the action and the stock, and to alleviate any stress on the action when it is tightened down to the action. The following summary of the process should help you acheive this goal!
Disclaimer
Ultimate Reloader LLC / Making with Metal Disclaimer: (by reading this article and/or watching video content you accept these terms)
- The content on this website (including videos, articles, ammunition reloading data, technical articles, gunsmithing and other information) is for demonstration purposes only.
- Do not attempt any of the processes or procedures shown or described on this website.
- All gunsmithing procedures should be carried out by a qualified and licensed gunsmith at their own risk.
- Do not attempt to repair or modify any firearms based on information on this website
- Ultimate Reloader, LLC and Making With Metal can not be held liable for property or personal damage due to viewers/readers of this website performing activities, procedures, techniques, or practices described in whole or part on this website.
- By accepting these terms, you agree that you alone are solely responsible for your own safety and property as it pertains to activities, procedures, techniques, or practices described in whole or part on this website.
Finish Prep of the Action and Stock
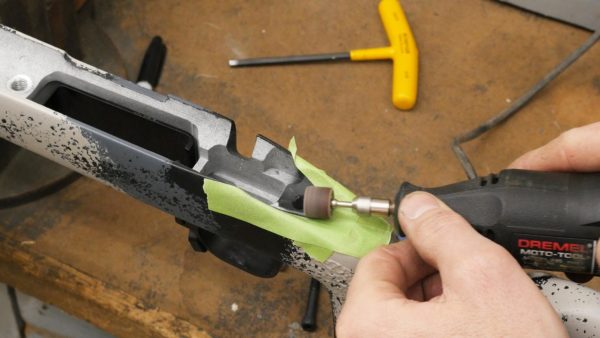
Before getting the epoxy mixed, the following needs to be done:
- Remove any paint/finish (see removal of paint from tang seating area in above photo)
- Test fit action and stock, double check for interference/clearance
- Tape off front/sides of recoil lug (in some cases, the sides of the recoil lug are not taped) for after-bedding clearance
- Apply release agent (I’m using Hornady One-Shot case lube) to action and action screws
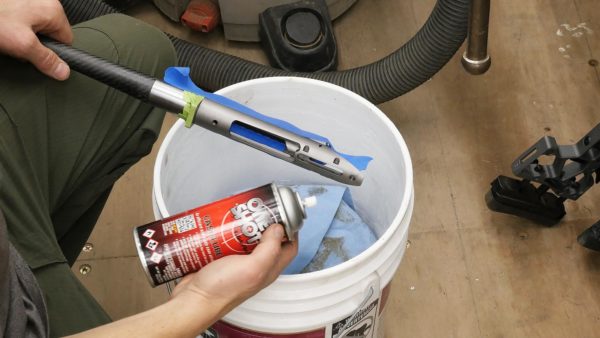
Above: spraying Hornady One-Shot case lube onto the action surfaces to act as a release agent. I tend to use too much of this spray 🙂 A couple light coats is all that’s needed, and it’s easily removed later with paint thinner.
Choose Your Bedding Compound
There are multiple products that you can use for bedding a barreled action to a stock including:
- Various types of epoxy
- Various blends of fiberglass and resin
- Various types of liquid metal and other specialty adhesives/fillers
I use Marine Tex Epoxy because it’s dark (good color for a wide variety of finishes/materials), inexpensive, and it works really good without any discernible shrinking.

Above: Marine Tex gray expoxy. Marine Tex is also available in white, and it can by dyed to match different stock materials and finishes.
Prepping and Applying the Adhesive
Marine Tex epoxy is mixed 5 parts epoxy to 1 part catalyst by volume. I typically mix epoxy on a pad of paper so that I can tear off the top sheet when done and throw it away. Not a perfect mixing surface, but it works and prevents unwanted clean-up!
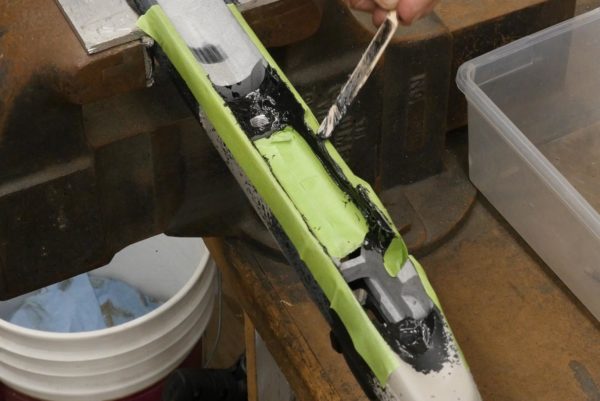
After the epoxy is mixed well, I use a popsicle stick to apply a liberal coating of the epoxy to the surfaces of the stock to be bedded:
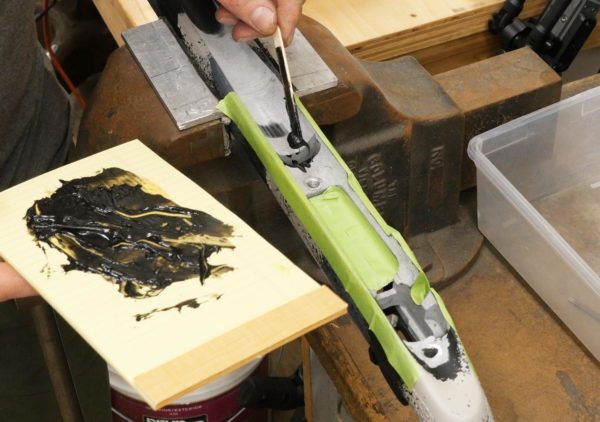
After carefully applying the epoxy to the stock, it should look something like this:
Setting the Action in Place
Now comes the critical part of the process! (OK, there are actually a lot of critical aspects of this job). When setting the barreled action in place, the goal is to squish the expoxy in place, hopefully with all of the air pockets working themselves out, and to create an even layer of “overflow” around the outside boundary of the action and stock bedding surfaces.
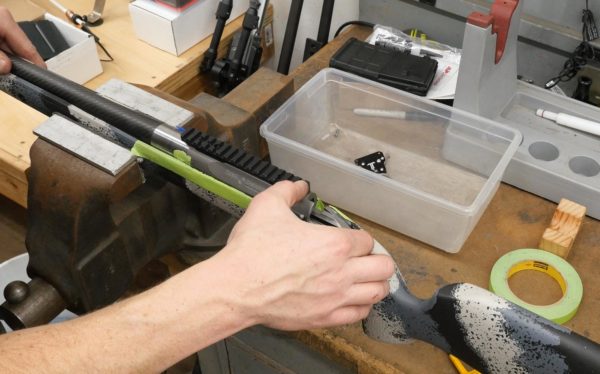
Here’s the process I use:
- Get the action close to the stock, hold the action about 1/16″ or so FORWARD of where it will come to rest
- Lower the action into the stock until it “seats”, then pull the action BACK gently until the recoil lug seats
- From underneath, thread in the action screws until they are LESS THAN finger tight
- Back the screw torque off completely (learned this from Gordy Gritters)
That’s it! The last step is an important part of achieving a “stress free” seating position for the action in the stock once you do the final install. At this point, all that’s left to do is to clean up the overflow with Q-Tips (and a cleaner like vinegar or paint thinner) and then wait at least 24 hours until breaking the action free from the stock.
Final Touch-Ups
After the epoxy has cured for a day, you can loosen the action screws and then break the action free from the stock. Following this “separation” you’ll need to:
- Trim the epoxy overflow from unwanted areas inside the stock (using a milling machine, or Dremel and file)
- Drill excess epoxy out from the action screw holes
- Perform any additional cosmetic procedures
- Validate fit of action in stock
- Optional: paint the interior of the stock

Above: finished bedding job prior to painting the interior of the barrel channel.
The rifle shoots GREAT, even after removing/installing the action. I’m really happy with how this job turned out!

We’ve got one more article for this rifle build, unboxing and installing the Leupold Mark 5HD scope. So don’t miss out on Ultimate Reloader updates, make sure you’re subscribed!
Thanks,
Gavin


Gavin,
Nice job! Just an added prep item I learned from experience. Take a trash bag long enough that you can cut it length wise such that you end up two halves that resemble an envelope with an open end and no flap. You can place one of these over the rifle then cut away just enough to expose the work area of the stock and tape it down to the masked area. This protects the entirety of the stock from drips and strings. I love your e-mail updates.
Gavin:
Really enjoying your gunsmithing journey! The interviews with Gordy were inspirational and educational. They have made me believe that a rifle built out of reasonably good parts and assembled with skill should shoot well to very well. I love how you are accumulating knowledge and skills and then sharing those with us through real-world applications as you are doing with this 6.5 PRC project. Looking forward to watching the last installments of this build and your results with hand loads. Given your factory ammo results, I can only guess what you might be thinking this rifle is capable of.
Thank you!
Thanks Hank, it’s been an AMAZING journey!