In this article we’re going to look at different parts of rifle brass prep and the information the AMP press gives us. Each process is examined and a graph is presented of the bullet seating forces. We anticipated some of what we saw, and were surprised by other things!
Disclaimer
Ultimate Reloader LLC / Making with Metal Disclaimer: (by reading this article and/or watching video content you accept these terms). The content on this website (including videos, articles, ammunition reloading data, technical articles, gunsmithing and other information) is for demonstration purposes only .Do not attempt any of the processes or procedures shown or described on this website. All gunsmithing procedures should be carried out by a qualified and licensed gunsmith at their own risk. Do not attempt to repair or modify any firearms based on information on this website. Ultimate Reloader, LLC and Making With Metal can not be held liable for property or personal damage due to viewers/readers of this website performing activities, procedures, techniques, or practices described in whole or part on this website. By accepting these terms, you agree that you alone are solely responsible for your own safety and property as it pertains to activities, procedures, techniques, or practices described in whole or part on this website.
Starting Point
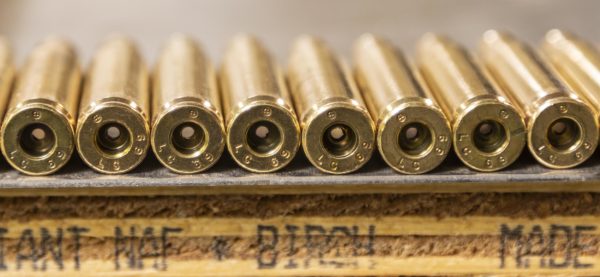
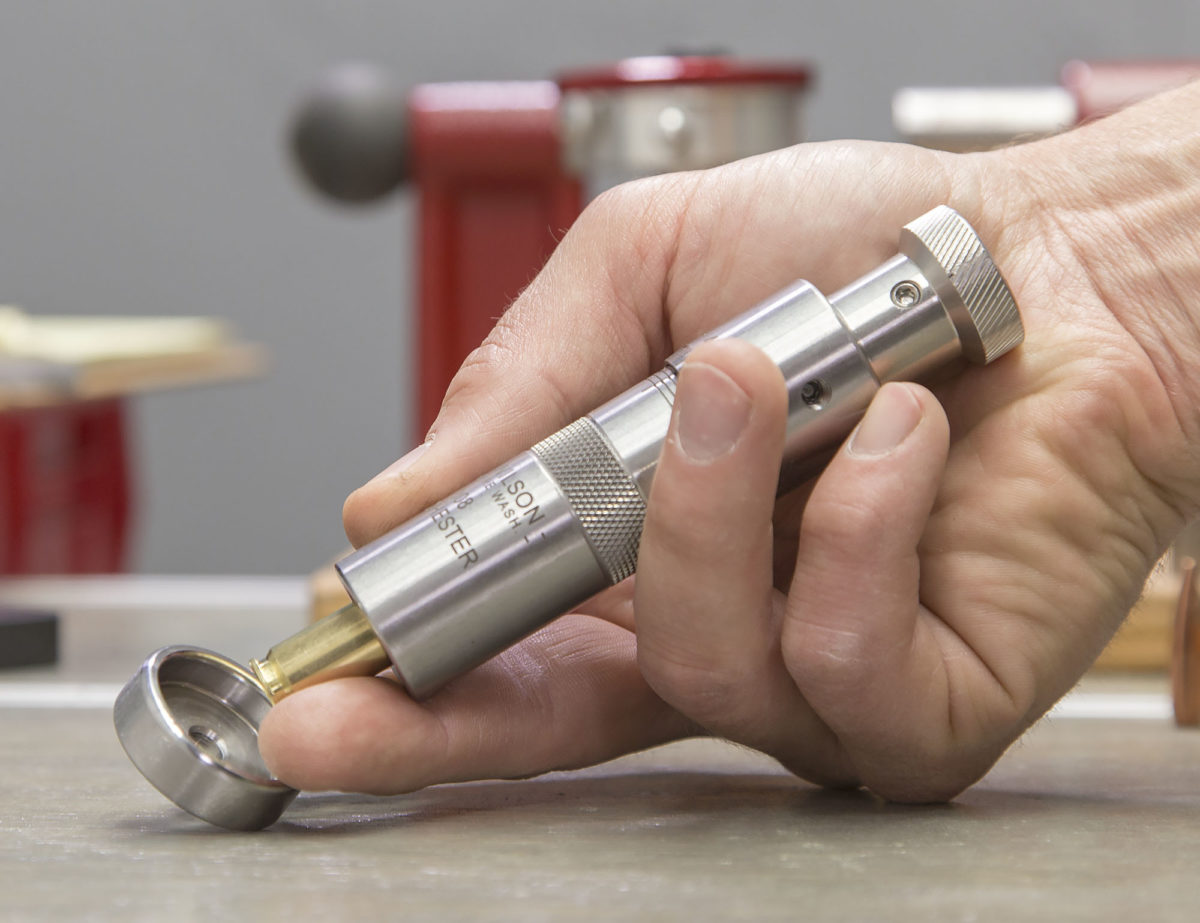
The AMP Press is the data gathering device for this test. This instrument produces a graph showing bullet seating force as it changes over the distance of seating the bullet. We recently published an introduction to the AMP Press showing unboxing, setup and intro to use. The AMP press requires an LE Wilson seating die for each cartridge you seat bullet for. Our entry into this test will be very simple and basic. Using once fired LC Brass in .308, de-primed and stainless steel pin tumbled. Many of you may question the “why are we using this brass for this test?”.
- I have a large lot to use and with many future tests planned we need a large amount.
- Can we improve this brass?
Summary of Processes Tested
Here’s a picture showing pieces of brass with various brass prep steps applied:
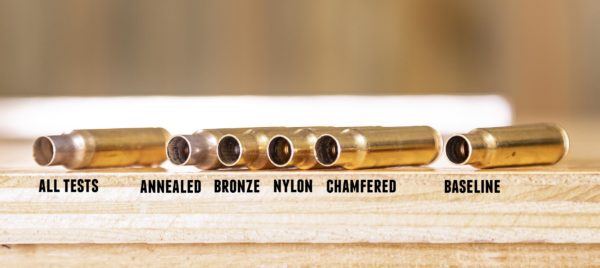
Here’s the summary of what we’ll show testing data for:
- Test 1, (Baseline) Full length sizing + Mandrel neck expansion
- Test 2, Baseline + Inside Neck Chamfer
- Test 3, Baseline + Inside Neck Nylon Brush
- Test 4, Baseline + Inside Neck Bronze Brush
- Test 5, Baseline + Annealing
- Test 6, Combining All Process
For all of the tests with the AMP Press, L. E. Wilson inline seater dies are used:
Test 1, Baseline: Full Length Sizing + Mandrel Neck Expansion
This is the baseline brass prep for all tests below.
Brass was spray lubed, full length sized and then mandrel sized with a Wilson Mandrel die. Brass was then tumbled in walnut media to remove the lube. This is important to note as media dust residue will have an effect on the seating forces.
Results from Baseline (click/tap to enlarge):
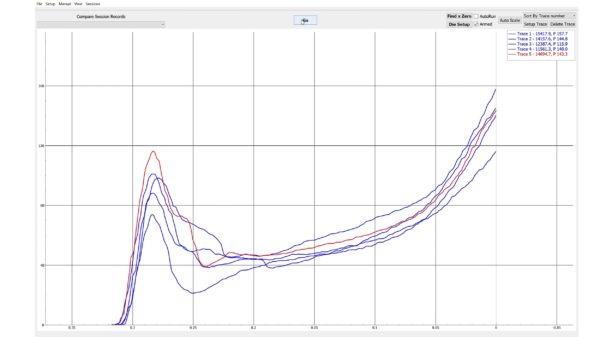
This graph result is what we would expect. The initial spike in pressure as the bullet starts movement and enters the neck. This is followed by a dip and then progressive increase which is typical for the bullet seating process.
Test 2, Baseline + Inside Neck Chamfer
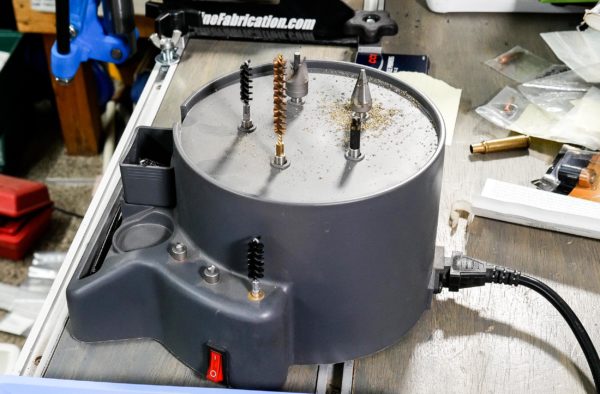
Adding an inside neck chamfer using the Lyman Case Prep Xpress. In our first test let’s see what a chamfer added to the inside of the case mouth will effect the bullet seating forces? Prior to this test I have always liked to chamfer the case mouth. When I am reloading, having the chamfer on the inside of the case mouth does two things. One, it is easier to place the bullet onto the case mouth with a chamfer. The bullet sits in the cup created by the chamfer better than without a chamfer. Two, it lessens the chance that the edge of the brass will “score” or shave off the bullet jacket. I never have thought that this chamfer would change seating forces.
Results from the Inside Neck Chamfer (click/tap to enlarge):
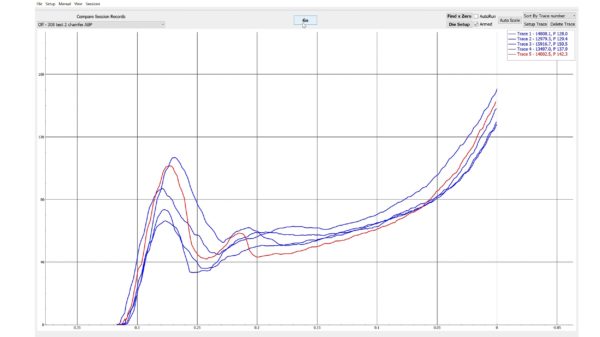
Well surprise! That is an interesting graph! This has a much greater effect than I ever thought it would. The seating forces are very even and consistent throughout the seating process. I thought the chamfer would help with the initial spike but I did not think it would eliminate it.
Test 3, Baseline + Inside Neck Nylon Brush
Research via the internet suggests that a brush on the inside of the neck is likely the biggest contributor to affecting seating pressure. Again the baseline brass prep and then the nylon and bronze brushes are mounted on and used on the Lyman Case Prep Xpress. There is a very different feel to each of these brush processes.
The nylon brush was passed up and down in the neck twice, down-up-down-up. This process has a very easy feel to it. Not much was happening so it seemed.
Results from the nylon brush (click/tap to enlarge):
Test 4, Baseline + Inside Neck Bronze Brush
The bronze brush was one time, down-up. The bronze brush required a much firmer grip on the cartridge to prevent rotation. It was obviously having a much greater effect on the brass, the brush really felt like it was “scrubbing” the neck. Definitely much more was happening with the bronze brush. The visual result was obvious also. The bronze brush had a definite brushed pattern look to it. My thought was that this bronze brush would have a greater effect on the results.
The results from the bronze brush (click/tap to enlarge):
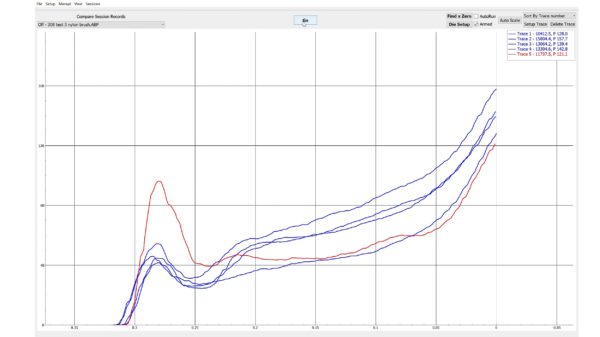
Conclusion: the internet research did not get backed up with these results! Seating pressure was not reduced as much as I had expected. Below the nylon and the bronze brush graphs are overlaid. Note the differences. I will admit I was surprised. The nylon brush while it did not feel like it was doing much it generated a more consistent result. The bronze brush was initially a lower seating pressure but it did have a larger spread. My thoughts are the “bulk” LC brass was the culprit of this spread. Likely I will need to do more testing.
Test 5, Baseline + Annealing
AMP Mark II Annealed Cases vs Unannealed Cases
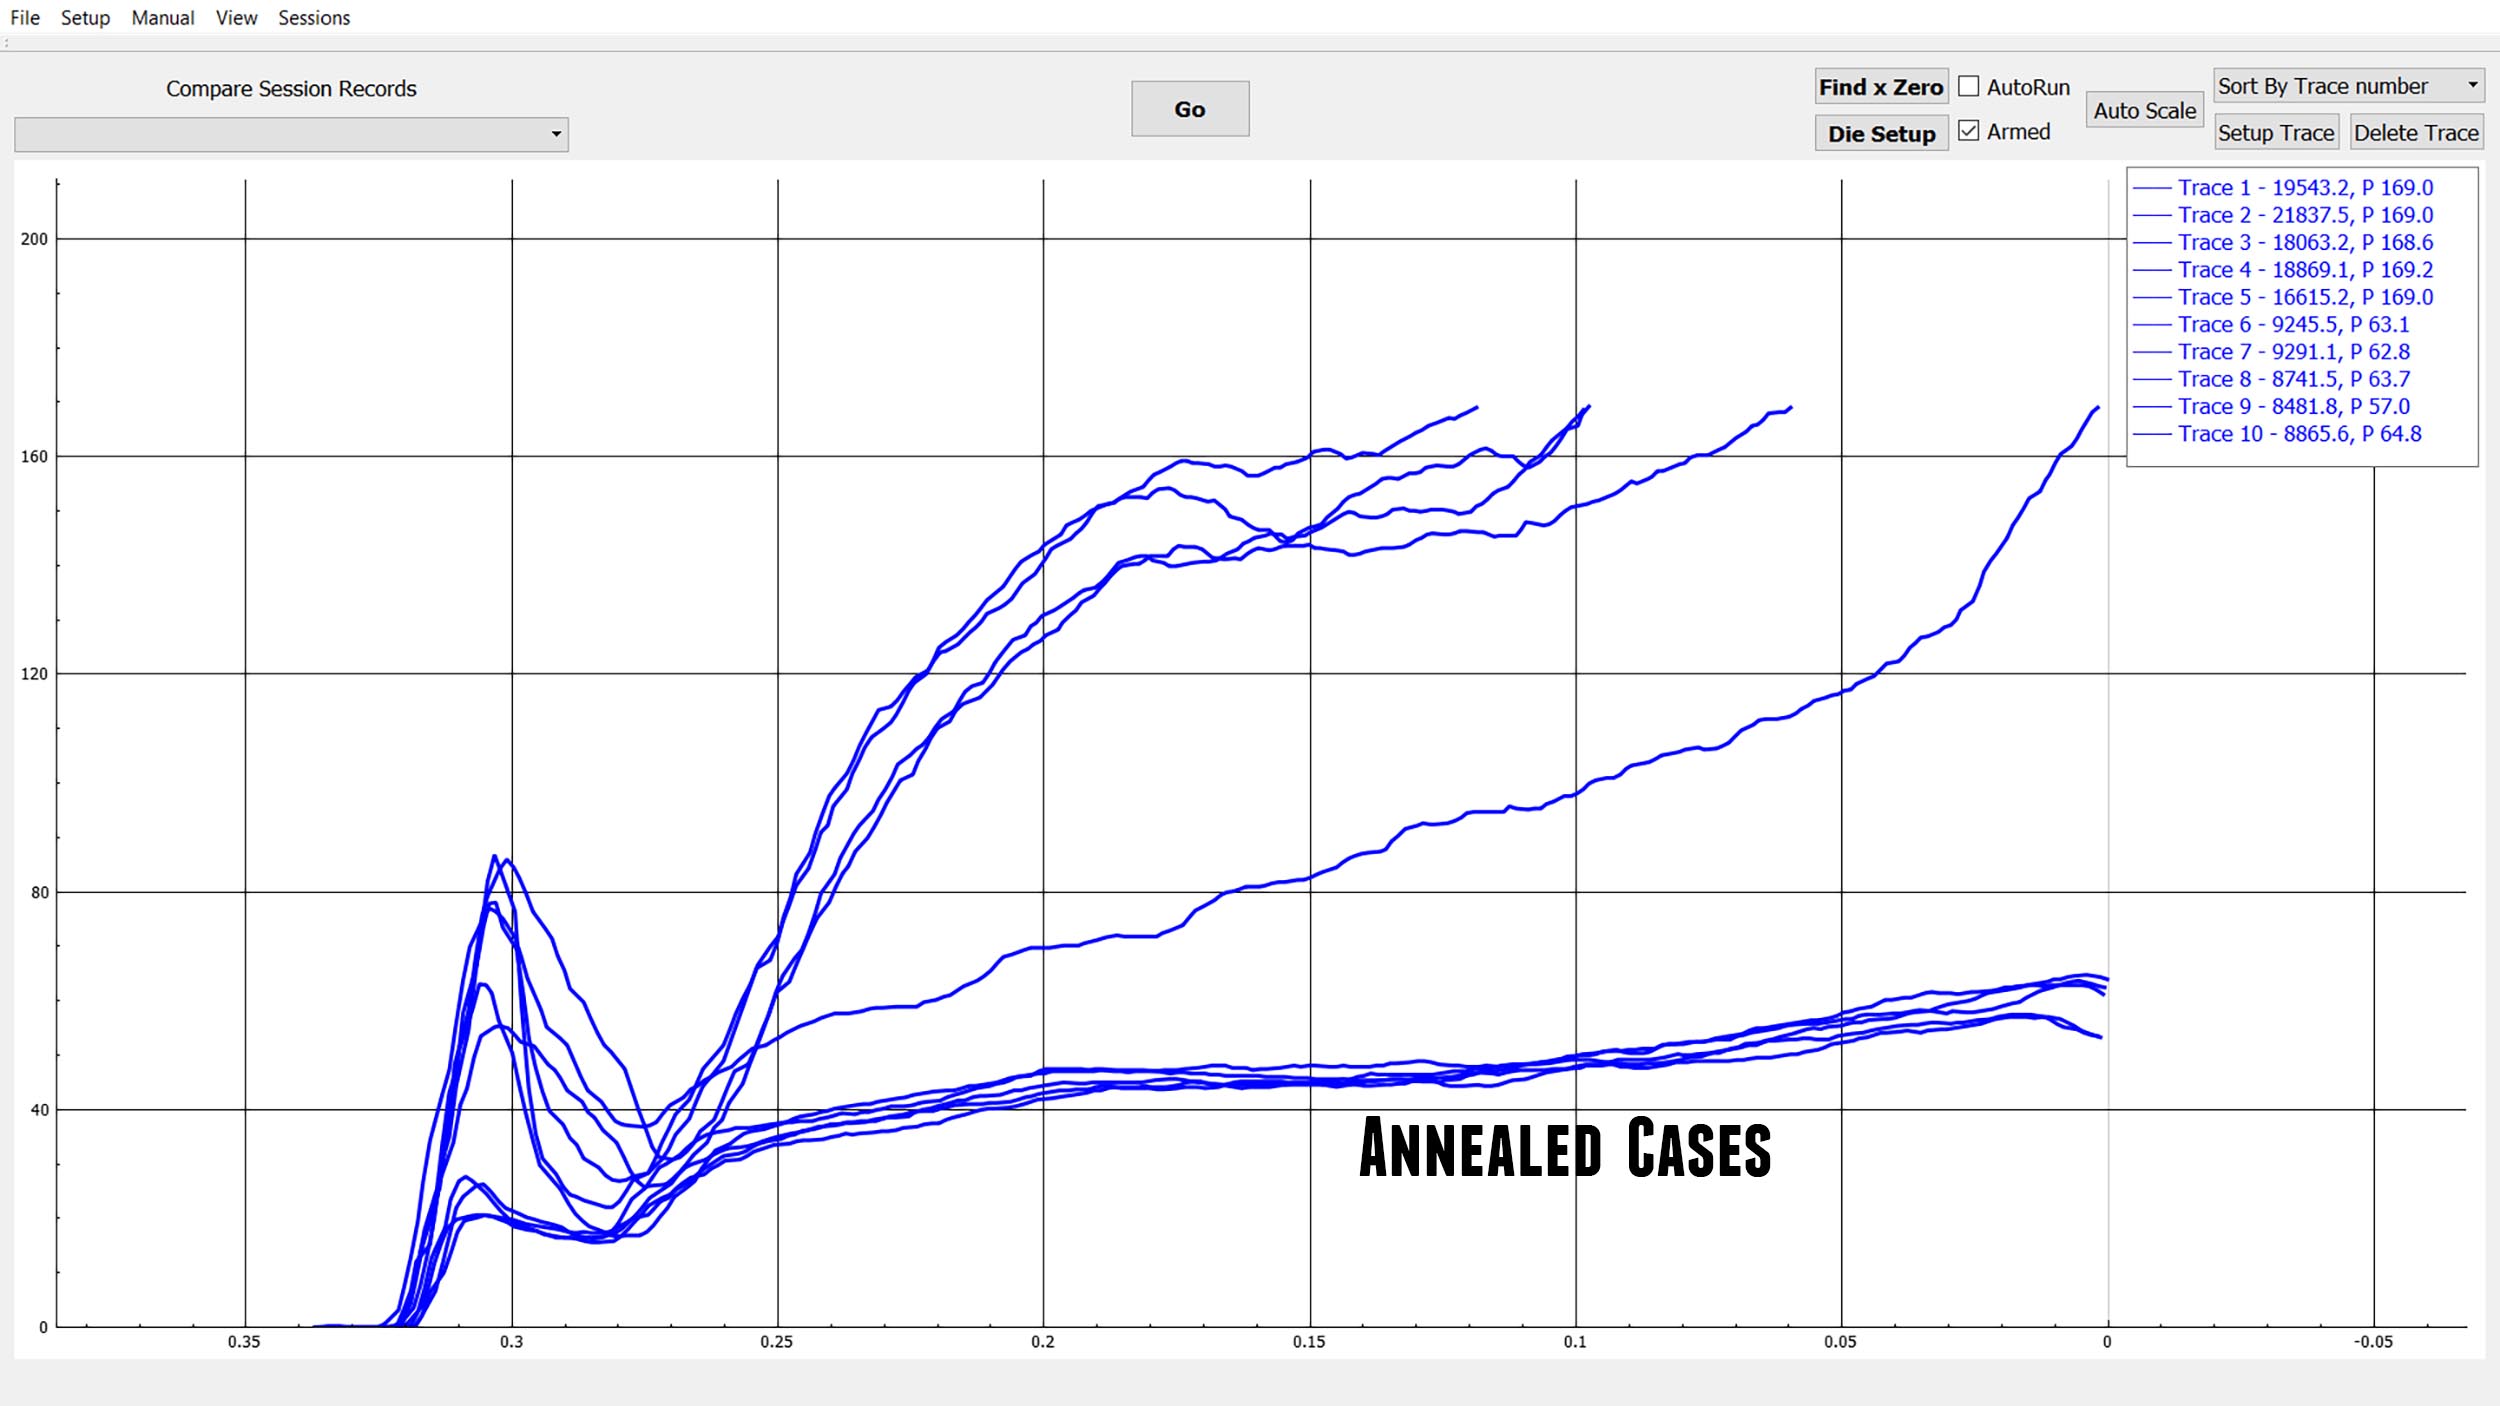
This test was recently done in our coverage of the introduction of the AMP Press. In that test we used new Lapua 6.5 Creedmoor brass.
Here is a quote from those results:
“We did indeed see lower forces, about 63% less force compared to without annealing! You can also see just how consistent each trace is compared to the others in that group. And, much less “jumpy” – smooth lines indicate smooth bullet seating.”
Results from the initial unboxing test (click/tap to enlarge):
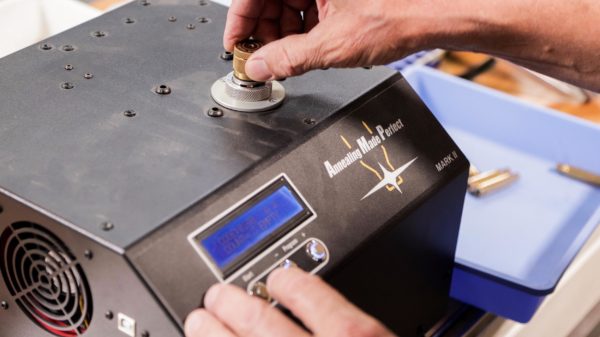
Most of us know the benefits that annealing can bring. Consistent neck tension, longer brass life, easier resizing and usually more accurate loads. The AMP Press will show us the difference that the annealing process has on seating pressure.
The results from the AMP Mark II annealing process (click/tap to enlarge):
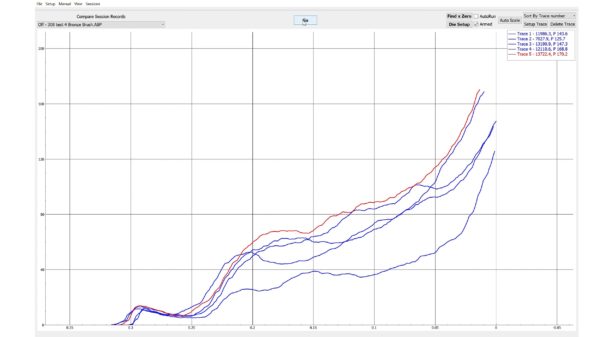
Most of you that have reloaded annealed brass will not be surprised by this graph. The annealing process is something you can feel with most reloading presses. On the press stroke the annealed brass has a smoother and easier seating feel. The graph demonstrates that lower pressure. The initial spike in pressure is gone with annealing. Similar to the chamfer removing the initial spike in pressure.
Test 6, Combining All Processes
Final test for this article is the combination of all the processes detailed in combination.
What will the net effect be when we do all of the following:
- Chamfer
- Inside nylon neck brush
- Inside Bronze Brush
- Anneal
Results seen on the AMP Press from all processes combined (click/tap to enlarge):
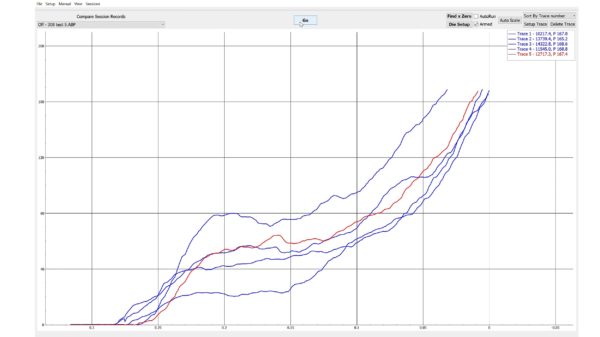
The results were not as good as I had hoped. I do really feel that this is due to the bulk LC brass. Another test of 5 cartridges was done with a very even and consistent graph, results were not saved unfortunately. It does appear that all processes combined helped to give the brass a more consistent and even seating pressure.
Results of Tests/Thoughts
Of course there is a lot to take in with this. There are multiple important parts of this test. Short term data would be group size and velocity data, with the SD and ES of this examined and compared. Then the long term data of understanding of brass life and the processes that are worth the time investment.
I was most surprised by the effect that the chamfer had on the seating pressures. We were expecting a reduction in the initial pressure spike but we were surprised to see the result. This chamfer process had a significantly smoother increase in the seating pressures over all the other processes. We saw a similar reduction in bullet seating forces through the process of annealing. This is followed by the bronze brush and lastly the nylon brush.
Here’s my take-aways for future reloading: I do feel these processes improved the LC brass. After sizing and the mandrel I will continue to chamfer the brass as I have always done. A new process I will add is the bronze brushing. I will be continuing to anneal the brass also. The combination of chamfer bronze brush and annealing have the best graphs as far as consistent seating pressures. The nylon brush however does not look to be worth the time investment.
What’s next: Premium brass of course will be a better baseline to start with. However this test is a great representation of what the processes can do. We plan on neck turning tests and examining neck lubrication methods in the near future. What other tests are you interested in? Let us know!
Get the Gear!
The AMP Press is the primary data gathering device for this test. We have done an intro recently showing unboxing, setup and intro to use. On the AMP press we are using the LE Wilson seating die.
The AMP Mark II Annealer is a tool we use frequently here at UR. Here is the link to the article of unboxing, set up and use of the Mark II.
Lyman Case Prep Xpress is another tool I find myself using often also. This UR article shows the capabilities of chamfer, brushing and case prepwork.
LE Wilson Mandrel Die that I find myself using almost every time I am loading rifle ammo, we tested in May of 2020
Don’t miss out on Ultimate Reloader updates, make sure you’re subscribed!
Thanks,
Travis Fox
