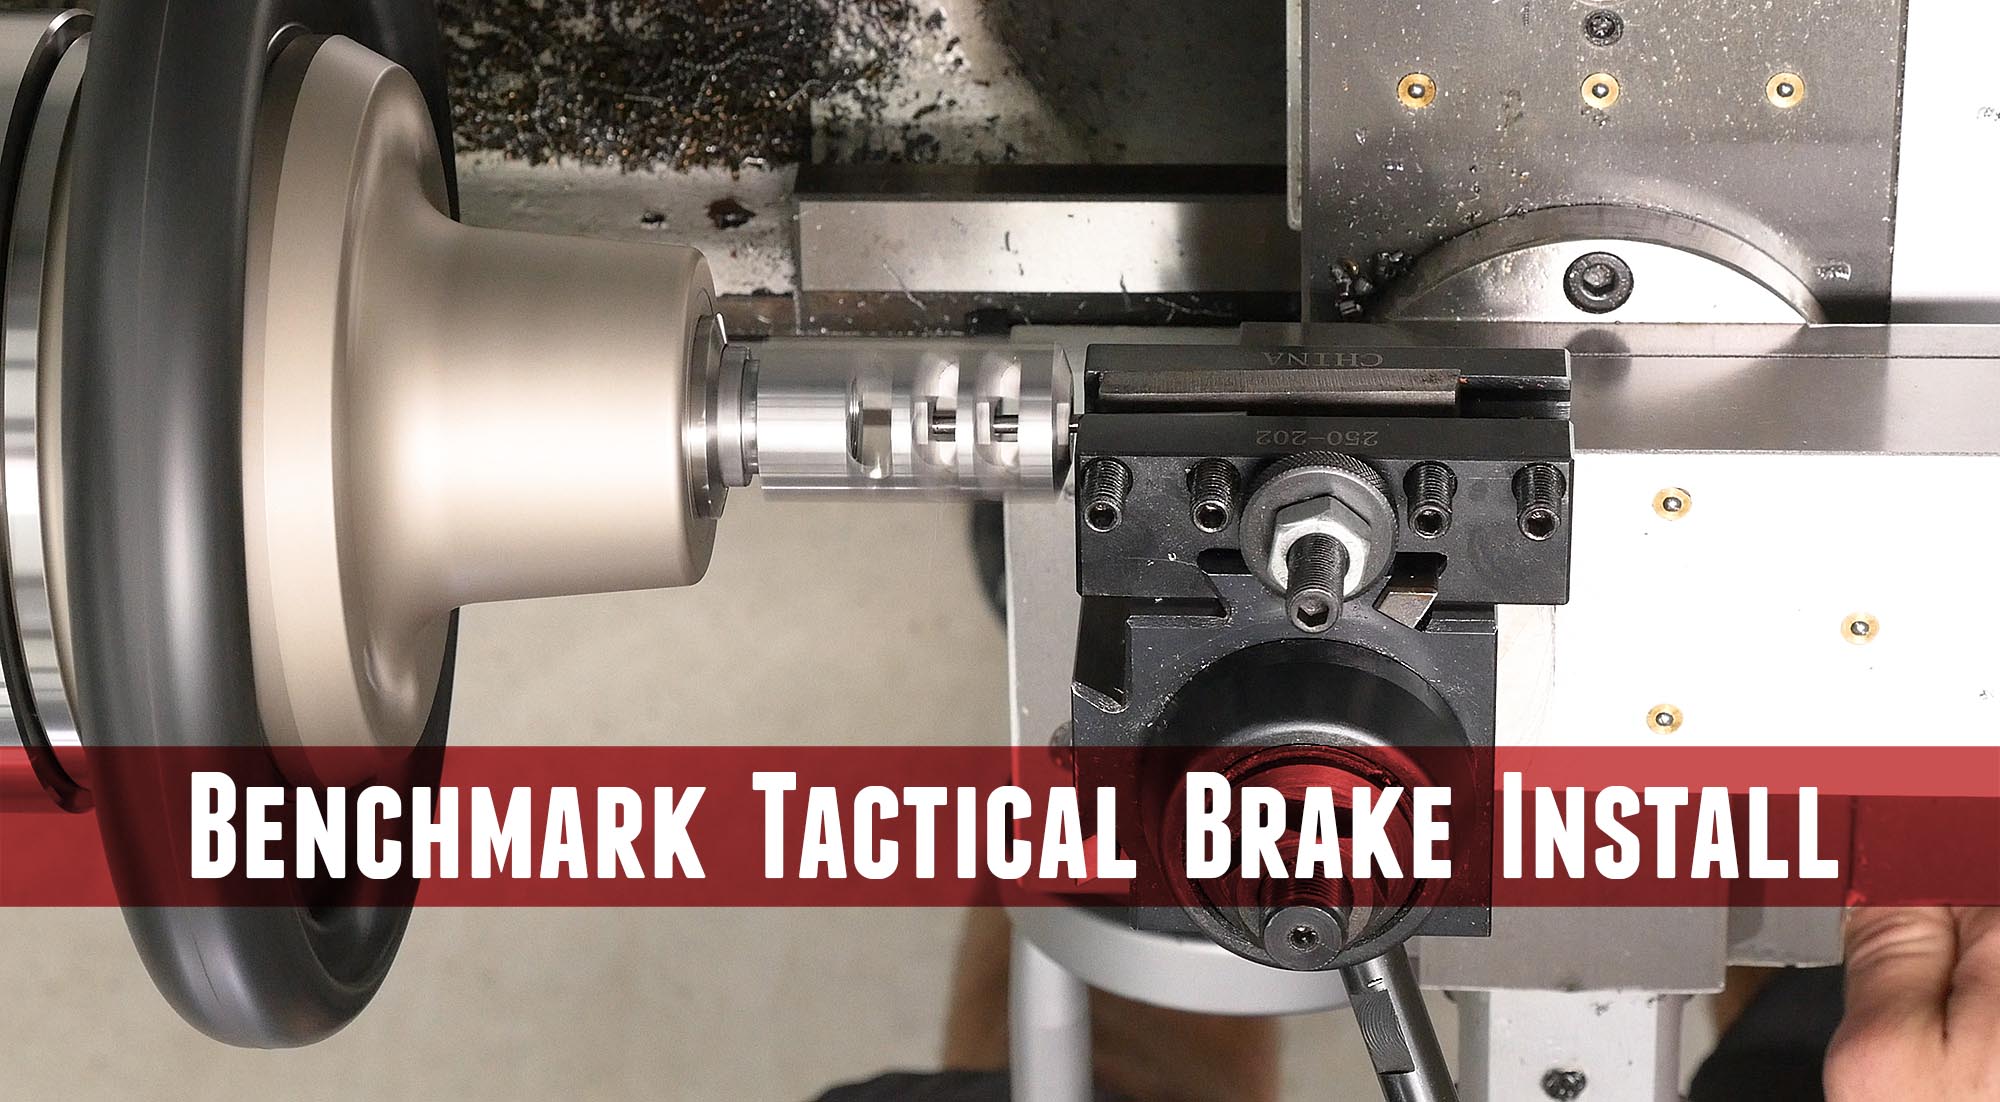
When you’re talking magnum calibers, a brake is one of the best investments you can make! Sure, the guys shooting next to you may not like it, but it’s a GREAT way to take the edge off heavy recoiling rifles and cartridges. Benchmark is known for world-record-setting barrels- but they also make muzzle brakes! In this article I’ll walk through the process of taking a semi-finished Benchmark muzzle brake and machining it for a perfect fit on my 300 PRC Full Custom!
Here are the stories form the series so far:
- In-Depth PRC Series: 6.5 PRC, 300 PRC End-To-End (Kick-Off)
- 300 PRC Custom Build Overview
- 300 PRC Custom Build: Chambering and Machining the Barrel
- 300 PRC Custom Build: MDT ACC Chassis Assembly, TriggerTech Diamond Install
Disclaimer
Ultimate Reloader LLC / Making with Metal Disclaimer: (by reading this article and/or watching video content you accept these terms)
- The content on this website (including videos, articles, ammunition reloading data, technical articles, gunsmithing and other information) is for demonstration purposes only.
- Do not attempt any of the processes or procedures shown or described on this website.
- All gunsmithing procedures should be carried out by a qualified and licensed gunsmith at their own risk.
- Do not attempt to repair or modify any firearms based on information on this website
- Ultimate Reloader, LLC and Making With Metal can not be held liable for property or personal damage due to viewers/readers of this website performing activities, procedures, techniques, or practices described in whole or part on this website.
- By accepting these terms, you agree that you alone are solely responsible for your own safety and property as it pertains to activities, procedures, techniques, or practices described in whole or part on this website.
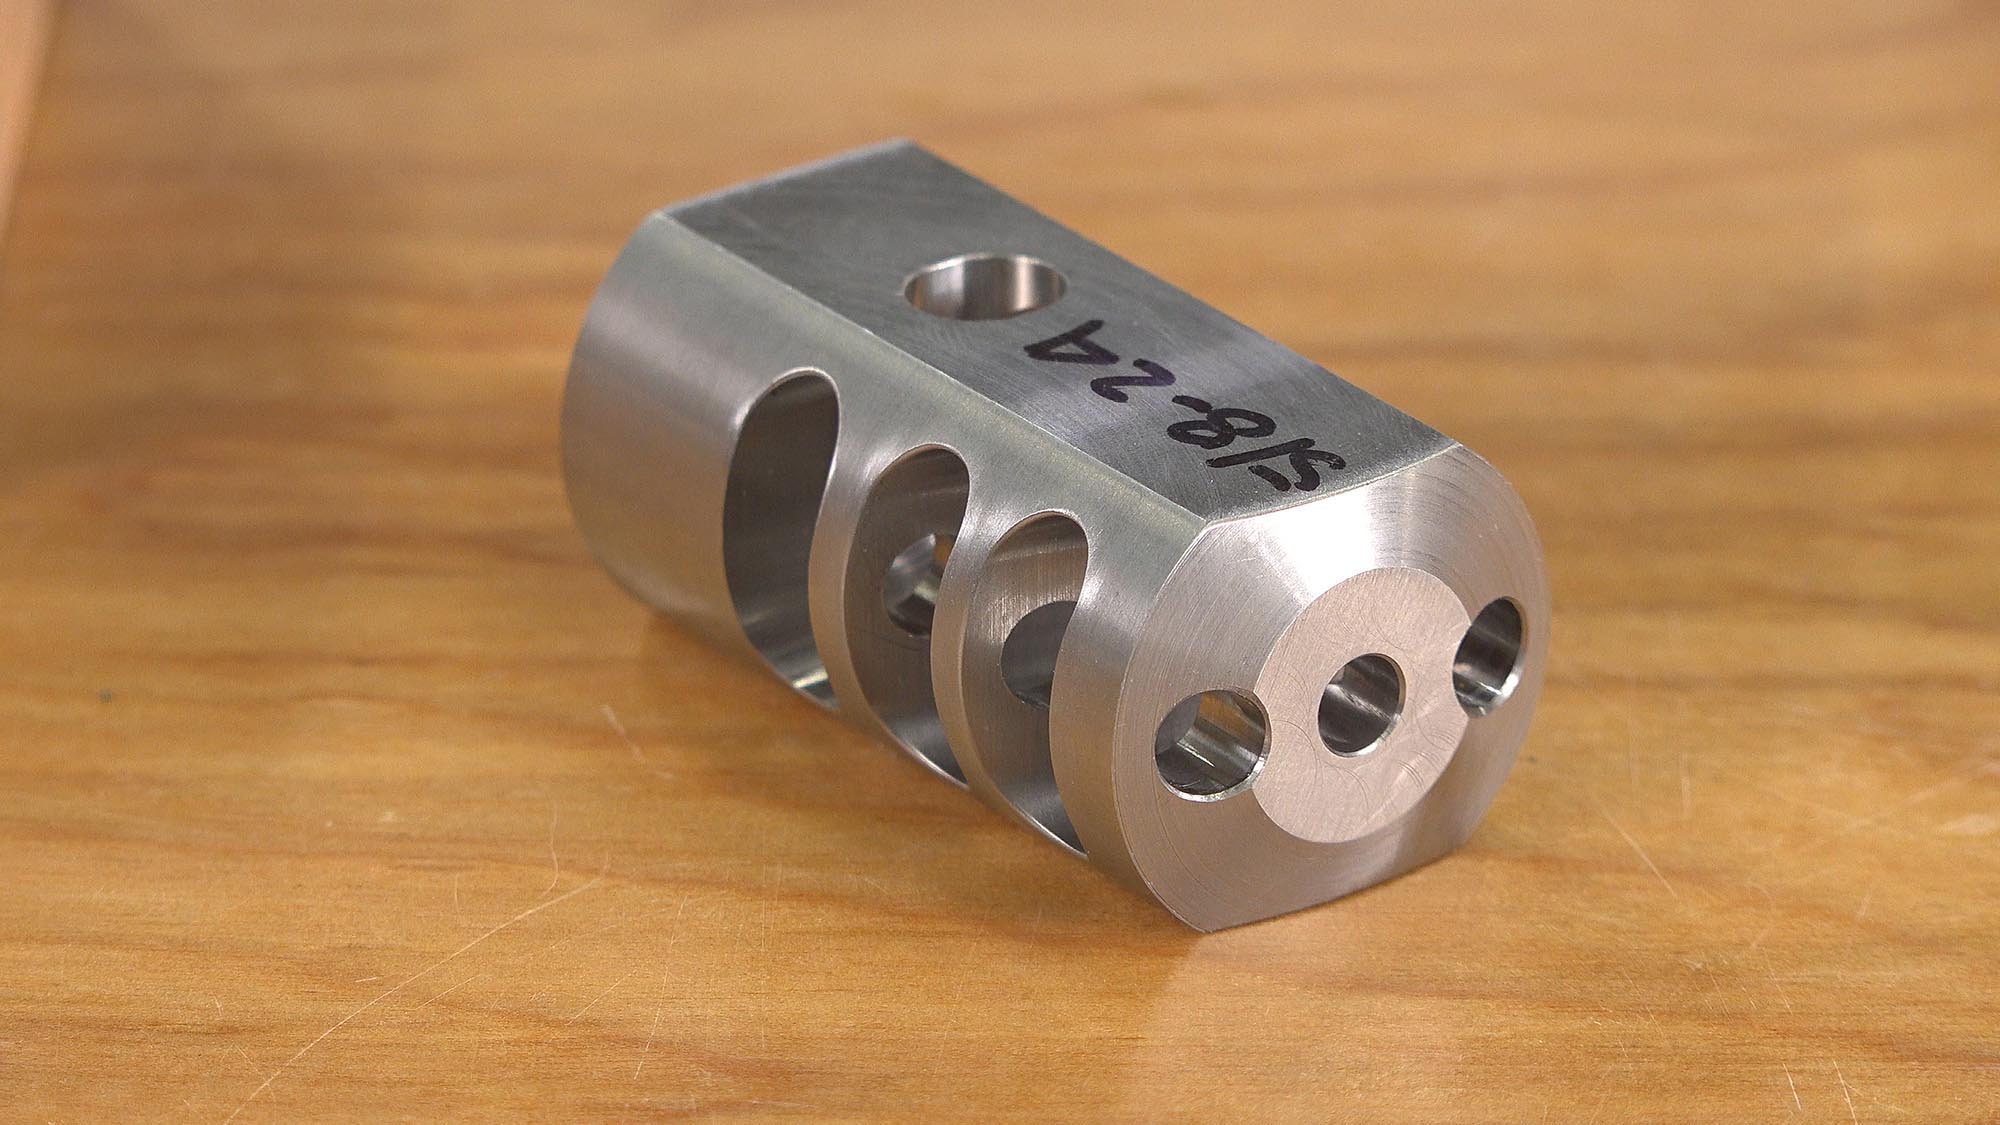
Here’s our starting point, a Benchmark 5/8″ x 24 TPI tactical (standard) semi-finished brake:
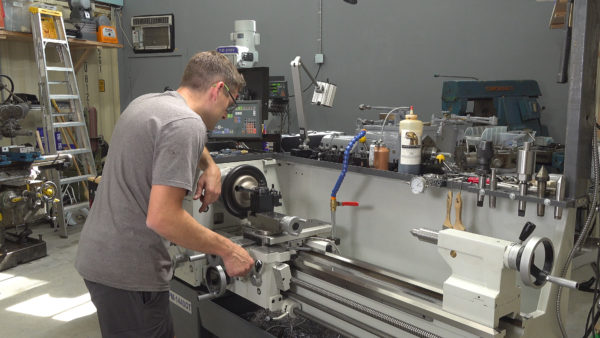
My Lathe
For this build, I’m using a Precision Matthews PM-1440GT. I believe this is the best gunsmithing lathe you can by new in the USA (Taiwanese made, not chinese, 2″ through-spindle capacity, Japanese high-precision spindle bearings, etc):
On to the machining!
Opening Up The Brake for Caliber
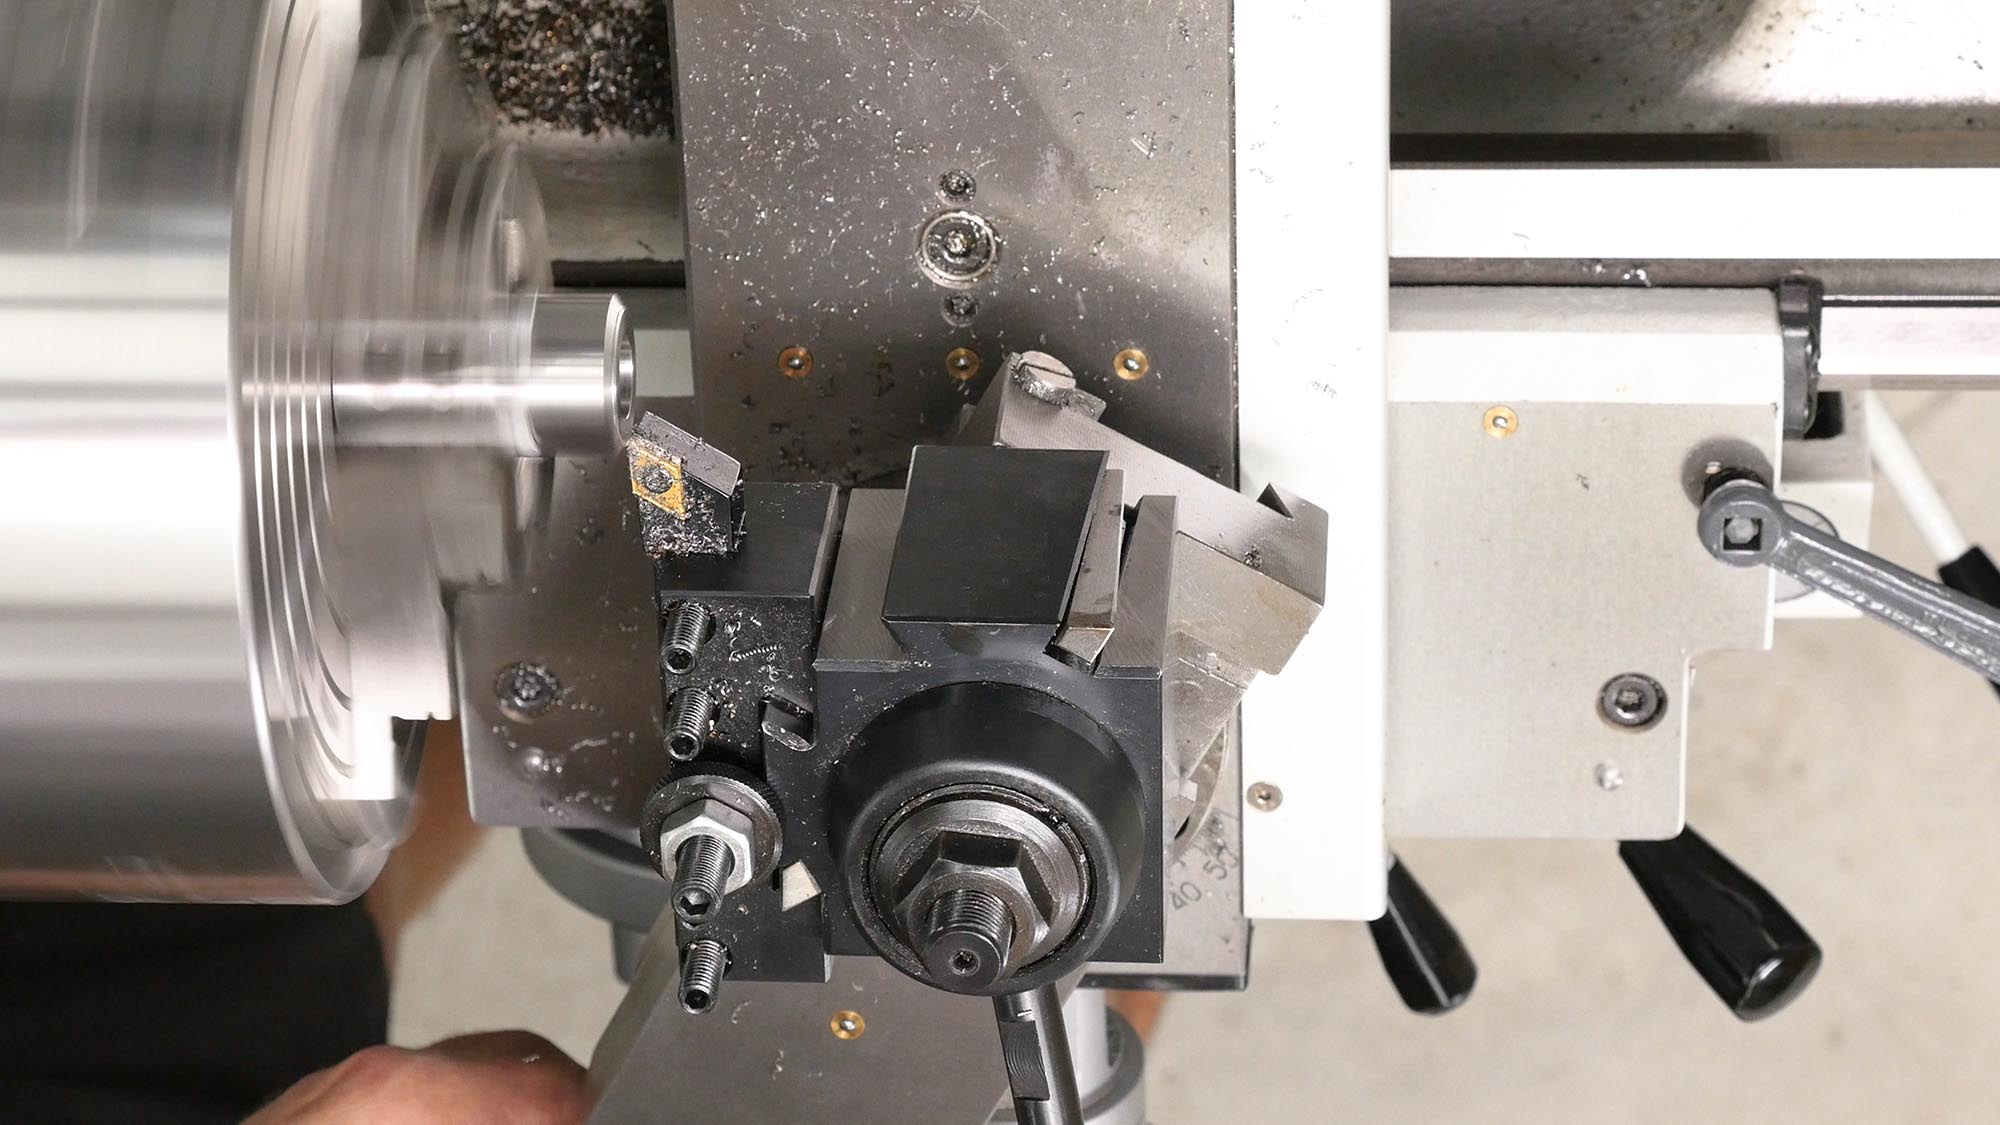
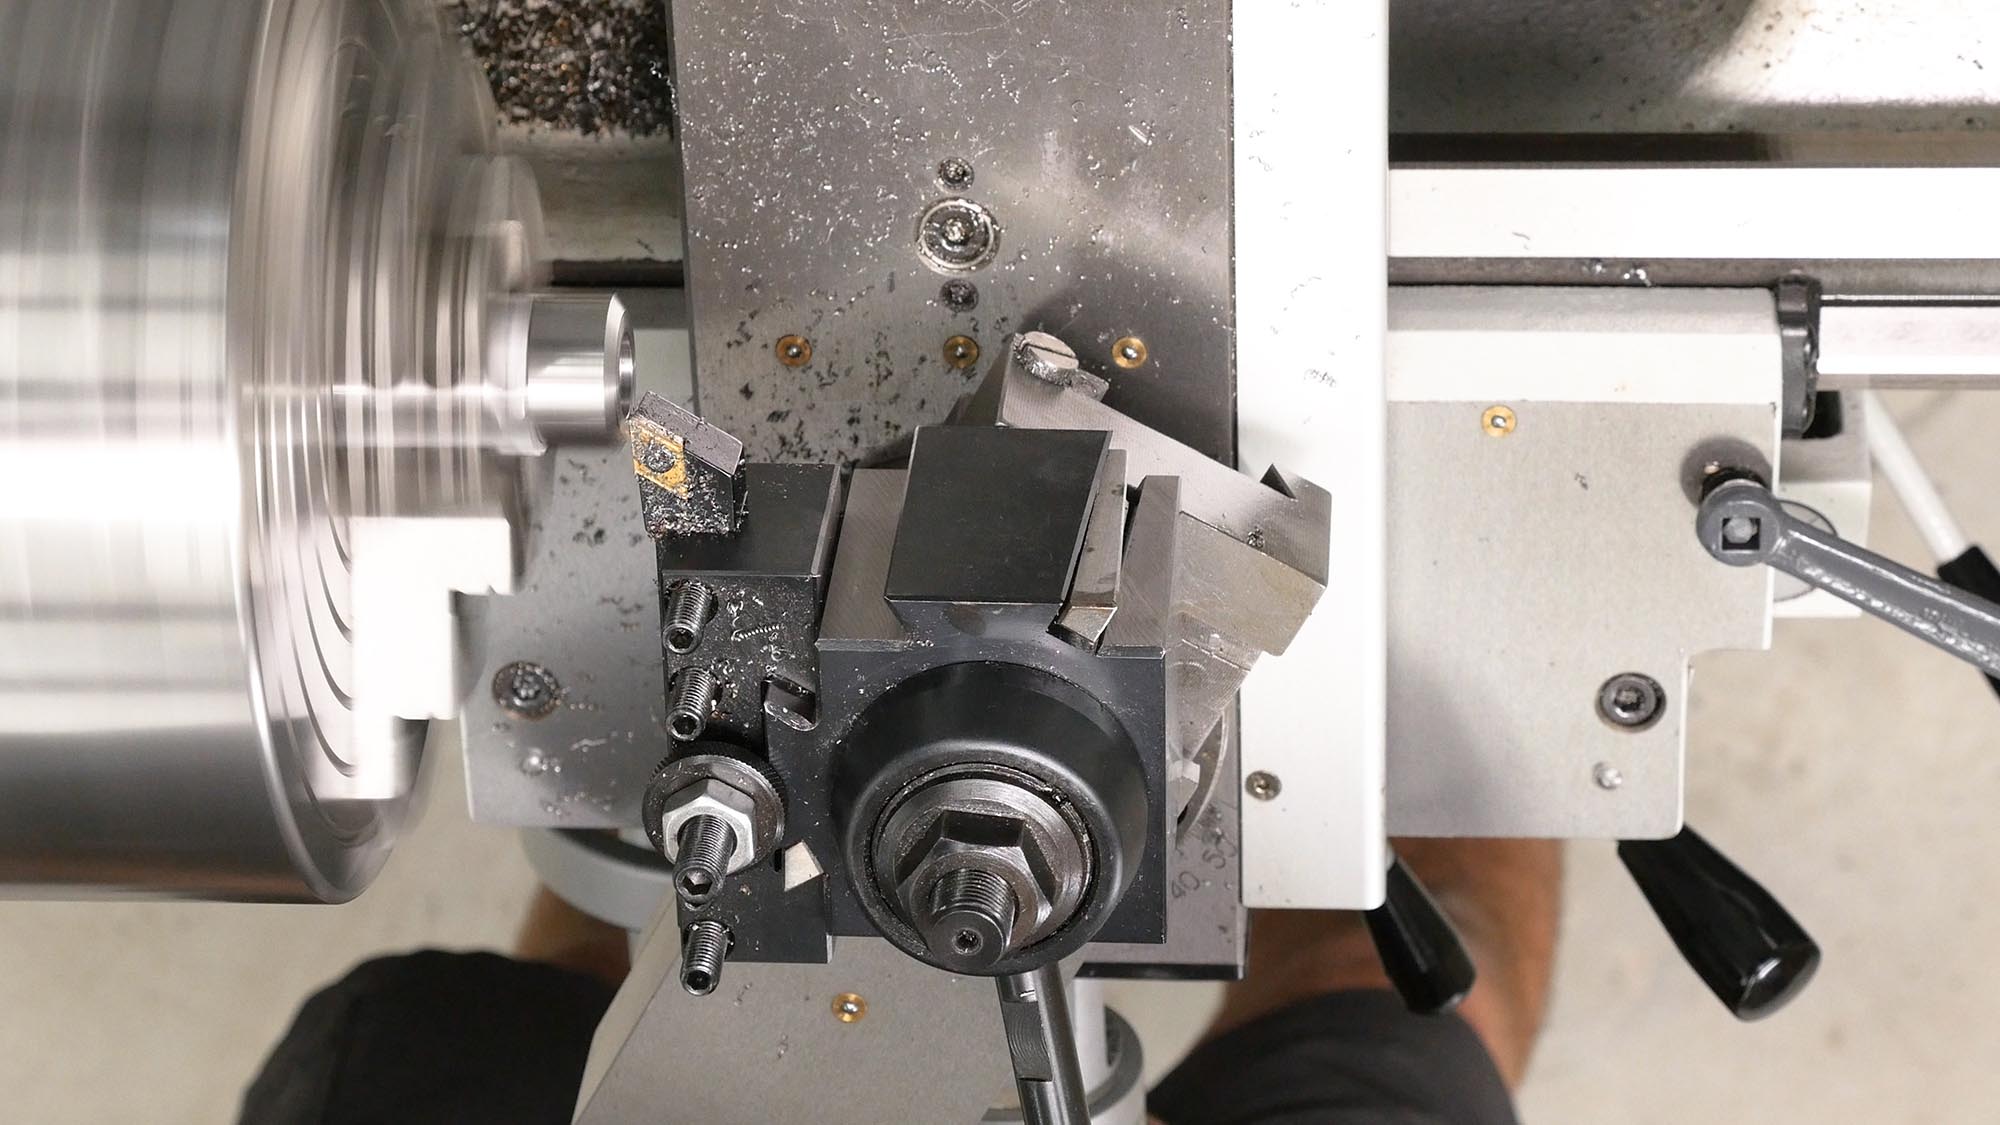
Ideally, the bore in your muzzle brake will have a diameter of [bullet diameter] + 0.020″. So for 300 PRC this is 0.308″ + 0.020″ = 0.328″. Benchmark brakes come with the bore undersize, so the first order of business is opening up the bore. I’ve fabricated a 5/8″ x 24 TPI “mandrel” that I can chuck up on my lathe with a collet, and this makes things real easy!
Here, I’m using this mandrel to turn the brake, and am opening up the bore using a small solid carbide boring bar that is *just long enough* to reach the surfaces to be bored. This optimizes rigidity.
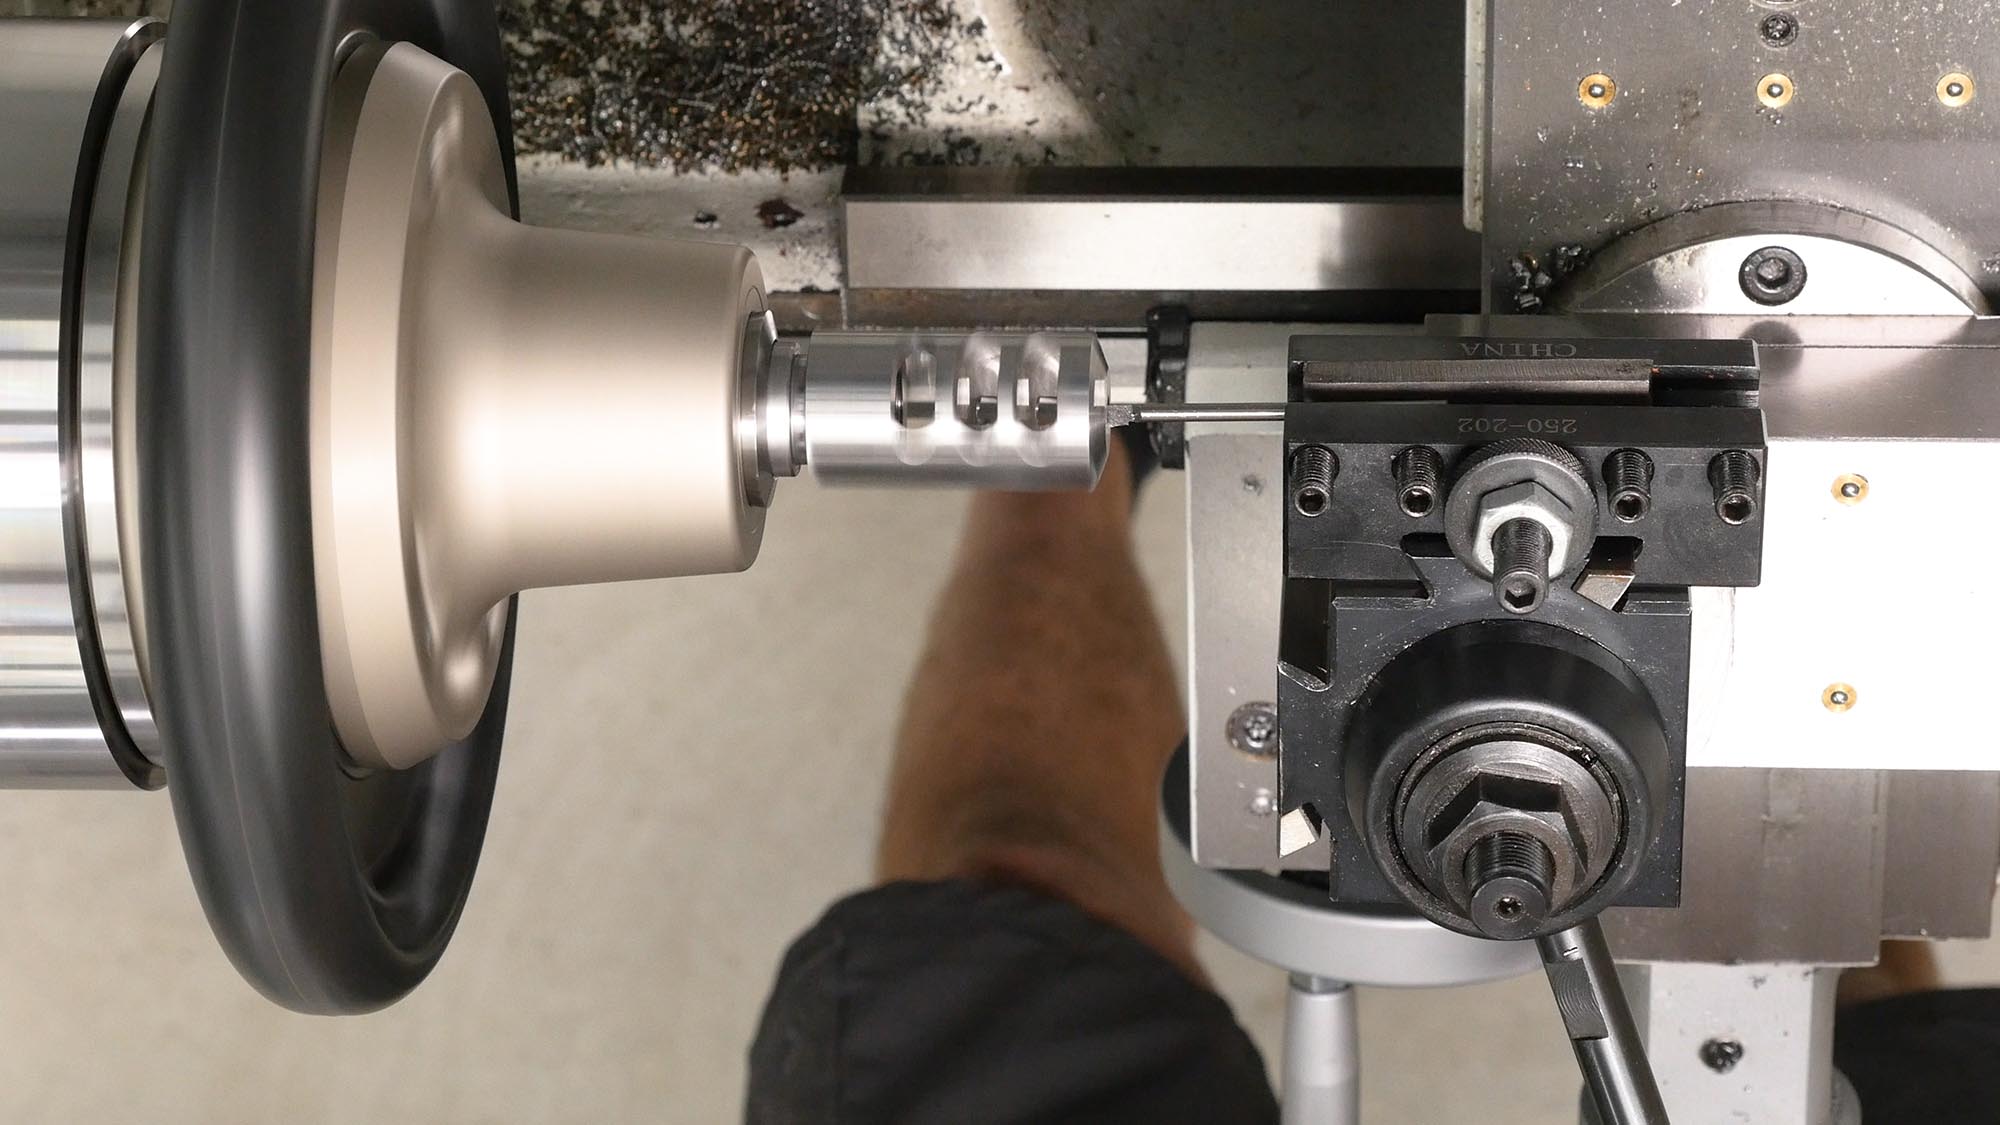
Still, with a thin boring bar you have to take “light passes”. Once the bore is opened up and the outer edge is chamfered, it’s time to test fit the brake, and measure the material removal for clocking the brake.
Profiling and Clocking the Brake
As shipped, the back of the brake is profiled to a 90° angle. You’ll likely want to turn this down at a 45° or 30° angle. I chose 30°! For this operation and the clocking cuts, the brake has to be held with a 4-jaw chuck, or with a special fixture. I used my 4-jaw chuck, and carefully dialed in the brake to about 0.0005″ TIR. I profiled the back of the brake so that I had a flat (mating surface for barrel shoulder) about 0.020″ larger in diameter compared to the threaded muzzle shoulder.
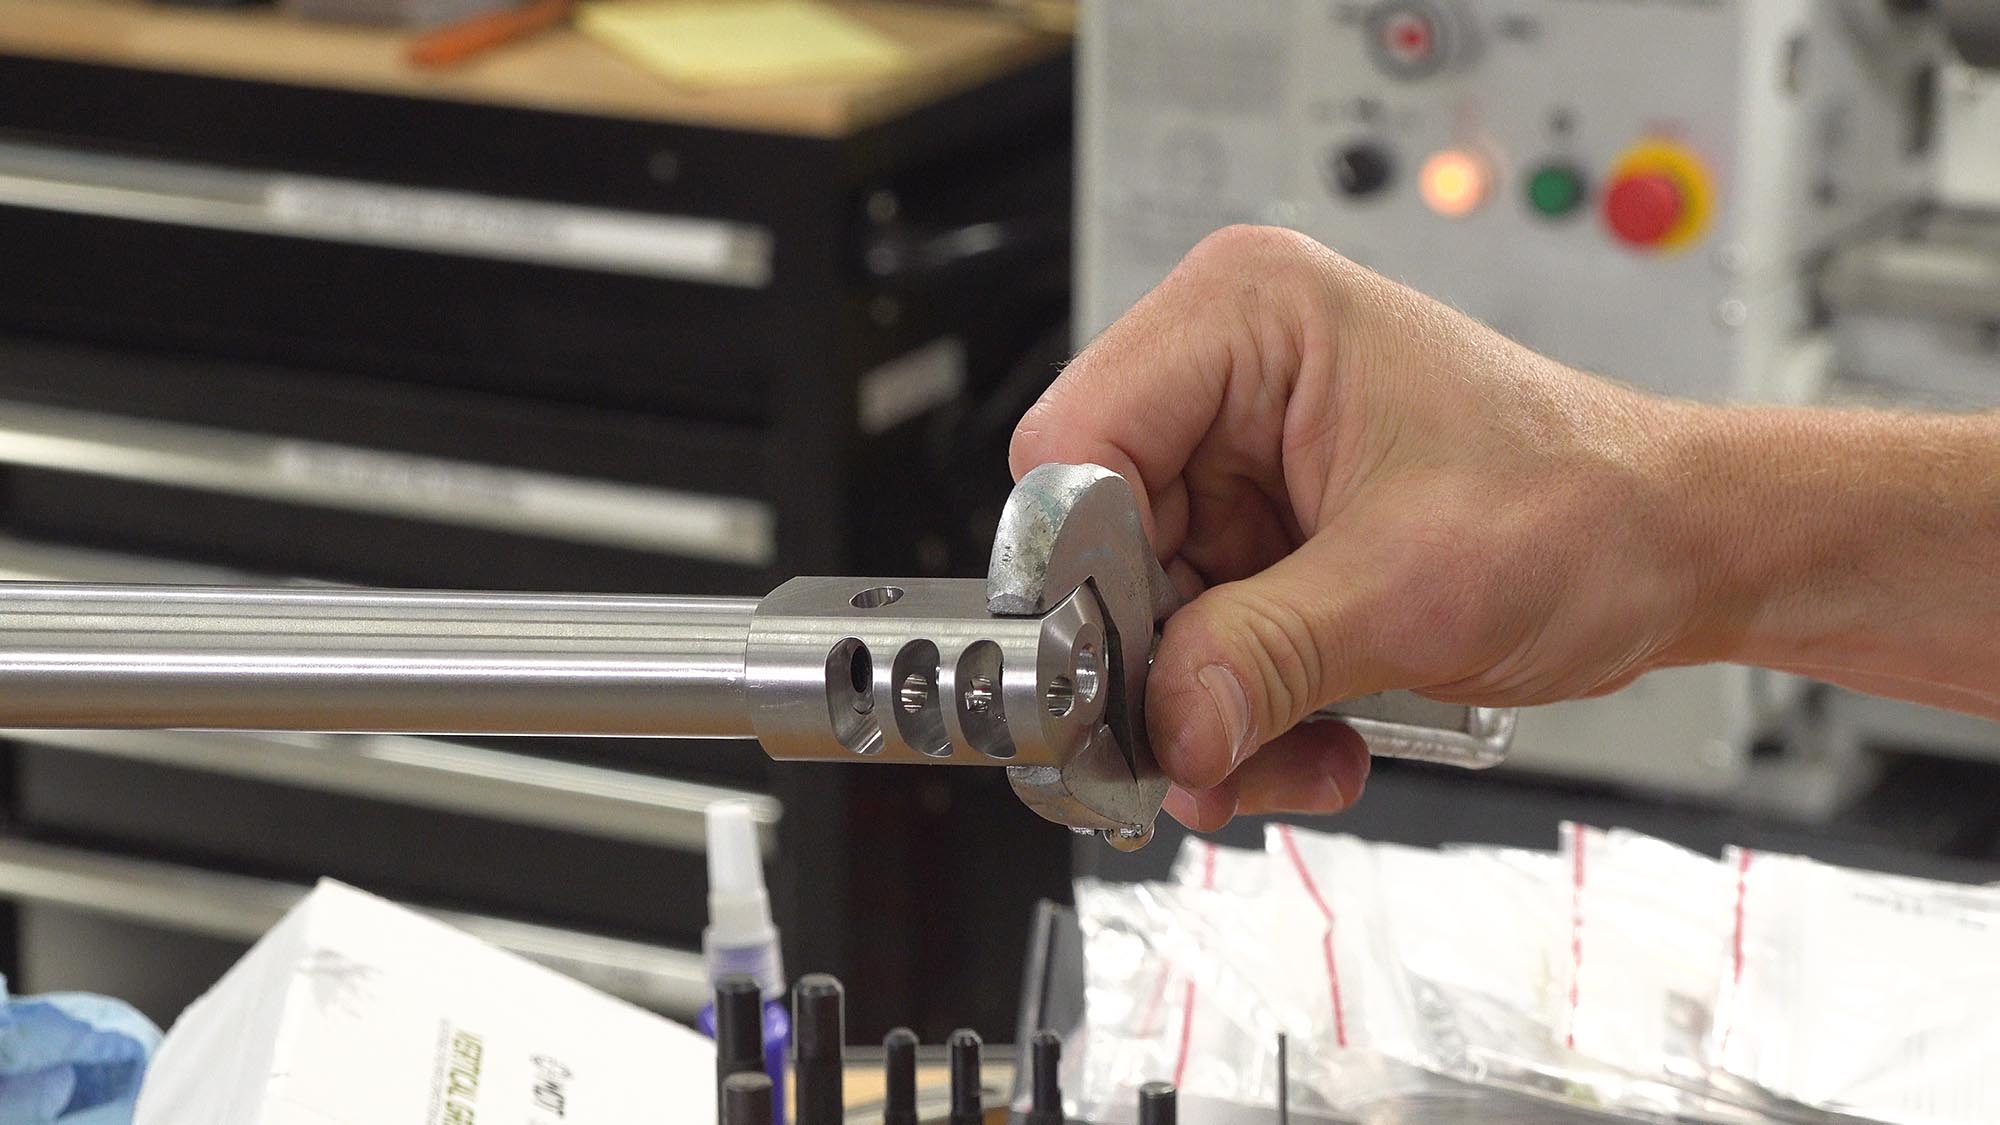
Before I chucked up the brake in the lathe, I took careful measurement of how far the brake needed to “swing” to bring it into perfect timing:

For this measurement, I used a large protractor with swinging arm. The brake needed to be threaded onto the muzzle an additional 55° in order to be perfectly timed. Time for some math!

There’s a simple formula to calculate the material removal for the face of the brake:
(rotations) X (thread pitch) = material to remove.
In this case:
0.15277 rotations X 0.042″ = 0.0064″.
Hypothetically, taking 0.0064″ off the face of the brake would result in perfect alignment. Experience has taught me to be conservative: planning for 2-3 cuts total to “work my way” up to the exact profile needed. The goal is a muzzle brake that can be installed with minimal torque (10 ft-lb or less) with a wrench- with the assembled rifle sitting in the stock. It’s very important to keep torque values to a minimum so that we don’t tweak anything. And that’s why I have a lathe!
So I proceeded to take a first cut at ~80% of the calculated material removal:
After this cut, the brake was removed from the lathe and test-fit on the rifle:
I repeated the process until I had the perfect alignment with perfect (light) torque required to install the brake. It takes a lot of patience, but it’s worth it! A perfect install job, and now I can swap my brake for a suppressor in the field with minimal trouble. That’s awesome!
Here’s me looking intense talking about this awesome rifle, I LOVE IT!

We are so close to shooting this rifle! Just needs an optic now. Don’t miss out on Ultimate Reloader updates, make sure you’re subscribed!
Thanks,
Gavin


I like the “clocking” process, learned a trick there. The one question I do have, why did you choose a boring bar to open the hole in the brake? Would a drill/reamer combo been more accurate, less flexing?