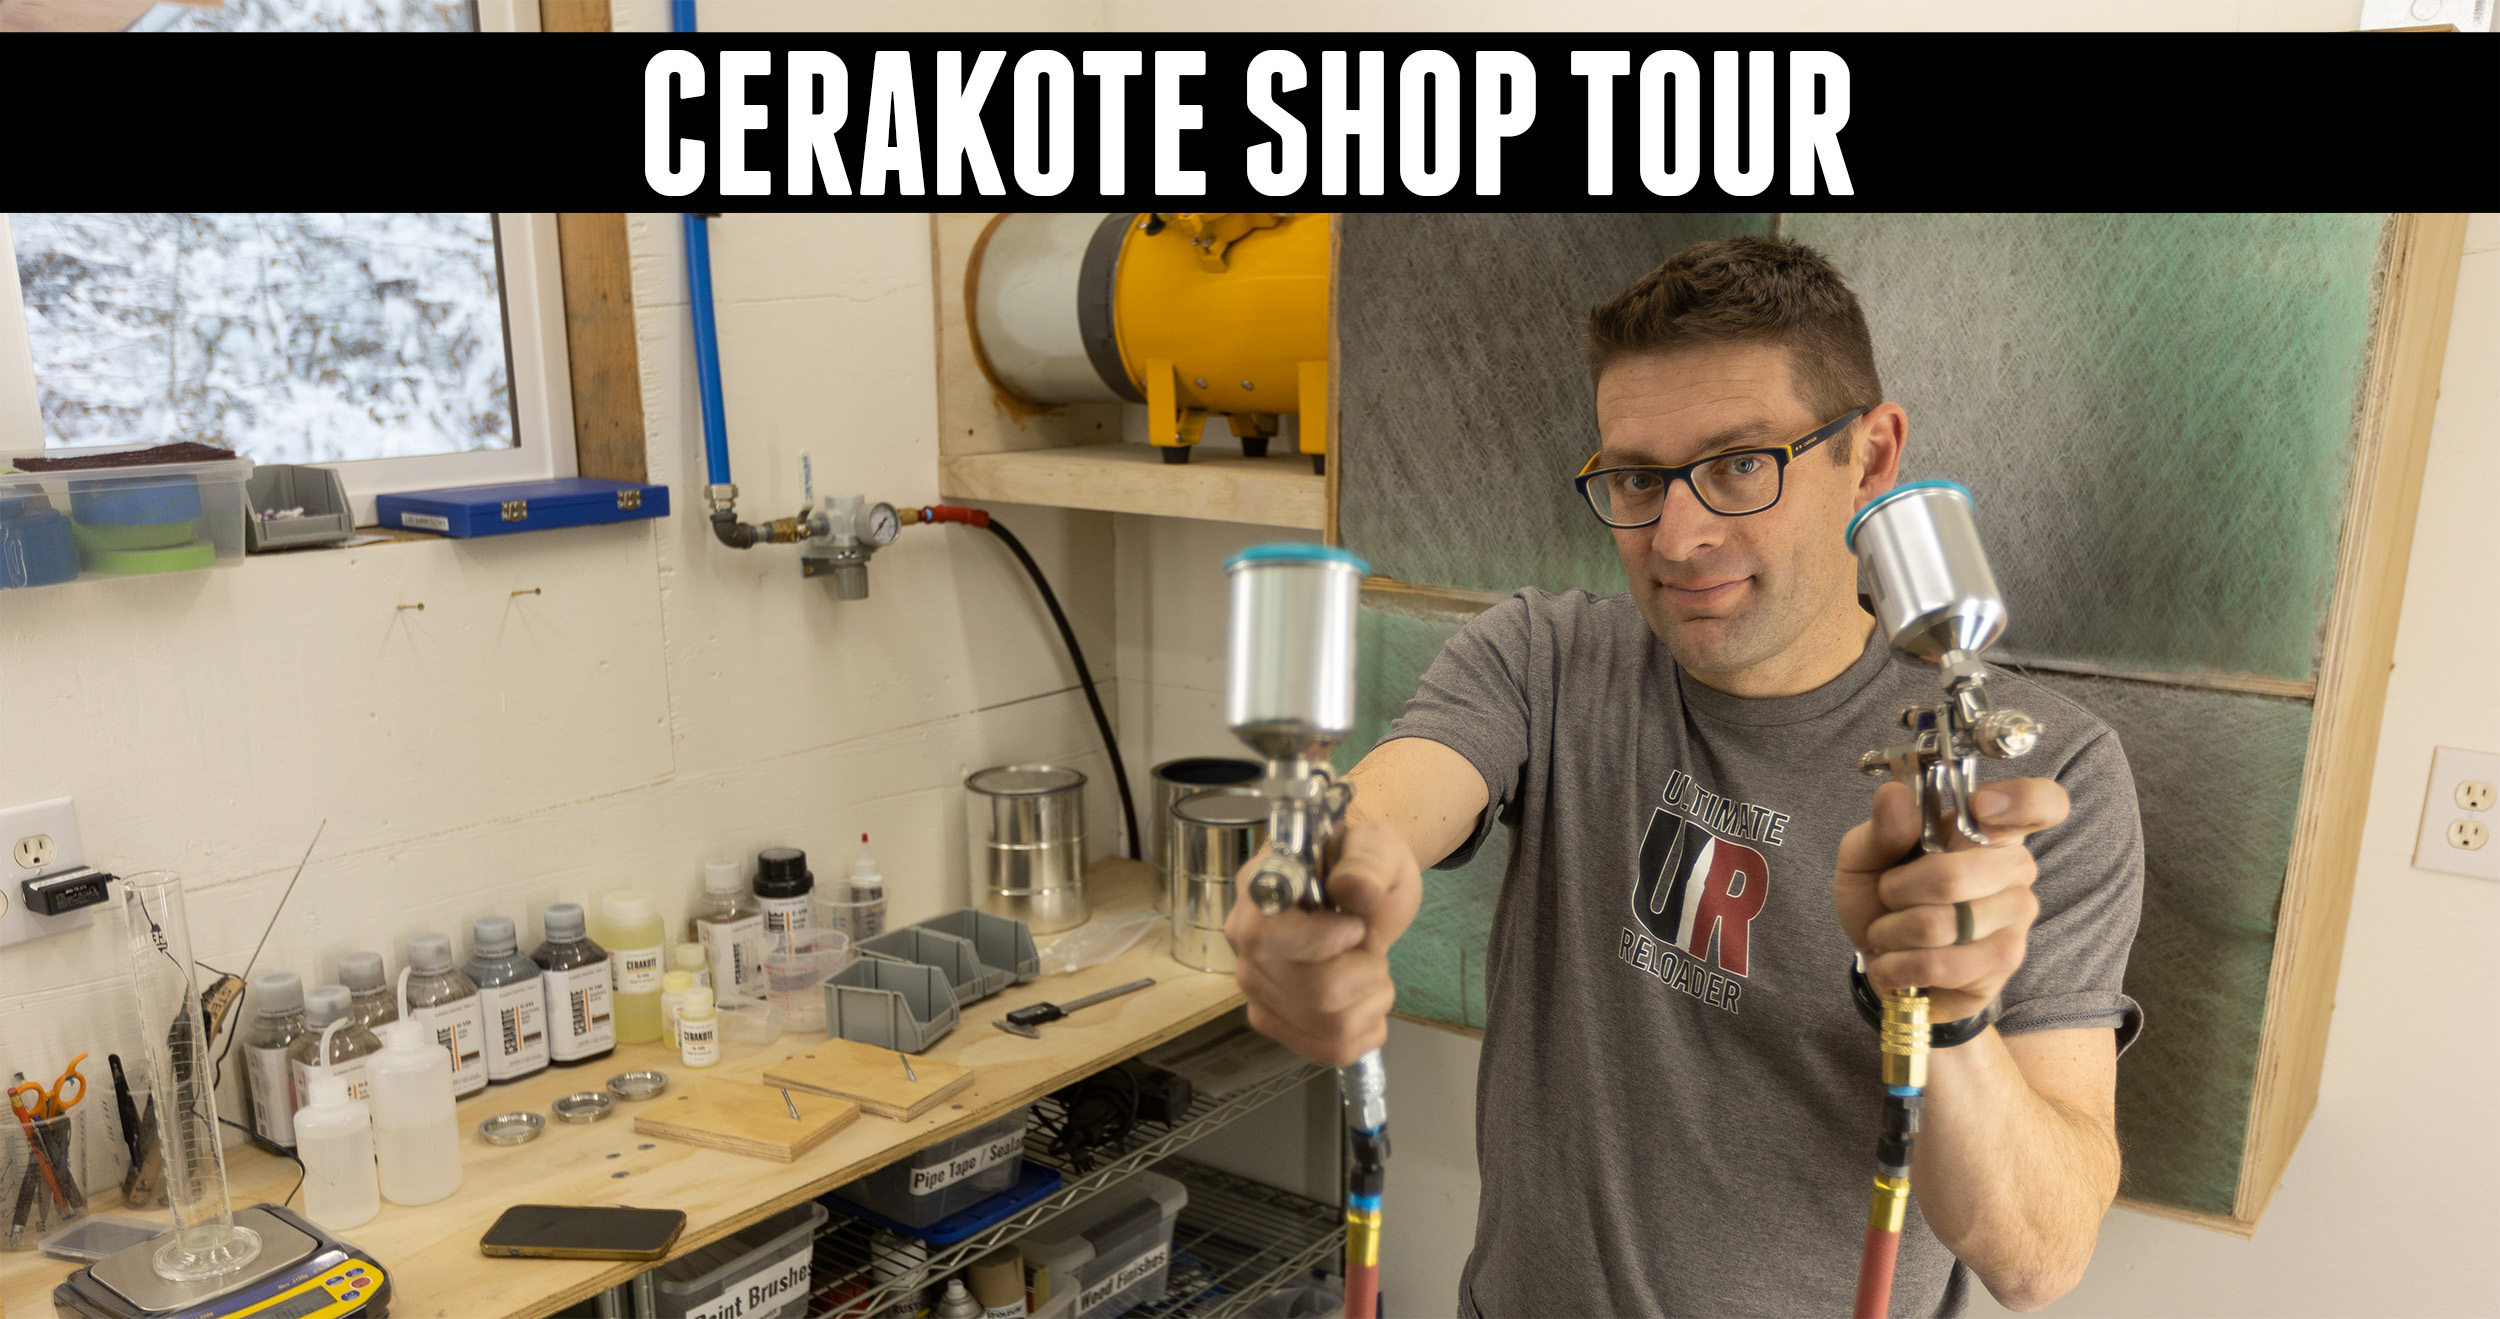
Following my official Cerakote training, I built a Cerakote shop here at the Ultimate Reloader Ranch. Today, we’re giving a tour!
Disclaimer
Ultimate Reloader LLC / Making with Metal Disclaimer: (by reading this article and/or watching video content you accept these terms). The content on this website (including videos, articles, ammunition reloading data, technical articles, gunsmithing and other information) is for demonstration purposes only. Do not attempt any of the processes or procedures shown or described on this website. All gunsmithing procedures should be carried out by a qualified and licensed gunsmith at their own risk. Do not attempt to repair or modify any firearms based on information on this website. Ultimate Reloader, LLC and Making With Metal can not be held liable for property or personal damage due to viewers/readers of this website performing activities, procedures, techniques, or practices described in whole or part on this website. By accepting these terms, you agree that you alone are solely responsible for your own safety and property as it pertains to activities, procedures, techniques, or practices described in whole or part on this website.
Cerakote Success
Since going to the training at Cerakote headquarters, I’ve completed my shop, and some awesome projects! Here’s a few pictures of some Cerakote work I’ve completed:
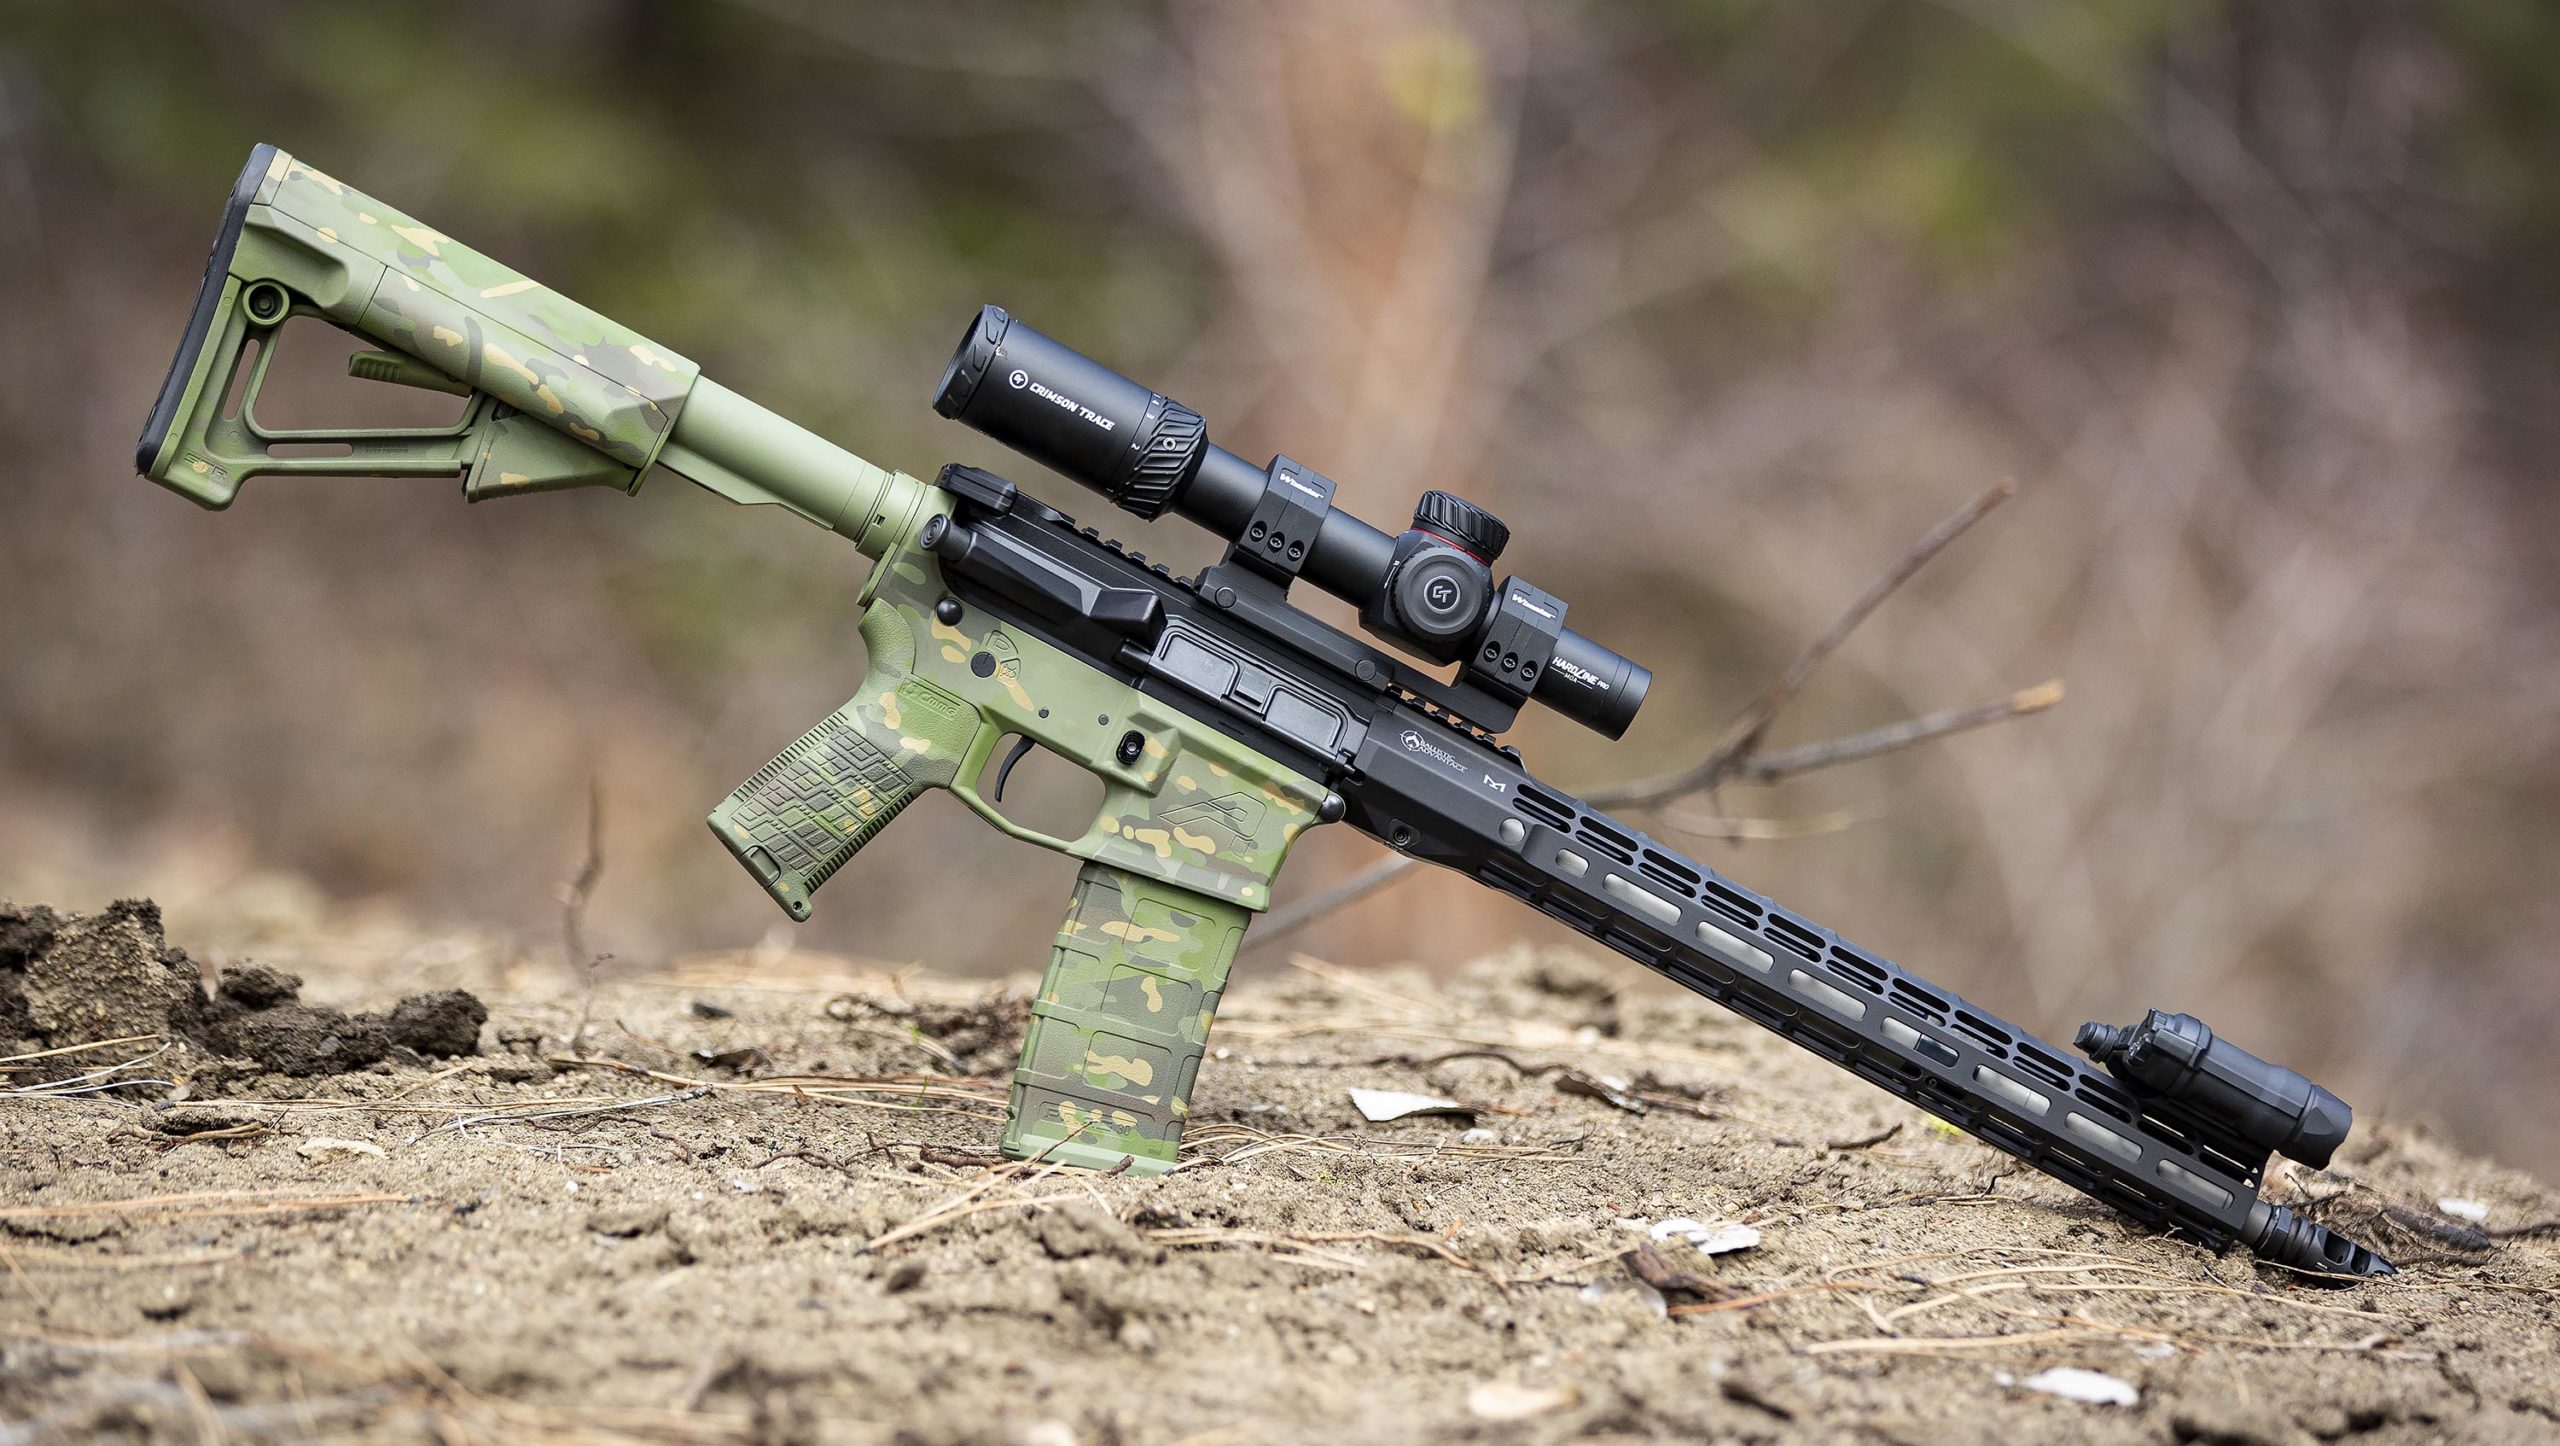
Cerakote Training Project: AR-15 Multicam lower:
Graphite black barrel for 224 Valkyrie custom rifle build:
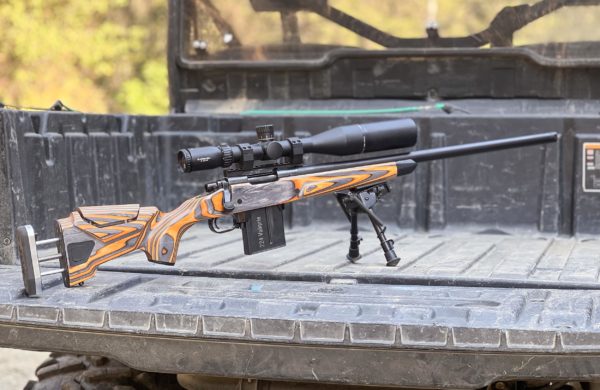
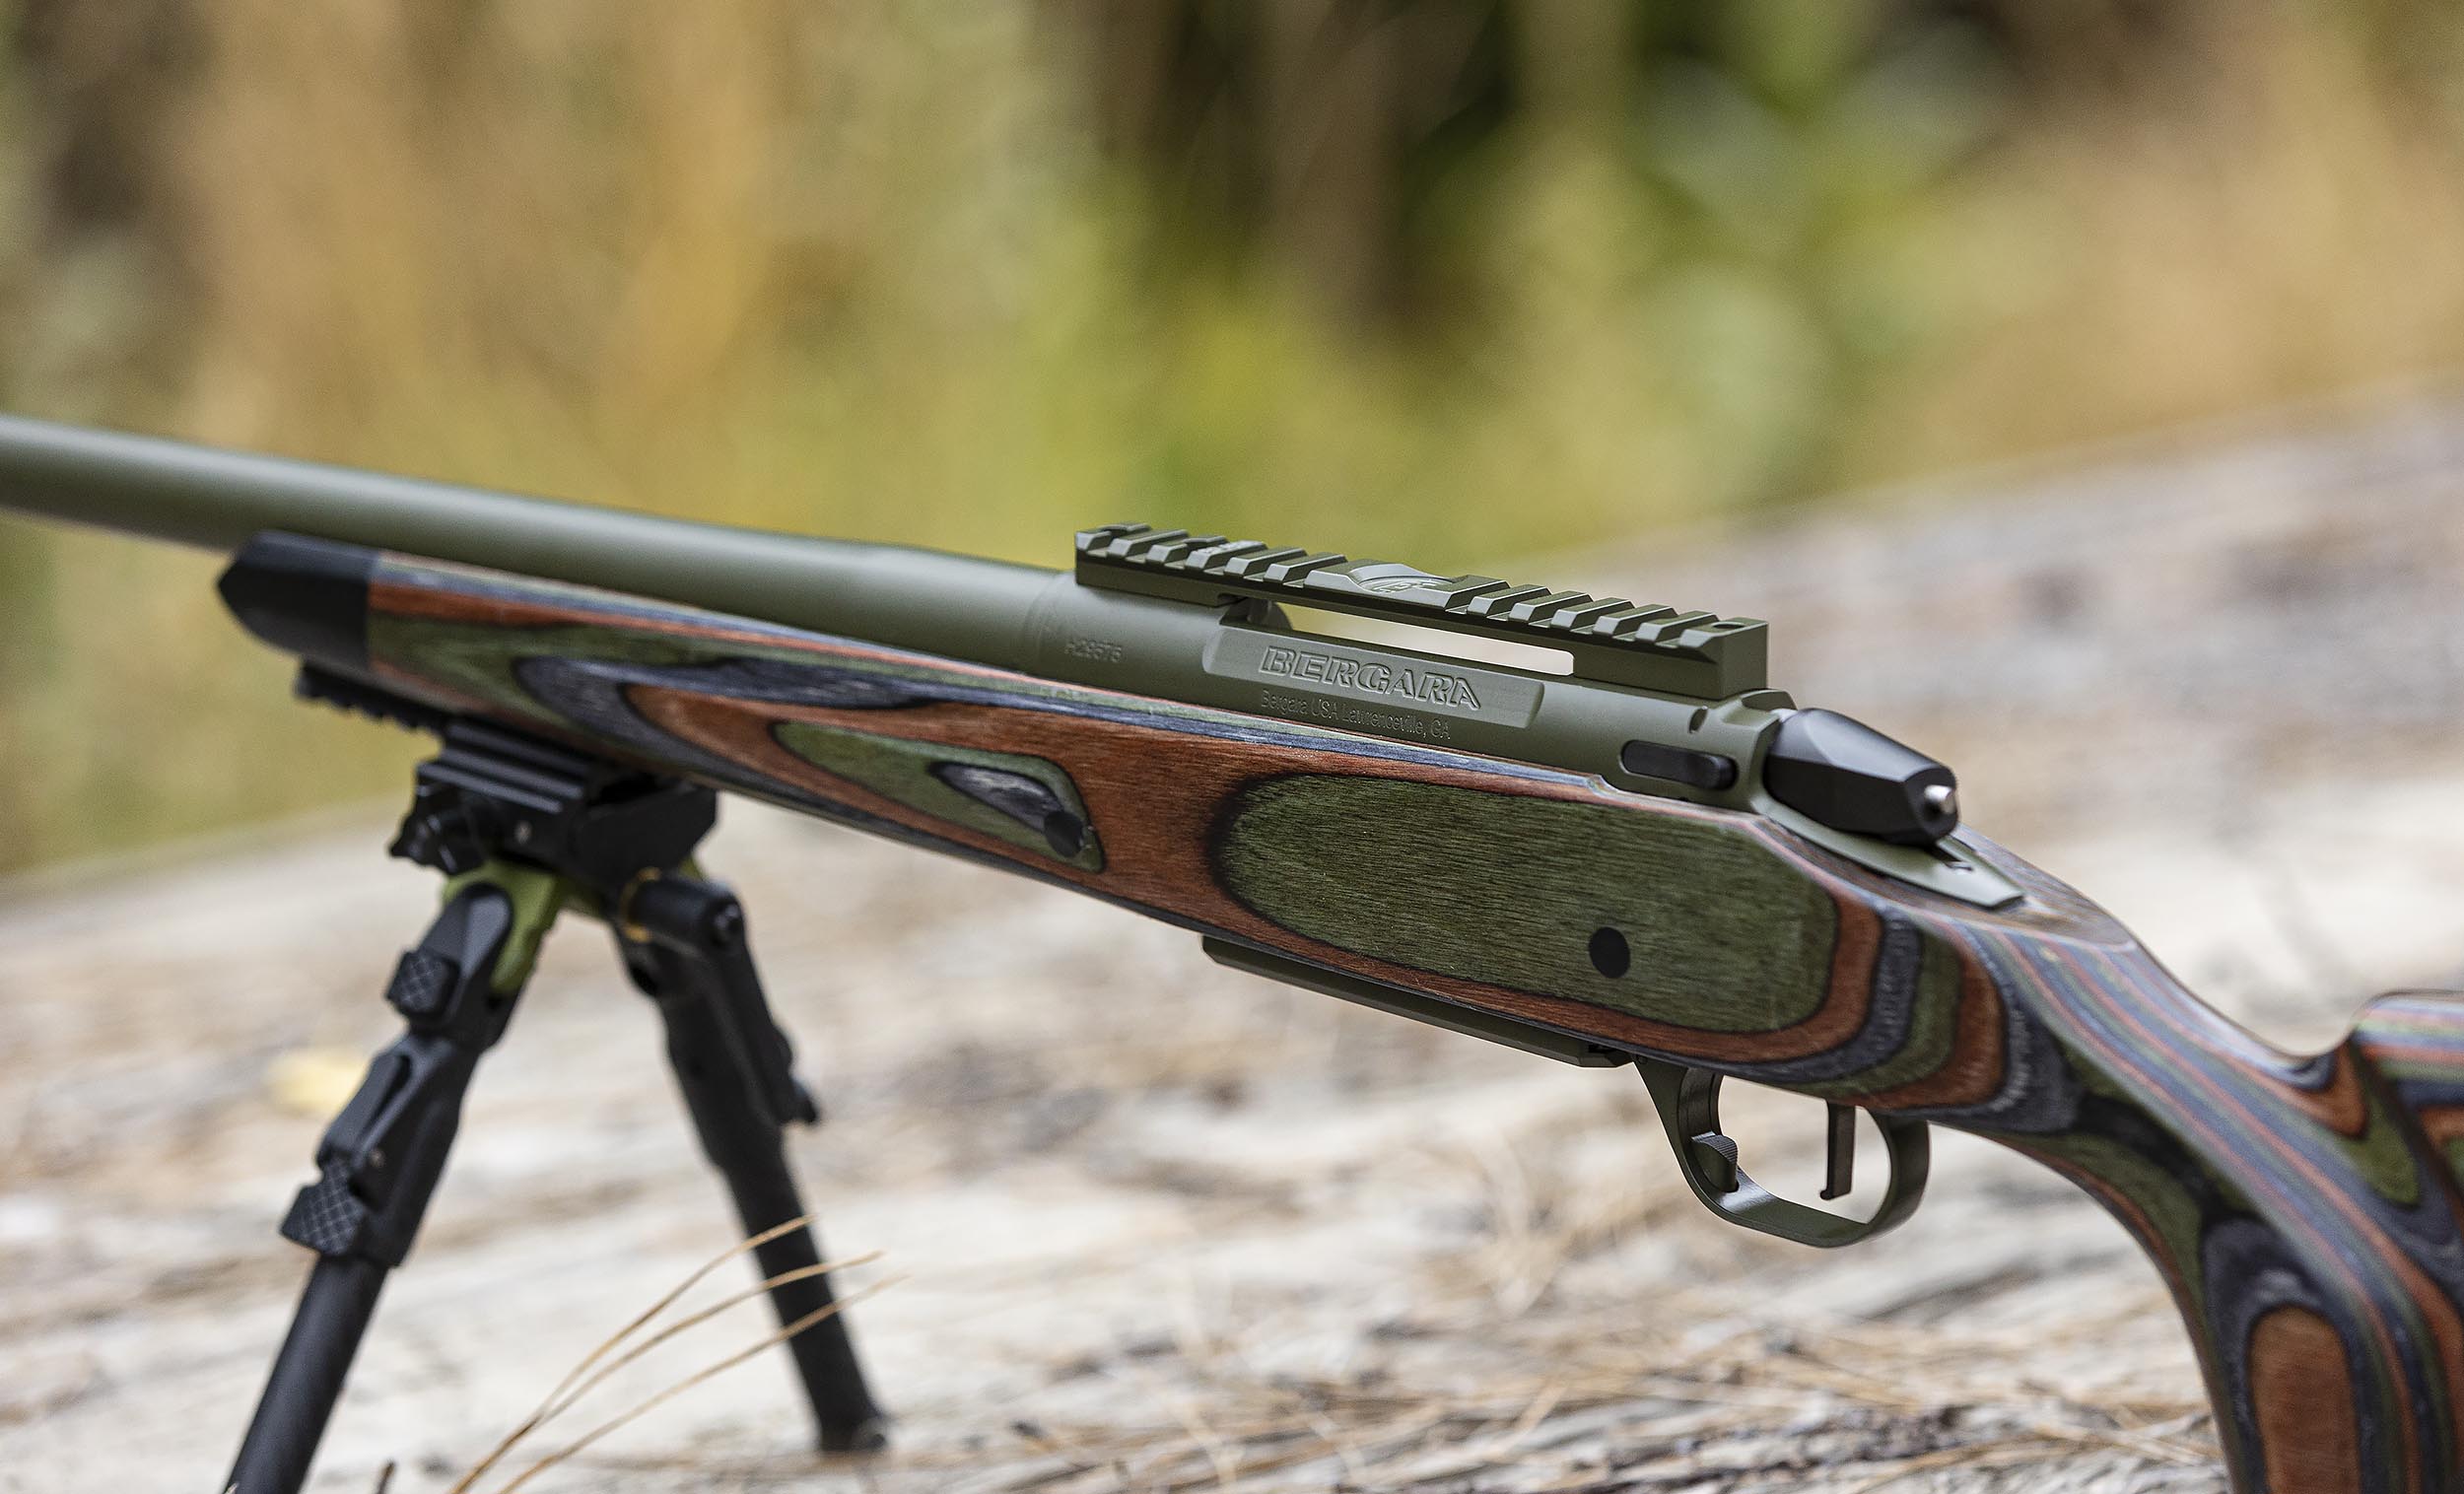
Bergara full-custom 7mm PRC Build: (OD Green)
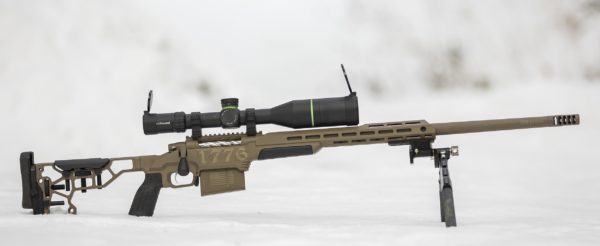
Bat HR / MDT ESS 7mm PRC Full Custom Build with FDE Cerakote and Laser Imaging:

It has been VERY rewarding to do this level of Cerakote work, and I’m just getting started! No on to the shop tour.
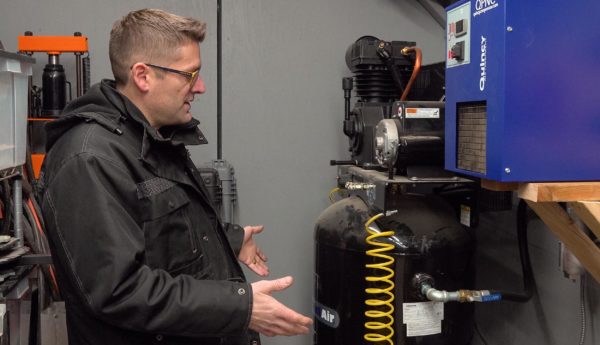
Air Compressor Station
I’ve been working on my Cerakote booth for some time. I wanted a professional setup, but something affordable that wouldn’t take up tons of space.
Starting out the process is the air compressor station. I have an 80 gallon Industrial Air compressor. It isn’t a high dollar compressor but it has high CFM and works well. It is incredibly loud though. It has a five horsepower motor, 175 max PSI and 17.9 CFM at 100 psi and 17.0 CFM at 175 psi.
Check it out my compressor on Amazon HERE.
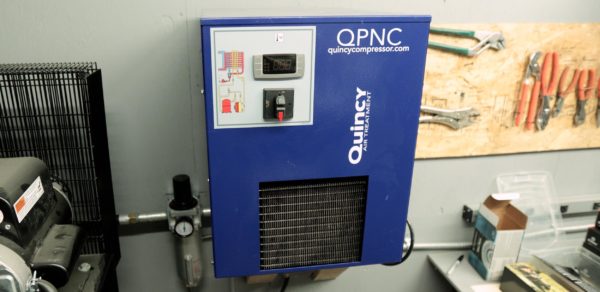
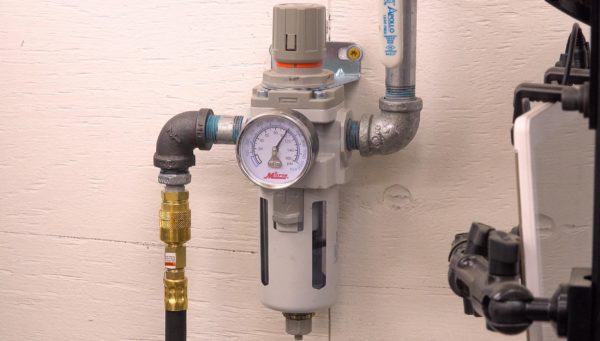
My primary concern was sandblasting. Sandblasting requires a high volume of air (lots of CFM) and I wanted to ensure I had a compressor that could keep up. Coming out of the compressor, I have a pre-filter and primary regulator before entering the air dryer.
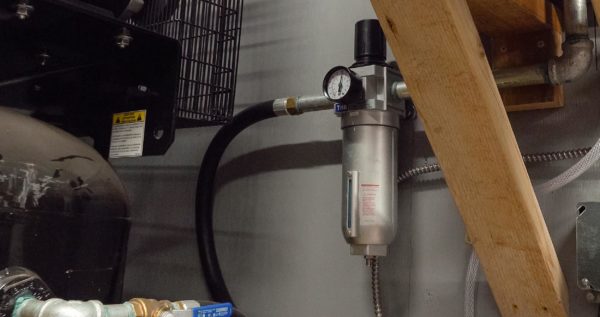
I looked at many solutions including the Harbor Freight air dryer that many Cerakote applicators have had good luck with. I decided on the Quincy unit. It’s made in Italy and has great reviews. So far, it has worked very well.
See: Quincy Refrigerated Air Dryer — Non-Cycling, 30 CFM, 115 Volt, Single Phase, Model# QPNC-30
Power Station
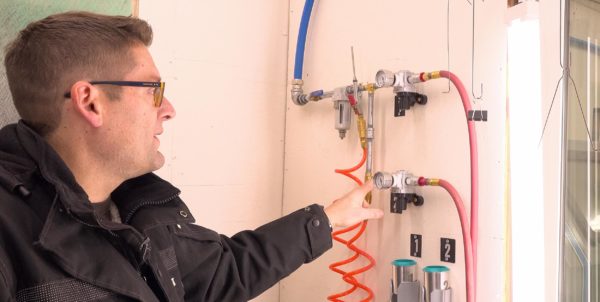
The power station is in the main shop area — very easily accessed. There is a breaker-style main power switch for the compressor with an air ball valve above.
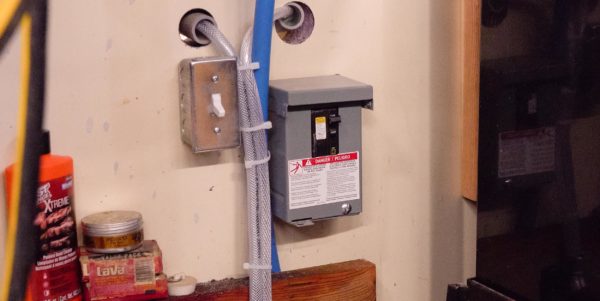
You can also see here my compressor drain line, and the drain line (automatic) from the air dryer.
I’m using max line ¾” throughout the entire shop. Max line is affordable and super easy to work with.
I bought the Maxline 3/4″ kit as pictured here, and some extra fittings:
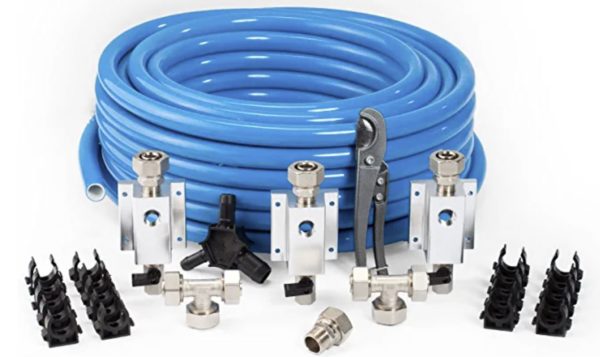
You can cut it to length with the included lopper tool. There’s a chamfer tool. The fittings use compression and O-rings. It’s also mesh reinforced!
The air dryer can also be accessed via a switch in this area. After turning them all on, it’s time to head to the sandblasting station for prep.
Sandblasting
The SKAT Blast 960 DLX has 46” x 28” x 28” of working space.
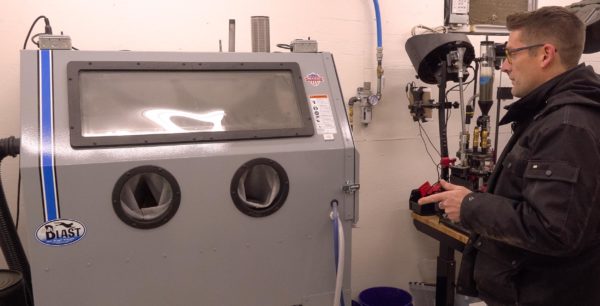
I made a few upgrades to this machine. I added LED lights — simple flood lamps I got at Home Depot.
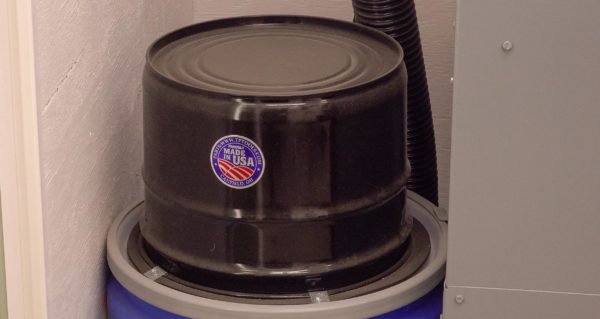
I also added a metering valve. This unit costs a bit over $2,000 as equipped (with freight), so it’s a big investment. From the research I conducted and Facebook threads I read, people either went with the SKAT Blast or the Harbor Freight unit with a ton of upgrades. I wanted a quality machine that would last a decade and allow me to be productive. I really like that this machine has an included dust collection.
I also upgraded this machine by welding a tray and adding castor wheels to it so I can move the entire unit around if needed.
Feeding into the sandblaster is regulated air with another filter, just like near the compressor.
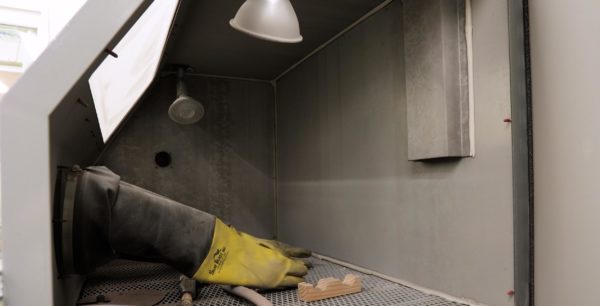
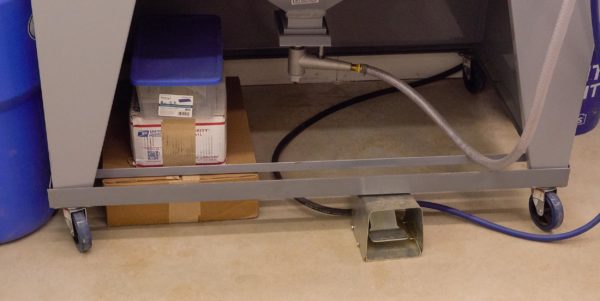
Next is to turn on the power and add a part. There is a single latch on the front right side to secure the unit and integrated gloves to manipulate the part and blaster while pressing on the foot pedal. Also in the unit is a rack for supporting rifle barrels.
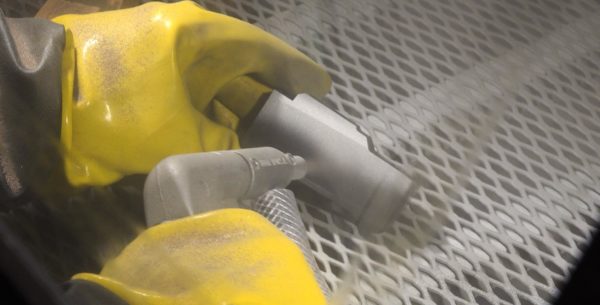
Be careful not to touch the part with your bare hands when removing it if it’s intended for cerakote. The pressure regulator next to the machine allows for quick and easy adjustments. If I’m blasting polymer pieces, I will be approximately 45 psi. If I’m doing stainless steel barrels or other metal parts, I’ll use 90 psi. Sandblasting is especially fun. This is the machine I fire up when friends or family members come around.
The Booth
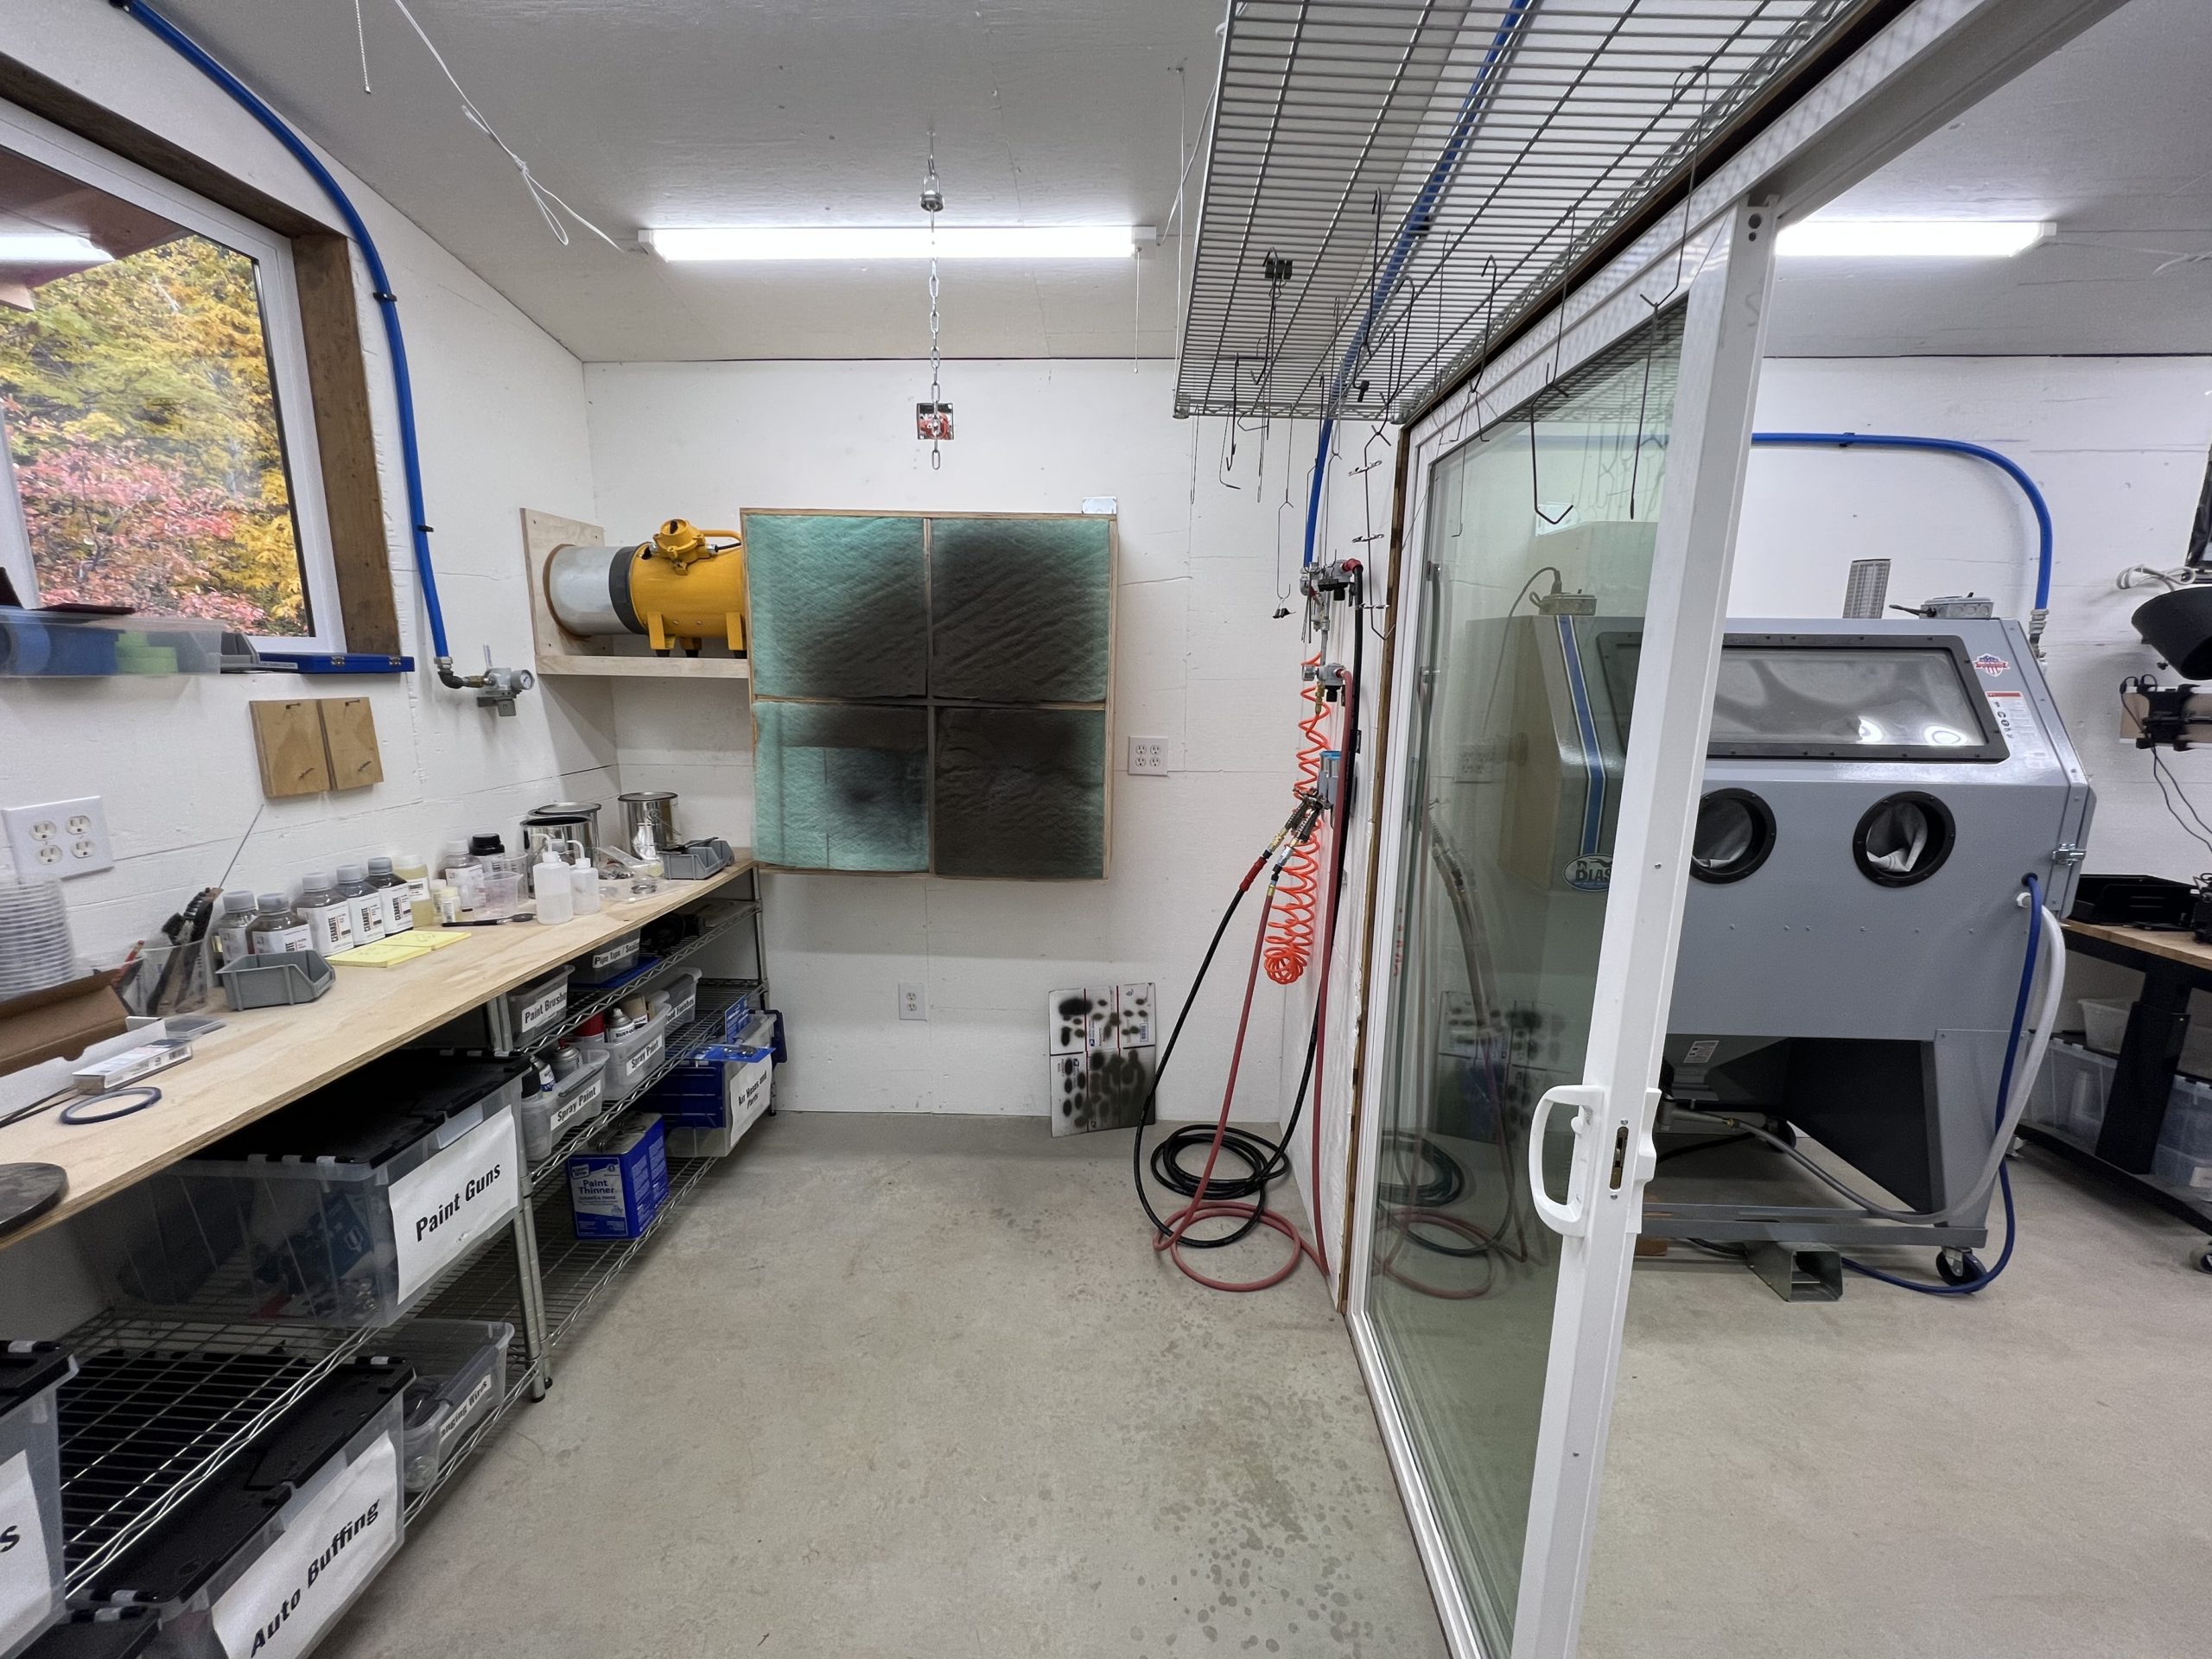
The booth itself is not very big. It is approximately 8’ x 10’.
When I built it I envisioned pre-filtered air at the top and the ability to close both patio sliders to seal off the entire booth in terms of air flow. When I start up my exhaust system with the slider doors shut, all air comes through the pre filters to prevent excessive dust.
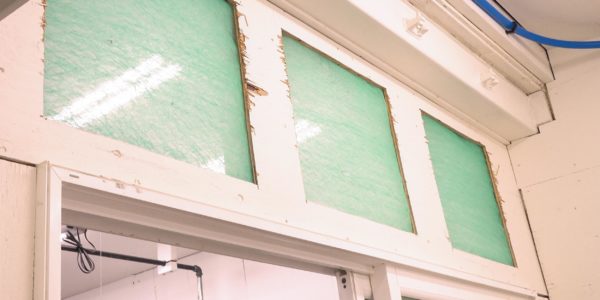
The plenum box for the filters was a DIY project. I wanted to avoid DIY where possible and save on time, but this was an area that required it. I built the plywood box, attached it to the wall and ensured an outlet for the fan was nearby.
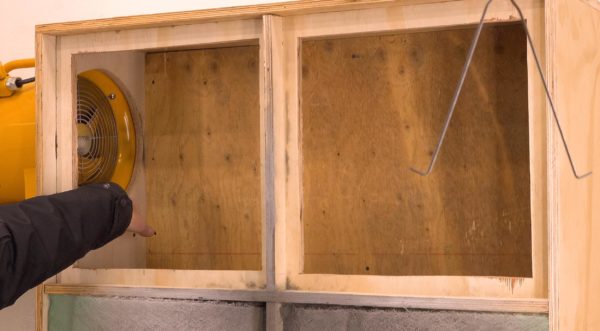
I also made spots for the filters to fit in. This system works and costs several hundred compared to the thousands of dollars an off the shelf solution costs.
Many on the internet will tell you a simple bathroom fan is good enough, but I don’t believe that is true. I bought an explosion-proof fan from Amazon that cycles 2400 cubic feet per minute, see:
This air flow is right where I need to be — preventing me from smelling the fumes.
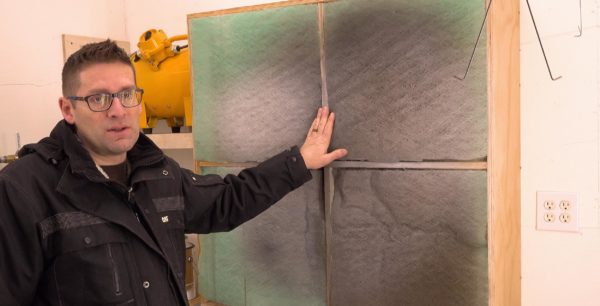
The 20” x 20” filters are the same ones I’m using for the pre-filters. I just add more when they get clogged.
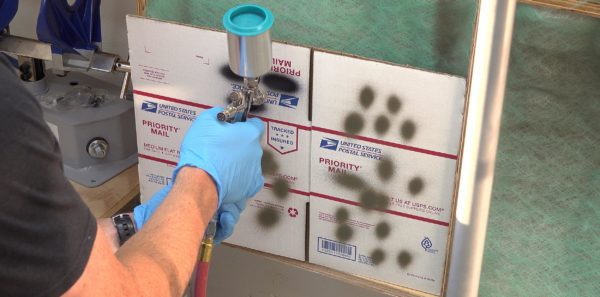
Also in this area is my test palette. Currently this is just a piece of paper on cardboard. When I start the fan, it sucks the paper/cardboard against the filters. It holds itself in place, so I don’t need a separate easel, support, or tripod in the room, which saves space! All the Cerakote overspray goes directly into the filters.
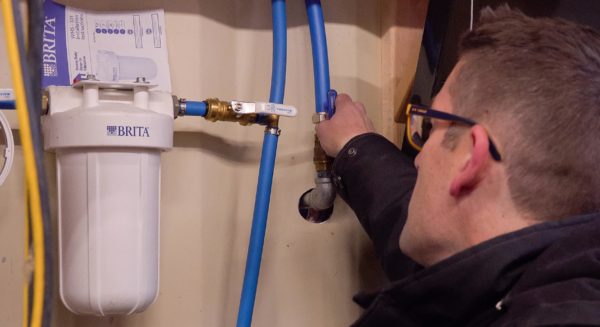
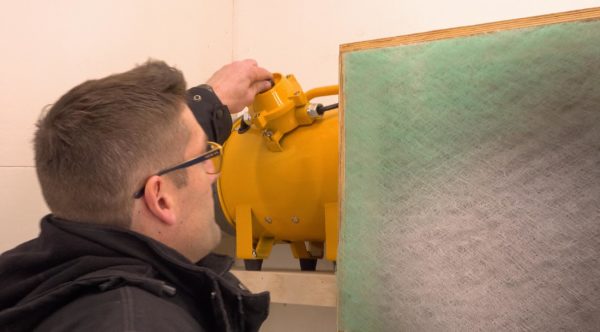
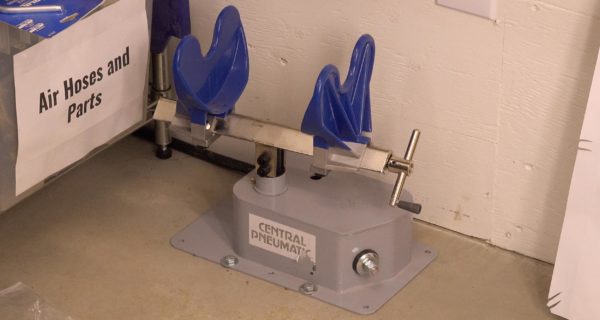
The max line of air runs into the room and into the Harbor Freight paint shaker mounted to the floor. I wasn’t sure about it at first, but Cerakote uses it at their facility as do many other professional Cerakote shops. I didn’t want the paint shaker to disturb the walls or anything else, so mounting it to the floor was a good option. It fits right under the plenum box as well.
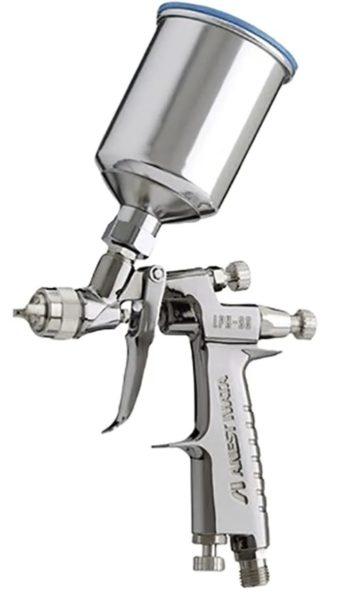
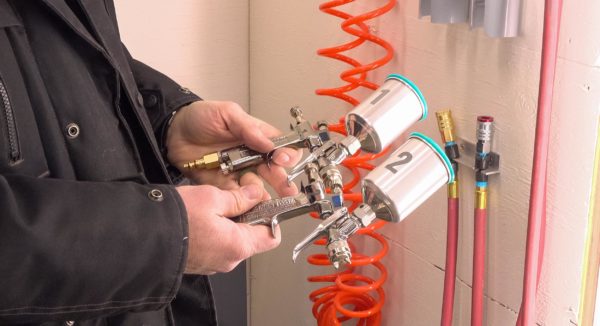
I use the Cerakote-Recommended IWATA LPH-80 HVLP spray guns with 0.8mm tips. These guns are top quality, and you know they will work perfectly with Cerakote! Don’t cheap-out here.
A second max line leads to a ball valve which can cut off air to the paint guns and to the full pressure air blowing outlet. All the guns have quick attach tooling. I also have two different regulators for two different guns I’ve labeled as such. A wall chart opposite the gun racks serves as a reminder for one turn out on the fan and two turnouts on the fluid.
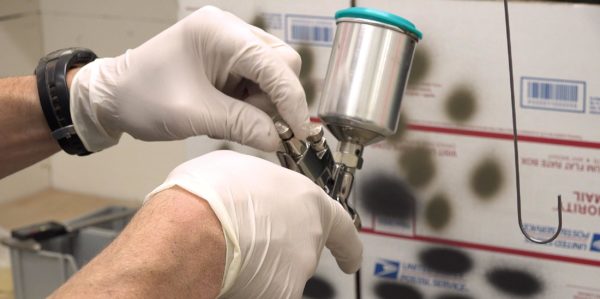
I’ve experimented with adjusting the air screw and it’s easy to accidentally move. Every time I do a coat of Cerakote, I do a confirmation on the test board just to be sure. The wall rack pieces holding the guns are 2” couplers for PVC conduit. I cut a slot in each and screwed them into the wall.
There is a bit of investment in time and money in the pipes, adapters, and valves to feed everything properly. Also, nothing leaks! If you don’t want your air plumbing to leak, use really good pipe dope (teflon paste or similar) and really good teflon tape. I used Mega tape with the dope (super glue in my case). On the bench I have homemade gun stands. Cerakote sells much nicer ones out of billet aluminum. The gun’s air coupler fits over the peg and the gun stands upright. You can disassemble the gun from this position. It’s also easy to use when adding the Cerakote to the gun. I also have two screws on the wall to hang the stands to economize space.
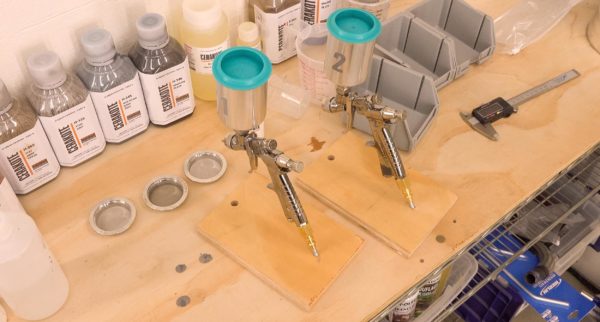
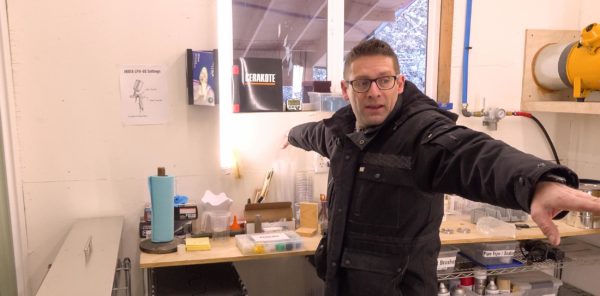
The benchtop is my working area. I can fit a rifle there if I need. I have a stand for my phone on the bench to use the Cerakote app without getting splatter on my phone. Eventually I’d like to have a tablet with the Cerakote mixing app installed.
The mixing scale is an important instrument in your Cerakote shop! I used the top-quality A&D EJ-3000 from Cambridge Environmental. Here’s my video showing this scale in action:
On the back of the bench are catalyst and various types of Cerakote. I also have waste cans to collect unused Cerakote and acetone. The shelving under the bench holds other types of paint, like traditional spray cans. We’ve used the Cerakote booth for more than just Cerakote, like painting steel targets.
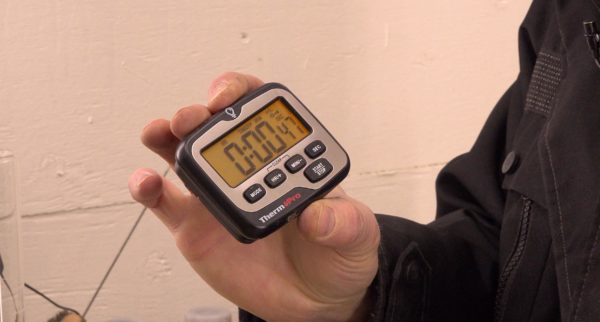
On the windowsill and oven I have timers with magnetic backs and a stand. Cerakote sells these. I use them for flash time or for time between coats. It issues a very loud beep when it’s finished. Also on the windowsill I have technical instructions from Cerakote and a thickness gauge. It will depend on the product, but you generally want to be between a half thousandth of an inch and one thousandth of an inch total coating. Before having the sensor, I used a micrometer before and after Cerakote application.
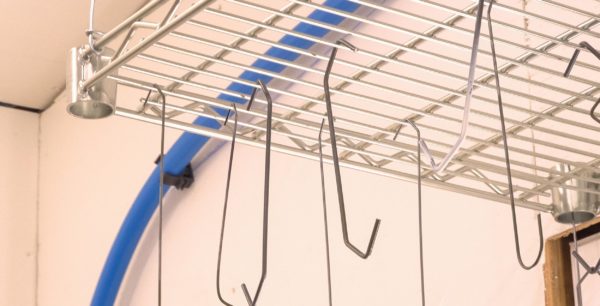
Also under the bench I have various racking — wires and hangers to hang various parts. I ordered the complete sets from Cerakote and used part of a food service rolling cart rack system to hang the items from. “Racking” the items happens between the various stages of Cerakote.
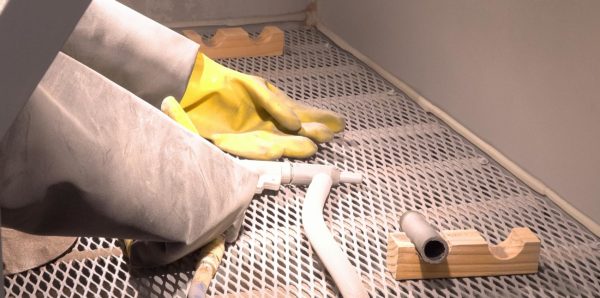
We also have protective gear, gloves (in a Harbor Freight magnetic glove rack), mixing cups, and tape. Whatever you are doing with Cerakote, you need to consider heat resistance. Normal tape or vinyl won’t work. It shouldn’t melt, be compromised, or leave residue on the Cerakote.
I use high temp tape for masking different lines and transitions. The adhesive is especially powerful.
On the opposite side of the booth to the filters and plenum, I have Cerakote’s acetone tank. It’s a bit expensive, but well worth it. It has a gasket on the inside so you don’t lose excessive acetone to evaporation. The internal basket will fit an entire barrel or barreled action or whatever parts I need to clean. You can lower the basket delicately without splashing acetone out. After cleaning, you can lift the basket and allow the parts to drip dry before running them over compressed air.
This is a must have for longer parts. Some use Simple Green rather than acetone, but I prefer acetone because I know it is super strong.
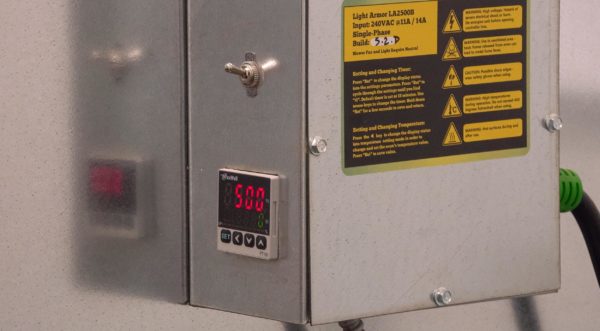
Light Armor LA2500B Oven
The oven is an area I didn’t want to compromise on. Many people use DIY ovens, but I didn’t have time and wanted the features present in a real industrial oven. I use Light Armor. It has the best deal going for an affordable commercial quality oven. The price for the LA2500B starts at $1800 and cost will vary depending on how you’ve equipped it. I have the circulating fan.
If you purchase a Light Armor oven with a circulating fan and use code OVEN125, you’ll get $125 off.

The oven is easy to operate. It has a flip on and off switch as well as a timer. You can set the temperature and timer and leave your shop. The oven will turn itself off at the completion of the timer.
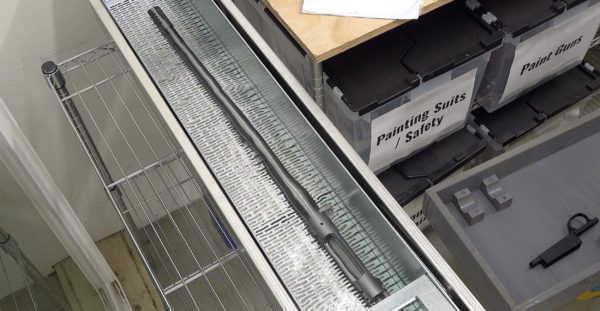
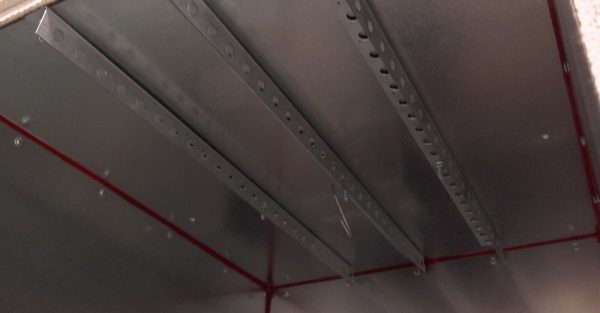
Inside the oven we have racking to hang parts and with the five foot unit, I have plenty of room for barreled actions, chassis systems and more.
Conclusion
I’m very happy with my current setup. One thing I learned is lighting is critical for proper application. Keep in mind that if you want to be able to make money with Cerakote and produce quality work, you need a professional solution. This doesn’t mean you need 3,000 square feet or have to break the bank. Our 8’ x 10’ booth will allow us to do great Cerakote work up to a pretty good level of production.
If you are serious about Cerakote, I’d highly recommend attending the official Cerakote Certified applicator training.
We have a lot of Cerakote projects coming up in addition to the work we’ve already done.
Get the Gear!
Cerakote Certified Applicator Training
A&D EJ-3000 from Cambridge Environmental
Light Armor LA2500 B Customizable Curing Oven – OVEN125 saves you $125 on ovens with circulating fan
Harbor Freight Magnetic Glove Dispenser
Don’t miss out on Ultimate Reloader updates, make sure you’re subscribed!
Thanks,
Gavin Gear


