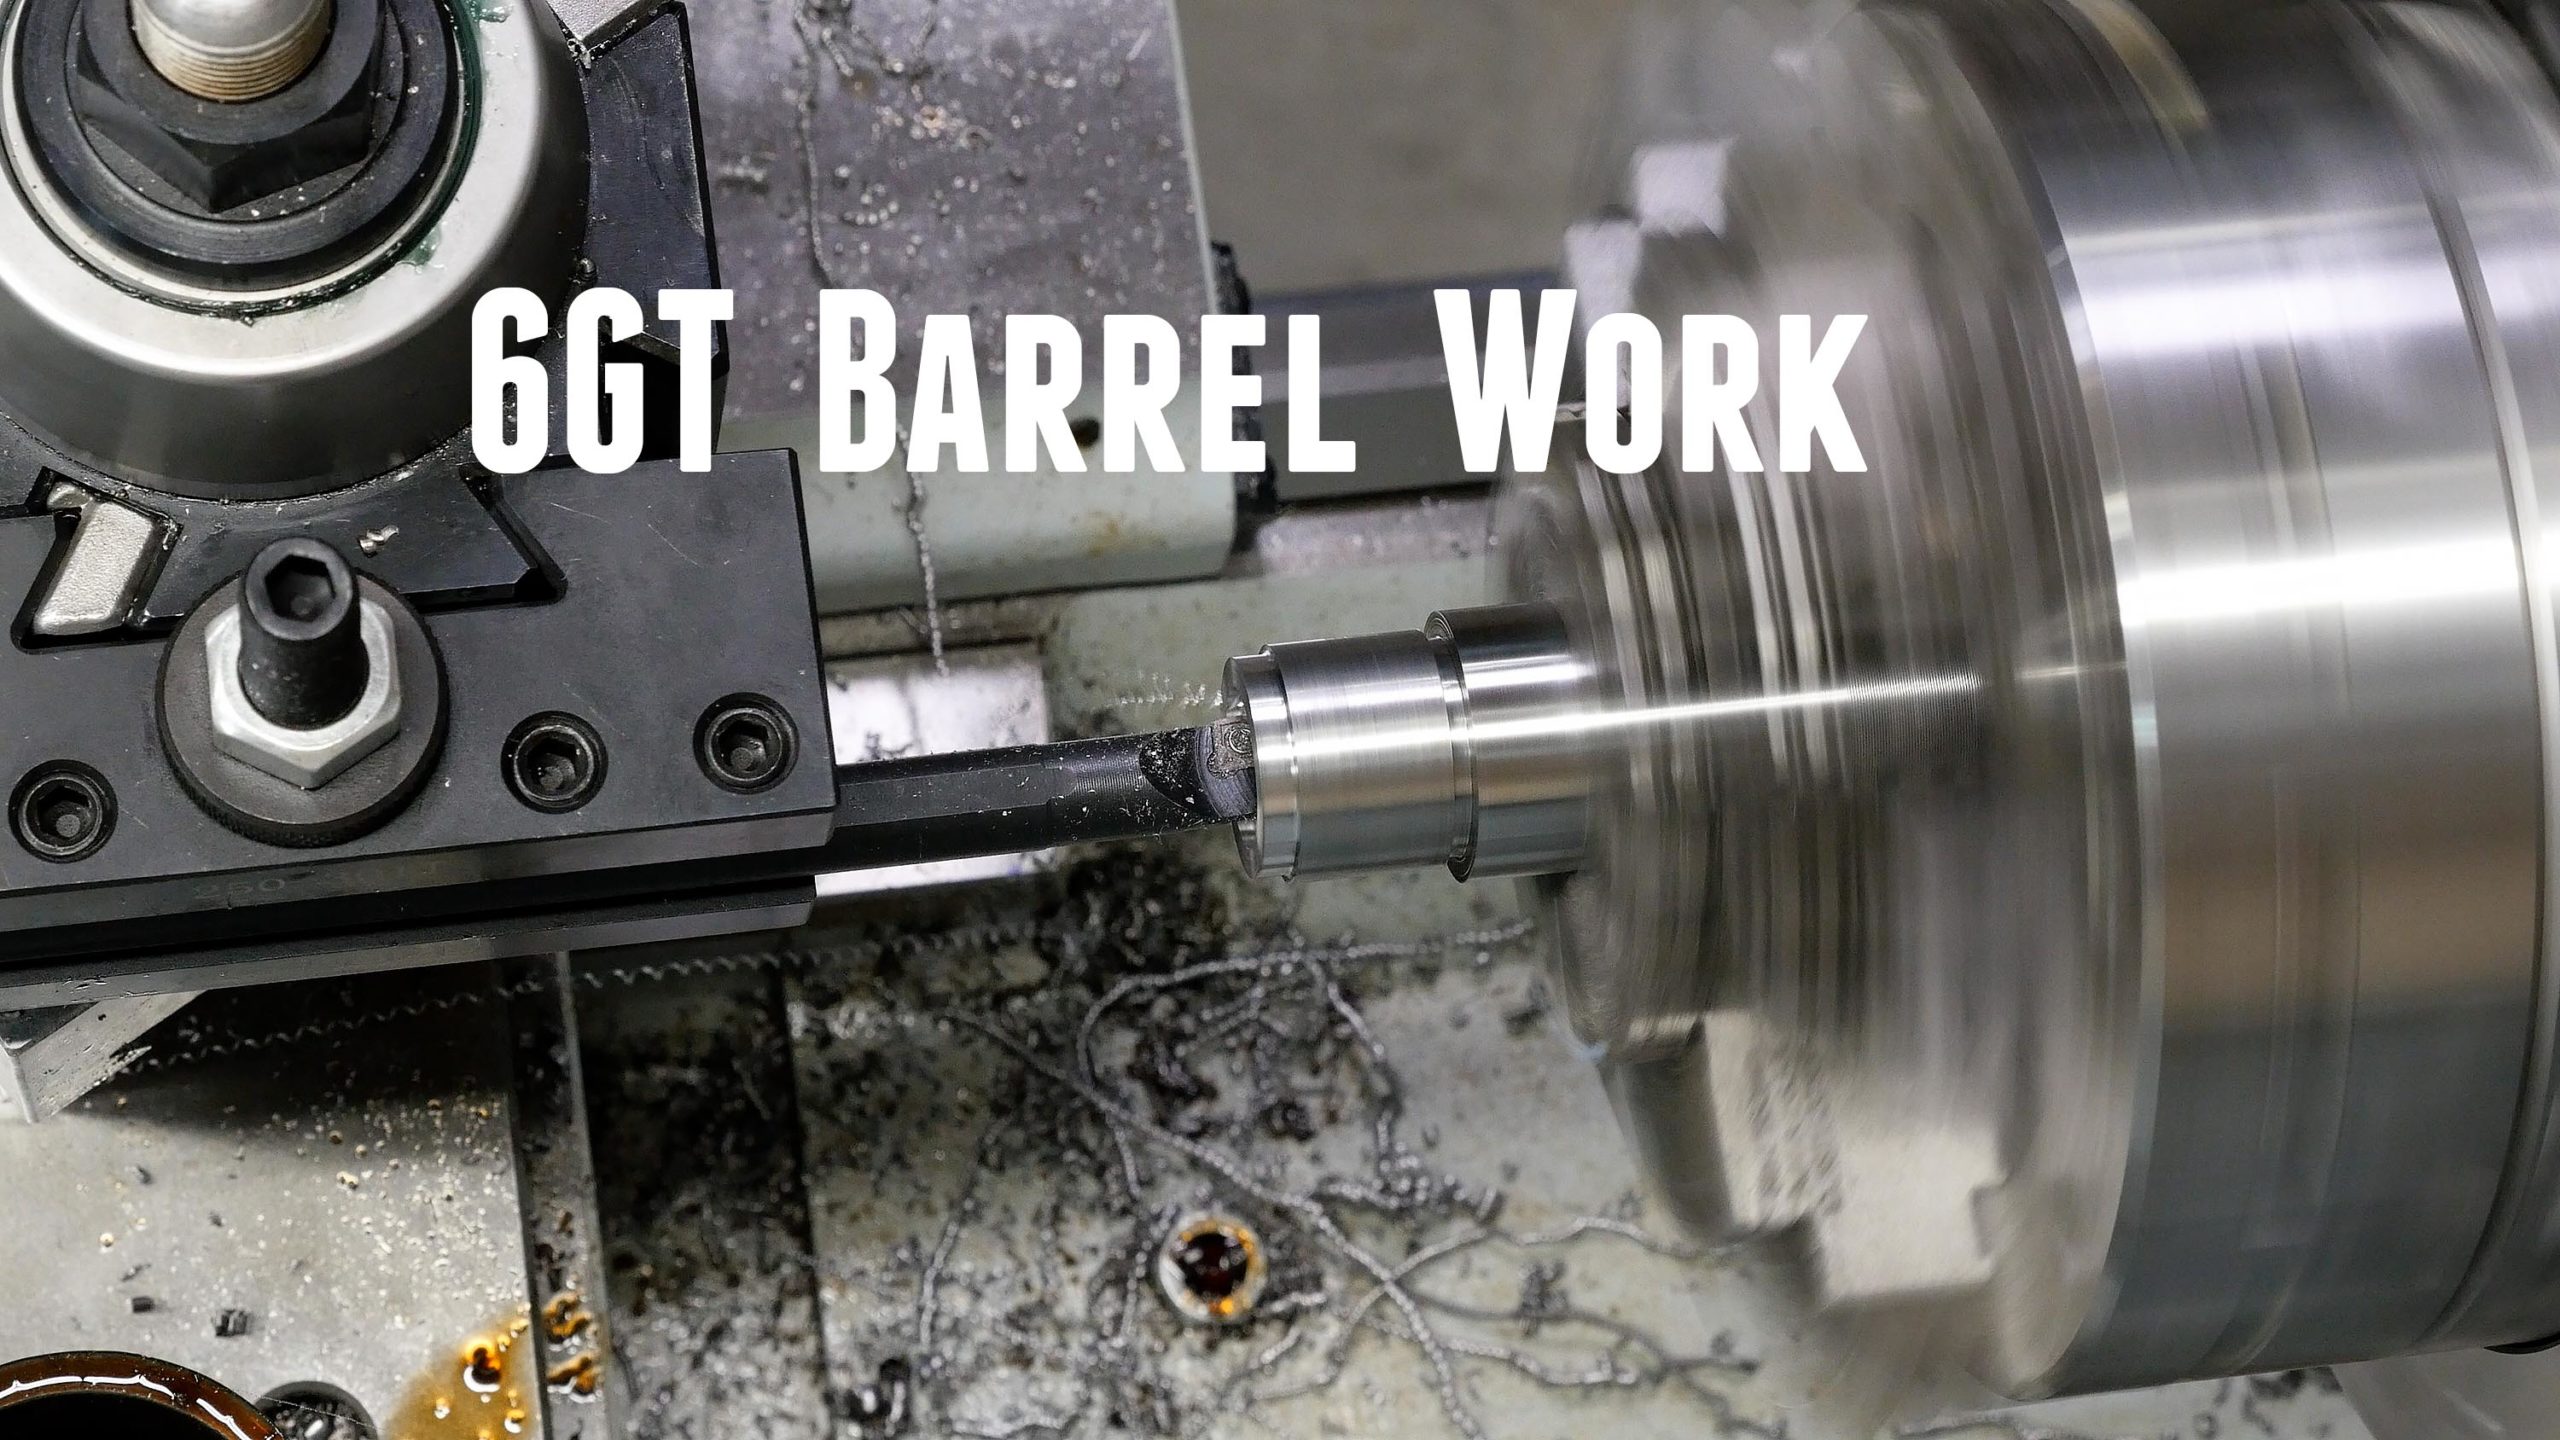
I’m building my first 6GT- and in this story we’ll cover the barrel work: muzzle threading, breech-end machining, chambering, and then barrel polishing and laser engraving!
Disclaimer
Ultimate Reloader LLC / Making with Metal Disclaimer: (by reading this article and/or watching video content you accept these terms)
- The content on this website (including videos, articles, ammunition reloading data, technical articles, gunsmithing and other information) is for demonstration purposes only.
- Do not attempt any of the processes or procedures shown or described on this website.
- All gunsmithing procedures should be carried out by a qualified and licensed gunsmith at their own risk.
- Do not attempt to repair or modify any firearms based on information on this website
- Ultimate Reloader, LLC and Making With Metal can not be held liable for property or personal damage due to viewers/readers of this website performing activities, procedures, techniques, or practices described in whole or part on this website.
- By accepting these terms, you agree that you alone are solely responsible for your own safety and property as it pertains to activities, procedures, techniques, or practices described in whole or part on this website.
Recap: Preparations for the Build
Recently I published a story outlining the goals for this build, contrasting 6GT and 6 Dasher, and more, here’s the video from that story:
Here’s a review of the build components:
- MDT ACC Chassis
- AICS MDT mag with extension
- TriggerTech Diamond Remington 700 Trigger
- BAT TR action (stolen from 6mm Dasher barreled Action)
- Krieger Match Grade 1:7.5 twist, 5-groove barrel (which I plan to finish off at 26”)
- Area 419 Hellfire Muzzle Brake
To put all this together, I need tools. At the heart
- AICS MDT mag with extension
- TriggerTech Diamond Remington 700 Trigger
- BAT TR action (stolen from 6mm Dasher barreled Action)
- Krieger Match Grade 1:7.5 twist, 5-groove barrel (which I plan to finish off at 26”)
- Area 419 Hellfire Muzzle Brake
Precision Matthews TL-1660 Ultra-Precision Lathe
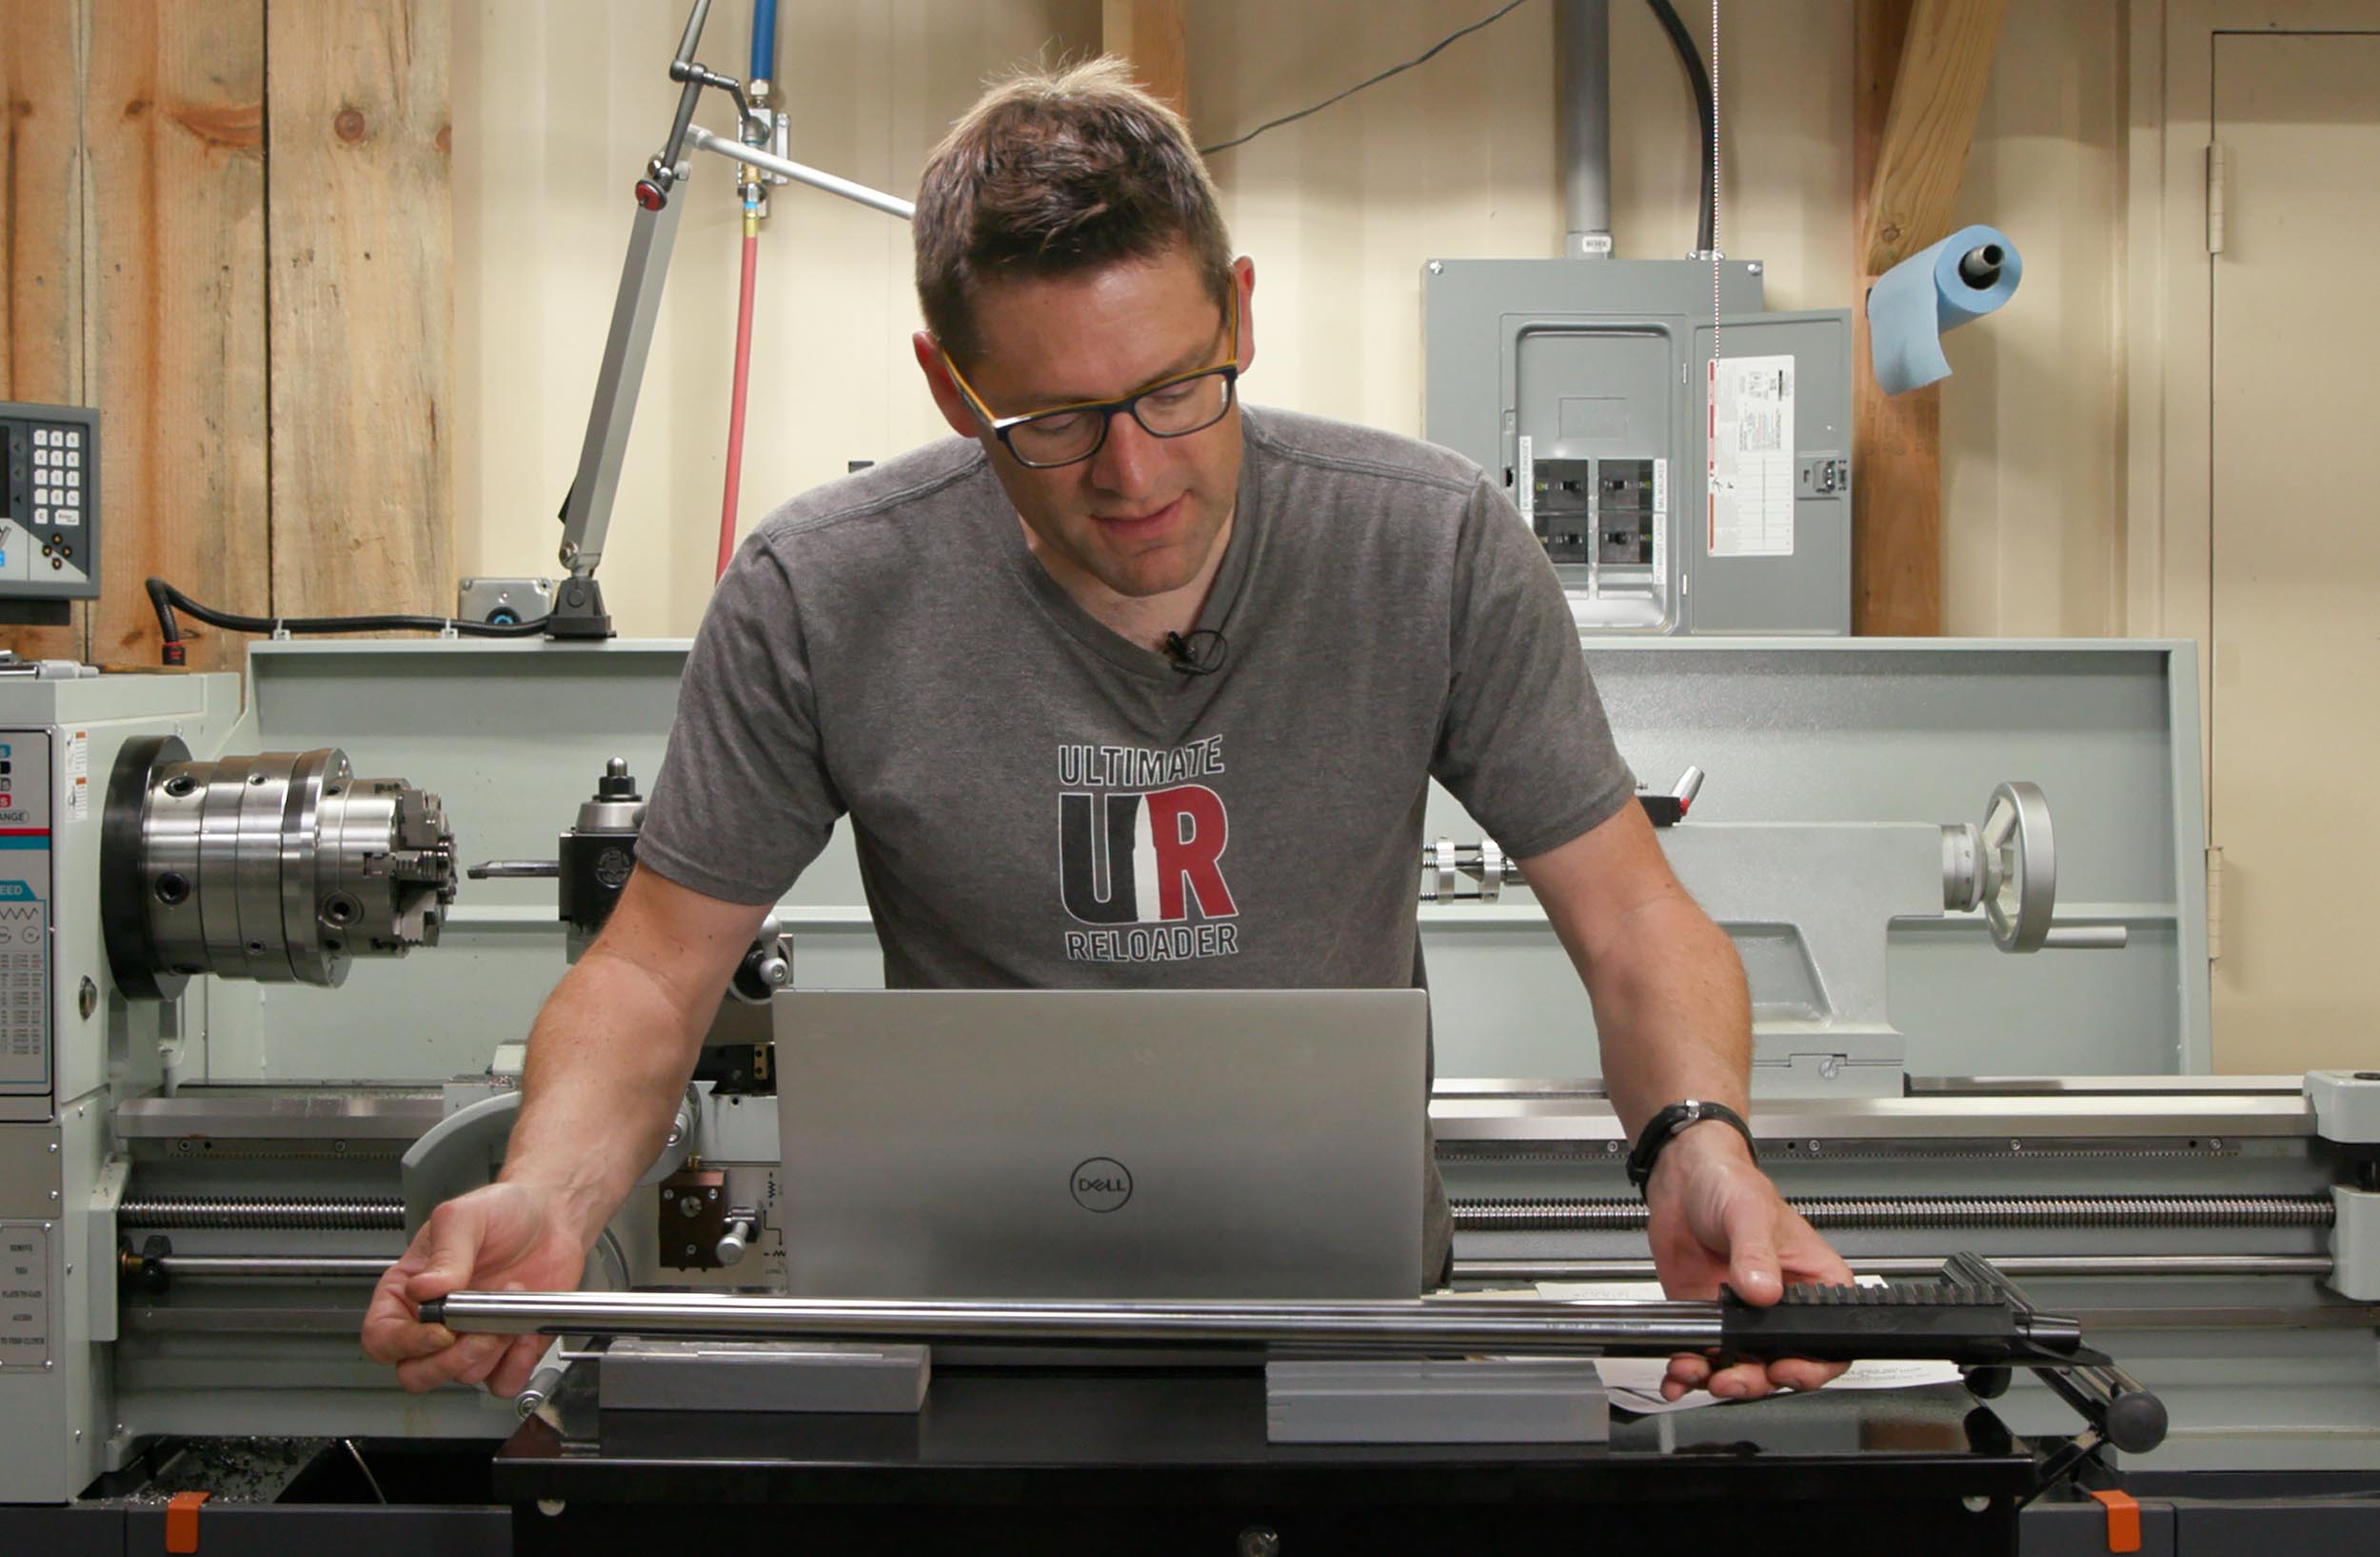
Again I’m using my preferred manual lathe for chambering, the Precision Matthews TL-1660!

This lathe is a beast! Here are some of the specs for the Precision Matthews TL-1660:
- Ultra Precision, made in Taiwan
- 16″ swing, 60″ between centers capacity
- D1-6 high precision spindle
- English and Metric threading without gear changes
- One shot lube on the carriage
- 3-Phase 5hp motor
*Note: for most gunsmiths, the TL-1640 would be a great choice. You likely won’t need 60″ between centers like the TL-1660 offers. The TL-1640 can save both space, and significant money on freight! I opted for the larger lathe because I wanted to have a lathe on hand with extended capacity between centers.
Straight Shot Gunsmithing “True Bore Alignment System” and Range Rod
Recently I’ve become a huge fan of the SSG True Bore Alignment System (TBAS). This unique articulating chuck system allows you to dial in your barrel with both radial and axial adjustments.
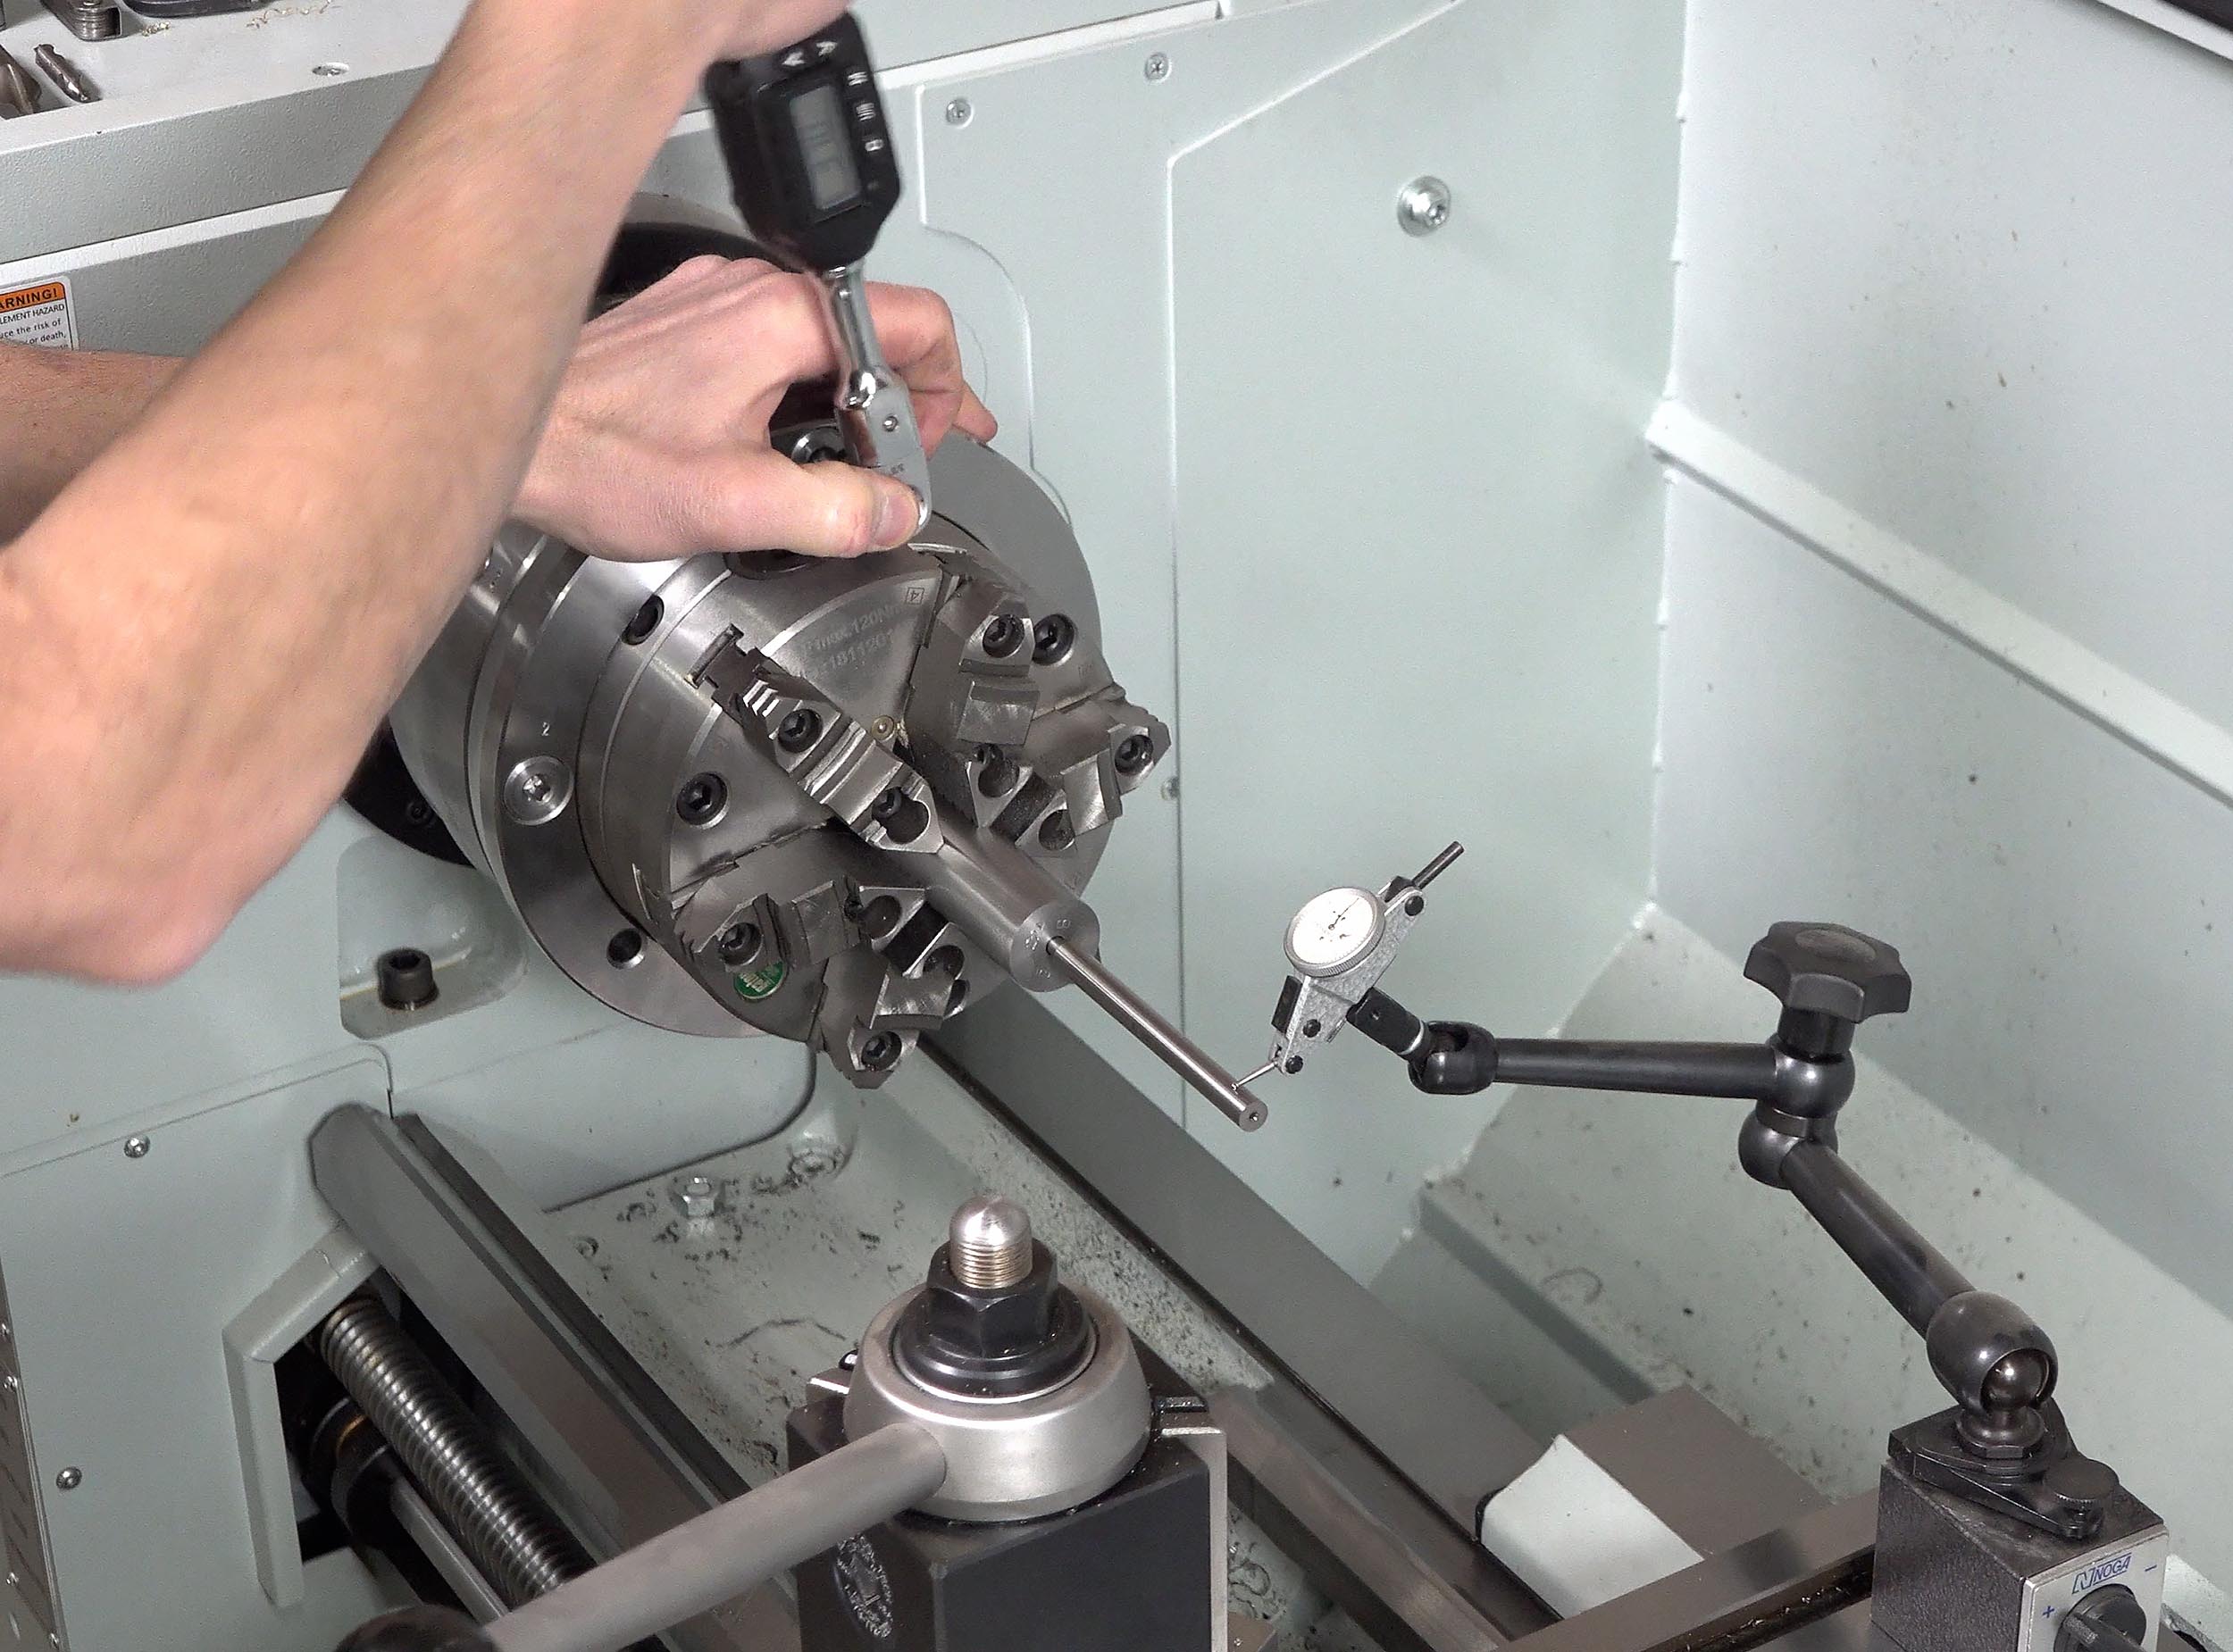
Above you can also see the SSG Range Rod (see bottom of page HERE) which is used in conjunction with the TBAS system to indicate barrels (I used this on both the breech and and the muzzle end of the barrel.
This top quality lathe has a 16” capacity swing and 60” between centers. On this lathe I have the Straight Shot Gunsmithing true-bore alignment system and will be using the Straight Shot Gunsmithing range rods as well. I also have a Greg Tannel (Gre-Tan) fixed holder for the specialized Alpha Munitions carbide reamer with 0.170” freebore. This was recommended by Alpha Munitions for use with the Berger 105’s, Berger 109’s and Hornady 110 A-Tips. For verification purposes, I also have the Dave Manson 6GT Go gauge, which can easily be converted into a no-go gauge with some masking tape. This tool was featured in my 22 GT build. Finally, I have a Mitutoyo Precision measurement and an Aloris CXA size tool post and tool holder system I splurged on when I bought my lathe.
Alpha 6GT Reamer

On this build, I’ll be using an Alpha carbide 6GT reamer that is optimized for the slower-speed manual machine I have with 0.170” freebore.
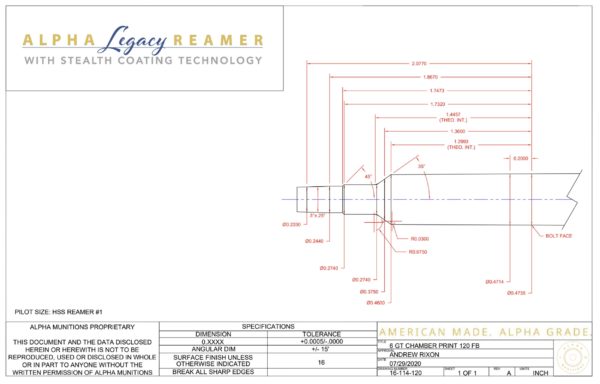
This geometry was specifically recommended to me by Tom Danielson at Alpha Munitions while we discussed what bullets I would run in Alpha Munitions’ brass.
Now on to the build!
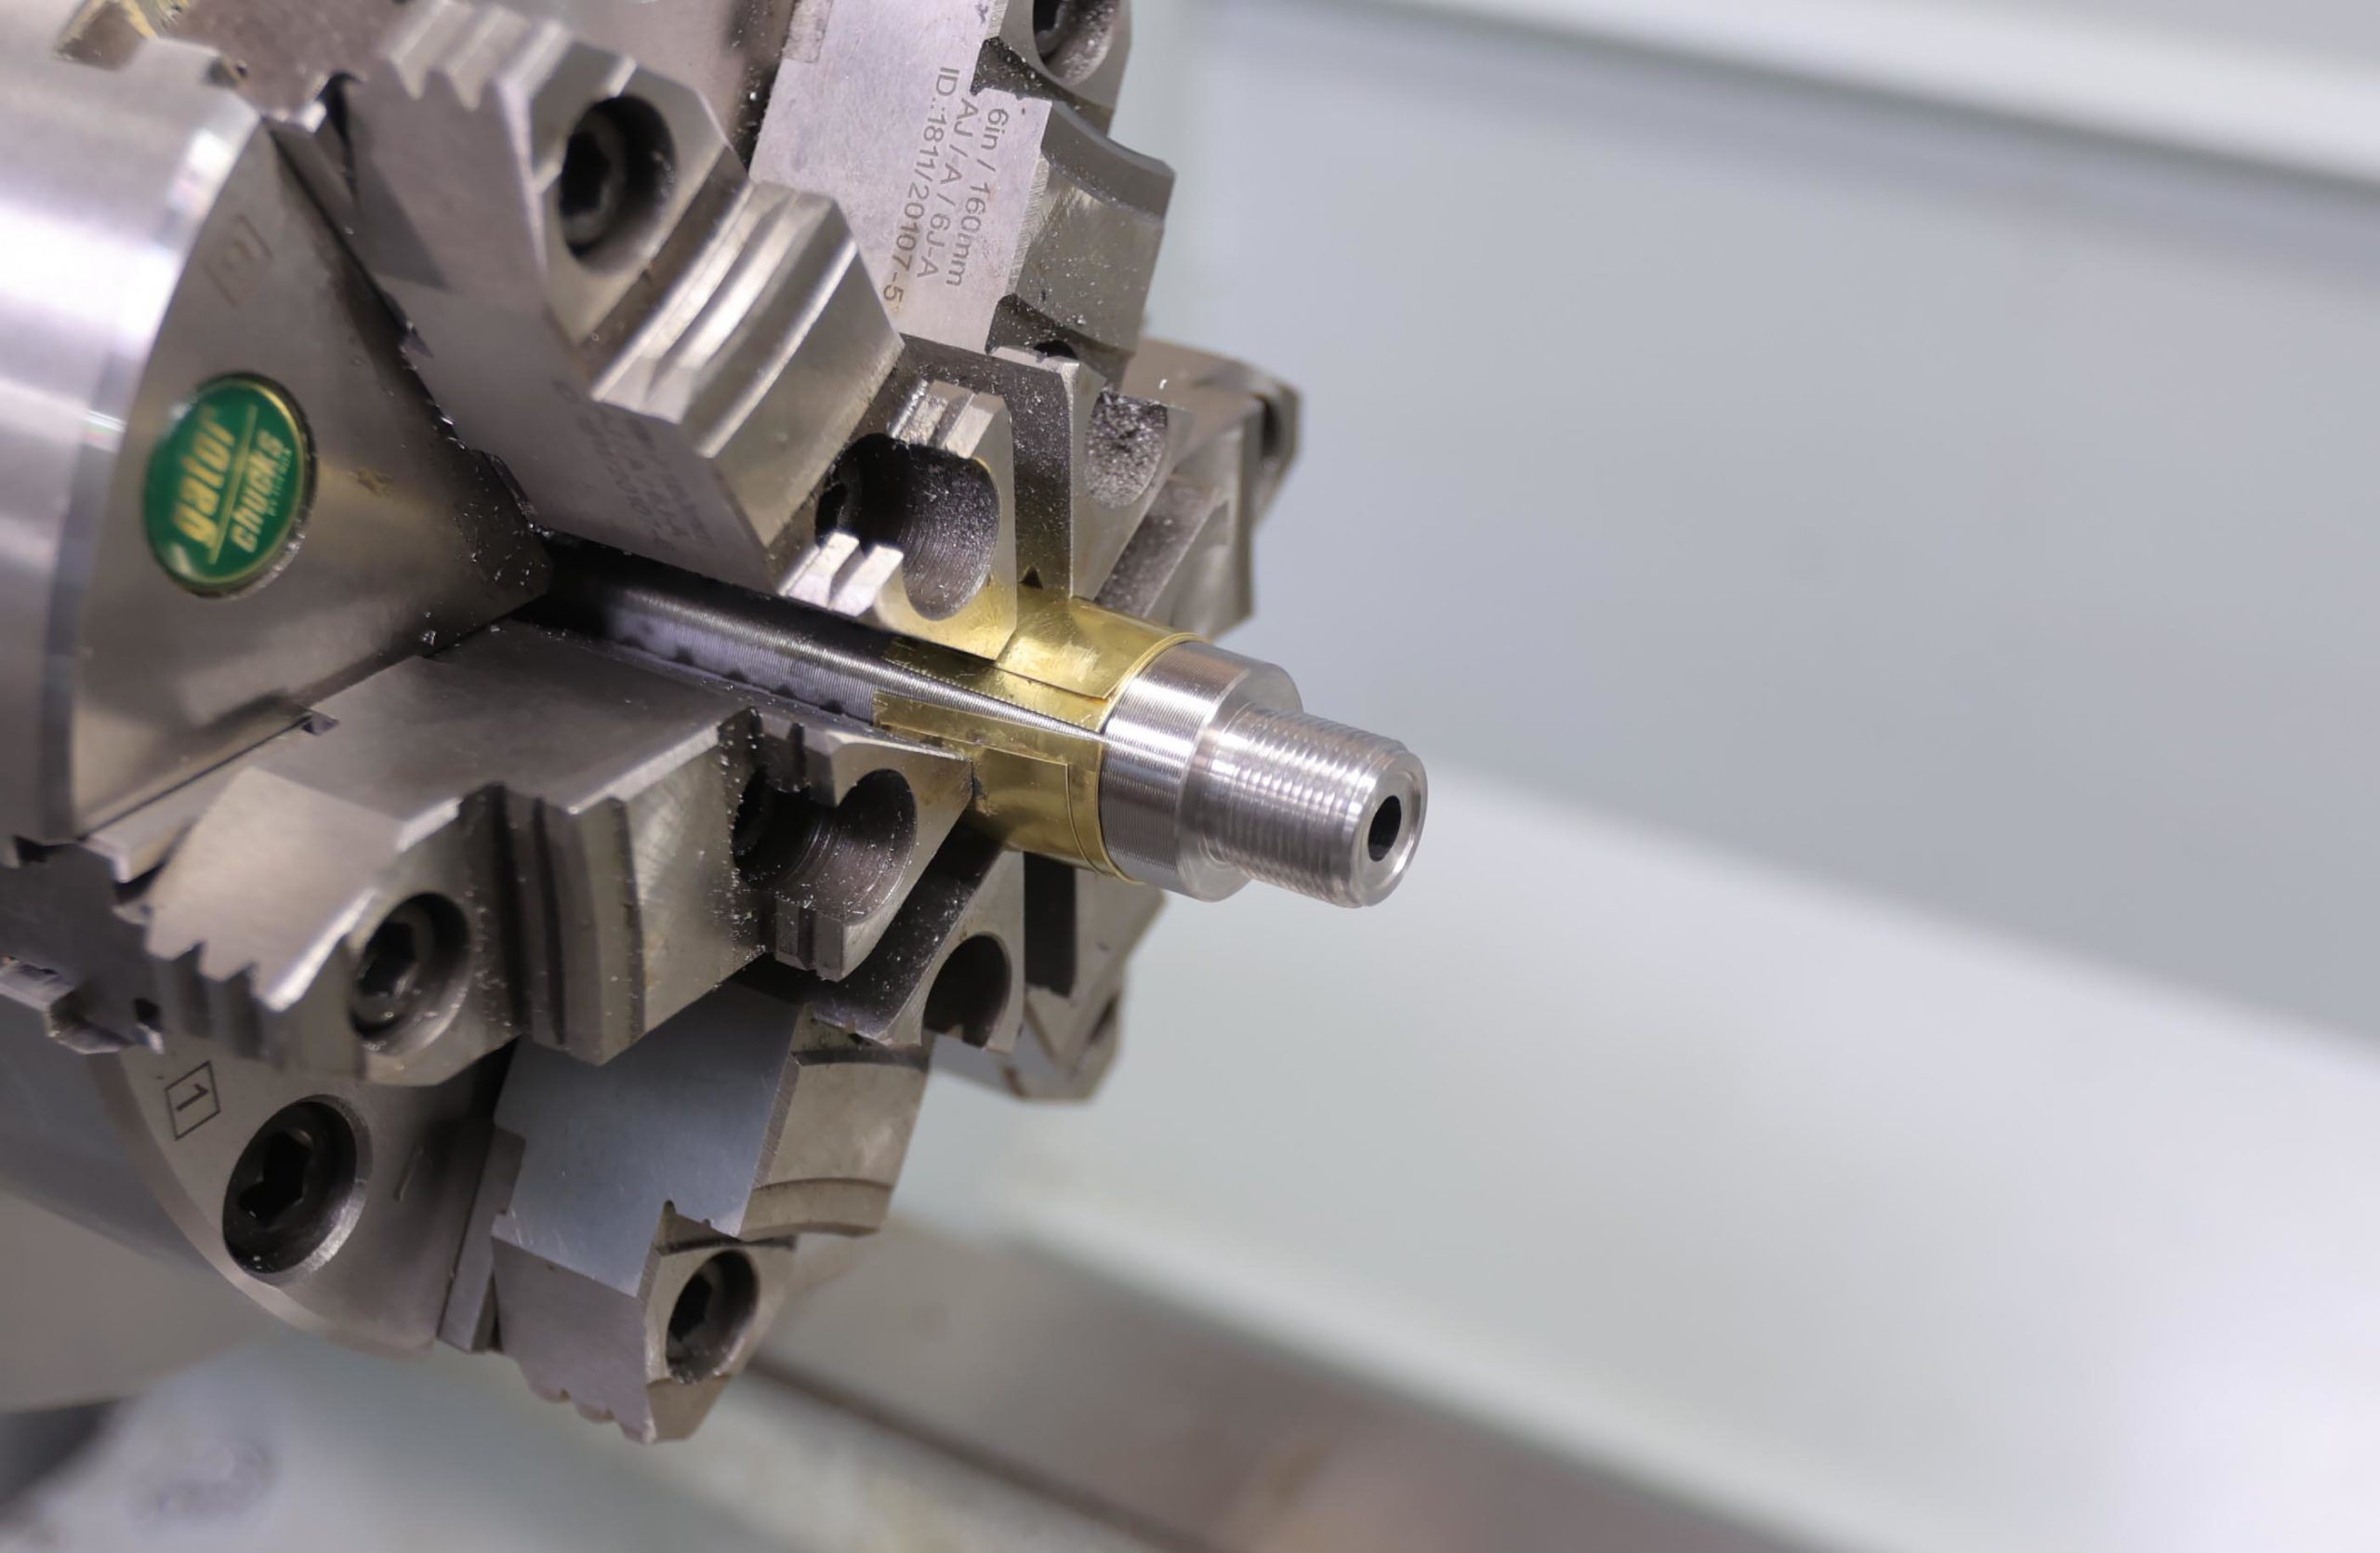
Muzzle-End Work
When using the Precision Matthews TL-1660 for chambering, I perform the muzzle threading and related work FIRST. This is so that I can use my barrel extension (needed with a super-long lathe spindle!).
Here’s a breakdown of that process:
- Dial-In
- Part off end
- Turn down tenon
- Cut thread relief groove
- Cut step-down on end
- Face to length
- Thread
- Cut recess / crown
And here’s the finished product:
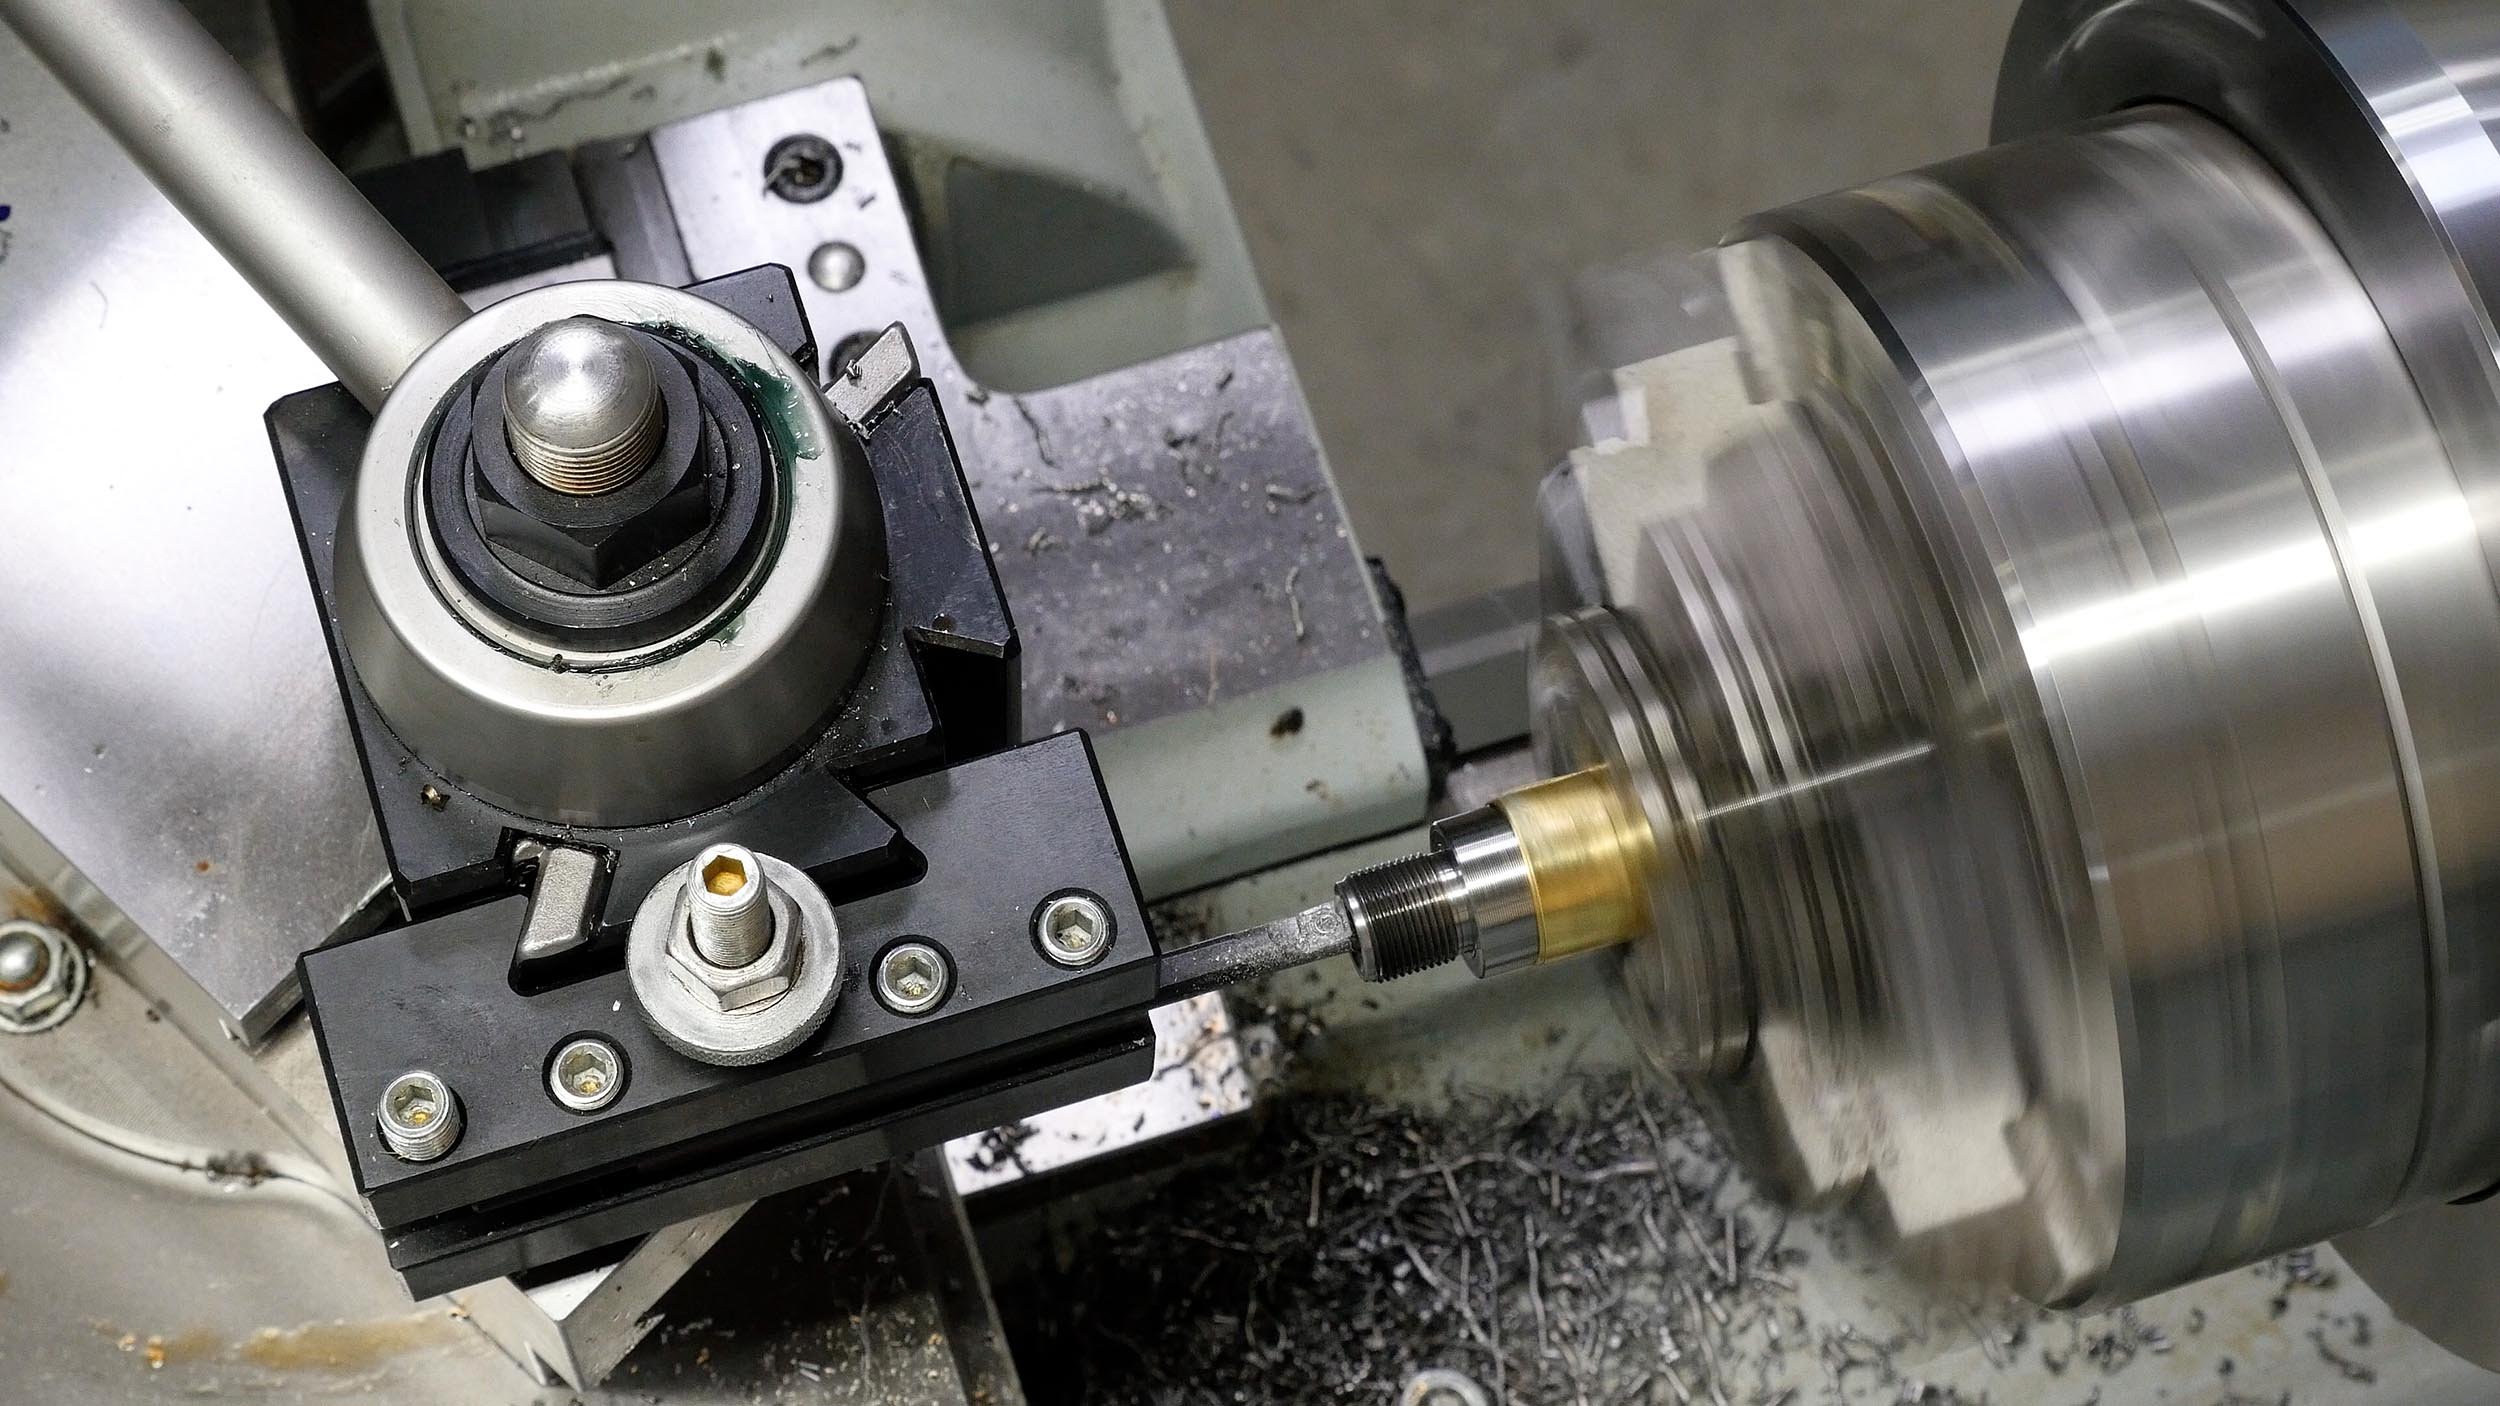
Breech-End Barrel Work
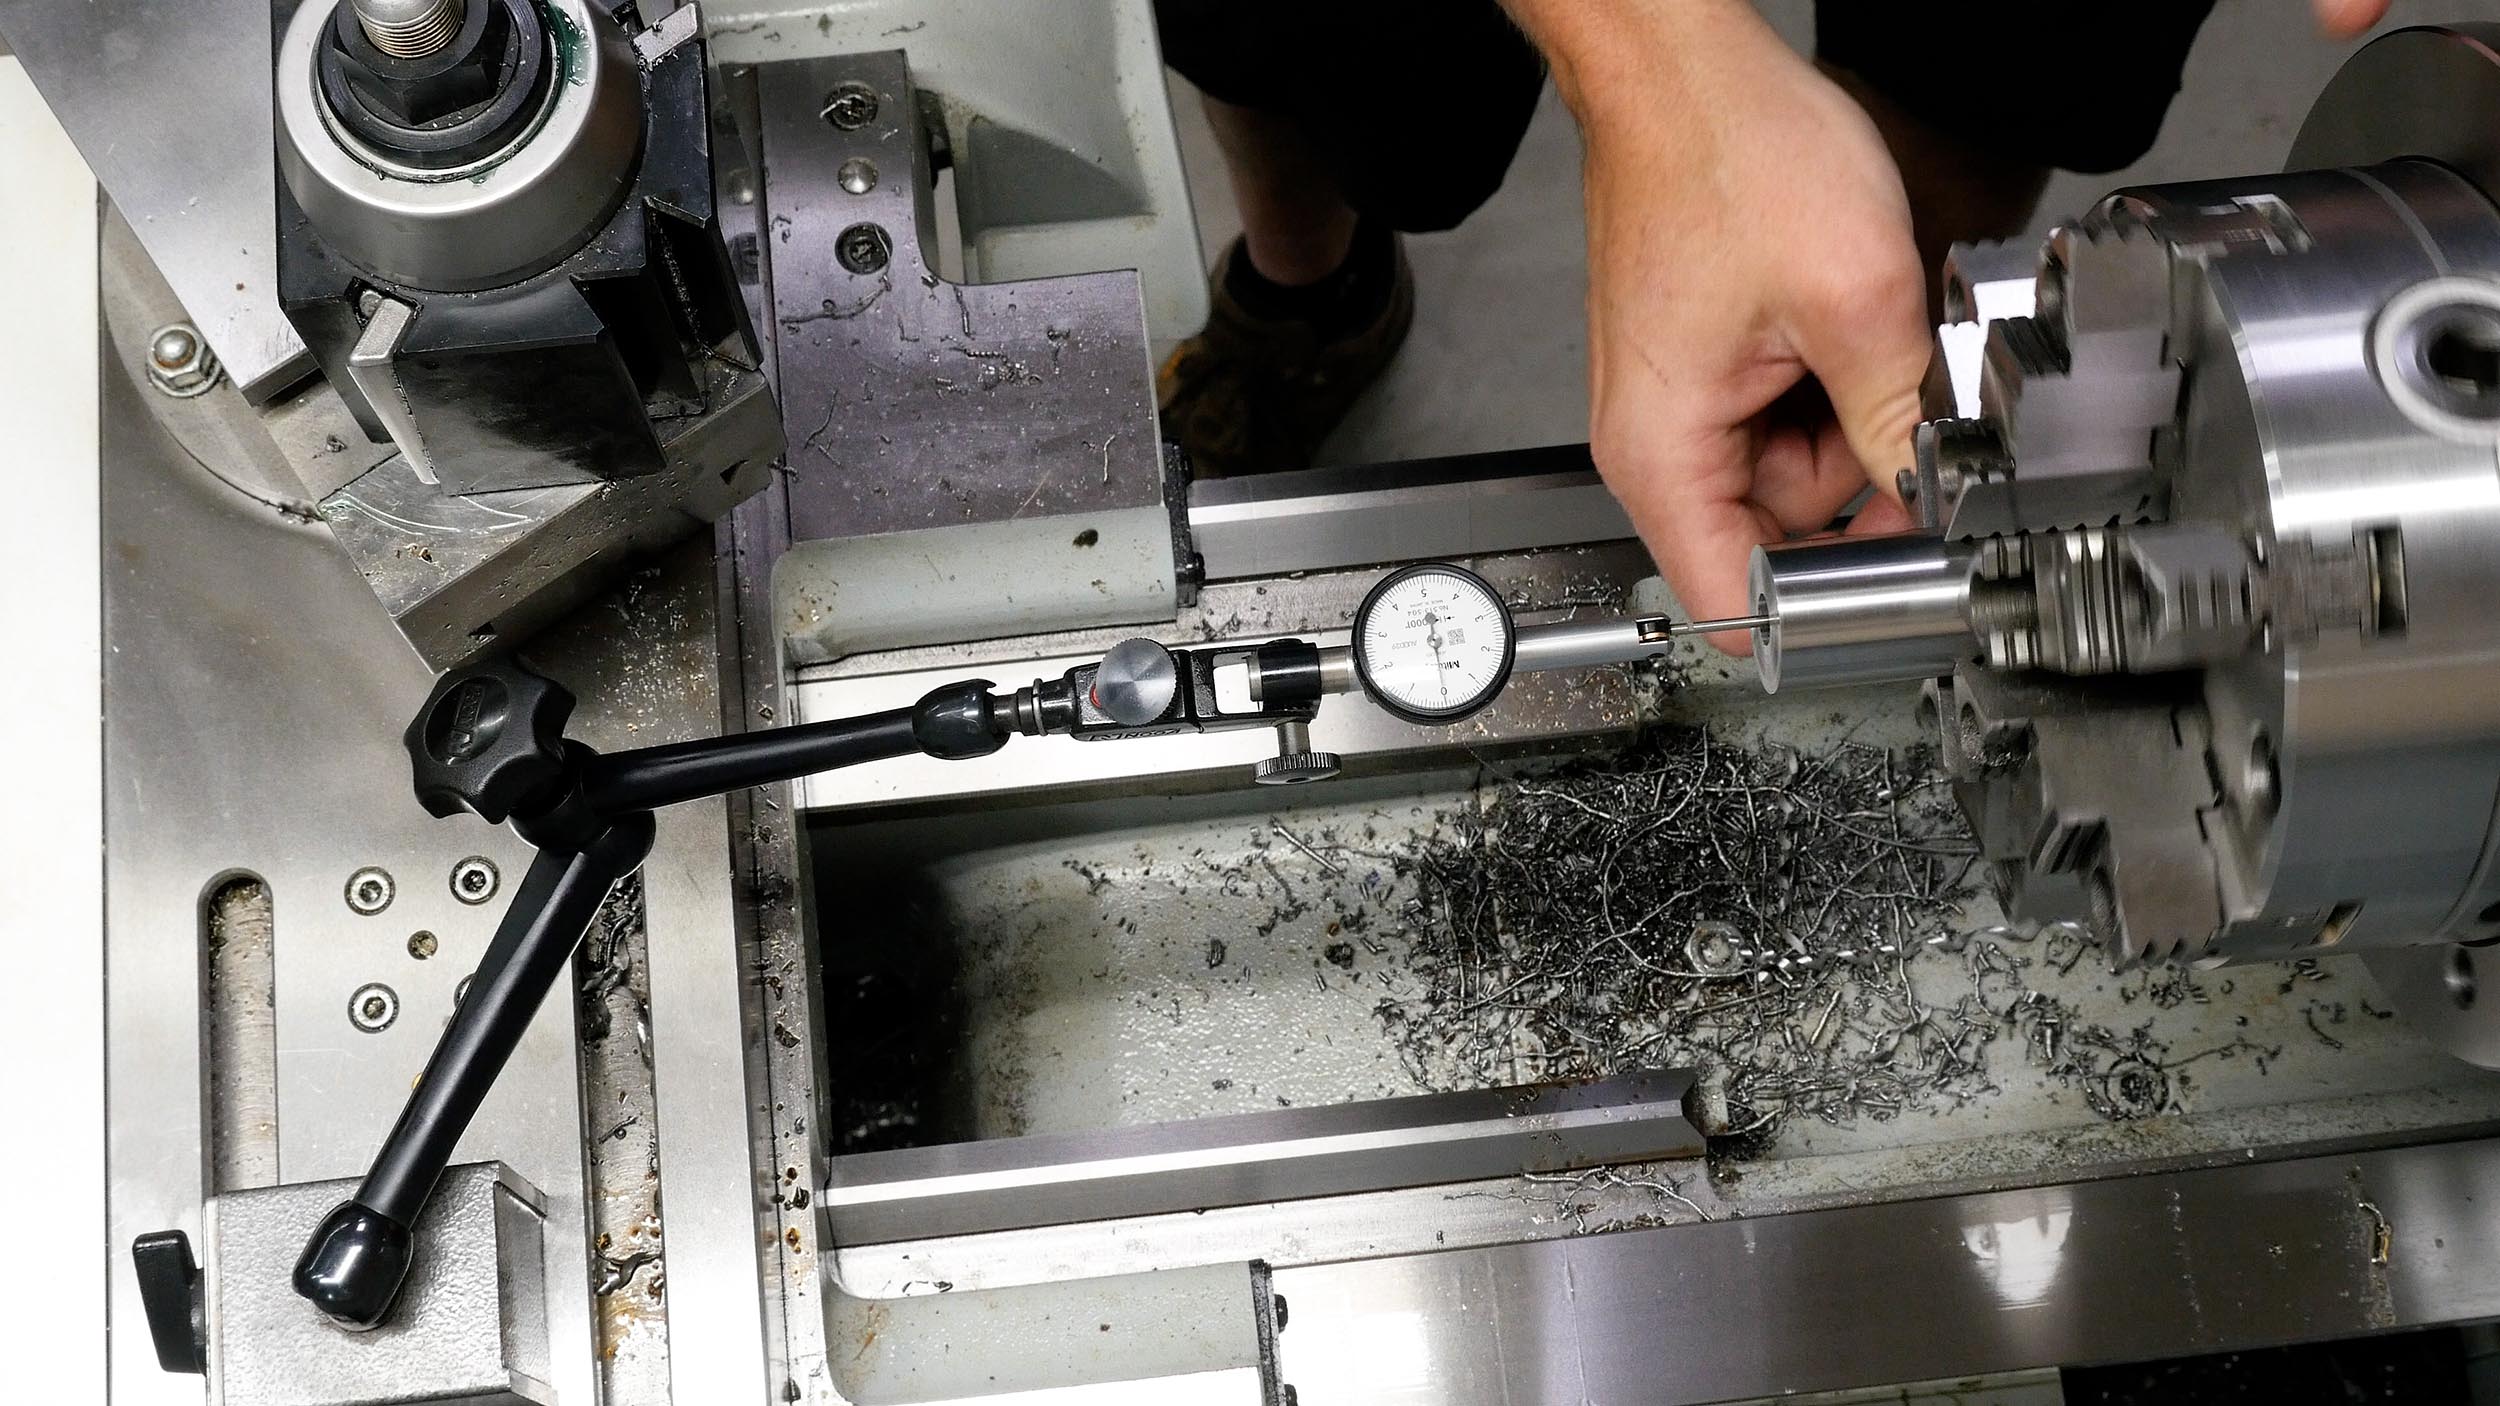
For this chambering job, I used the same methods shown in the following recent builds, also using Bat TR Actions:
Here’s a breakdown of the steps:
- Pre-dial barrel
- Face/part
- Pre-drill
- Final dial-in
- Bore pre-drill true
- Turn down tenon
- Cut thread relief
- Cut step-down
- Cut counterbore
- Thread transitions
- Threading
- Cutting chamber (bulk)
- Cutting chamber (last 0.020”)
- Inspect throat transition
- Polish chamber
- Cut chamfers
Here’s a picture of the completed breech end barrel work:

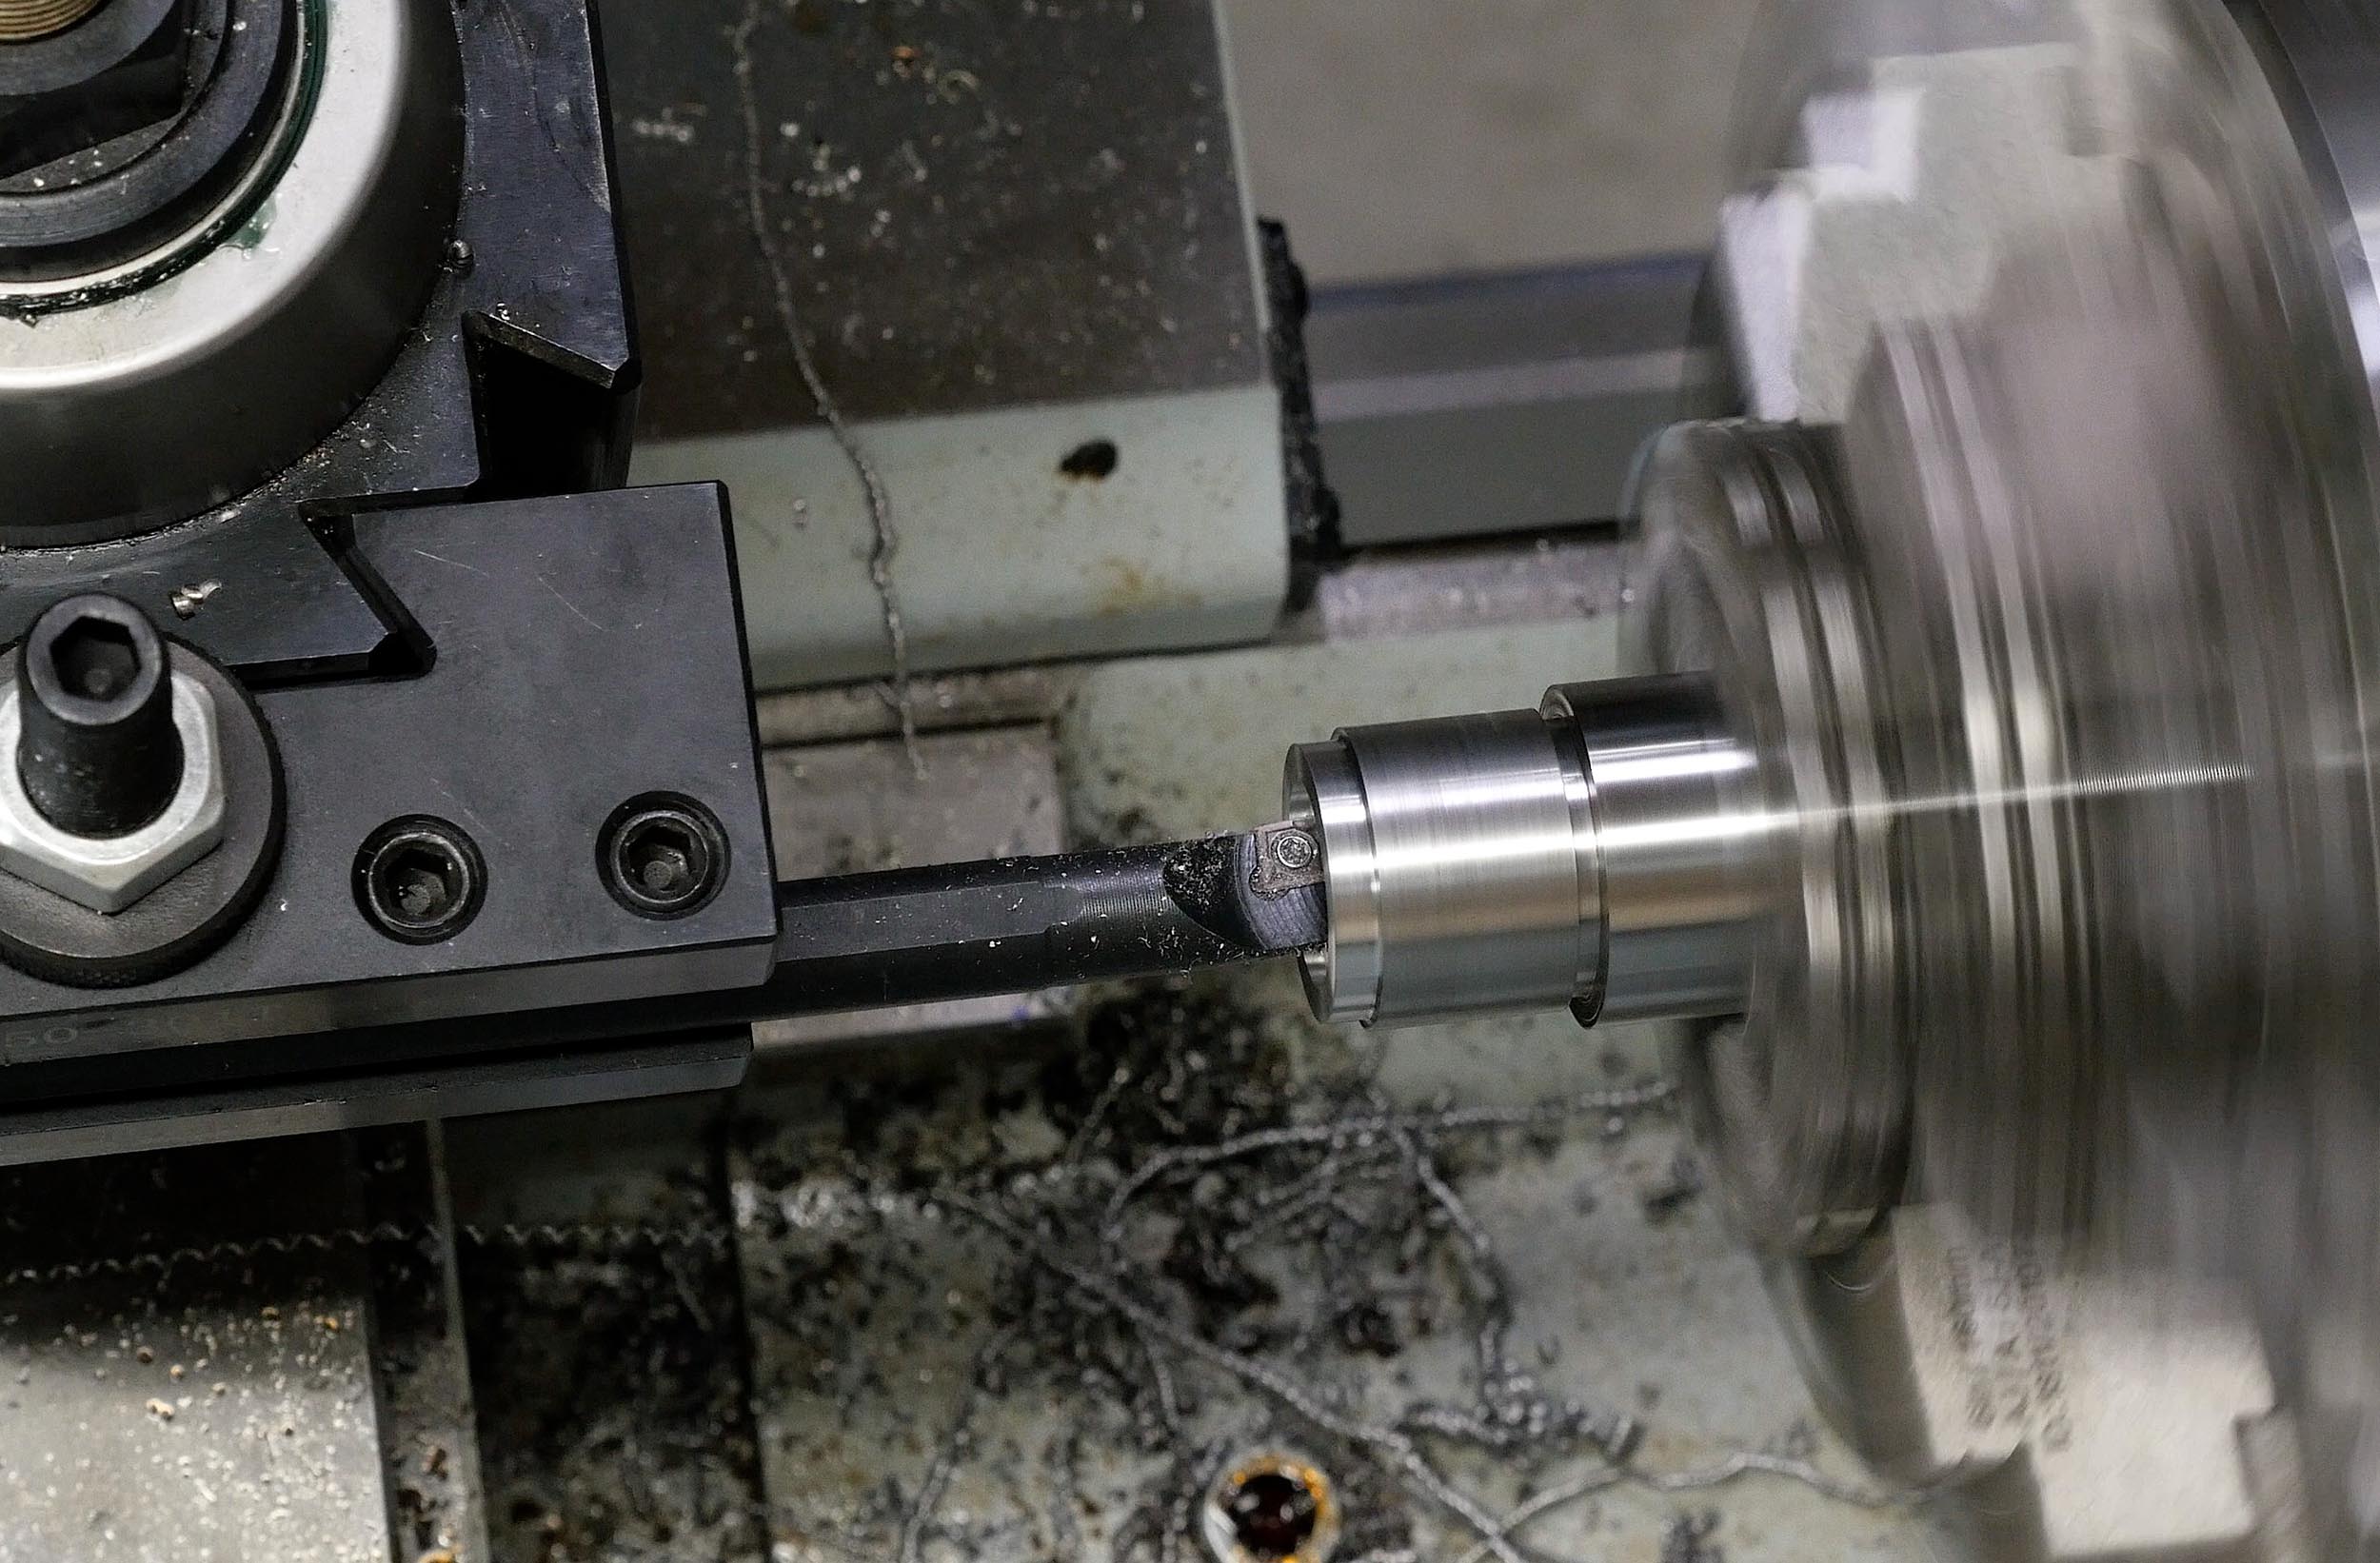
Inspecting the Chamber with the TESLONG NTG 100P
As seen in the video, for this chambering job I tried out a new setup on the TL-1660- a TESLONG NGT-100P pistol borescope mounted to a quick change toolholder. With this setup, I can send the borescope down the bore, and perform a complete inspection (including critical throat transition) while the barrel is in the lathe. This is a GREAT way to inspect your work while chambering.
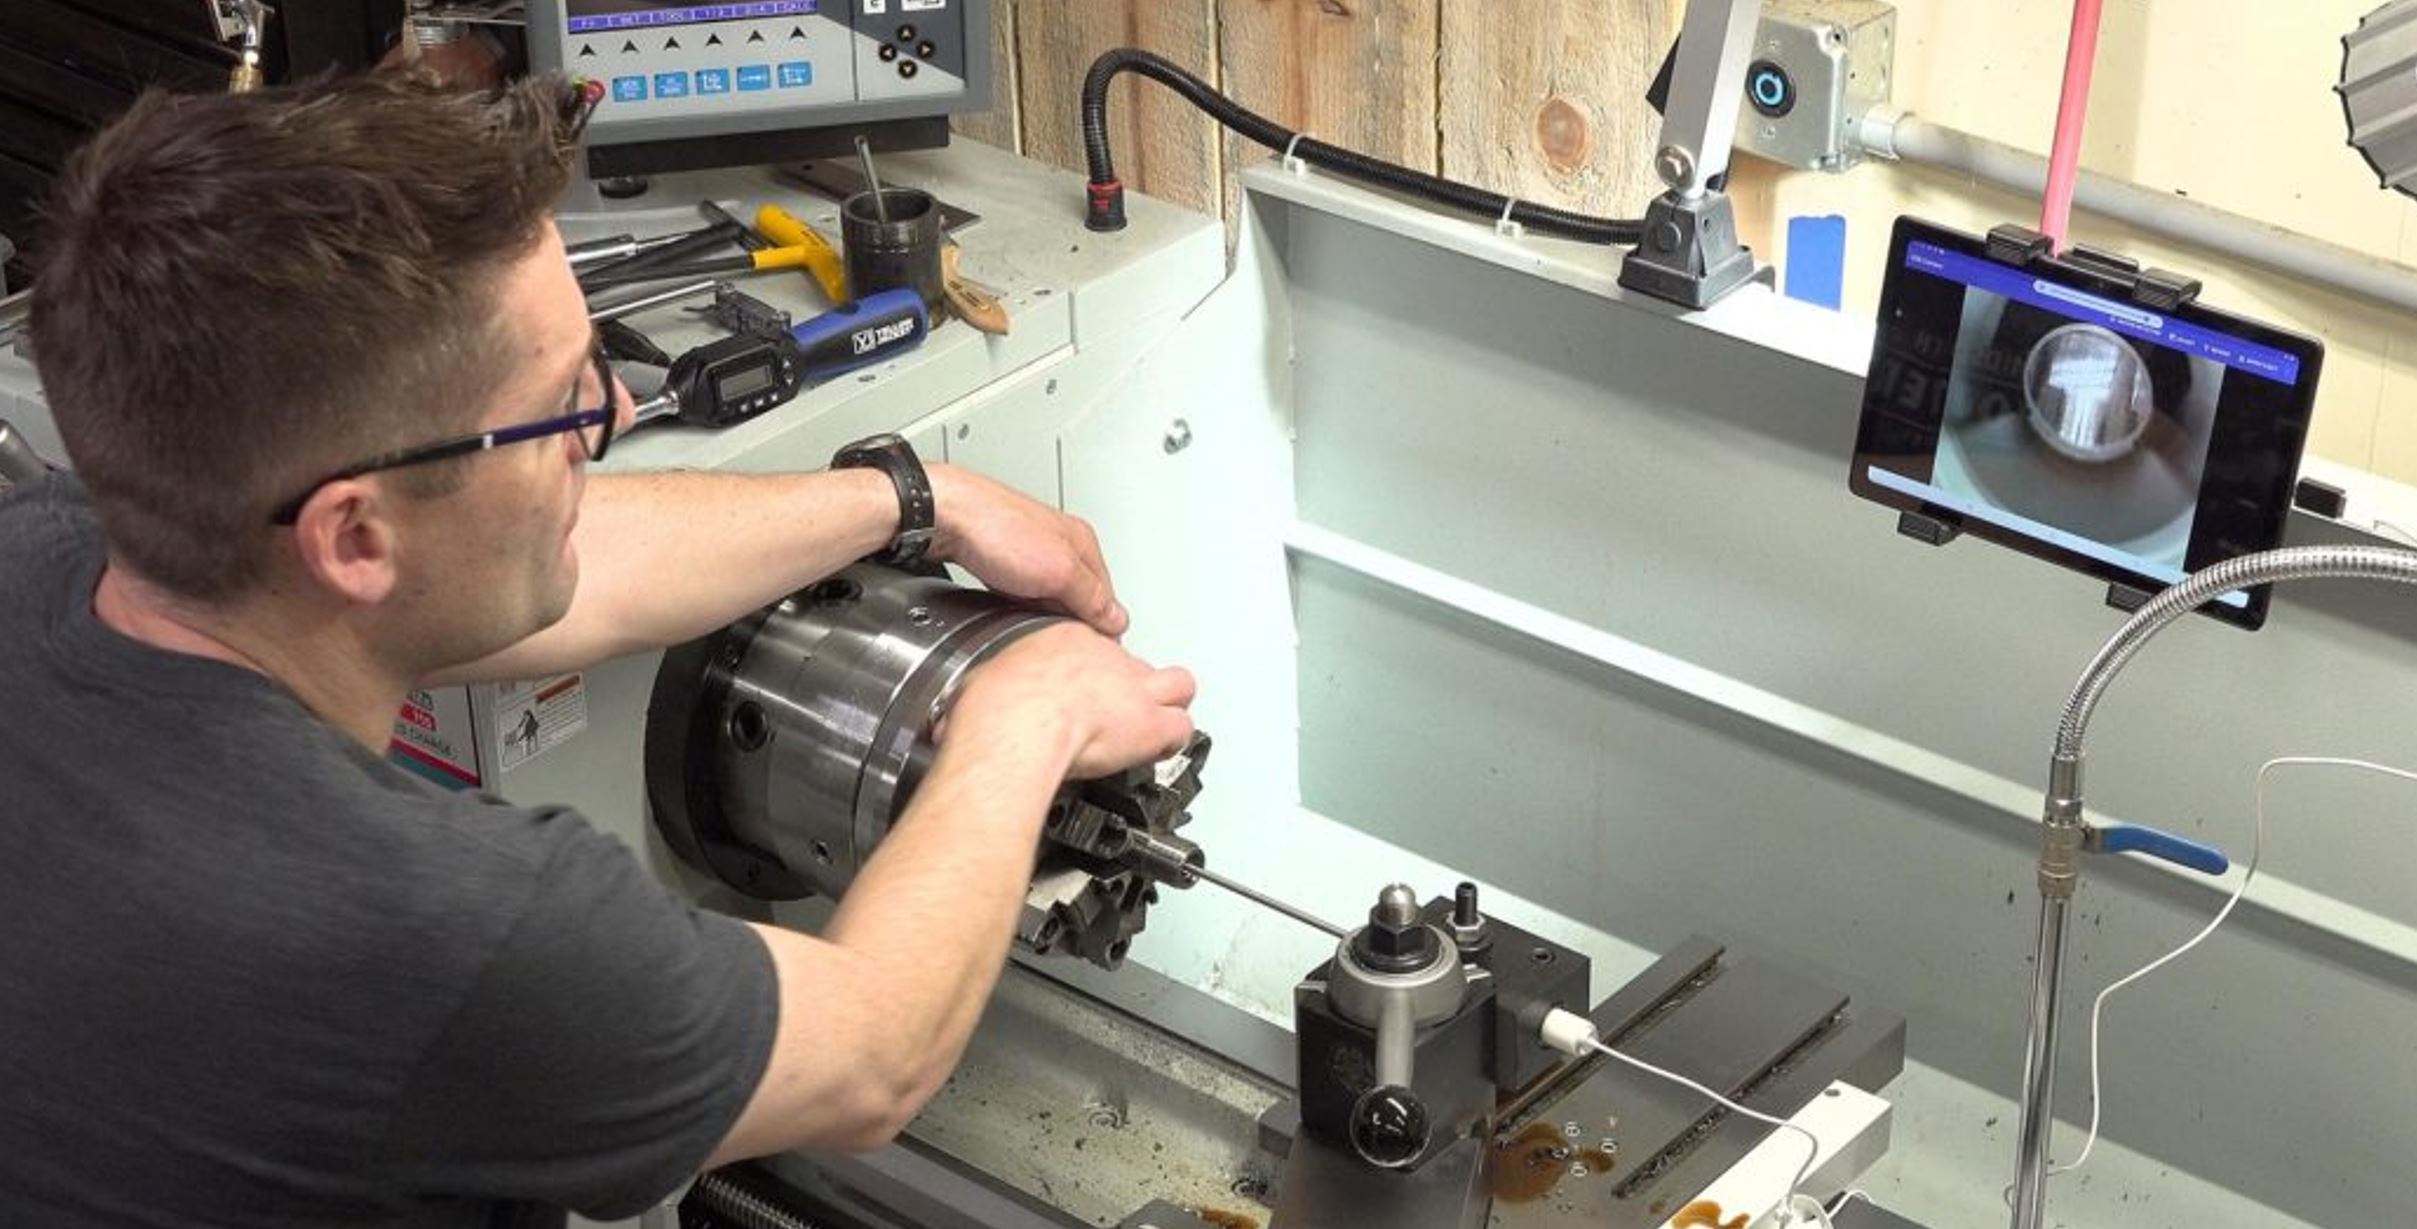
The throat in this barrel looked VERY straight!
Sanding and Polishing the Barrel
The Kreiger barrel blank I used for this project had machining/turning marks on the outside, so I thought it would be a good idea to sand and polish the barrel!
I started on the Precision Matthews PM-1440GT lathe, sanding with 80 grit and some finer grit papers to remove the machining marks:

I then used 150, 400, 500, and then ultrafine polishing compound to polish the barrel:
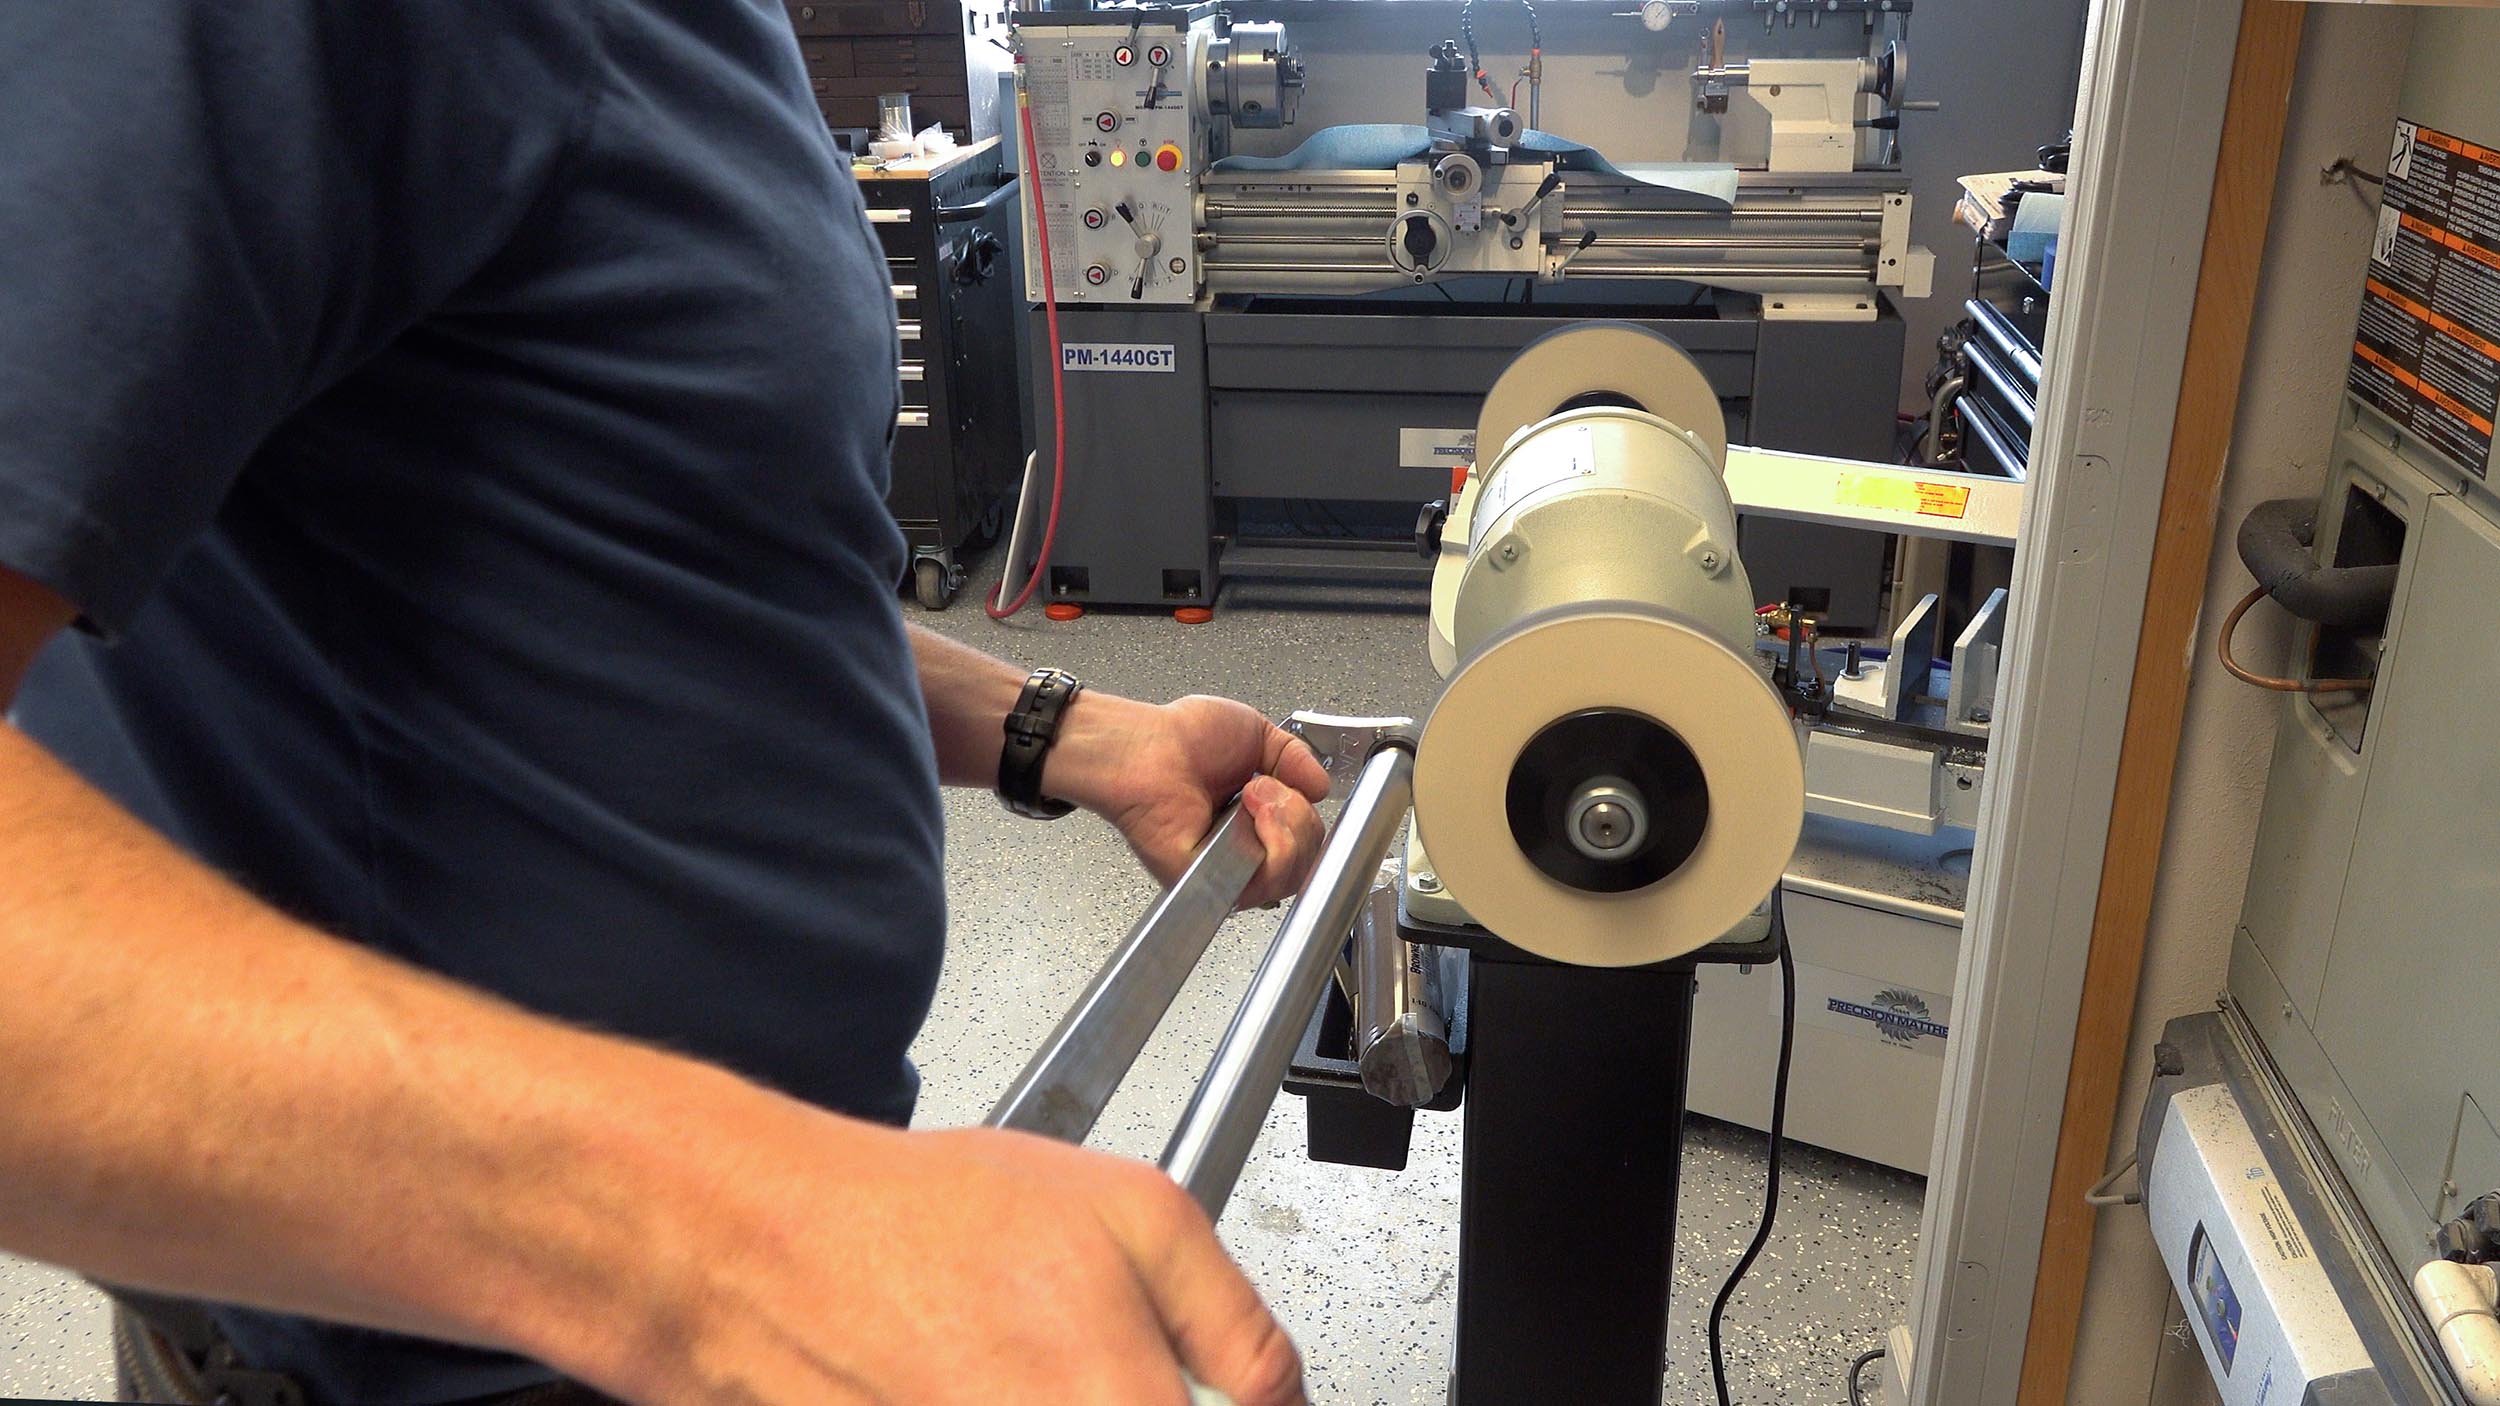
Getting into the Laser Engraving Game
I have looked at a LOT of different methods for marking barrels and firearms. Ultimately, I decided I needed a laser engraver! And that sent me on a “YouTube learning journey”. It’s funny- I put educational materials on YouTube, and when I want to learn something, I end up consuming others’ content. It’s a great resource!
Meeting Alex from Laser Everything
Literally the very first video I watched was from the Laser Everything channel on YouTube:
Soon after watching this video, I reached out to the Laser Everything team, and started emailing Alex (the owner) back and forth with questions. He was VERY helpful in my researching what machine to buy!
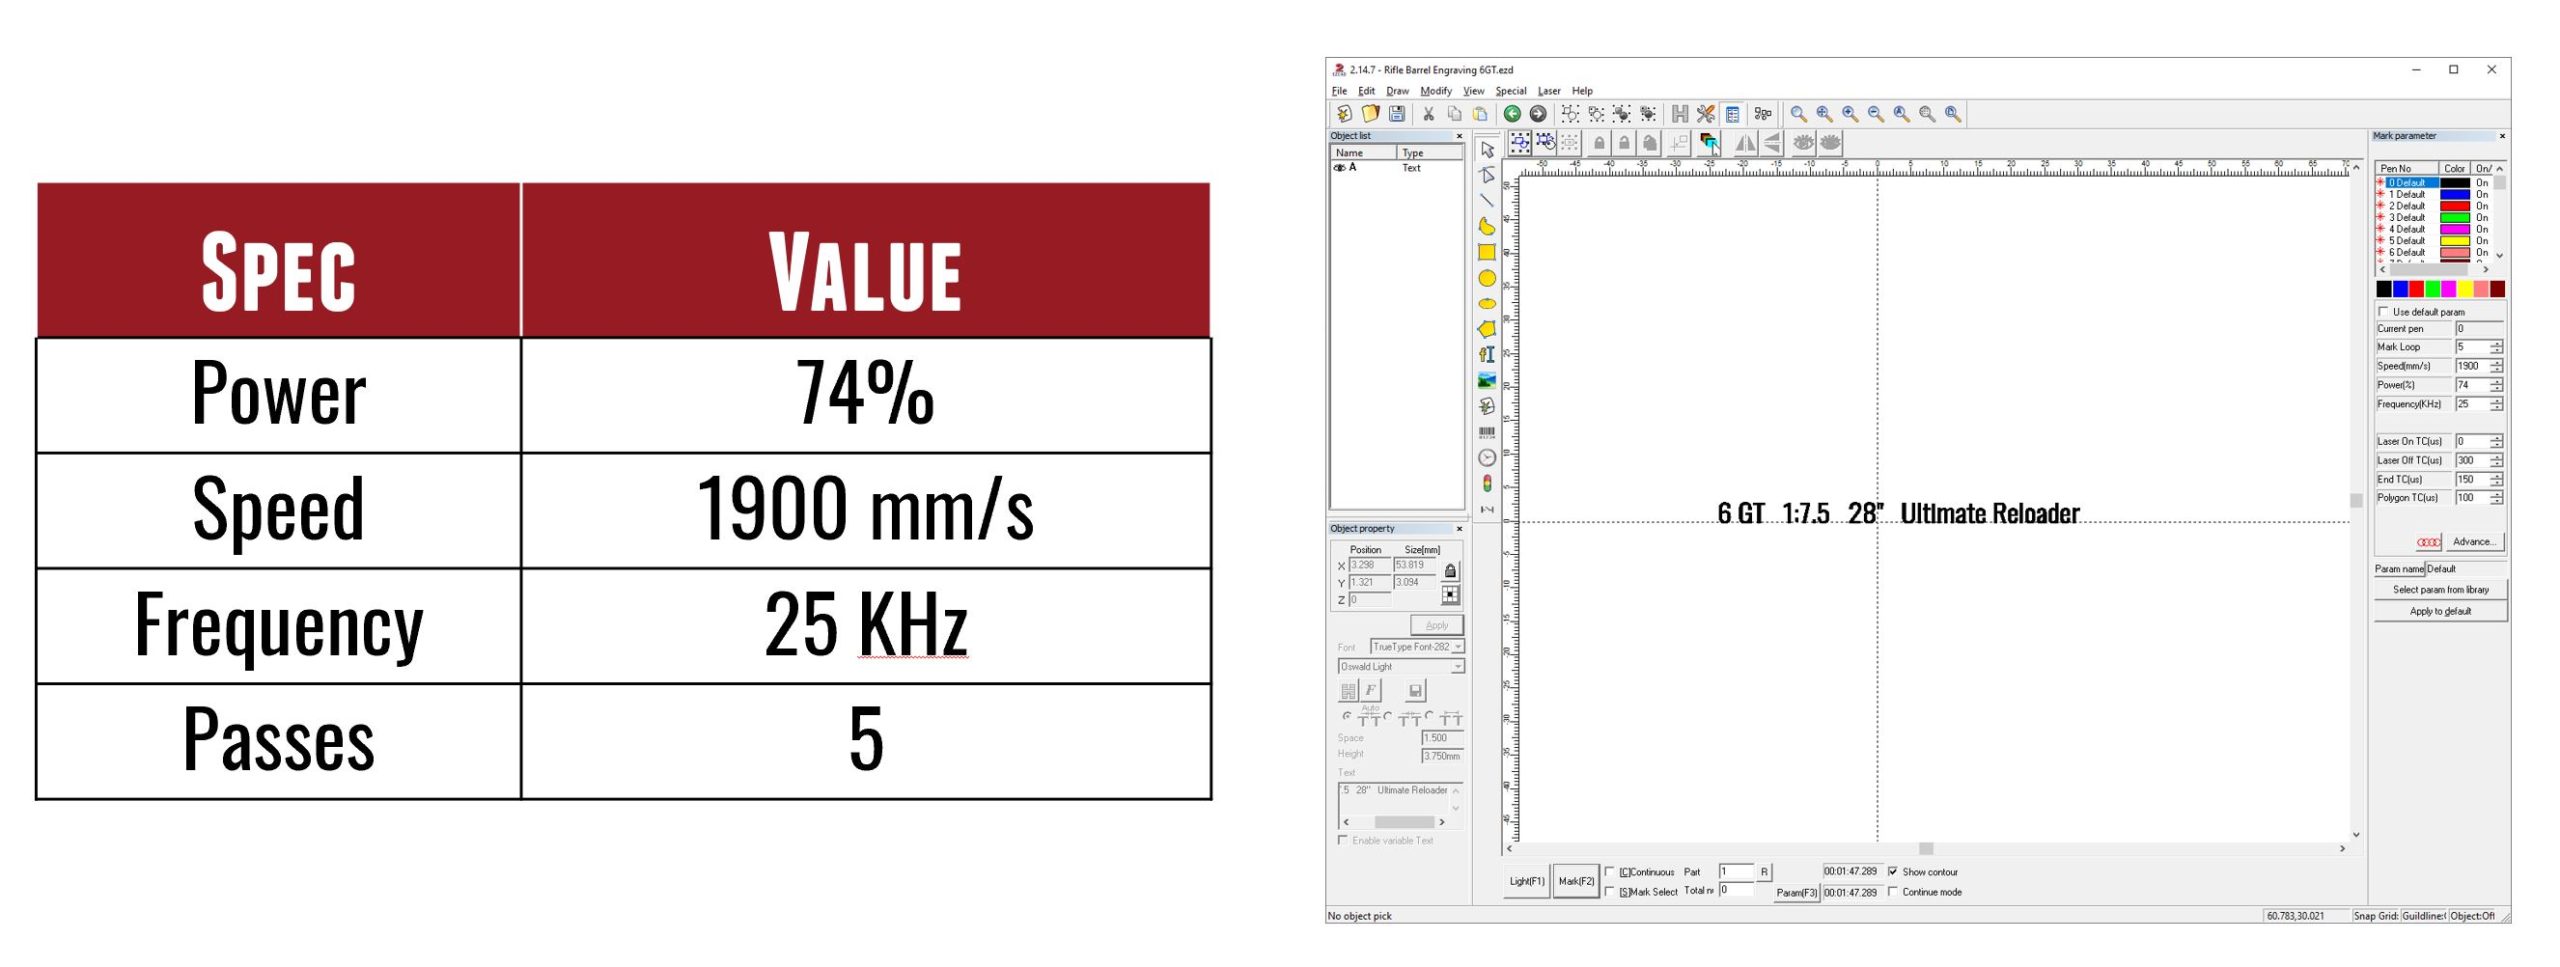
I ended up with a 50 Watt Fiber Laser with rotary attachment and it has been great! Alex supplied me with some settings for various materials which saved me a LOT of time getting things setup.
Here’s the settings I used for this engraving job:
For the engraving, the process is as follows:
- Setup engraving text / settings in EZCAD 2
- Align/support part
- Focus laser
- “Light” path
- Engrave part
- Clean with Zep

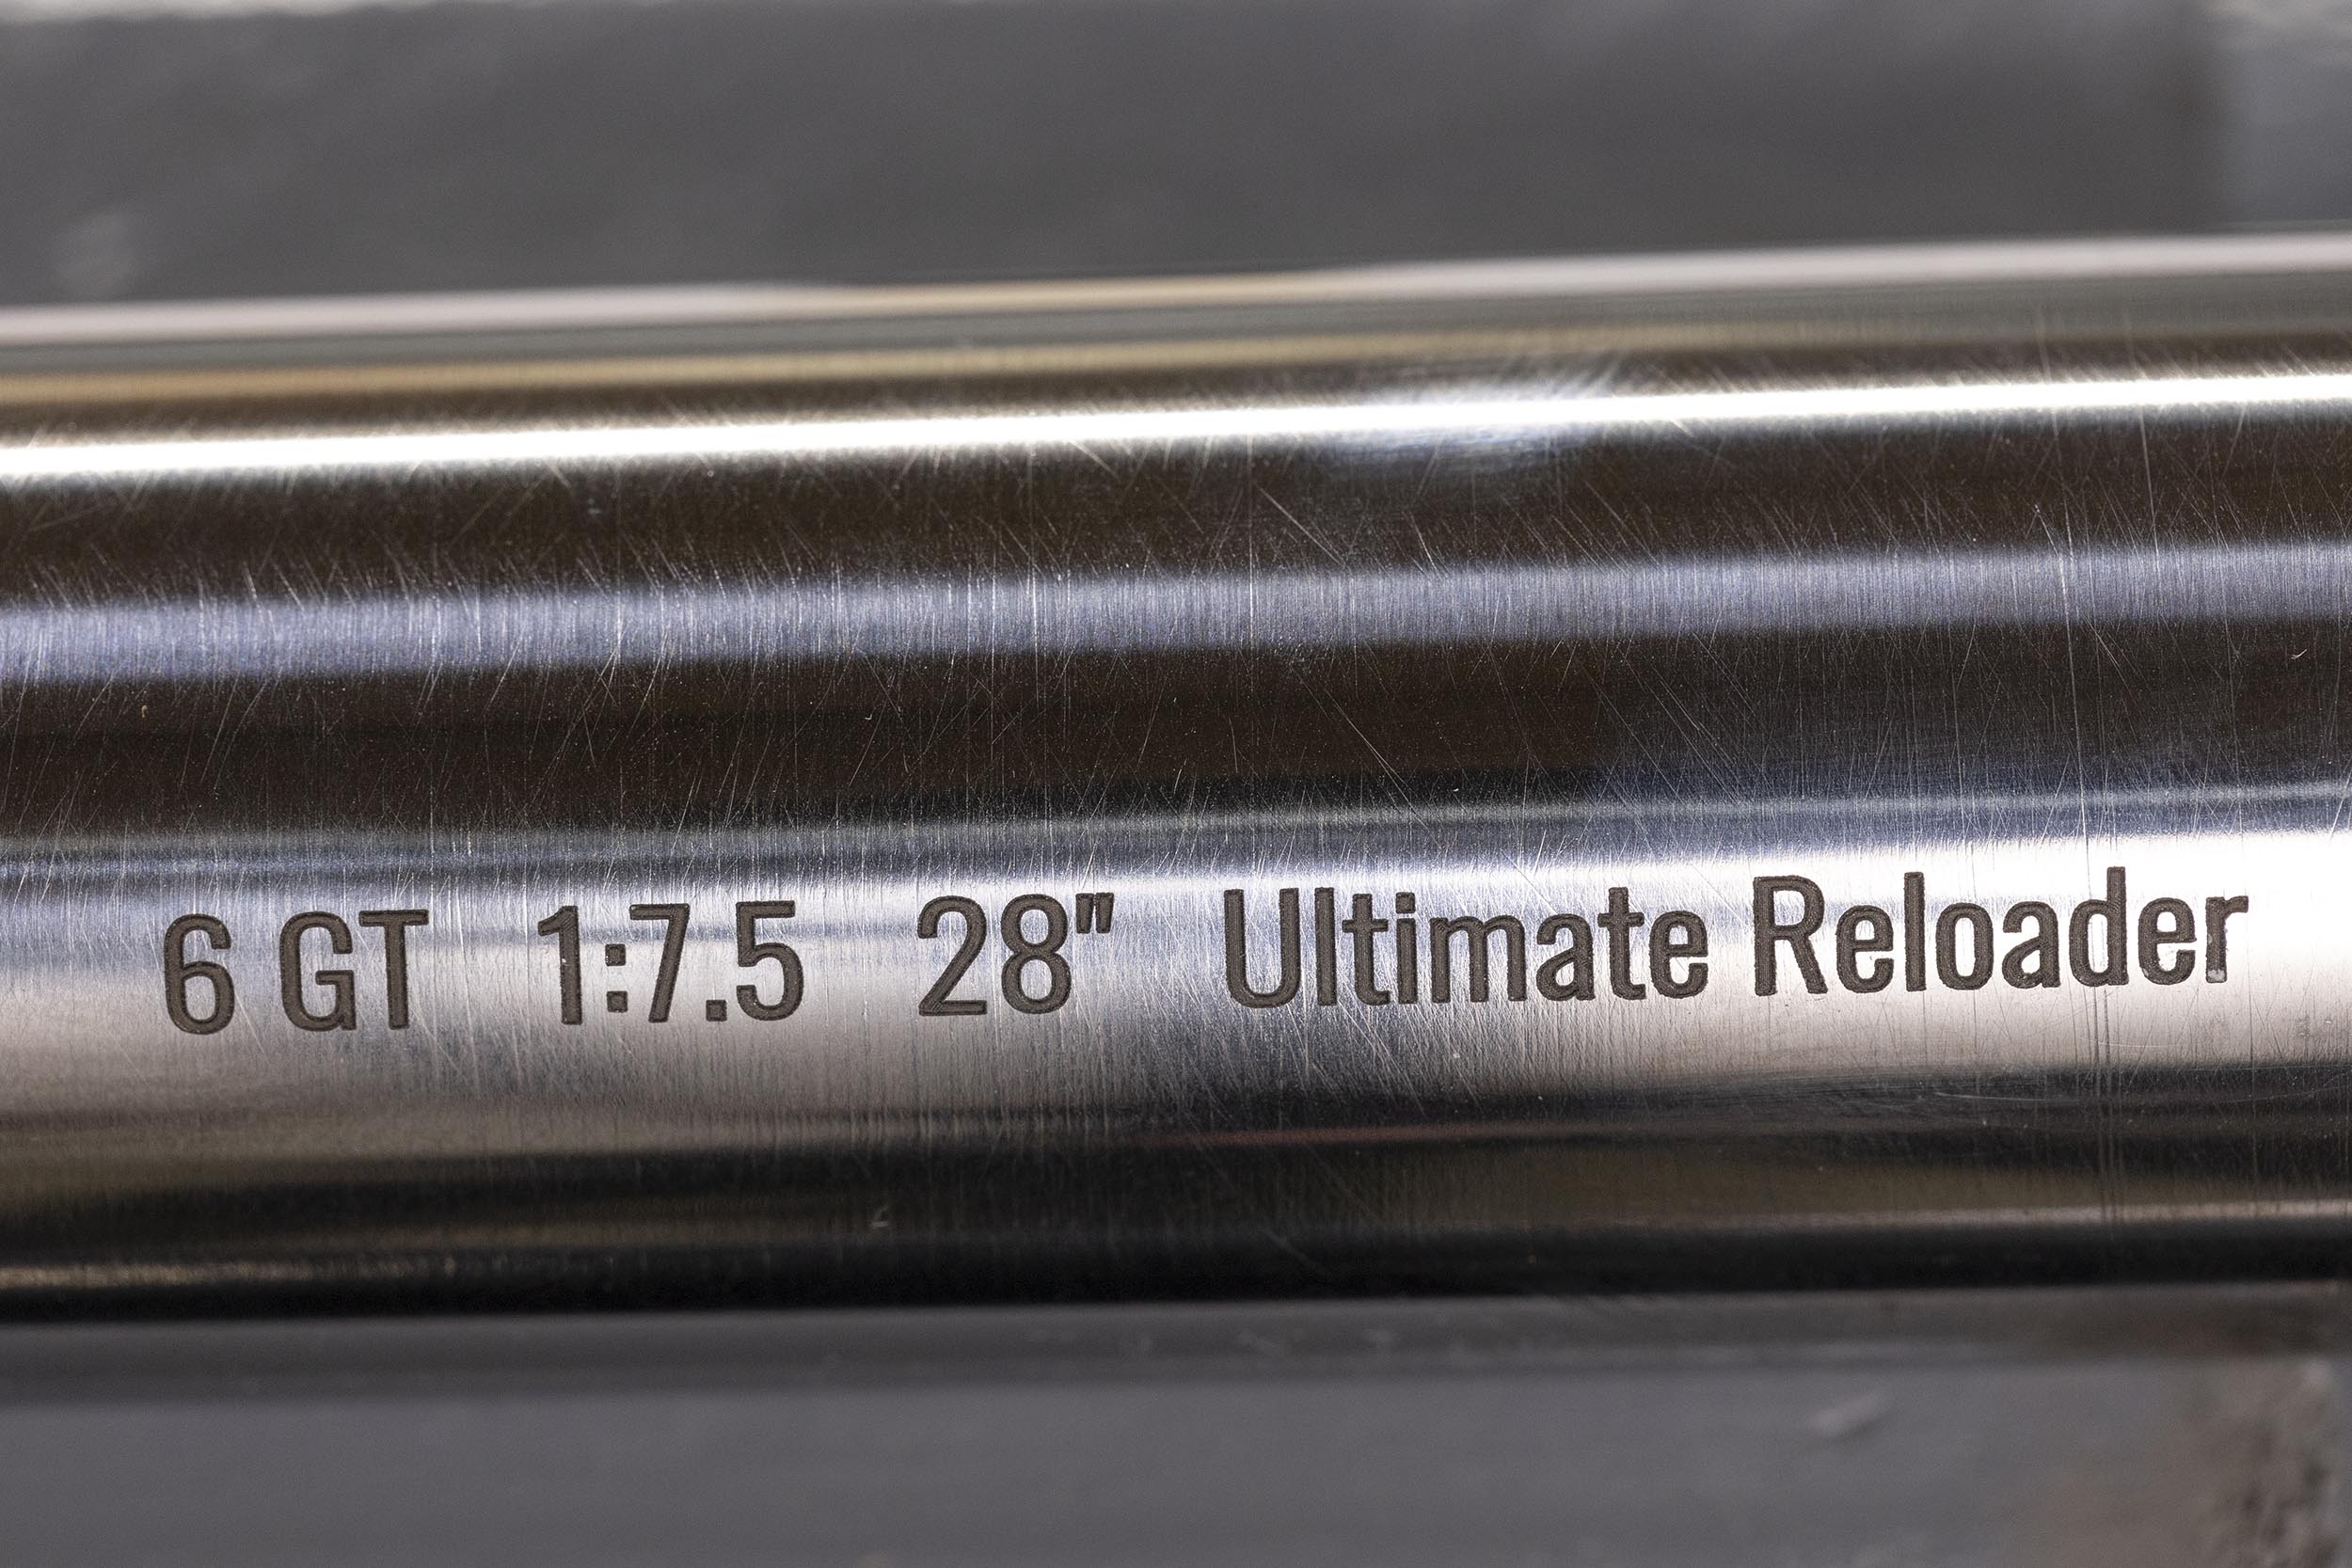
The finished product looks GREAT:
The Completed Product
Following the barrel work, it was time to torque the action onto the barrel! I used a torque value of 90 ft-lb, and did a headspace check, right on the money!
The complete barreled action looks great, and I’m really looking forward to shooting it in the MDT ACC chassis!
What’s Next
Next I’ll get an optic mounted, load some ammunition, and break-in the barrel, stay tuned!
Don’t miss out on Ultimate Reloader updates, make sure you’re subscribed!
Thanks,
Gavin


