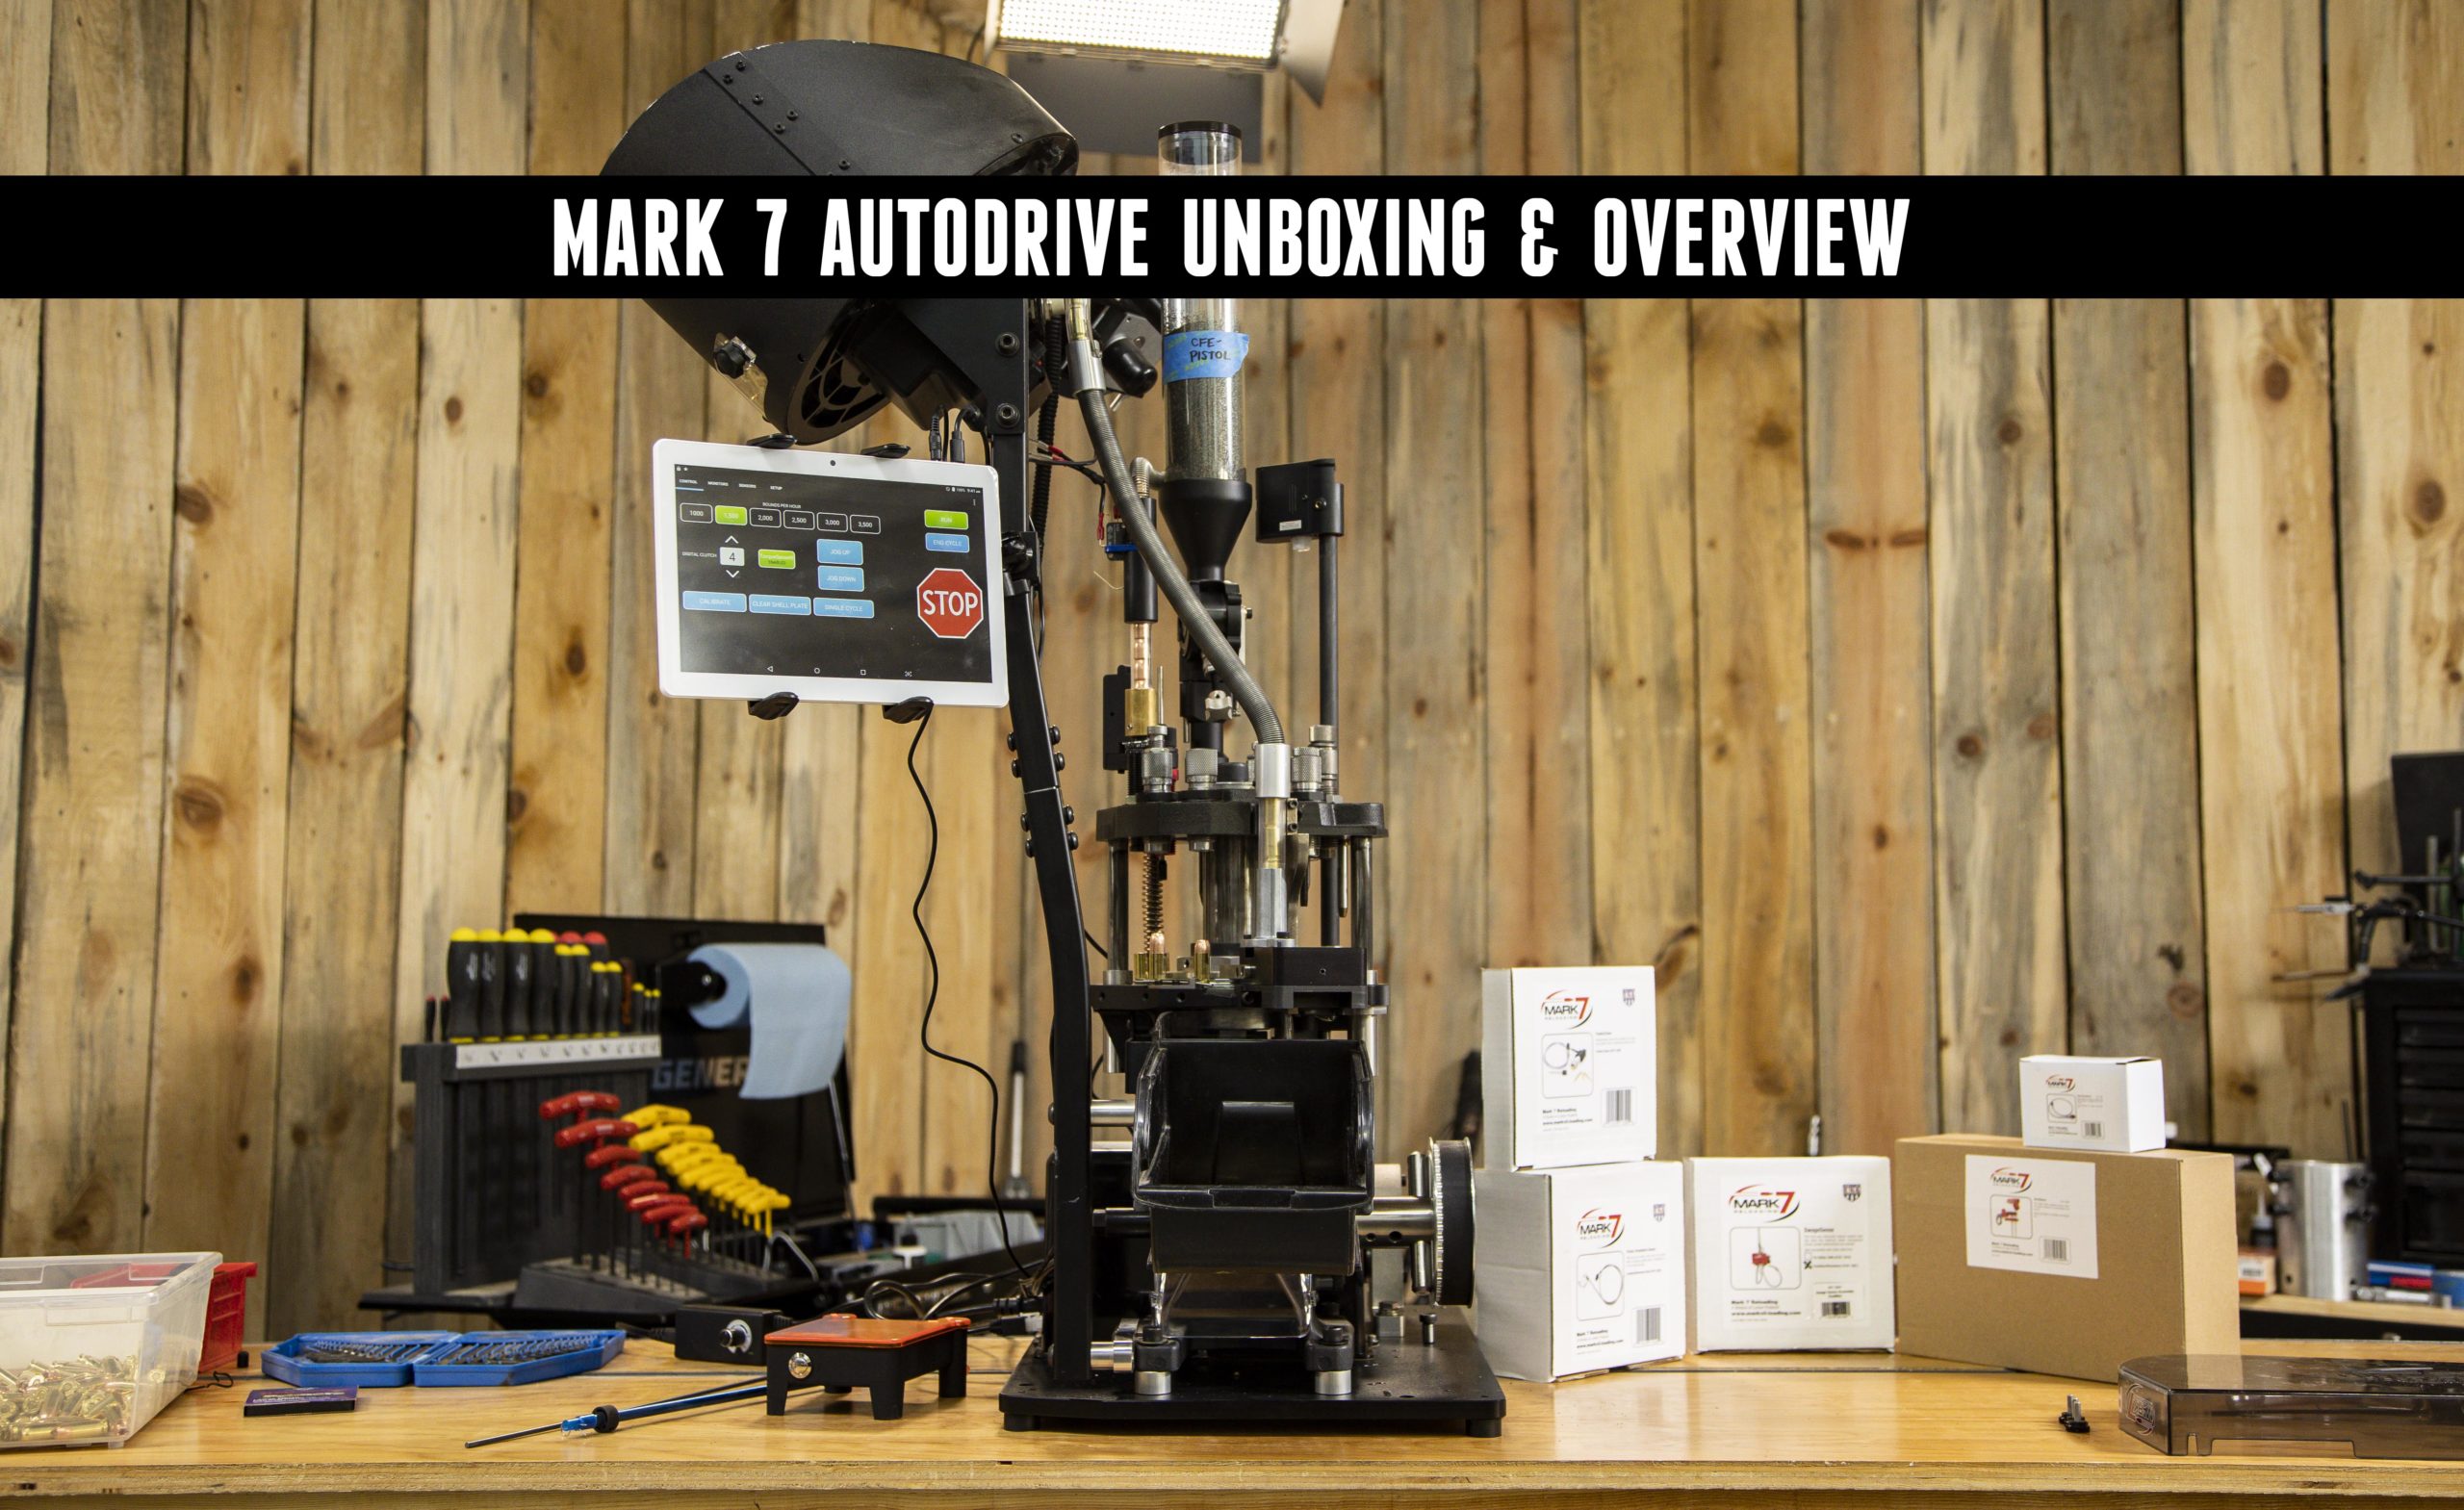
Do you want to load ammunition with more efficiency and ease on your Mark 7 APEX 10 or Evolution? Enter the Mark 7 Auto Drive! Mark 7 has charted new territory with their intuitive, powerful Autodrives for their presses. Check out this story as we walk through the unboxing, assembly, and set up on our Mark 7 APEX 10.
Disclaimer
Ultimate Reloader LLC / Making with Metal Disclaimer: (by reading this article and/or watching video content you accept these terms). The content on this website (including videos, articles, ammunition reloading data, technical articles, gunsmithing and other information) is for demonstration purposes only. Do not attempt any of the processes or procedures shown or described on this website. All gunsmithing procedures should be carried out by a qualified and licensed gunsmith at their own risk. Do not attempt to repair or modify any firearms based on information on this website. Ultimate Reloader, LLC and Making With Metal can not be held liable for property or personal damage due to viewers/readers of this website performing activities, procedures, techniques, or practices described in whole or part on this website. By accepting these terms, you agree that you alone are solely responsible for your own safety and property as it pertains to activities, procedures, techniques, or practices described in whole or part on this website.
Background: APEX 10 Overview
When the APEX 10 was released, I published a full article and video which you can watch here:
About the Auto Drive
From the Mark 7 Auto Drive Product Page:
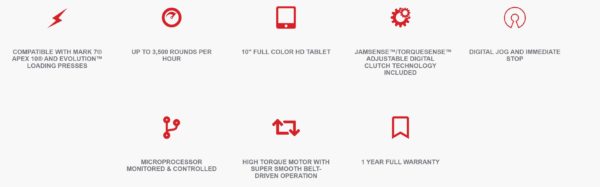
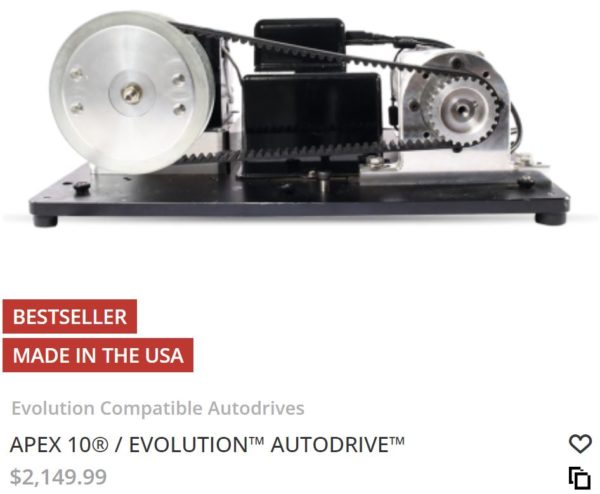
Tired of pulling on the handle of your press over and over and over? The Apex 10® / Evolution™ Autodrive™ will fully automate your Mark 7® APEX 10® or Evolution™ manual presses for speed, efficiency and performance. The Autodrive™ is packed with features that make it the most advanced system ever designed. The patented digital drive system is computer operated allowing you to fully control the speed, torque, and dwell of the press with a simple-to-use high definition tablet.
MARK 7 AUTODRIVES ALLOW YOU TO AUTOMATE YOUR APEX 10 OR EVOLUTION HAND OPERATED RELOADING PRESS.
The combination of our patented digital sensor technology, torque sensing motor and jam sense technology ensures a safe and trouble free loading experience. If top of the line technology, innovative features and high quality are what you are looking for, Mark 7 is the only choice.
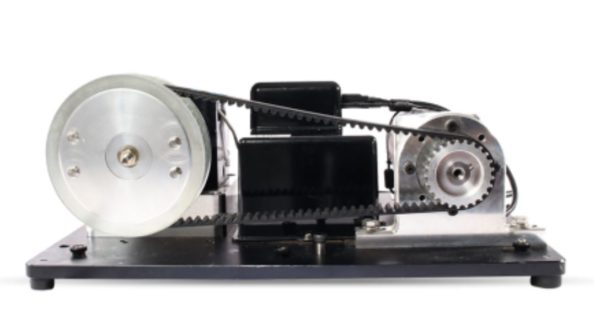
This is a true “plug and play” system that makes it easy to mount and set-up on your press. The included TorqueSense and JamSense sensors protect the press and system if anything gets out of place. The Autodrive controller can also accept additional sensor options for the ultimate level of protection. Autodrives come with their own rugged base and a drilled and tapped press mounting plate. The high torque motor and precision machined components combine for super smooth operation.
What’s in the Box
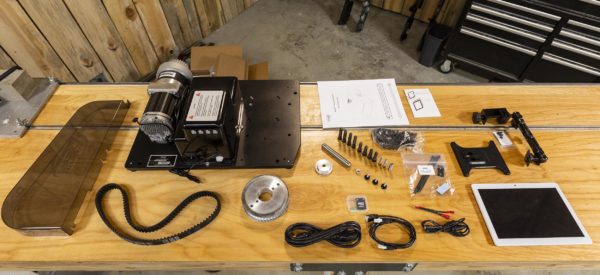
The Auto Drive comes ready for both the Mark 7 Apex 10 and Evolution Progressive Presses. Here’s a list of what’s included:
- Base Unit, which includes the electronics housing and pulley
- Drive Belt
- Pulley for the Apex 10 or Evolution
- All of the Hardware
- All the Electronics Interface and Power Cables
- Tablet Mounting Kit
- Mark 7 HD Tablet
- Auto Drive and Tablet Manuals
- Auto Drive Gear Cover
Now that we’ve covered the box contents, let’s start the setup!
Mechanical Assembly
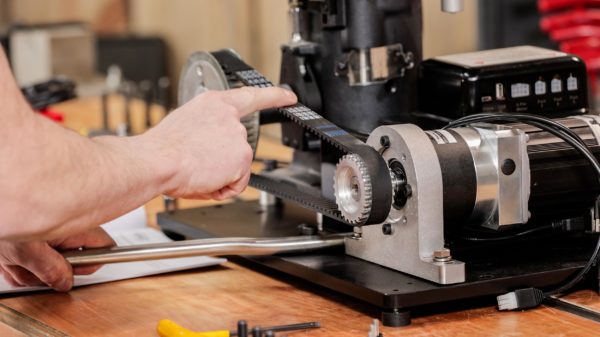
The Mechanical Assembly was straightforward. Here, we are pretty familiar with the Apex 10, So we’ll be setting up with that. Here’s a walk through of what we did to get the mechanical install done.
- I installed the press on the Base Unit. There are 4 bolt holes to fasten your press down on.
- I then removed the handle on the Apex 10. A guide rod slides through the arm, replacing the handle. The Press Pulley will fasten to that.
- Next, I loosened the bolts holding down the gear box, sliding it closer to the Press. This positioned the pulleys loose enough to slip the belt on. Start with the Press side first, as there are guide bars. The splines of the belt will go directly onto the gear box pulley.
- Once your belt is on, it’s time to tension it. A pry bolt on the base of the unit enables you to slip your Press handle between, and apply tension to the gearbox as you slide back out to its original position. Tighten the gear box bolts down.
- At this point you will want to install the belt cover for safety. We held off on this step for video purposes.
At this point, the mechanical installation is complete. Time to route our electronics!
Electronics Assembly
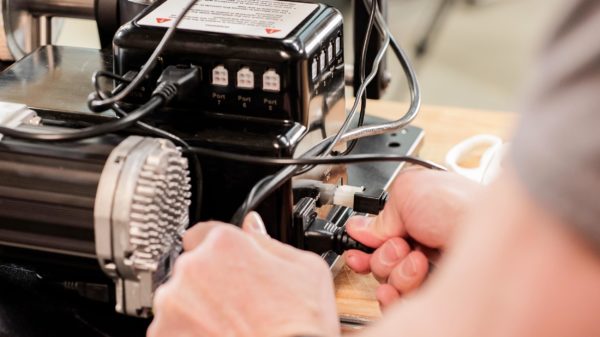
We’re just one step away from getting the Auto Drive running!
- Plug in and route the dedicated Interface cable for the tablet.
- Plug in the dedicated power cable that supplies power to the tablet from the electronics housing on the AutoDrive
- Plug in the 2 cables that route from the gearbox to the electronics housing
- Plug in your dedicated power cable to the Auto Drive Base.
At this point we are ready to power up the Auto Drive!
Calibration and Run Up
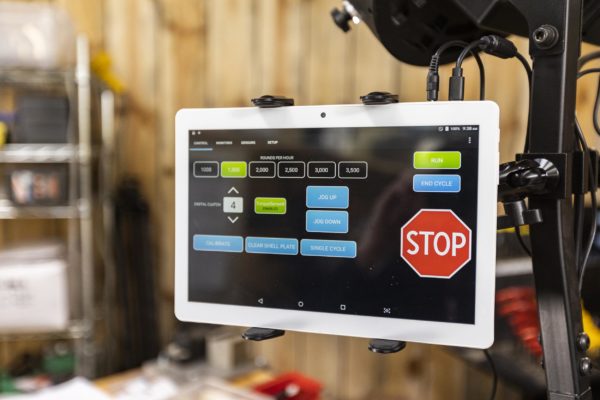
I had been waiting for this moment for some time now. It was finally time to power up the Auto Drive, by doing the following:
- Flip on the power to the Auto Drive.
- Turn on the Tablet.
- The Boot up sequence begins.
- Press the Calibrate button (machine will auto-calibrate)
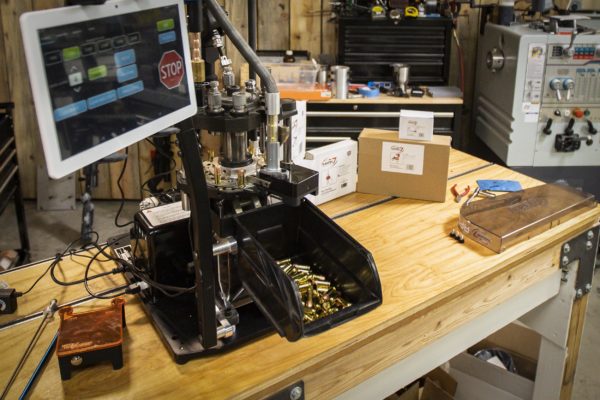
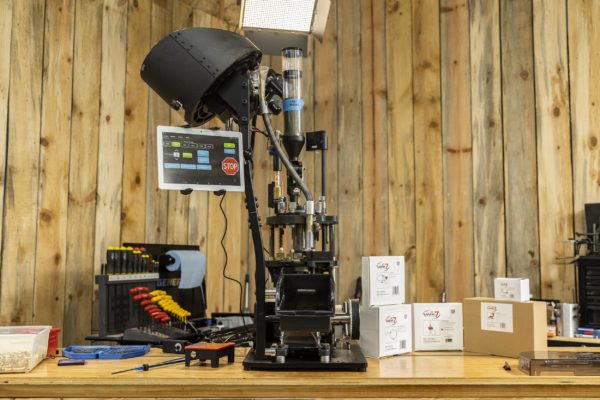
Die Station Utilization
Here’s quick review of how the machine is setup for loading 45 ACP:

As shown in the picture above:
Station 1: Case feeding
Station 2: Sizing and decapping
Station 3: Swage with hold down
Station 4: Primer seat with 500 S&W magnum die (no decapper) for hold-down
Station 5: Case flare/neck expansion
Station 6: Powder drop
Station 7: Powder check
Station 8: Bullet Dropper
Station 9: Seating
Station 10: Crimping
Basic 45 ACP Loading Scenario
Once we had things setup and components filled, I did the following:
- Run up all the stages with single cyclings of the press (one complete cycle, advancing the cases one station at a time)
- Slow speed loading (1000 rounds/hour)
- [checking of everything, examining loaded ammunition]
- 1500 rounds per hour test
Conclusion
Everything is working great with my autodrive!
Don’t miss out on Ultimate Reloader updates, make sure you’re subscribed!
Mark 7 Auto Drive Product Page:
Double Alpha Magnetic Powder Check
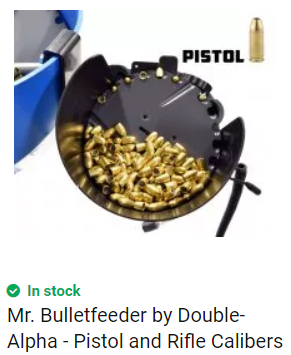
Mr. Bullet Feeder at Double Alpha
As mentioned in the APEX 10 overview article, the Mark 7 APEX 10 is also available from the Double Alpha Academy! (autodrives available as well)
Thanks,
Gavin Gear


That press with auto drive would be great if you were a competition shooter, needing to crank out thousands of rounds for practice and matches.