
During a recent visit with Fred Zeglin of 4D Reamer Rentals at the Ultimate Reloader ranch, Fred and I decided that a “guest rifle build” was in order! In this story, I’ll tell the story of watching Fred re-barrel a 350 Legend Ruger American rifle to 300 AAC Blackout. What’s more: with simplified tooling.
About Fred Zeglin
In case you missed the full story, here’s the video I recently published which gives a quick bio for Fred, and an overview of his books as well as 4D Reamer Rentals.
Build Part 1: Chambering the Barrel
I have read some of Bill Marr’s articles on Rifleshooter.com that cover chambering a barrel for the Ruger American, now it was time to see the process in-person! Fred started with a “build sheet” for the barrel tenon and chamber.
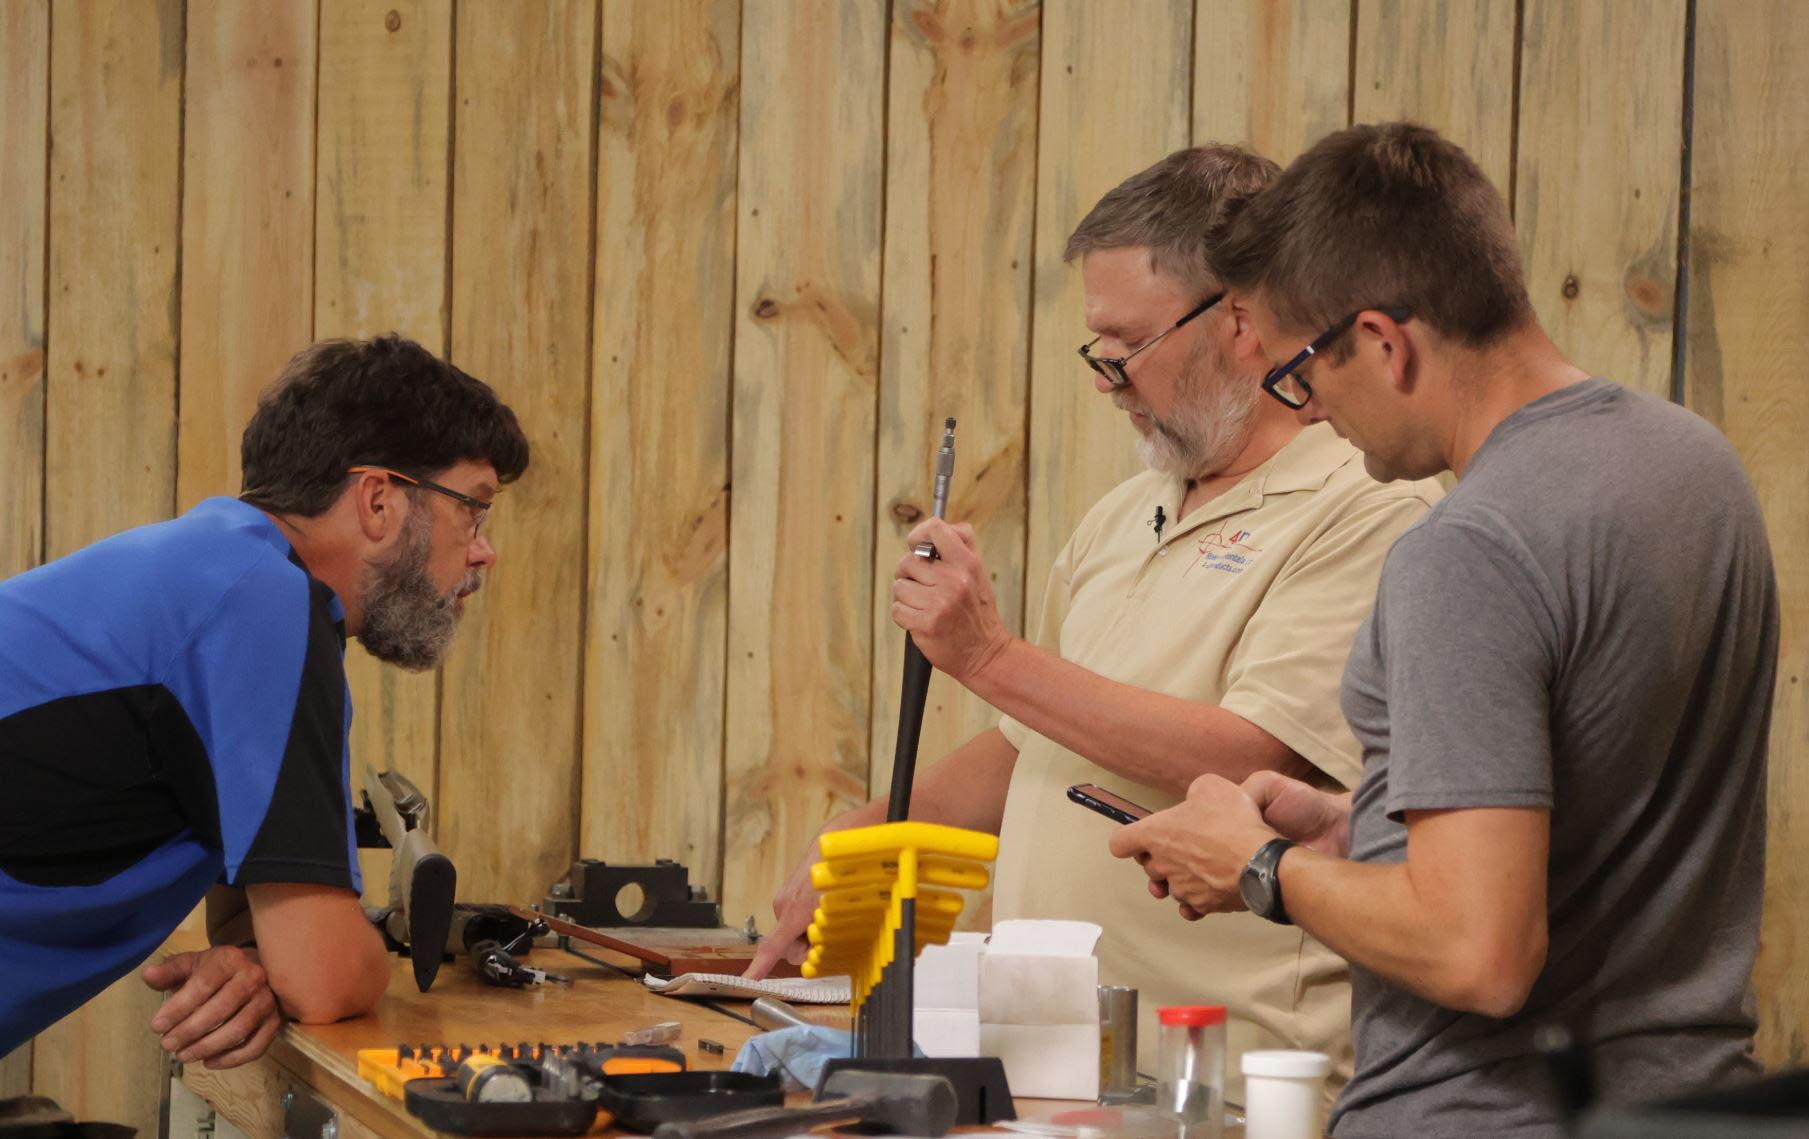
Above: Travis watches and Gavin checks the math as Fred measures and records tenon dimensions
With the Ruger American using a barrel nut instead of a traditional shoulder, there is more “Forgiveness” when cutting the tenon to length, and when cutting the chamber to depth.
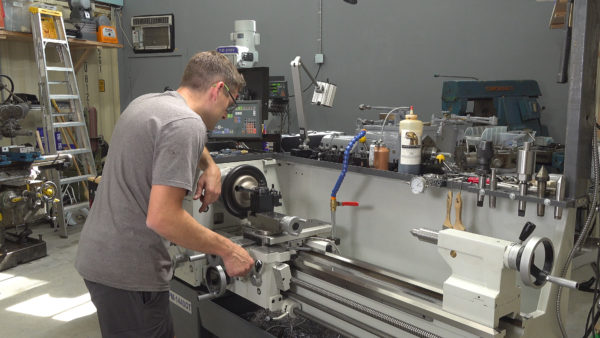
My Lathe
For this story, we’re using the Precision Matthews PM-1440GT. I believe this is the best gunsmithing lathe you can by new in the USA (Taiwanese made, not chinese, 2″ through-spindle capacity, Japanese high-precision spindle bearings, etc):
I also built a custom outboard spider that I built- you’ll want to check out that story.
Here’s the process Fred demonstrates in the video for the initial breech end barrel work:
- Barrel is installed in a 6-jaw chuck, faced, and bore is beveled
- Barrel is moved out over the ways, and held between the 6 jaw chuck (on muzzle end) and a live center in the tailstock on the breech end
- Barrel tenon is turned to diameter for 1″ x 16 threads
- Barrel is threaded
- Shank is trued (skim cut)
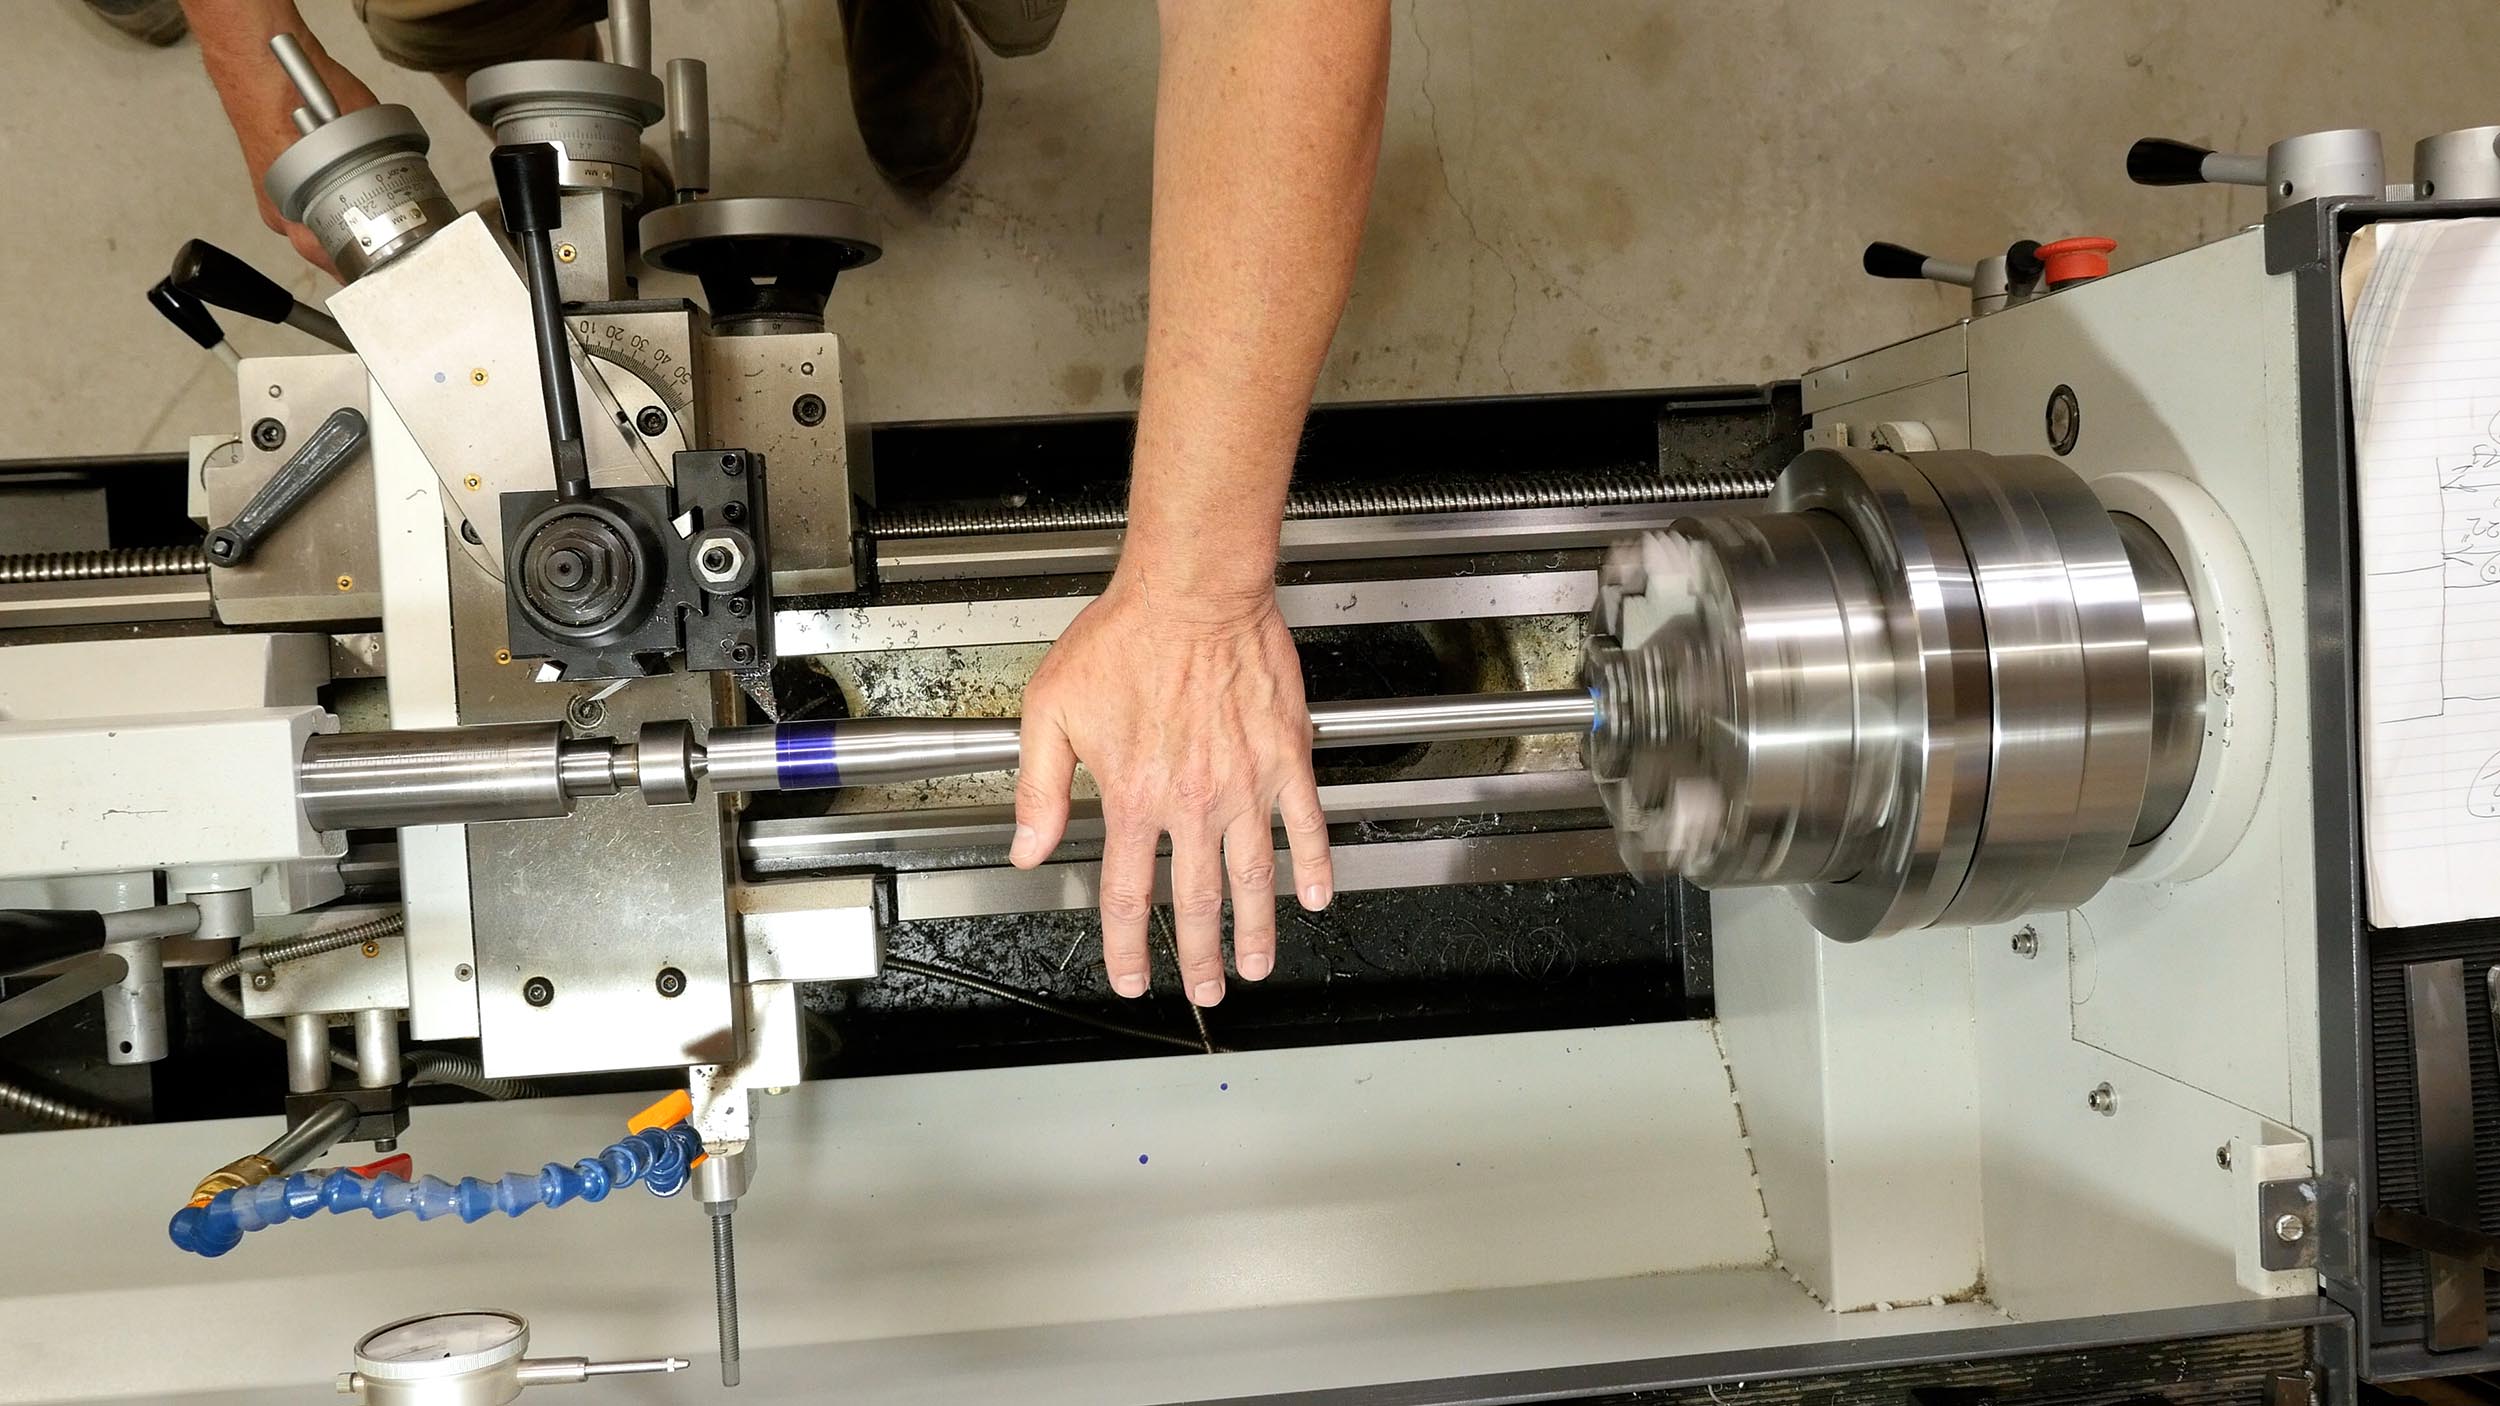
Above: using hand pressure to suppress cutting chatter while turning the tenon to diameter
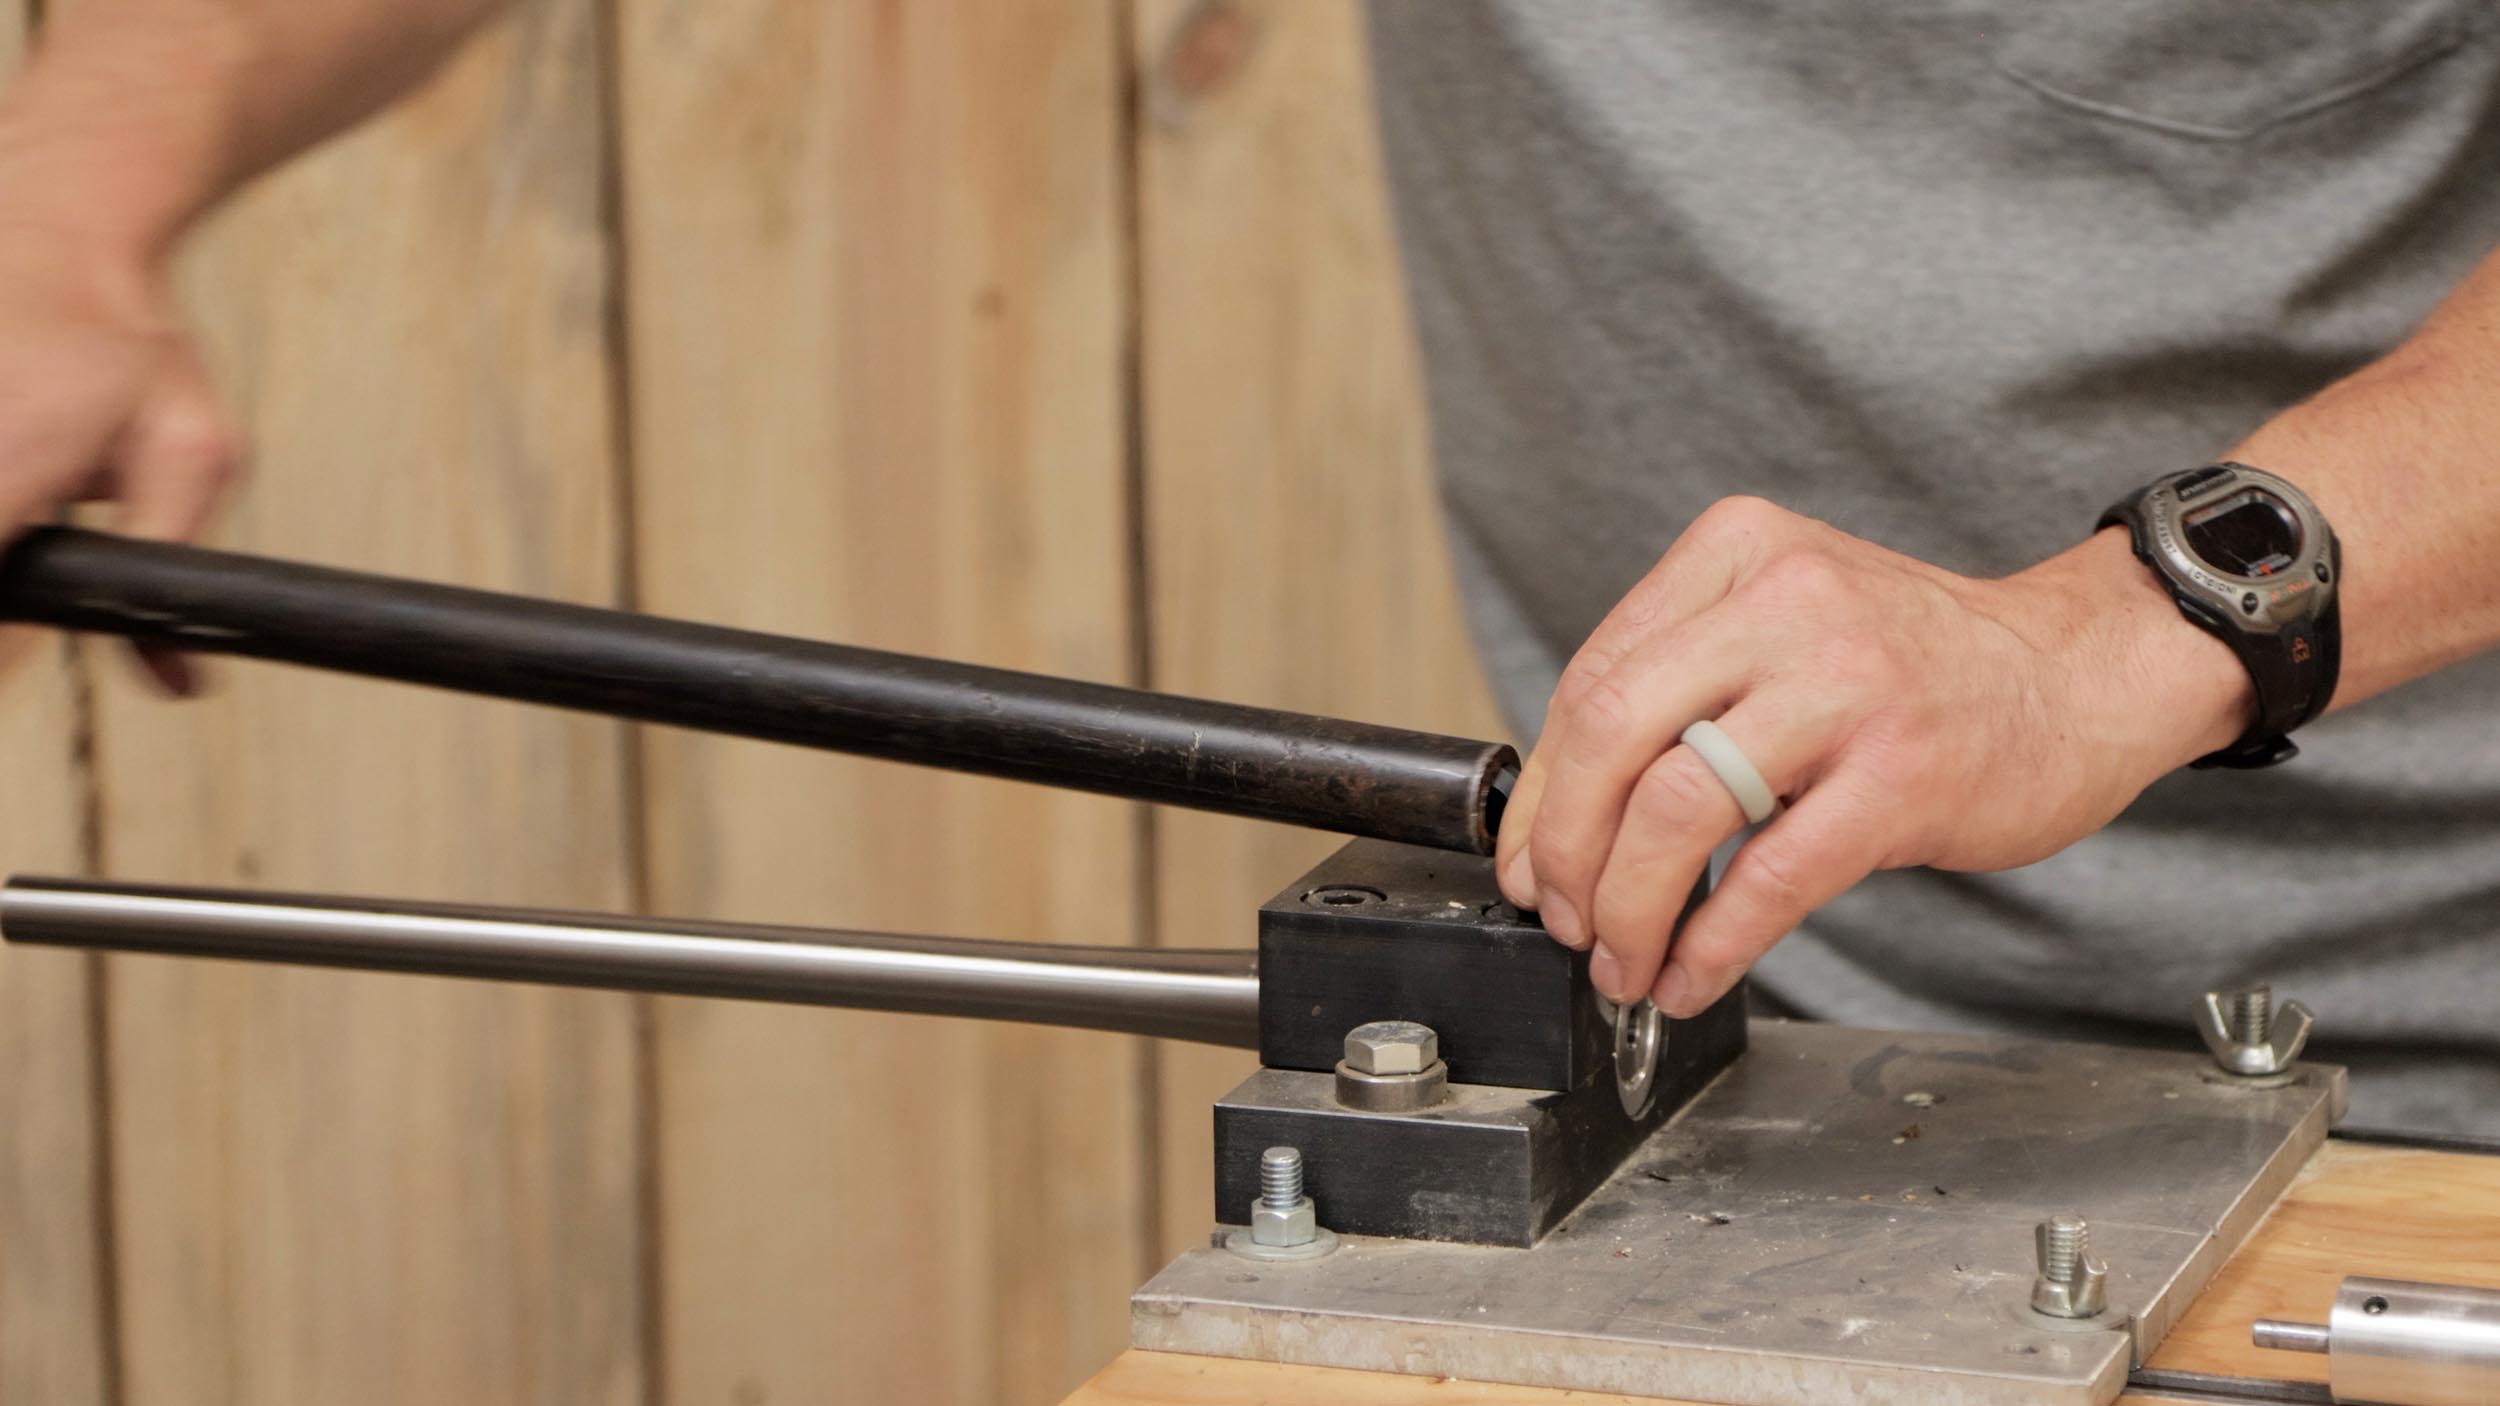
Then the barrel is chambered:
- Trued barrel shank is clamped with 6-jaw chuck
- Chamber is reamed with successive plunges (cleaning chips and chamber between each plunge)
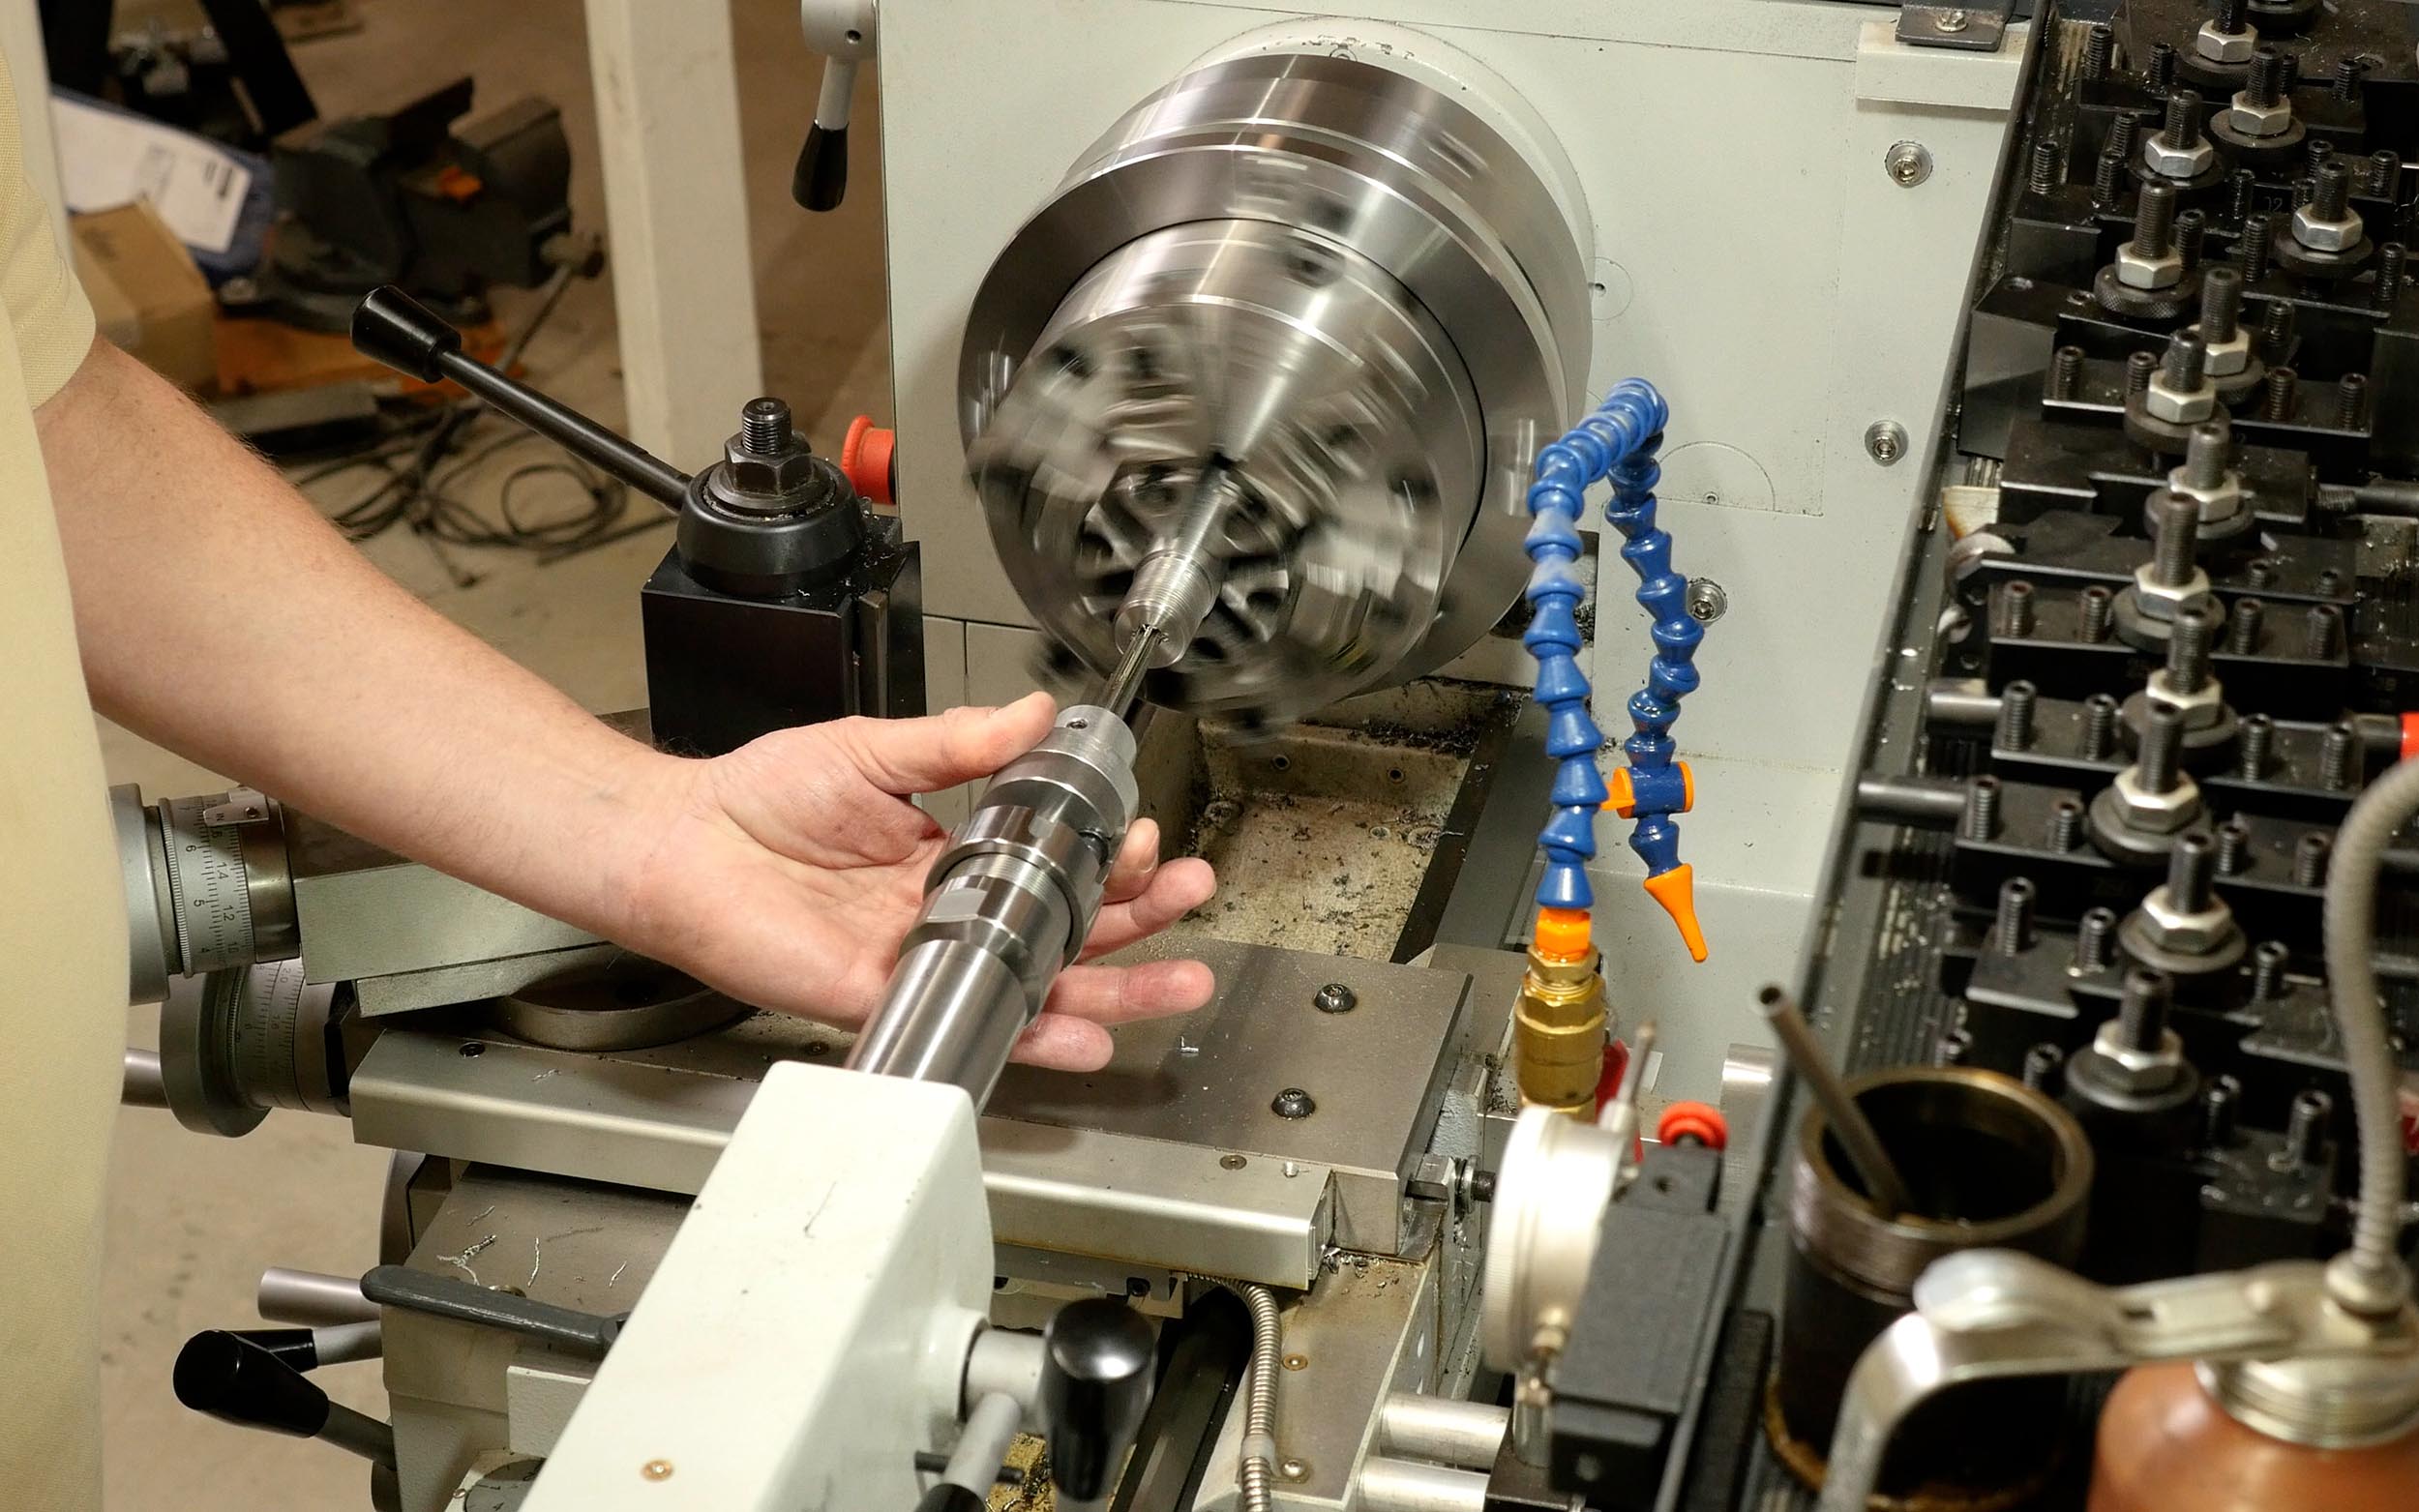
Above: Using a Dave Manson floating reamer holder while reaming the 300 Blackout chamber
Muzzle Threading
The barrel was taken out of the lathe and installed in a barrel vice with “healthy clamping force”. Fred then proceeded to use an annular cutter with pilot to turn down the OD of the muzzle to 0.625″:
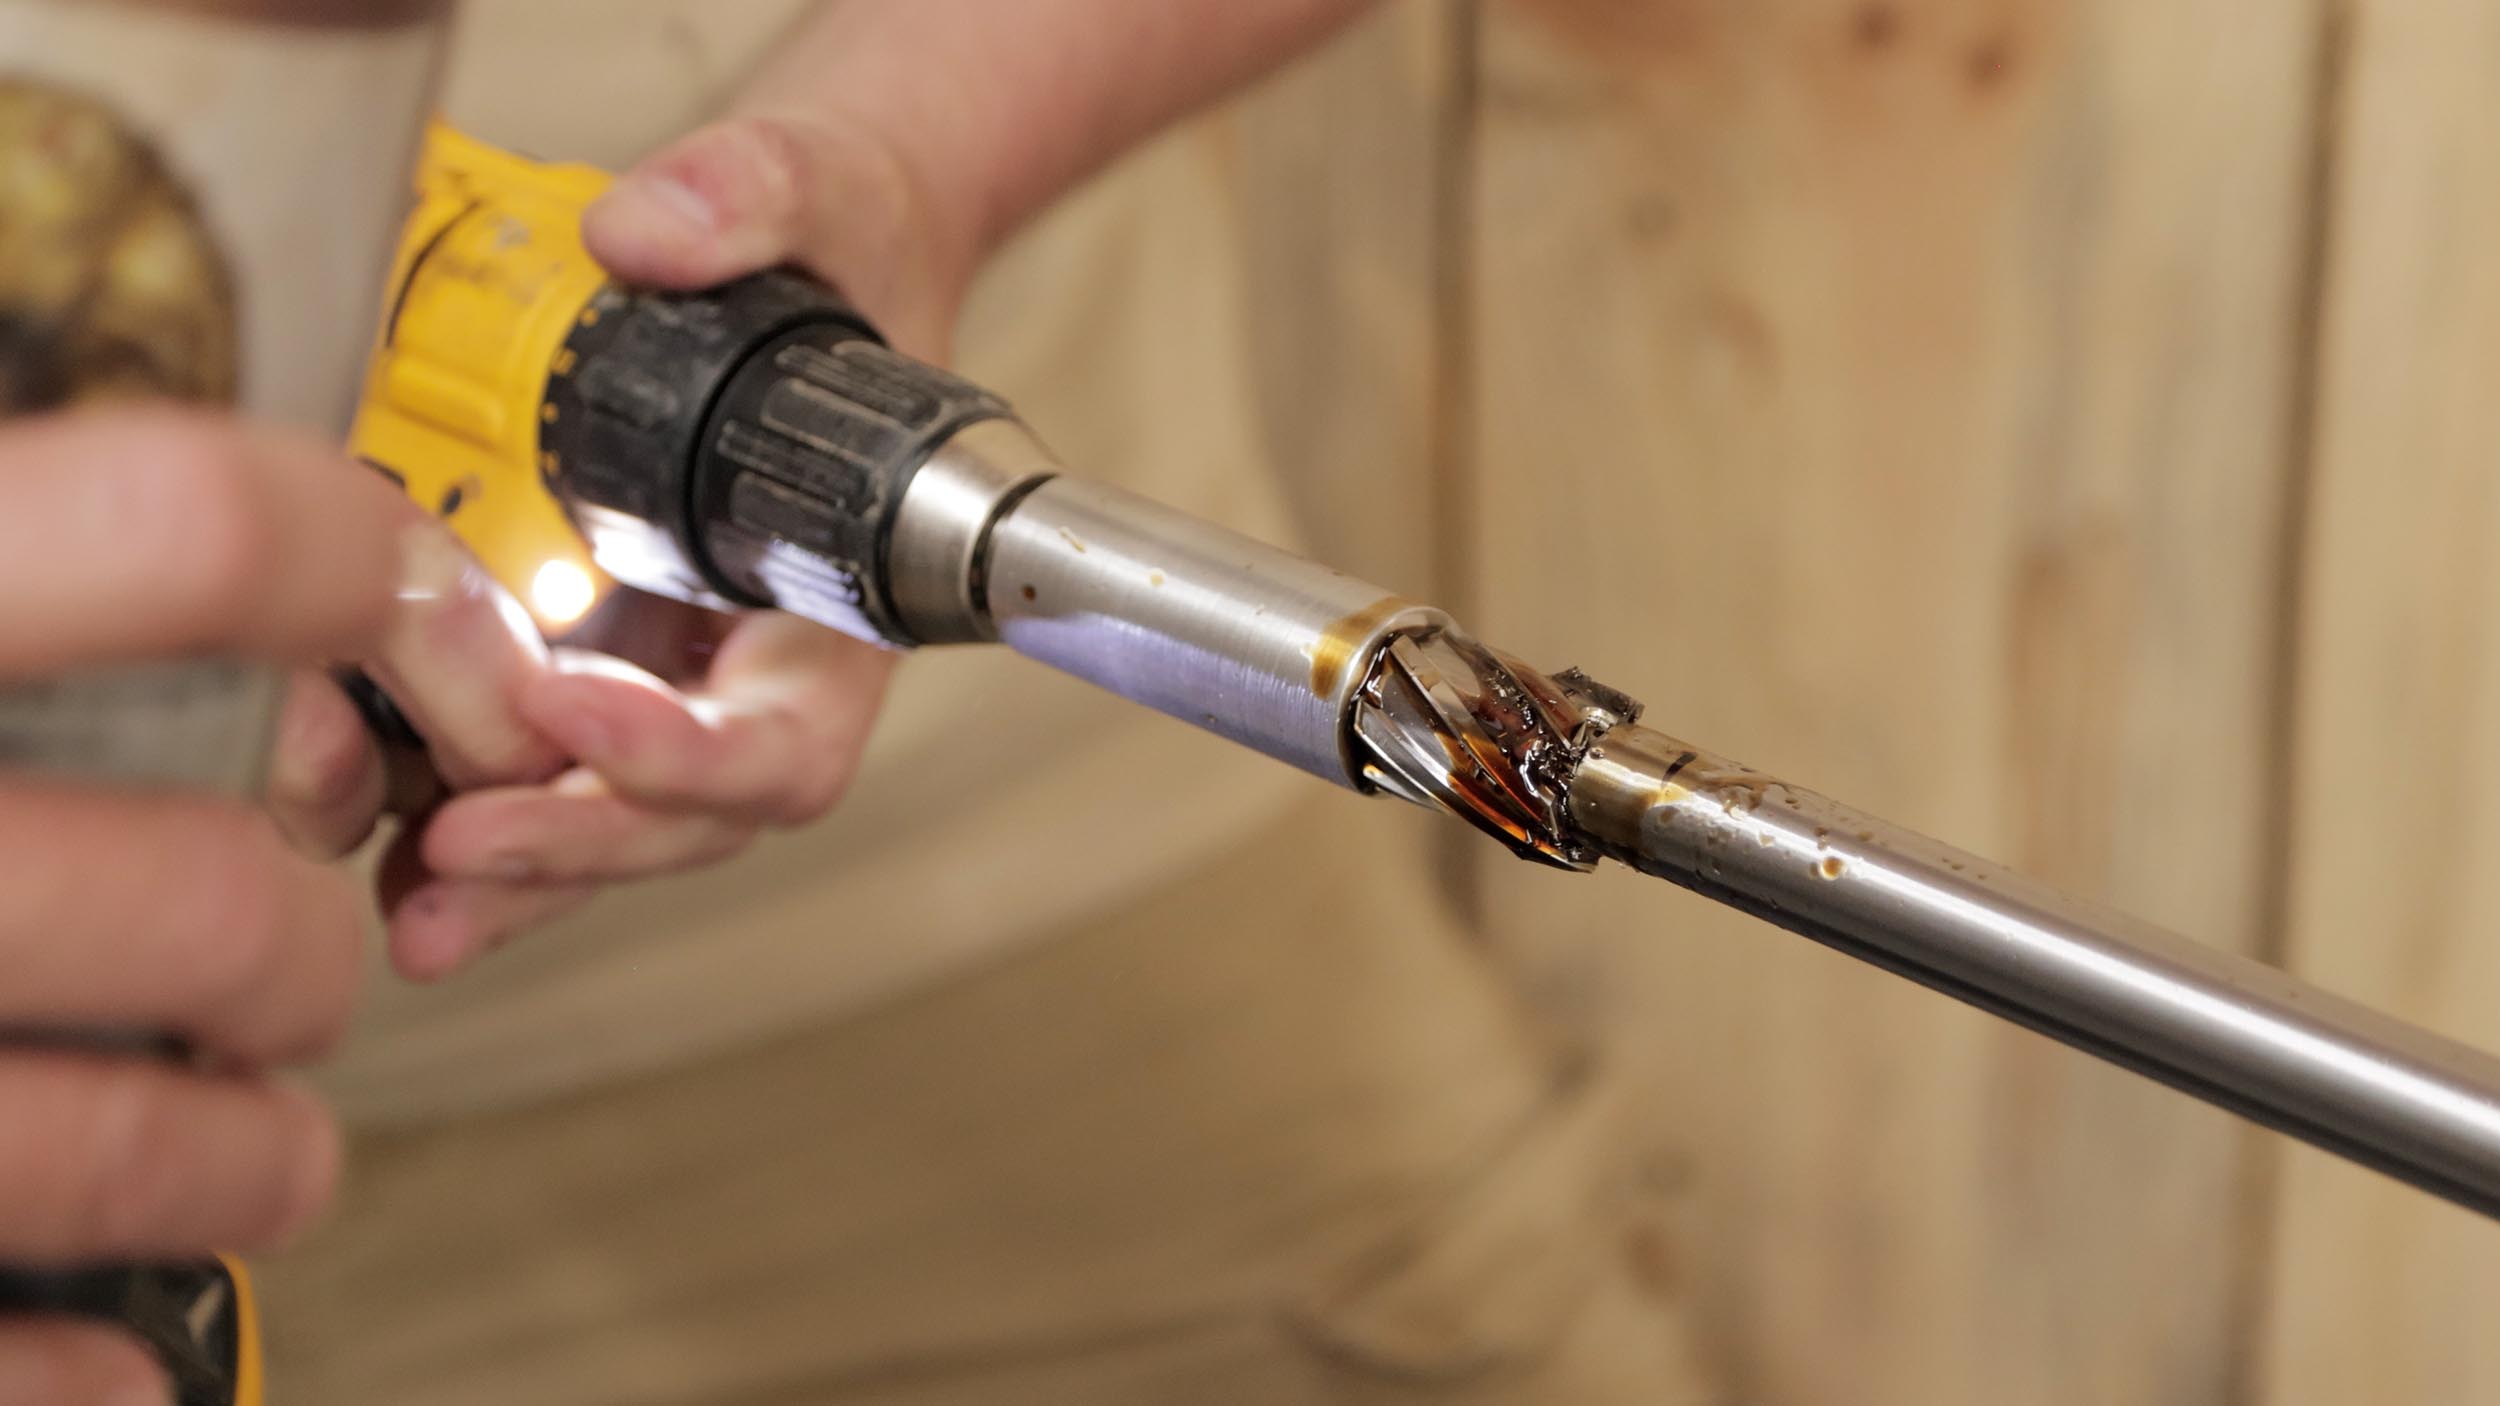
With the muzzle turned down to 0.625″, it was time to use a 5/8 x 24 die and guide to thread the muzzle:

*Note: This method of muzzle threading is NOT suitable for suppressors with tight bullet clearance. We were shooting a 30 caliber projectile through a 46 caliber suppressor. That worked fine, but a smaller suppressor diameter spec could cause issues!
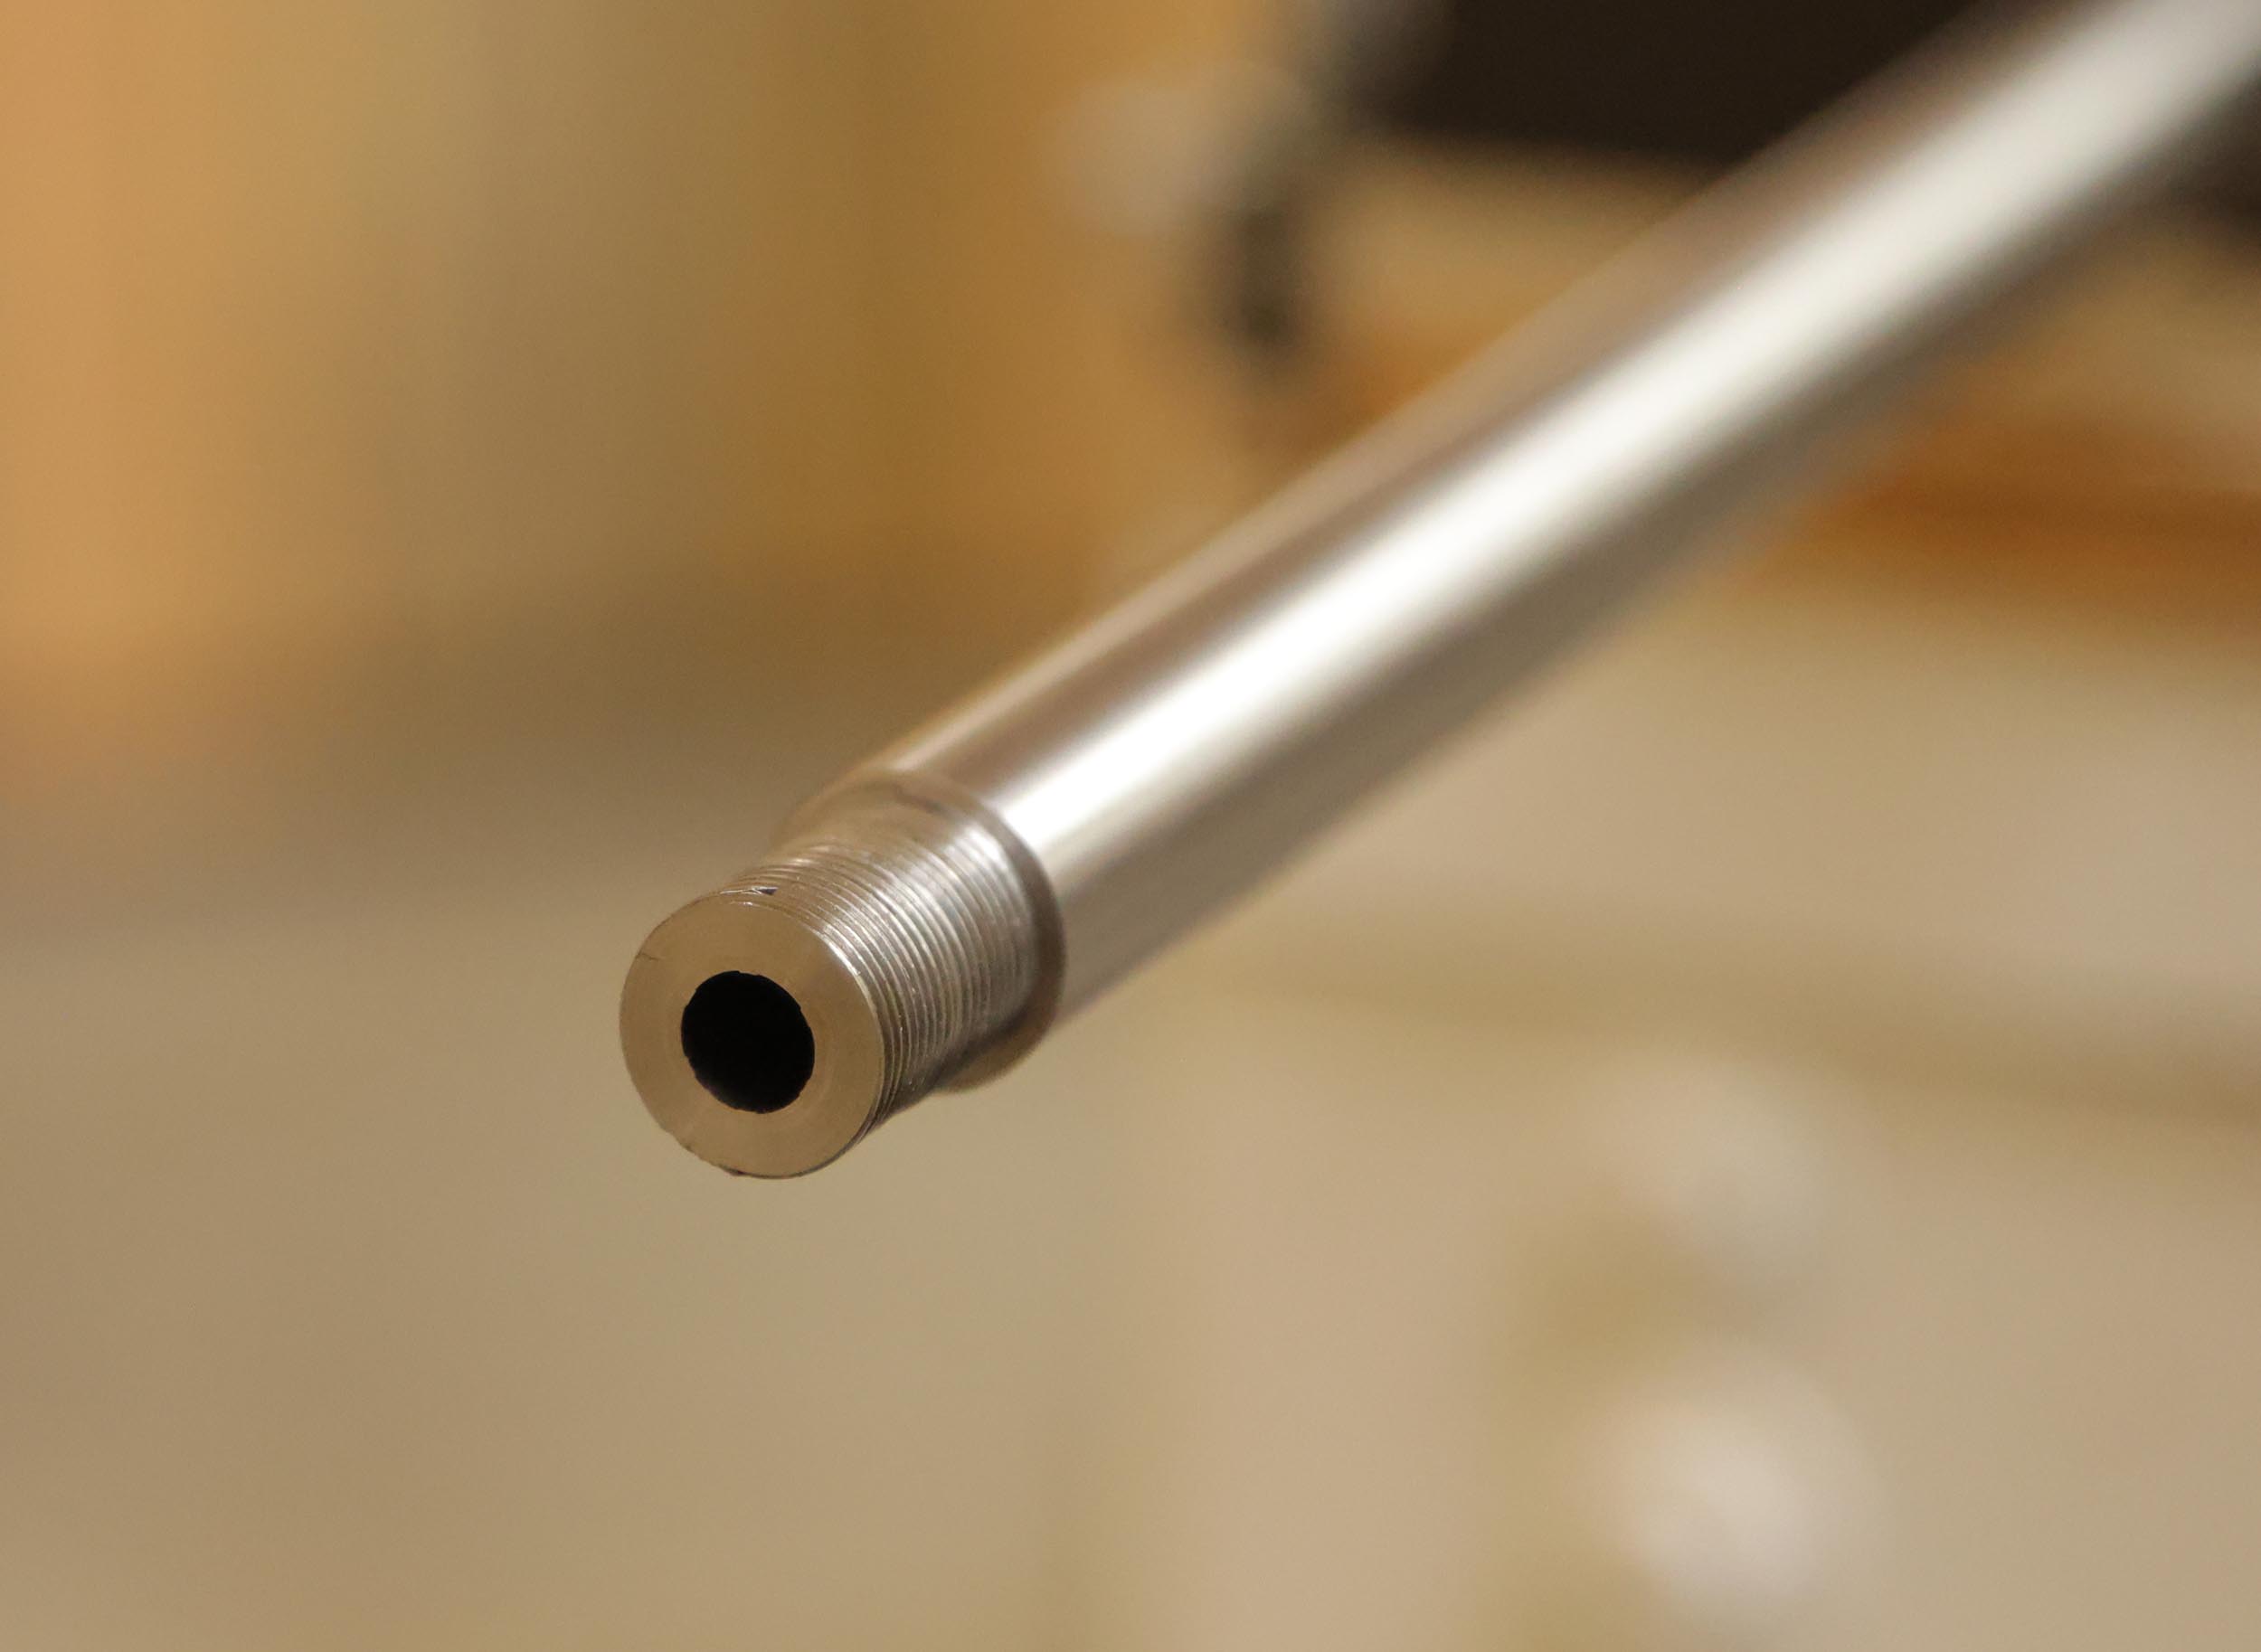
To finish of the muzzle end, a facing tool was used to clean up the muzzle, all done:
It was refreshing to see a new approach to building a rifle. These methods would be worth considering for someone with limited access to high-end tooling wanting to build a nice hunting rifle or similar.
Testing the Rifle
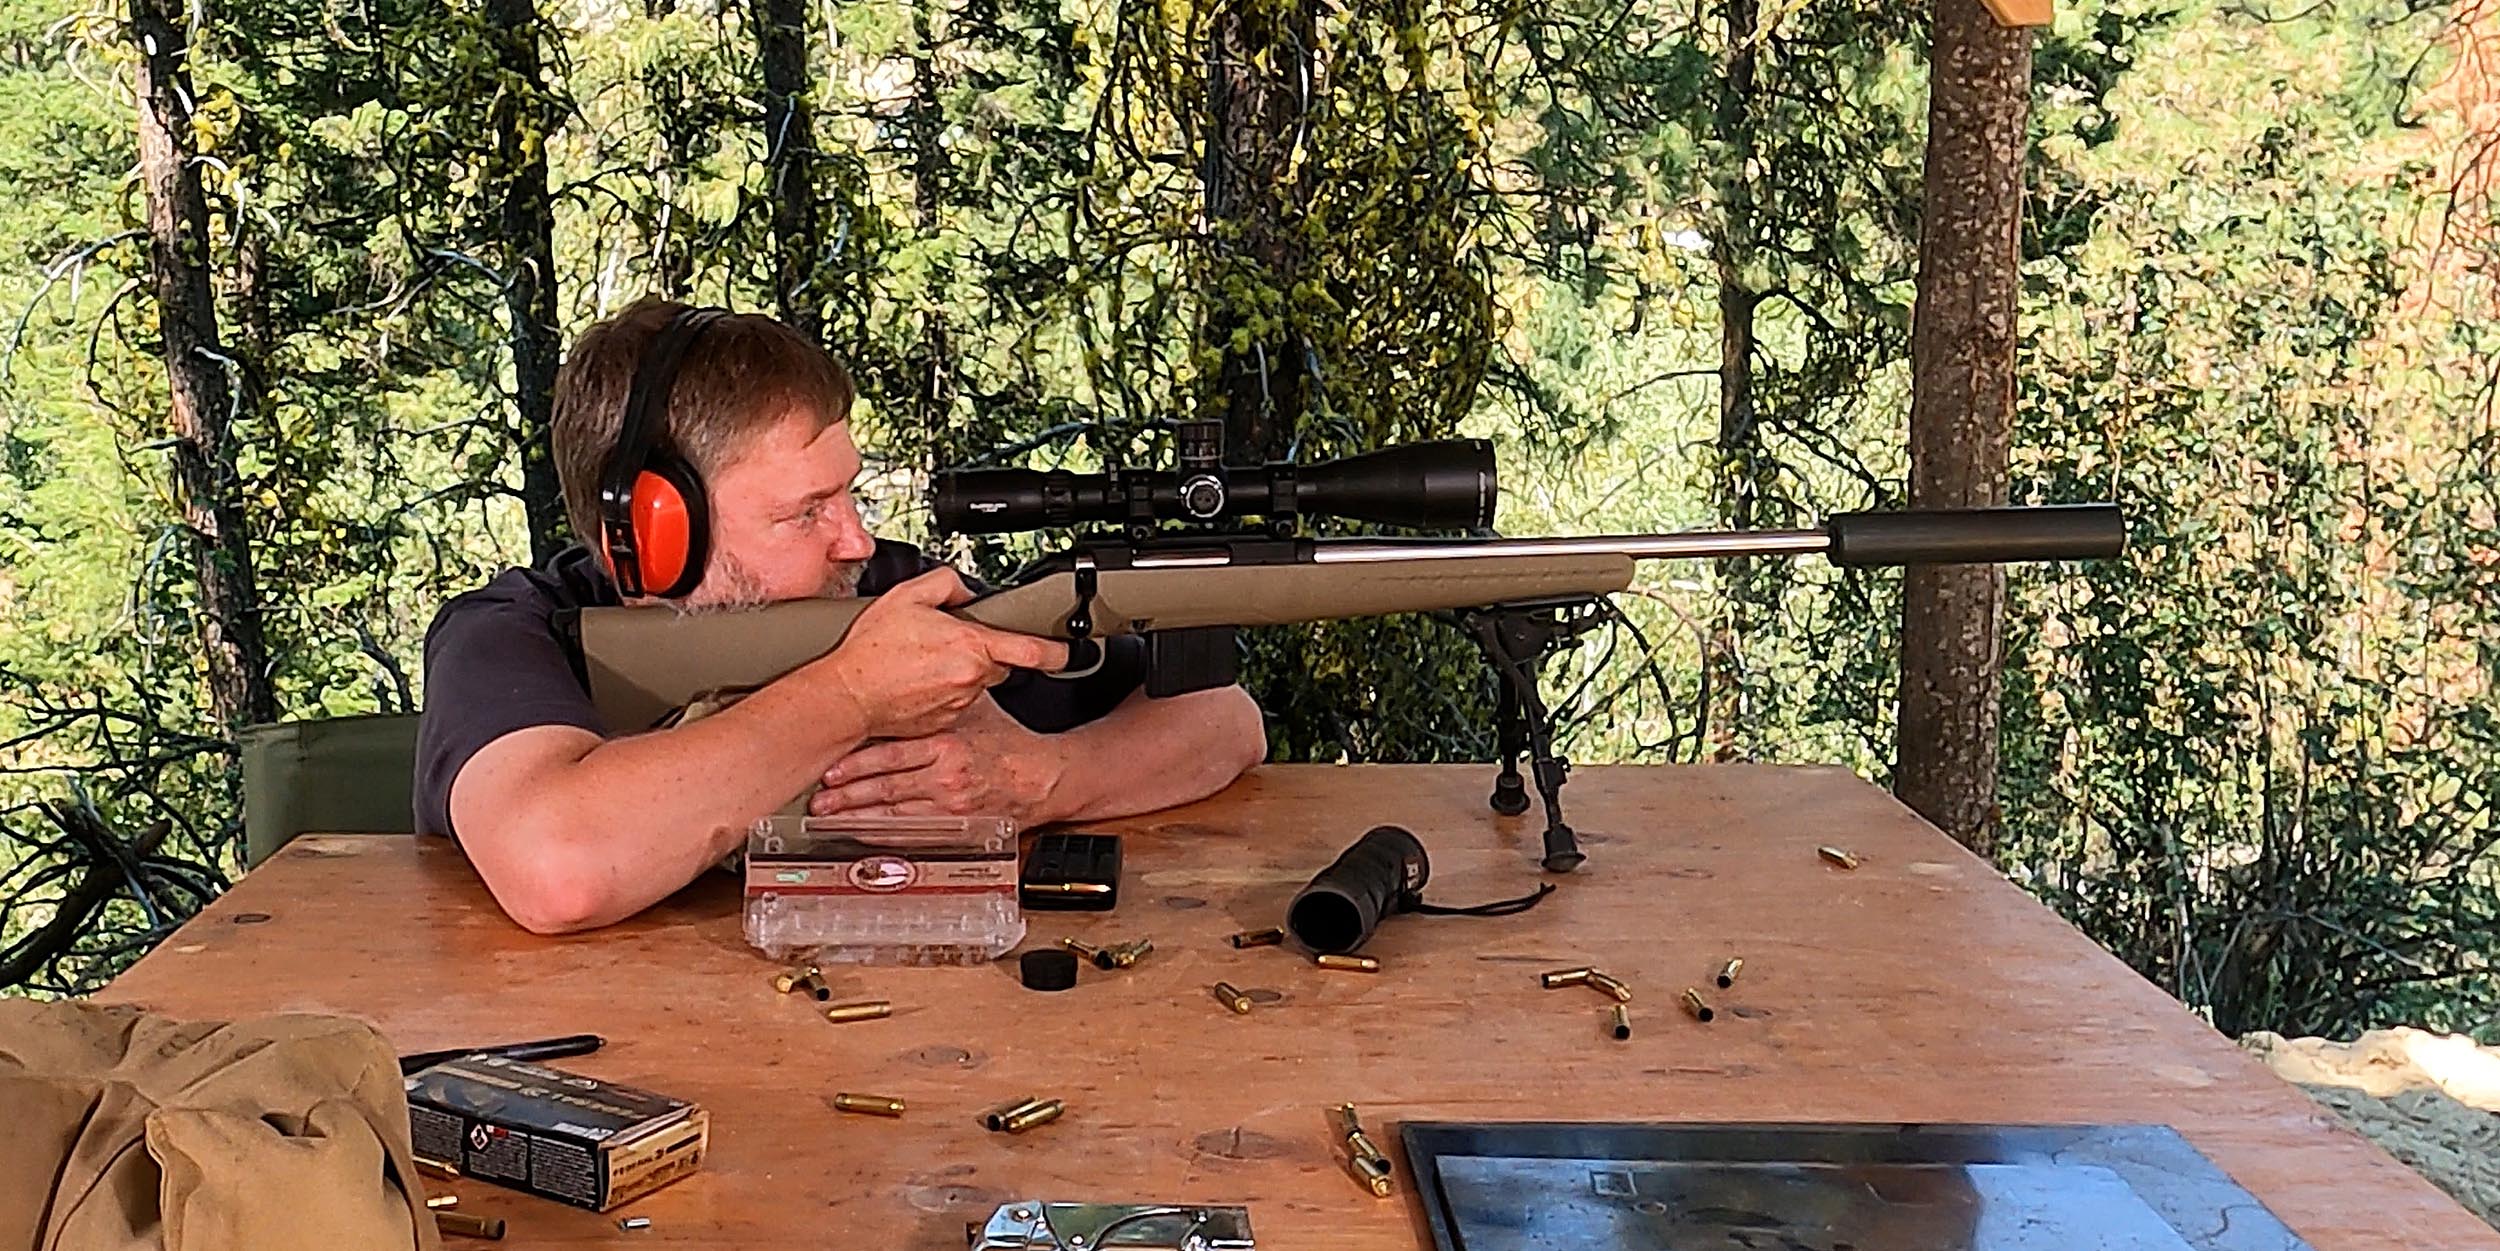
Previously to rebarreling, this Ruger American was shooting about 1.35″ groups at 100 yards with 350 Legend factory ammunition (Winchester Deer Season XP 150 grain).
After the rebarreling job things got much better, but not before some “not so good groups” with light (2″ groups with 155 grain range) bullets.
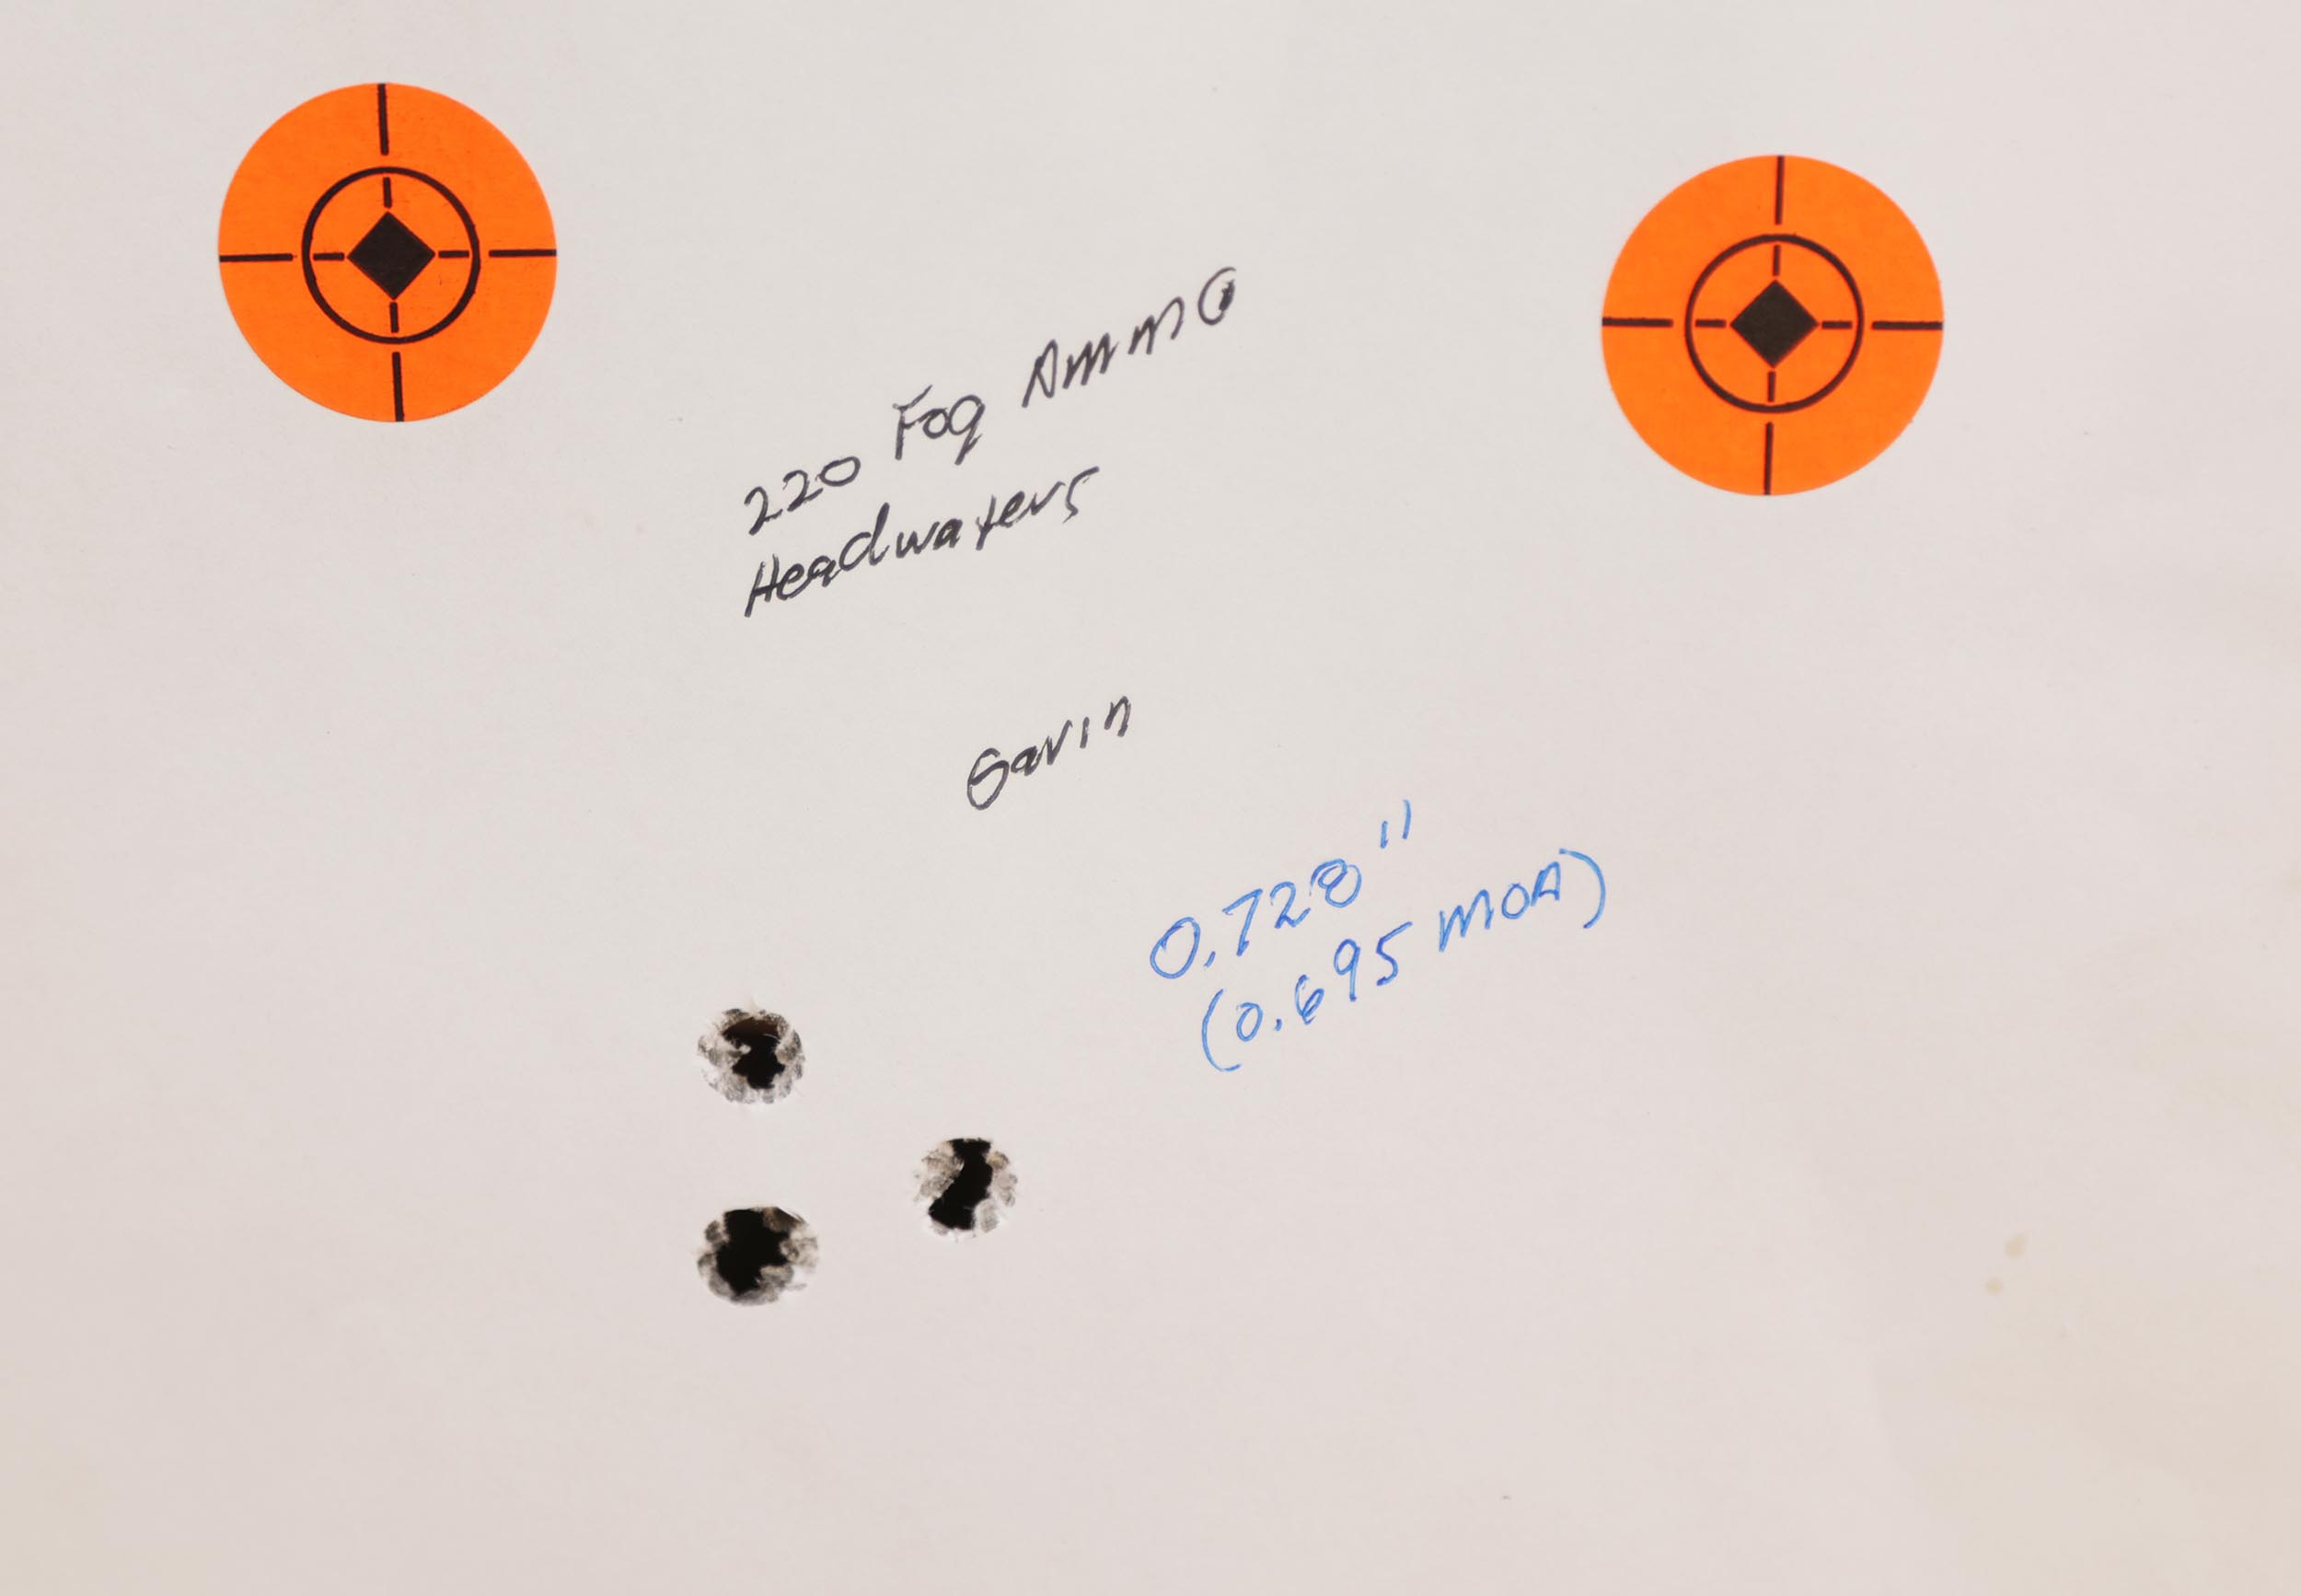
When things got great was with some 220 grain Sierra Match king loads from FOG Ammunition. Here’s the best group that Fred shot (bipod and rear bag):

And here’s the best group that I shot:
This was a fun project, and we got some great results! If you are interested in renting the tools shown in the video and this article, head on over to 4D Reamer Rentals!
Don’t miss out on Ultimate Reloader updates, make sure you’re subscribed!
Thanks,
Gavin


Fantastic video!!! This is the way things are done in the real world. I enjoy all of your videos, but before my retirement, this is the way things were done. Small
shop, very little money & customers that worked for a living. Just couldn’t afford
all the fancy stuff you use. Terrific to see you come back down to earth. Please
try to do this a little more often.