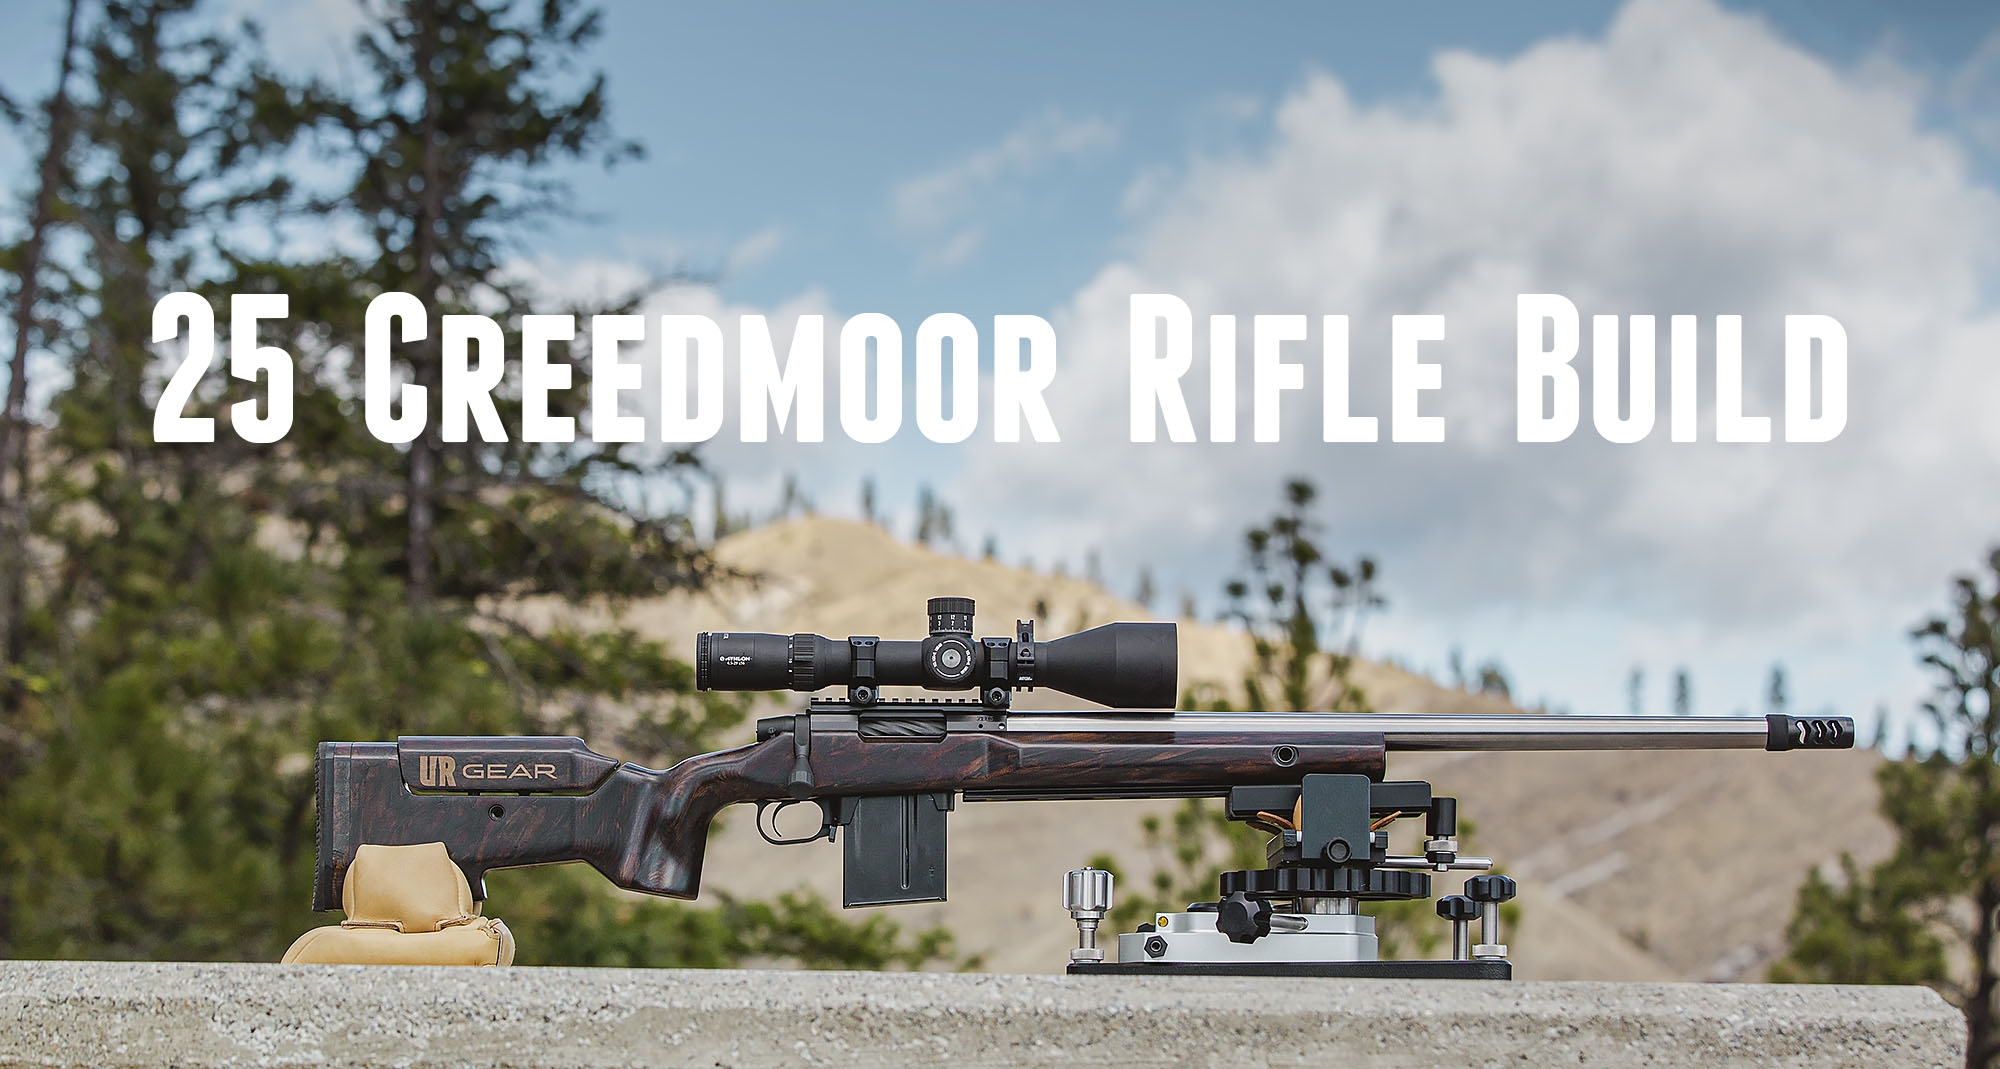
Competitors will stop at nothing to have an advantage, and nowhere is this more evident than in the PRS shooting community. And that’s where 25 Creedmoor was born from. In this article I’ll chronicle a start-to-finish 25 Creedmoor build with some amazing parts, components, and tools. I hope you have as much fun reading this article as I did building this rifle!
Disclaimer
Ultimate Reloader LLC / Making with Metal Disclaimer: (by reading this article and/or watching video content you accept these terms)
- The content on this website (including videos, articles, ammunition reloading data, technical articles, gunsmithing and other information) is for demonstration purposes only.
- Do not attempt any of the processes or procedures shown or described on this website.
- All gunsmithing procedures should be carried out by a qualified and licensed gunsmith at their own risk.
- Do not attempt to repair or modify any firearms based on information on this website
- Ultimate Reloader, LLC and Making With Metal can not be held liable for property or personal damage due to viewers/readers of this website performing activities, procedures, techniques, or practices described in whole or part on this website.
- By accepting these terms, you agree that you alone are solely responsible for your own safety and property as it pertains to activities, procedures, techniques, or practices described in whole or part on this website.
What is 25 Creedmoor?

25 Creedmoor is essentially a 6.5 Creedmoor necked down to accept a 0.257″ diameter bullet. Or you could think of it as a necked up 6mm Creedmoor (and brass can be formed either way). 25 Creedmoor seeks to “split the difference” between 6mm Creedmoor and 6.5 Creedmoor.
Here’s the value proposition for 25 Creedmoor:
- Reduced recoil compared to 6.5 Creedmoor
- Increased barrel life compared to 6mm Creedmoor
- Excellent ballistic performance
- Easily adapted components, brass, and dies
I’ll elaborate more on 25 Creedmoor in future stories!
Here’s the relative bullet diameters for these three Creedmoors:
- 6mm: 0.243″
- 25 caliber: 0.257“
- 6.5mm: 0.264“
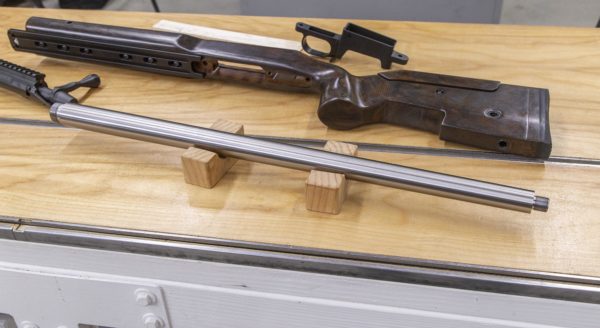
Parts and Pieces
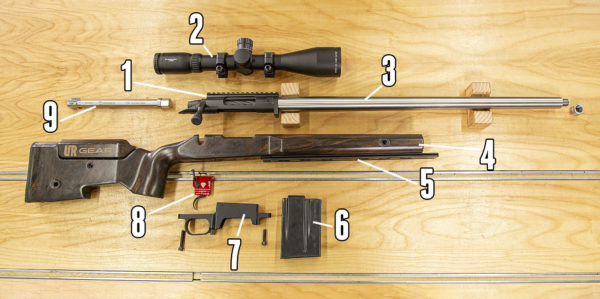
For this build, I’m using top-shelf components:
- Terminus Zeus 3-lug Remington 700 semi-clone short action
- Athlon Cronus 4.5-29x56mm BTR UHD First-Focal Plane scope
- Bartlein stainless barrel blank: 24″ finished length, 1:7 twist, 5R cut rifling
- Foundation Genesis 2 stock
- Foundation full-length ARCA rail
- AICS steel magazine (this one KRG branded)
- Hawkins Precision bottom metal
- TriggerTech Diamond trigger
- [Not Pictured: late arrival, Area 419 Hellfire Muzzle Brake, see below]
About the Terminus Zeus
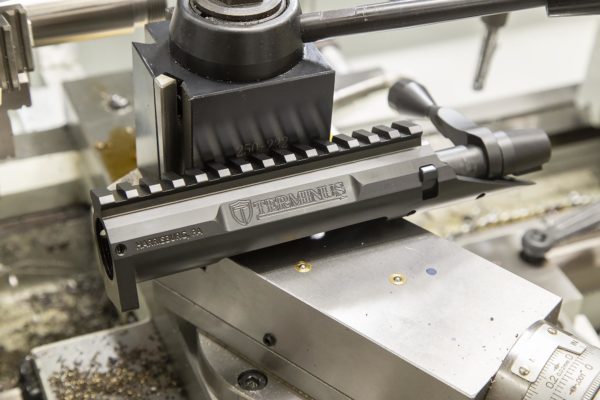
Terminus is a new company offering premium 3-lug custom actions. The Zeus is the tactical short action from Terminus, and features the following:
- Precision 3-lug receiver with 60° bolt
- Receiver is made of pre-hardened 416 Stainless Steel
- Receiver has an integral .300” recoil lug and 20 MOA Picatinny Rail
- Raceways are electric discharge machined, EDM, for exacting tolerances
- 3 lug, .725” diameter fluted bolt machined from one-piece, pre-hardened 4340 Chrome-Moly
- Receiver and bolt are both DLC treated
- Proprietary Bolt Knob
- Comes standard with quick change barrel feature
- Receiver headspace tolerance and timed threads allow pre fit barrels to be installed by the customer
- Receiver threads are 1.0625”x16 T.P.I.
- Unique threaded trigger pins replace outdated hammered-in style pins – Patent Pending
- Accepts Remington style triggers
- Mini M16 extractor
- Improved cantilever style bolt stop provides strength and does not require stock modification
- .062” diameter firing pin
- Roller tipped cocking piece for smooth cocking operation
- Designed to accept AI and AW style magazines
- Remington 700 footprint allows interface with standard stocks and chassis systems
- Zeus is only available in a short action
- Available in .223, .308, and Mag bolt
- Weight: 37.76 ounces
More information can be found on the Terminus Product Page.
About the Foundation Genesis 2 Stock
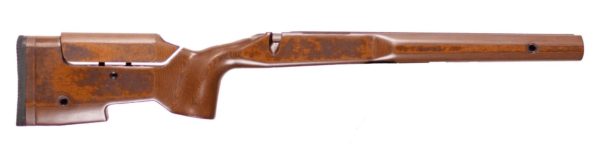
Foundation stocks are truly like no other. From the Foundation Genesis 2 Product Page: The Foundation Genesis 2 is a hybrid combing the grip to trigger spacing of an Exodus with the fore end of our original Genesis stock. A wide fore end, great balance and flexible attachment mounting options make prone and positional shooting strong points for the Genesis 2.
Here’s what I like about the Genesis 2:
- Weight: it has enough mass to tame recoil and feel extremely “solid”
- Custom Inlets: these stocks are inletted for specific actions, including an option for the Terminus Zeus (it fit PERFECTLY)
- Unique material and construction, recoil damping
- Ergonomics and features (love the integrated cheek riser, QD cups, and more
- Quality and finish (second to none)
Area 419 Hellfire Self-Timing Muzzle Brake
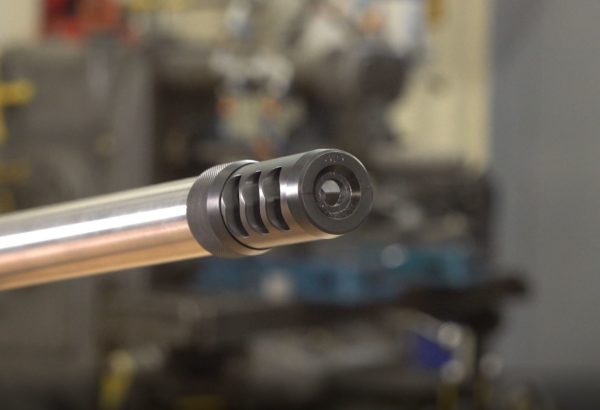
The Area 419 Hellfire is a unique muzzle brake for a few reasons, the most prominent being the way it is mounted on the rifle!
Features and Details:
- Two piece brake has separate taper mount
- Brake can be installed and removed by hand, timed in just seconds (taper mount requires wrench to install/remove)
- Available in 2 or 3 port configurations
- Extremely effective recoil reduction
I’ll have more information and features for Hellfire in future stories!
Tools and Reference
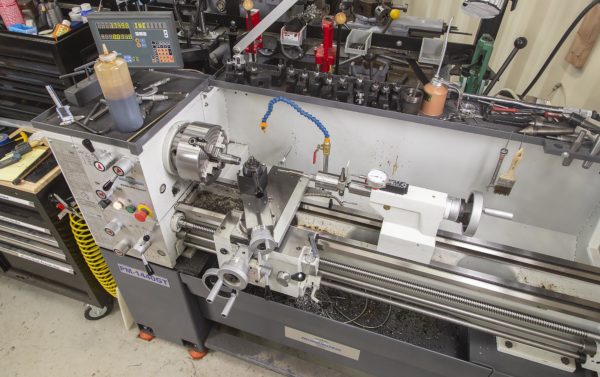
For this build, I’m using a Precision Matthews PM-1440GT. I believe this is the best gunsmithing lathe you can by new in the USA (Taiwanese made, not chinese, 2″ through-spindle capacity, Japanese high-precision spindle bearings, etc):
Below you can see the specific tools and grease I used for this build:
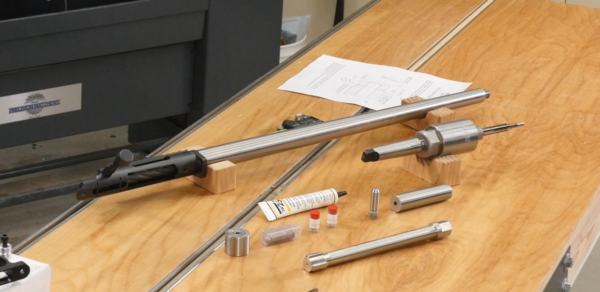
Pictured above:
- JGS Precision floating reamer holder
- Forster 6.5 Creedmoor go and no-go gauges
- Terminus action wrench
- JGS Precision 6-flute reamer with removable pilot bushings from Blackjack Bullets (cut to their spec)
- TW-25B grease
Fred Zeglin Books
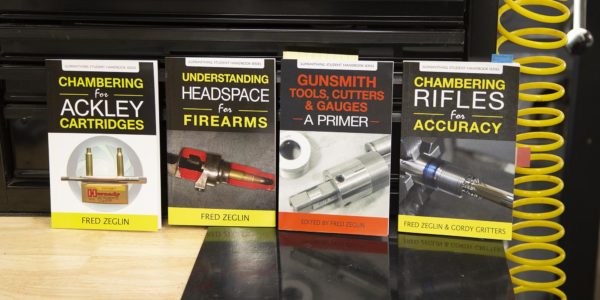
As noted in the video, I’m using some of Fred Zeglin’s books, which can be found on Amazon.com as I work through my rifle builds. For this build, I’m using the “Chambering Rifles for Accuracy” book which Fred co-authored with Gordy Gritters of Gordy’s Precision (specifically, the chambering checklist).
I’ll also note that if you need reamers quickly, or don’t want to pay full price for a reamer that you’ll use once, Fred Zeglin’s 4D Reamer Rentals is something you’ll want to check out!
In this case, I got my reamer directly from Blackjack Bullets, it’s a JGS Precision Reamer for 25 Creedmoor.
Barrel Work
Above you can see the finished barrel after the breech end work (chambering, etc), and muzzle threading were performed.
This diagram shows the breech-end features:
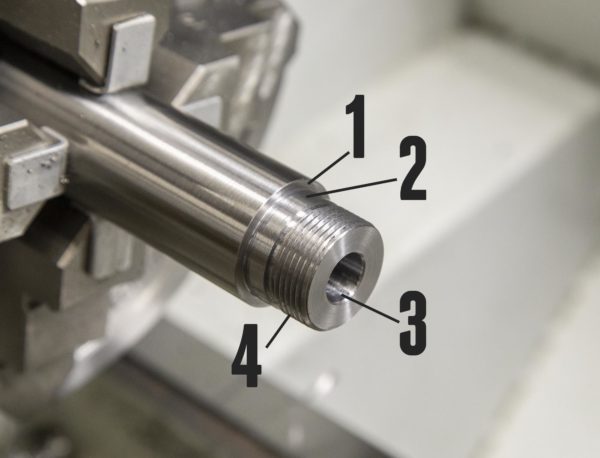
Pictured above:
- Shoulder
- Bearing surface
- Chamber
- Threads: 1 1/16″ x 16 TPI
And here we have a picture of the chambering process:
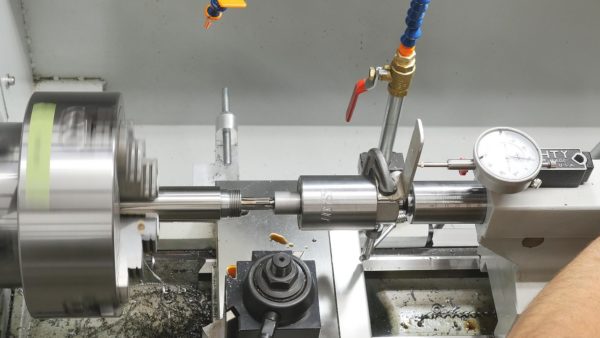
The machining (including chambering) went very smoothly, but I still had to check my final headspace!
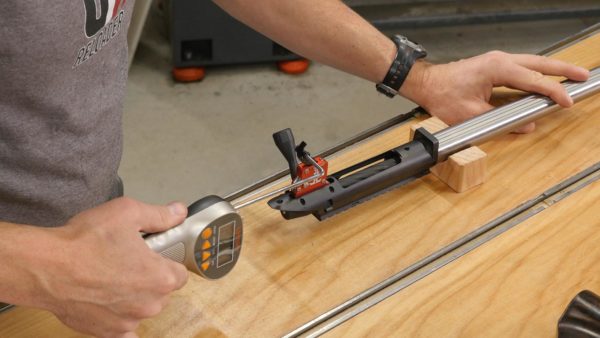
Assembling the Rifle
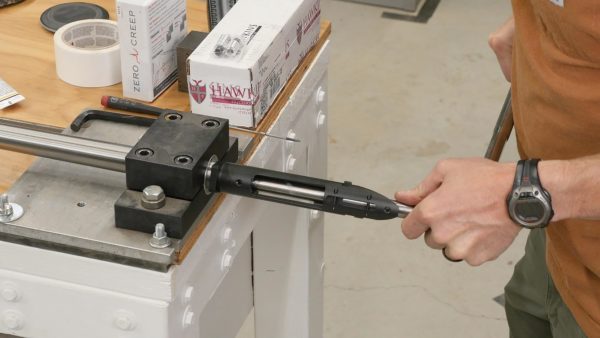
Installing the action onto the barrel is the “moment of truth”. And for this build, everything went together perfectly- headspace landed exactly where I wanted it to!
After the barreled action was complete, I installed the trigger:
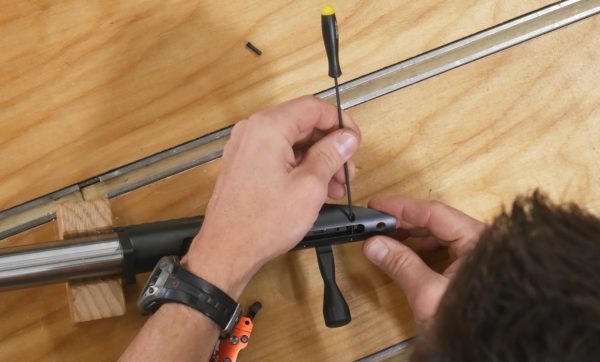
Here’s where the threaded trigger pins came in handy! With an Allen screw driver the pins are easily removed and replaced. That makes the trigger install VERY quick. It also helps that the Zeus action has an external bolt release- so you don’t have to worry about the standard Remington 700 style bolt release components.
After install, I tuned the trigger to the desired pull weight using the Lyman Trigger Pull Gauge:
At ~7oz, this trigger is set perfectly for accuracy testing. Note: Don’t assume it’s safe to run a trigger this light! Proceed at your own risk!
With the trigger installed, it was time to install the barreled action into the stock:
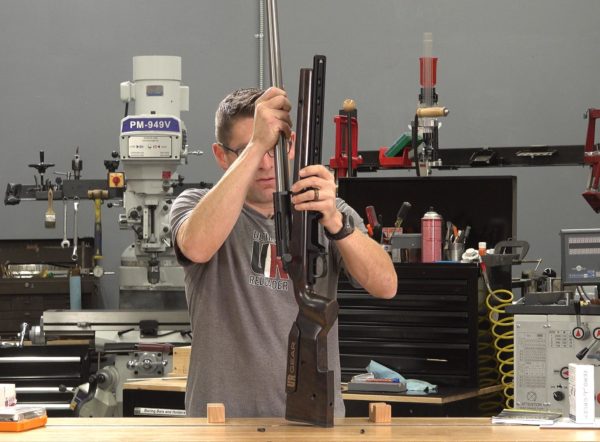
And this is where the custom inletting helps out. I typically have to do some “clearancing” when fitting a custom action to a custom stock. Not this time! Everything fit perfectly and aligned perfectly- with adequate gaps and clearances. This stock is like a piece of artwork- when you look at it, it just draws you in!
Optic: Athlon Cronus 4.5-29x56mm FFP
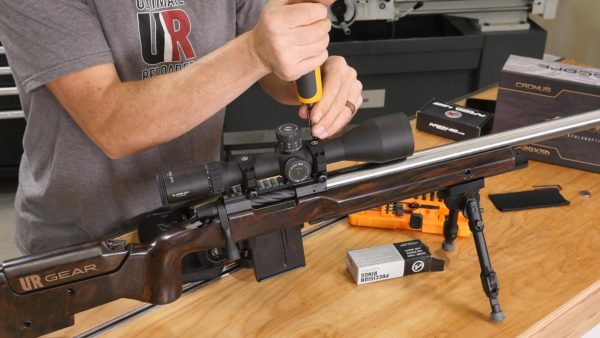
Preview! I wanted to show the Athlon Cronus 4.6-29x56mm BTR UHD scope in this story- and I’ll be following up with an in-depth overview at a later date. What I can say about this optic right now is- it looks VERY clear based on the shooting that I’ve done with it so far.
Some quick specs:
- UHD Glass gives you the utmost contrast, light transmission, and the sharpest image
- First focal plane reticle stays valid at all power settings allowing you to fully utilize the Specially designed reticle that shrinks or grows along with your target as you zoom in or out
- Advanced fully multi-coated lenses gives you better light transmission to bring optimum brightness and true color across the entire light Spectrum
- Reticle etched on the Glass that provides excellent backing support for complex reticle design and offers great durability and much higher shock resistance to Recoil
- Argon purging gives you better waterproofing and thermal stability
More on this scope later!
Break-In Loads
Blackjack ACE 131 grain 25 Cal Bullets
Blackjack bullets are the premiere bullets for 25 Creedmoor- for this project, I’m using their 131 grain 25 caliber ACE bullet:
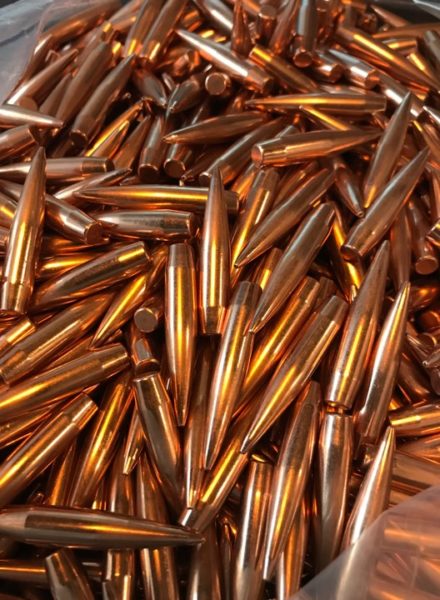
131 grain ACE Match Bullets from Blackjack Bullets:
- 0.332 g7 BC Litz BC (1000 yd average at 2930 fps) – Most customers use 0.340-0.345 G7.
- Designed and Optimized for use in Accuracy International & similar magazines running 25×47 Lapua & 25 Creedmoor
- 25×47 Lapua & 25 Creedmoor live-pilot chambering reamers from Manson & JGS available in webstore
Use load data at your own risk. Ultimate Reloader is not responsible for errors in load data on this website. Always cross-reference load data with manufacturer’s published data.
Here is the (conservative!) load I used for the initial break-in:
- Blackjack 131 grain 25 Caliber ACE bullet
- 37.5 grains Hodgdon H-4350 (increased this for later break-in)
- Starline 6mm Creedmoor brass necked up to 25 caliber (small primer pocket)
- Federal Small Rifle Primer
- 2.800″ COL
Break-In Process
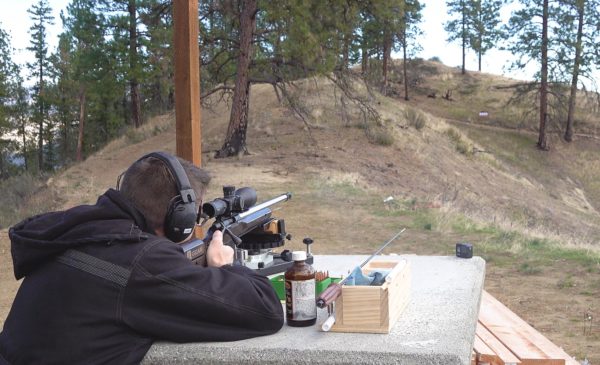
For break-in, I used my standard process:
- 1 shot, clean
- 1 shot, clean
- 1 shot, clean
- 3 shots, clean
- 3 shots, clean
- 3 shots, clean
- 5 shots, clean
- 5 shots, clean
- 5 shots, clean
My first shot was on-target, and the break-in process went smoothly! Even without any load development, I was able to put 5 shots into ~0.500″ (would have been much smaller without horizontal dispersion from wind), which makes me REALLY look forward to some load development with this rifle. How well will it shoot with proper loading equipment (I improvised for the ammo used here) and some experimentation? We’ll have to see! I am thinking it will be a tack-driver.
What’s Next
For 25 Creedmoor, I’ll look at load development, and also compare interior/exterior ballistics with the “other” Creedmoors. Have something you want to see? Please drop a comment!
Don’t miss out on Ultimate Reloader updates, make sure you’re subscribed!
Thanks,
Gavin


What was the total cost of this build?
Even though we use H4350, it’s not an optimal powder. Slightly slower powders in this burn rate are more better SW4350, RL16, Hybrid 100V, StaBall6.5. SRP is must with this cartridge I’ve found and although Aplha 25 CM is available at times, stick with Starline SRP 6.5CM, it just works! The speed/accuracy node sweet spot, with 1/7 twist barrel is 2930-2950fps, which works fine at my CO altitude.