When you’ve advanced beyond the reloading basics, it’s time to think about “the next level”. And one of the things you can do to improve accuracy for your rifle reloads is to turn case necks. Why? Because inconsistent case neck thickness will prevent perfect bullet alignment with the bore, and that can be a problem! In this article we’ll look at the Hornady Lock-N-Load Neck Turn Tool- a great way to turn case necks.
About the Hornady Lock-N-Load Neck Turn Tool
From the Hornady Product Page:
Designed for use on a wide variety of case lengths, the Hornady® Neck Turn tool allows for the use of a drill (not included) to make neck turning faster and easier, while providing superior consistency and surface finish.
An adjustment knob enables the user to choose detents for .0005″ adjustment increments, or no detents for infinite adjustment.
Mandrels for four popular calibers are included:
-
- 22 Cal.
- 6mm
- 6.5mm
- 30 Cal.
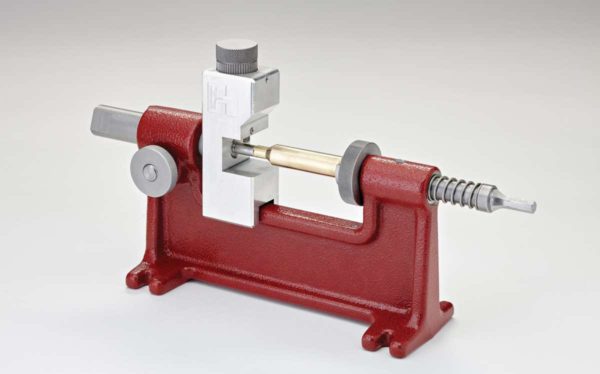
What’s In the Box
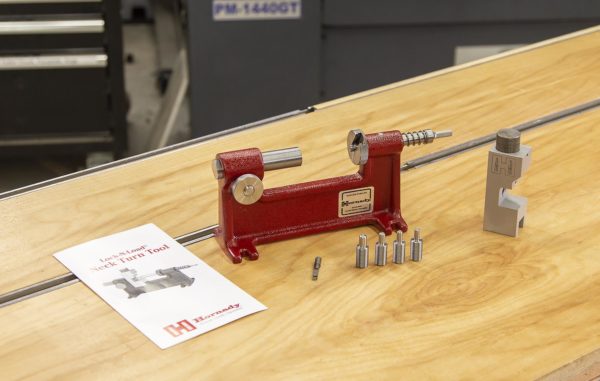
The Hornady Lock-N-Load Neck Turn Tool comes with the following as pictured above:
- Neck turning primary frame/assembly
- Cutting head with 0.0005″ adjustment knob, pre-installed cutter optimal for shoulder angles steeper than 30°
- Pilots for 22 caliber, 6mm, 6.5mm, and 30 caliber
- Cutter optimal for shoulder angles 30° or shallower
- Instruction booklet
In addition to what comes with the Lock-N-Load Neck Turn Tool, you’ll need an appropriate Hornady shellholder for the cartridge you are working with. I decided to trim Starline 308 Winchester cases, so I used a Hornady H1 shellholder.
If you are unsure what shell holder you need, Hornady has a page for that!
Setting Up the Lock-N-Load Neck Turn Tool
The first step in setting up this tool is to select the proper mandrel, and to screw it into the cutter head from behind:
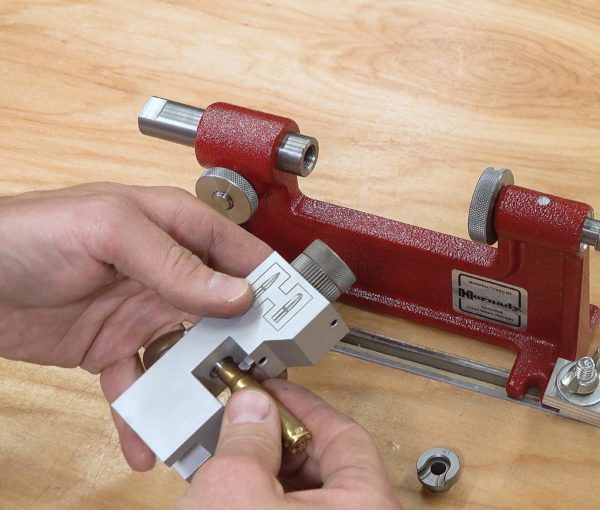
A part of this mandrel adjustment is to set its depth where the case will hit the “stop” built into the mandrel with the “corner” of the cutter is just up to the neck-shoulder junction, but NOT into the shoulder. You don’t want to weaken the shoulder!
Next, it’s time to screw the main shaft onto the mandrel as shown:
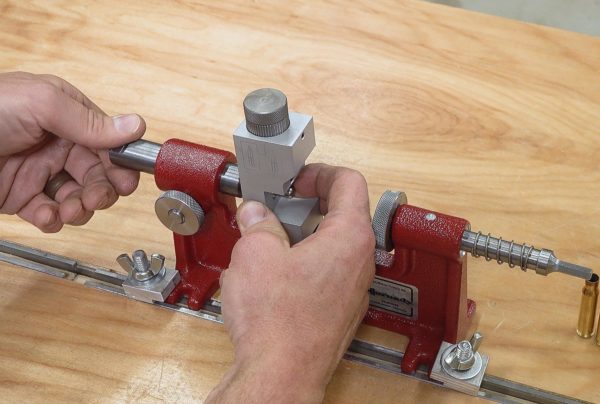
Then you’ll in install the shellholder by unscrewing the spindle from the locknut, sliding in the shellholder, and then re-tightening the spindle:
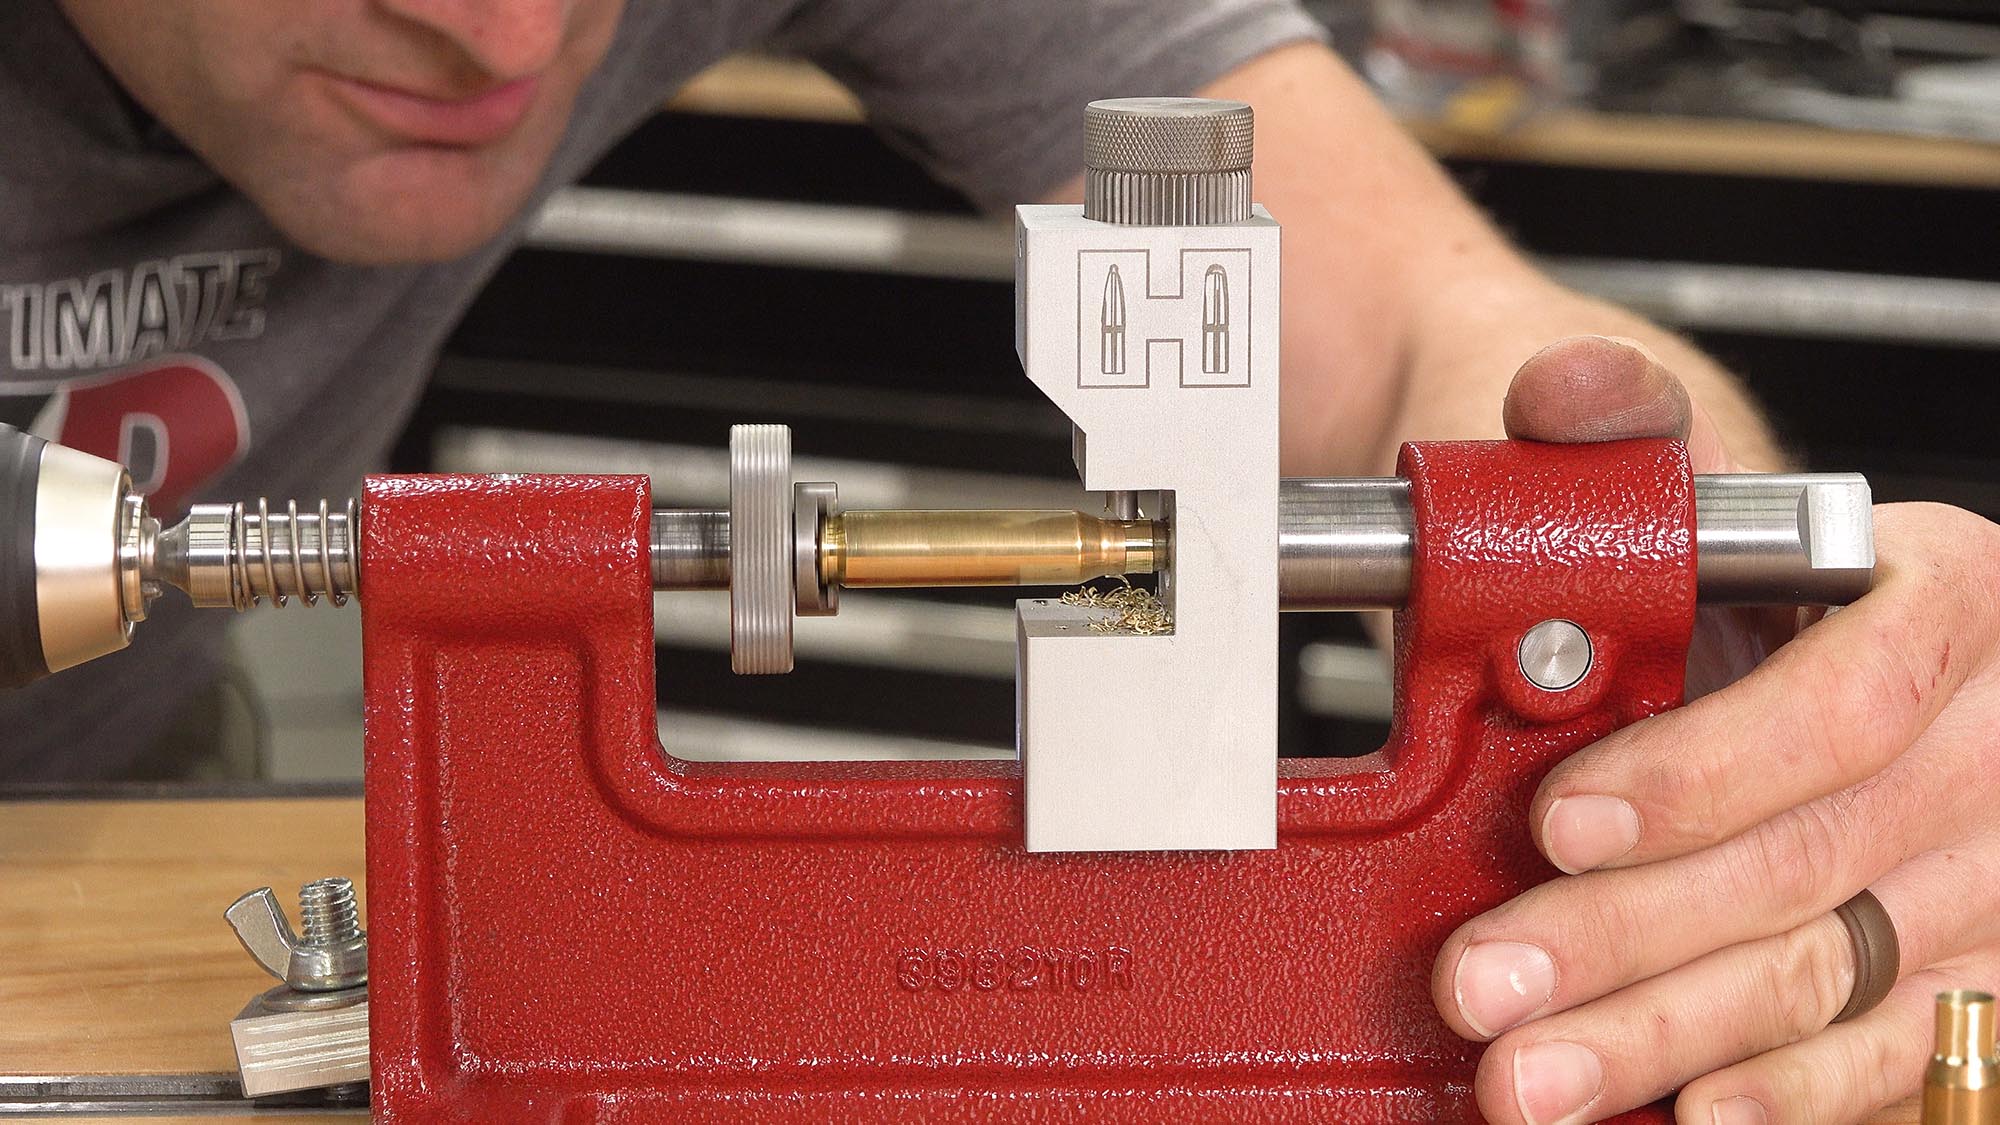
Now you can install a case, and get the cutter setup. The following steps are performed for this process:
- Drill is chucked up to spindle
- Case is inserted in shell holder
- Case is guided onto mandrel
- Clamp nut is tightened using drill torque
- Case is pushed up against stop
- Cutter is turned in towards case neck while drill is turning until cutter starts to skim cut
- Case is withdrawn from cutter
- Cutter is turned in a number of clicks (depends on situation)
- With drill turning another pass is taken
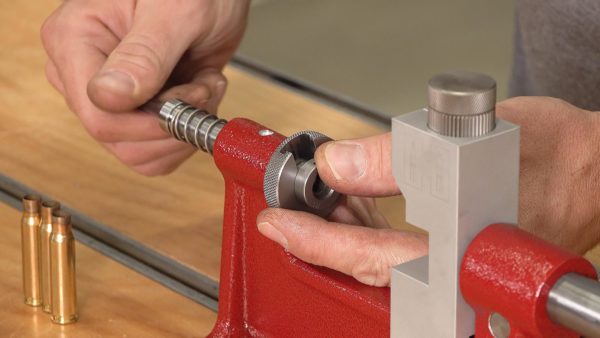
Once you have a consistent cut, you can use a ball micrometer to measure neck thickness. If a specific neck thickness is desired, turn in the appropriate number of clicks.
Here’s how you’ll determine the click count:
(Current Thickness in thousandths) – (Desired Thickness in thousandths) X 2 = Number of clicks to turn in.
Running the Lock-N-Load Neck Turn Tool

Running the neck turn tool is simple! For each case you turn, the following is performed:
- Insert case into shellholder
- Lube case neck (inside) or mandrel
- Advance case neck partially over mandrel
- Tighten shell holder lock nut
- Start drill
- Advance case slowly into cutter
- Maintain slow infeed until case hits stop
- With drill still running, with draw case completely
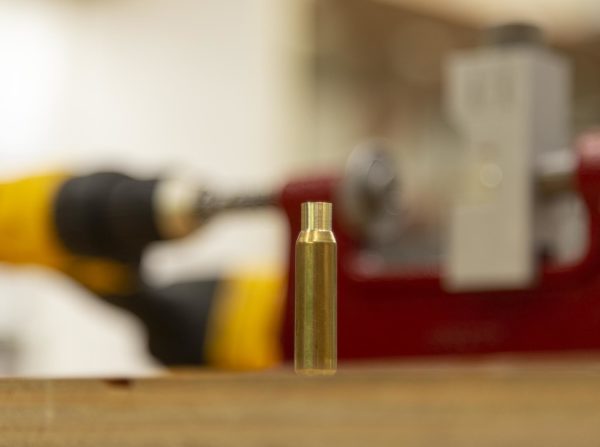
Sounds like a lot of steps, but goes quickly once you get “up and running”. And the results are worth the work. After switching from the “low” range on my drill to the “high” range, I got some great looking turned necks, here’s one:
Look for this tool in future stories!
Midsouth Has It!
If you are looking for a place to buy the Hornady Lock-N-Load Neck Turn Tool, Midsouth Shooters Supply has it:

Don’t miss out on Ultimate Reloader updates, make sure you’re subscribed!
Thanks,
Gavin


Really enjoy your videos, quick question, on neck turning, do you do this before or after resizing the cartridge case?
1) I always operated under the assumption that you wanted to just kiss the neck shoulder junction to help lessen the development of the donut.
2) Also though it was not necessarily ideal to remove brass from around whole circumference because doing so could leave too thin of a case neck thickness.
3) Always used Sinclair case neck trimmer equipment which for me included a neck bushing die designed to true case neck ID and move any case neck thickness Irregularities to the outside where the neck turning tool could reduce/remove any thicker sections in case neck ID.
4) Turned new brass before 1st firing.
5) Best I could figure the minimum safe case neck thickness 0.0010”. Also never could find definitive information on the safe case neck minimum safe thickness. Liability issue I’m guessing.