The time is FINALLY here! My Mark 7 Evolution press arrived this week, and that means it’s time for me to kick off a series of content showing this amazing machine from A-Z. We’ll start in this article with an unboxing, and also cover setup and loading of 9mm parabellum. Following this story, I’ll get into caliber changeovers, processing military brass, loading rifle ammunition, and much more. Let’s get to it!
Some Background on Mark 7
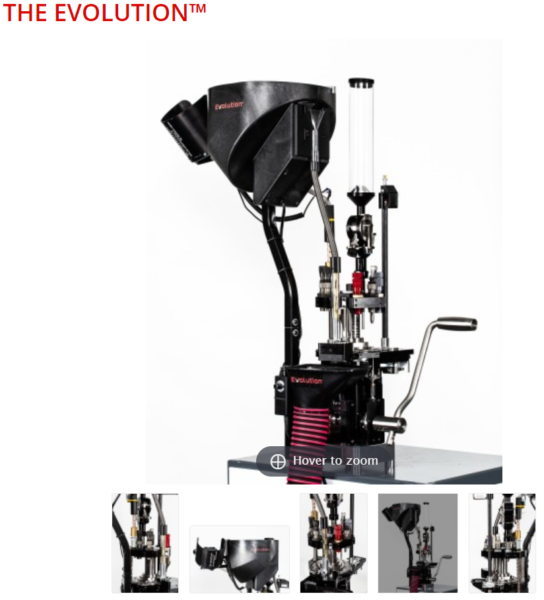
Mark 7 has only been in existence for about five years, and in that short time, they’ve disrupted the reloading industry, and become a part of the Lyman company which has over 140 years of heritage. Mark 7 offers two platforms, the Mark 7 Evolution (manual 10-station press, the subject of this article), and the Mark 7 Revolution: an automated 10-station press with all the bells and whistles available in various configurations.
Here’s the walk-through I recently did with Spencer Karoll showing both the Evolution and Revolution presses:
And here’s the full walk-through story:
High Tech Reloading: Mark 7 Evolution and Revolution detailed walkthrough
Now, back to the Mark 7 Evolution overview!
What’s In the Box
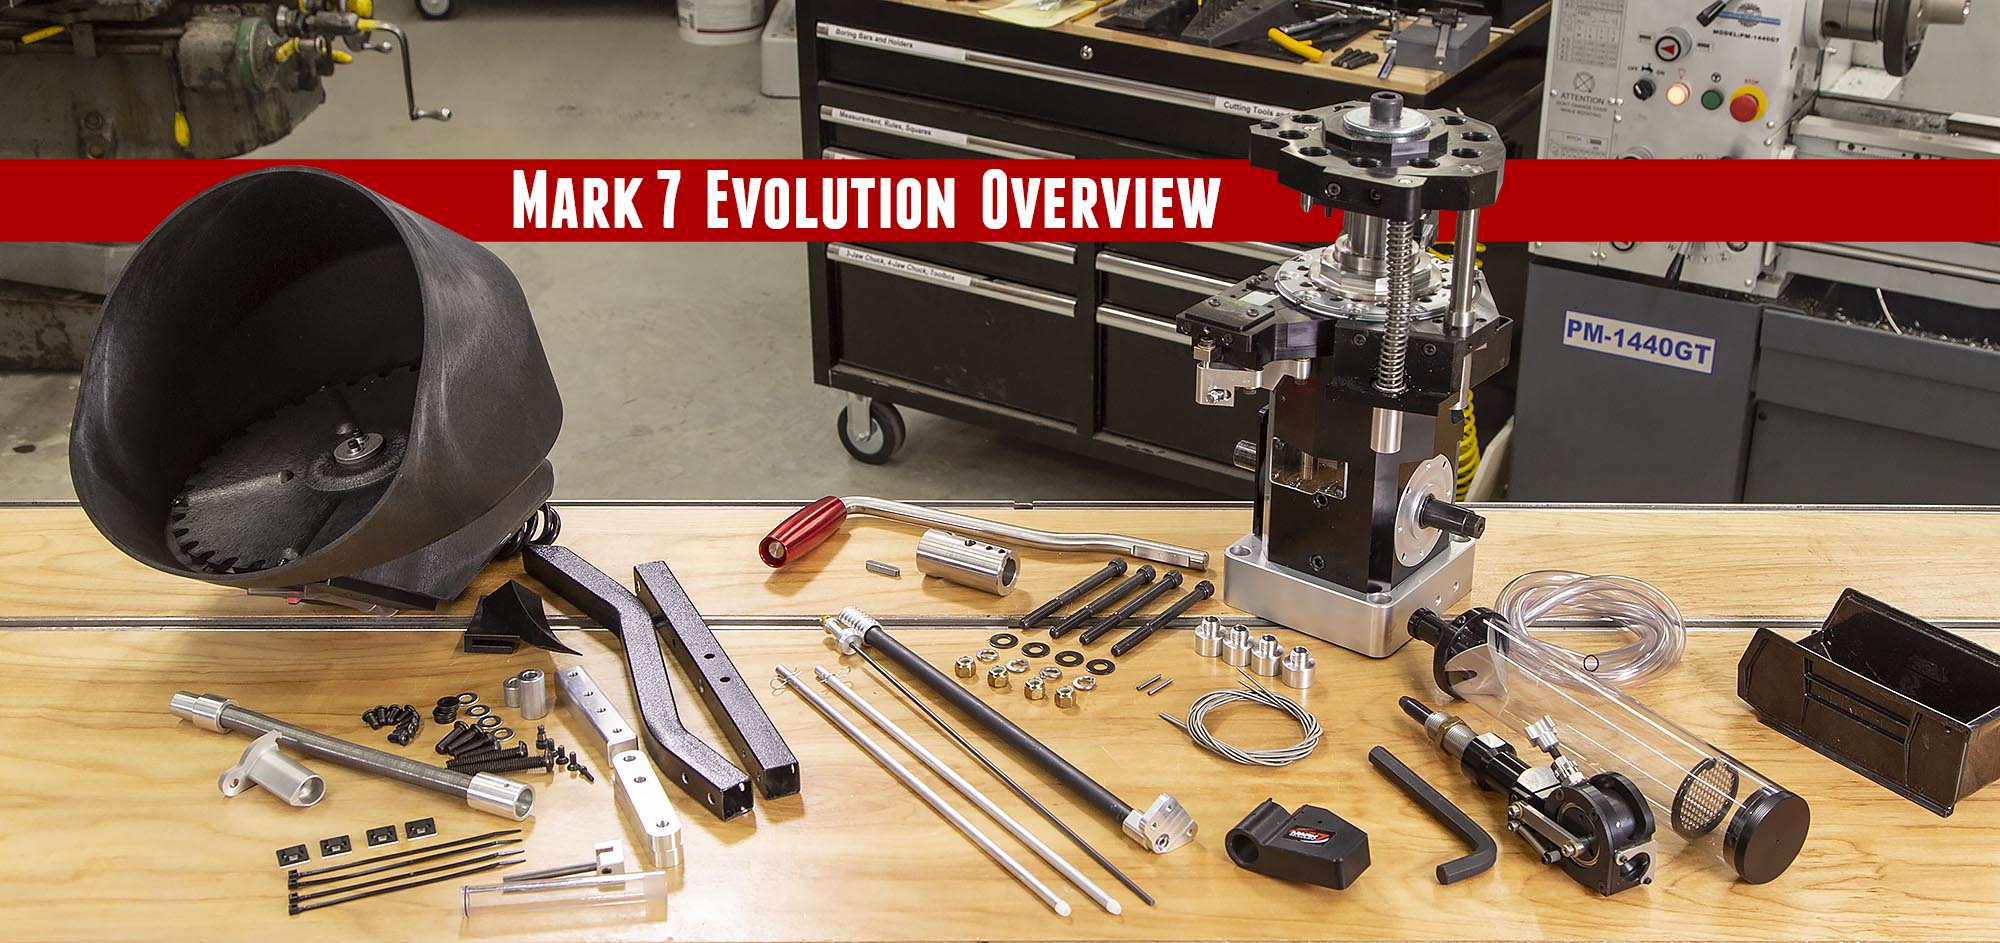
The Mark 7 Evolution comes with everything you’ll need to load a particular caliber except dies. Here’s what’s in the box (6 boxes inside on large box):
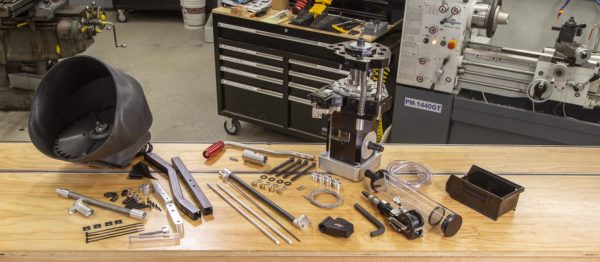
Above we have (clockwise from upper-right):
- Mark 7 Evolution press core (main press assembly)
- Spent primer discharge hose
- Completed cartridge bin
- Powder measure hopper and upper assembly
- Allen key for toolhead hold-down bolt
- Press riser feet
- Extra parts: case retention springs, case feed inserter retention springs
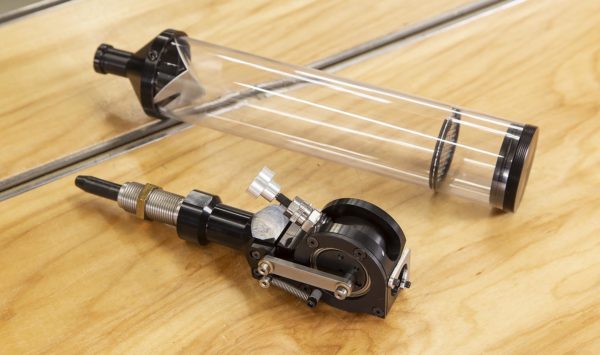
- Priming system: Prime sense module
- Priming system: Primer housing and drop tube
- Priming system: Weighted rod (also part of Prime sense)
- Priming system: Pick-up tubes (large and small)
- Press mounting hardware (bolts, nuts, washers)
- Press handle, handle adapter, key
- Case feed system: Upper and lower pole, connector
- Case feed system: Mounting brackets
- Case feed system: Lexan drop tube, case feed adapter, spring drop tube
- Case feed system: Motorized case feed bowl and case feed plate
Setting Up the Mark 7 Evolution
Setup Part 1: Handle Install and Mounting the Press
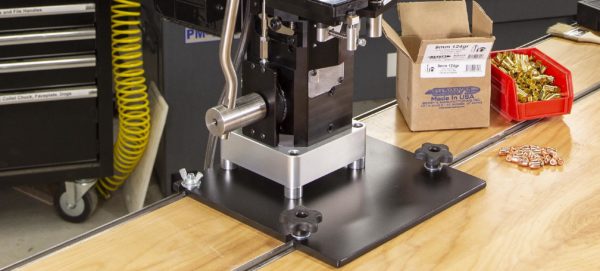
The Mark 7 Evolution is setup to mount directly to your bench: no riser is needed. If you are performing a typical install, you can first install the riser feet (screw into the bottom of the press) and then install the press handle. This will allow you to position the press for optimal operation, and you can also verify that you have sufficient handle clearance when the handle is at the bottom of its stroke (not hitting front of bench). You can then mark around each press riser foot to establish centers for drilling each of the four through-bench holes (they are 5″ on centers, forming a square pattern).
I fabricated a custom 3/8″ thick steel mounting plate for my Evolution as seen here:

This works great with the “Ultimate Reloader Bench System”- ZERO flex while loading- even when working the handle with large forces. Love it! Here’s a picture of the Mark 7 Evolution mounted on the plate:
Setup Part 2: Case Feed System
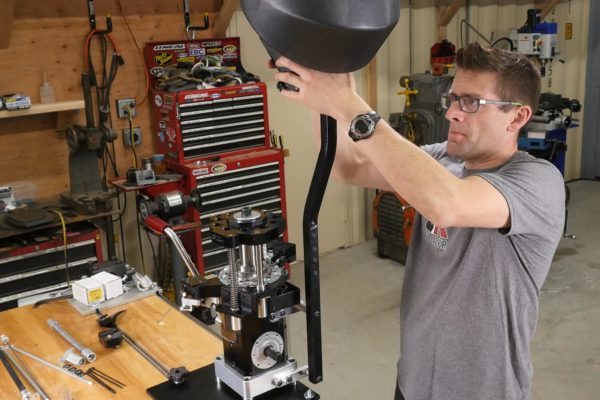
The case feed system setup involves the following: (see video for more details)
- Install brackets to press frame
- Install lower pole
- Install pole connector
- Install upper pole
- Set case feed bowl
- Drop in case feed plate
- Install case flipper and guide in bowl
- Install case feed adapter
- Install drop tubes (lexan window tube, spring tube)
Setup Part 3: Priming System
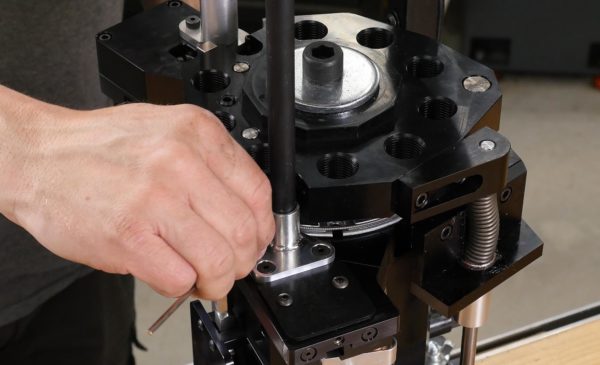
The priming system for the Evolution takes only a few minutes to put together. Here’s the steps:
- Install the primer tube assembly (three screws)
- Drop the Prime sense module on the top of the primer tube assembly
- Drop the weighted rod into the primer tube, verify buzzer sounds (as it will when primers are low/empty)
That’s it!
Setup Part 4: Powder Measure
The Mark 7 Evolution powder measure comes basically pre-assembled. The only things you’ll need to do are:
- Drop the hopper into the opening on the upper assembly
- Secure the hopper to the upper assembly with the bracket on the upper assembly
- Screw the powder measure into the press (just to secure it) – the height and charge will be fine-tuned during die setup
That concludes the core press assembly. Count on about an hour to unpack, clean, mount the press, and rough-configure everything.
Setting up the Evolution to Load 9mm
Setting up the Evolution to load ammunition will be a familiar process if you have loaded on a progressive press before. What’s different with the Evolution is the number of stations (a class-leading 10 total), and some special features. Here’s how the owner’s manual for the Evolution suggests setting up stations if you max-out the press:
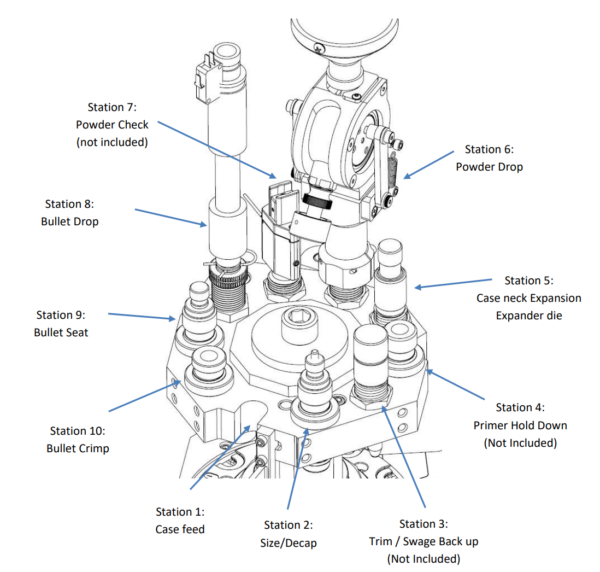
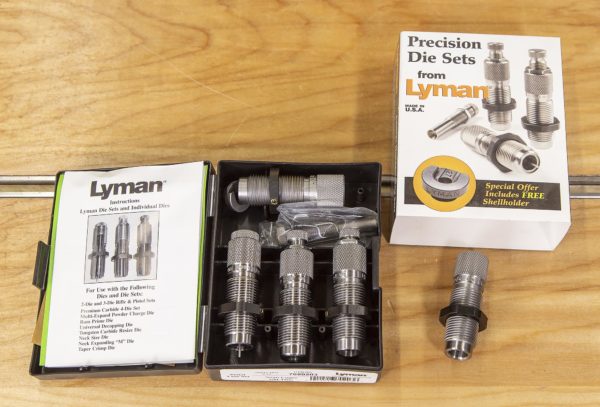
For dies, I used a Lyman 9mm 4-die set, and a Lyman 45 ACP taper crimp die (for hold-down):
I used essentially the same setup shown above when I setup my dies, but didn’t utilize all of the stations at this point. Here’s how I setup dies:
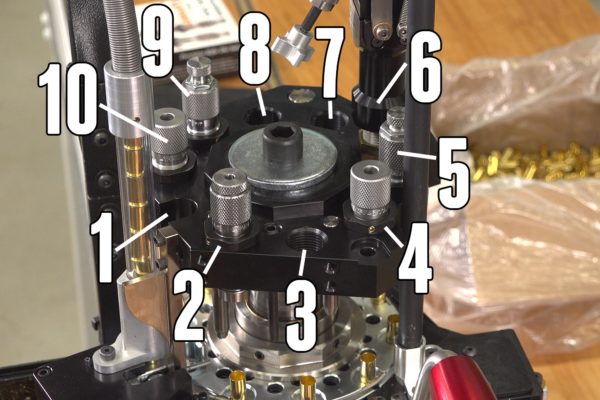
Above we have:
- Case feed
- Lyman 9mm sizer/de-primer
- Empty
- Lyman 45 ACP taper crimp die (used as hold-down die for priming)
- Lyman 9mm expander
- Powder measure
- Empty (will use for powder check)
- Empty (will use for bullet feed)
- Lyman 9mm Seater Die
- Lyman 9mm taper crimp die
9mm Test Load
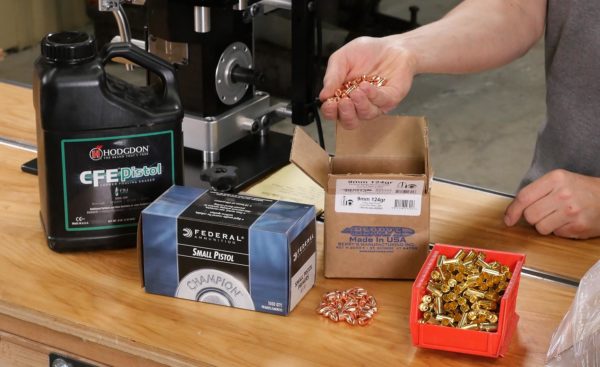
For my first loads on the Mark 7 Evolution, I used the following:
- Berry’s 124 grain Hollow Base Round Nose bullets (plated)
- New Starline 9mm cases
- Federal #100 small pistol primers
- Hodgdon CFE-Pistol primers
- New Starline 9mm Cases
This load worked GREAT! No function issues with my Glock 17 or my Canik TP9-SFX

I always seem to display the same “game face” when shooting.
Loading 9mm With the Evolution
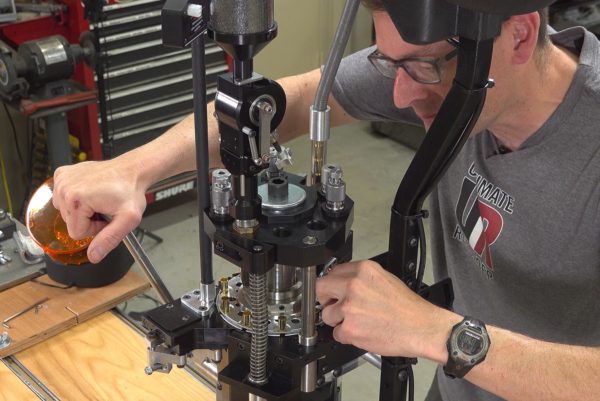
The loading I did for this story was really a part of my “ramp-up familiarization” with the Mark 7 Evolution. The setup I used is kind of a “stripped down basics” approach, but still works very effectively! As I continue to publish stories covering the Mark 7 Evolution, I’ll be showing more and more features and complexity with each successive installment. With so much technology (autodrive, sensors, accessories), I believe it’s helpful (for me, and for the viewers/readers) to take this incremental approach.
To get the press setup to load (after die setup and powder measure setup), the following is required:
- Fill powder measure with powder, validate powder charge
- Fill priming system with 100 primers
- Fill case feeder with cases, turn on and let fill
After these steps, you just pull the handle successively until there’s a case at the bullet seating station (#9 in this setup). With the press run up, you’re ready for full-progressive loading. Each time you pull the handle, you place a bullet at the seating station, and repeat.
Features and Specs Summary
Features
- Actuation: Manual (handle), can be upgraded to autodrive (see Autodrive for Evolution)
- Stations: 10 (shellplate), 9 (die stations)
- Mechanism: vertical moving dies/toolhead, rotating shellplate
- Indexing: Automatic
- Built-in primer pocket swaging
- Case feeder (standard equipment)
- Automatic priming (on-demand) with Prime Sense (low primer warning, can be interfaced with autodrive)
- Case retention: circumferential spring (cases can be inserted/removed from any station except #1 and #10 at any time without indexing press)
- Capacity (length): up to 308 Winchester
Dimensions
- Overall machine dimensions are 37″ tall (94cm) X 27″ (68.6cm) wide x 18″ (45.7cm) deep
- Machine weight 65lbs (29.5kg)
- Ships assembled on a sturdy aluminum base which is designed to be bolted into your workbench or placed on the Evolution™ Autodrive baseplate
- Shipping box dimensions are: 26″x16″x32″, 70 lbs
Warranty/Return
- 14 day return policy
- 1 year full warranty
Conclusion
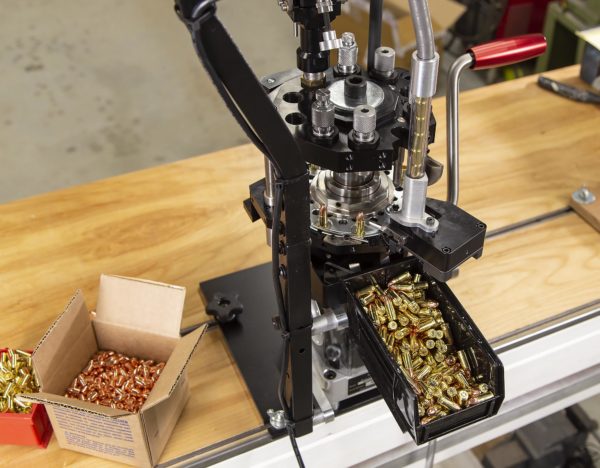
I’m very happy with the Mark 7 Evolution! I’ve loaded hundreds of rounds on this press without trouble, soon to be thousands of rounds. It’s a top-notch machine, and the quality shows when you take a close look at the press. As mentioned previously, there’s a lot more for me to explore with Mark 7, and I’ll be publishing a lot of stories chronicling my adventures in reloading with this technology. Stay tuned!
If you want to buy your own Mark 7 Evolution, you can do so directly from Mark 7 here:
Mark 7 Evolution Press
Don’t miss out on Ultimate Reloader updates, make sure you’re subscribed!
Thanks,
Gavin


How does this press compare against the Dillon RL1100?
Wow! I’ve been out of reloading for years now. The technology has left me behind and that’s part of the reason I don’t set up anymore.
Your articles has always inspired to jump in. What your doing is informing all degrees of a reloader. That’s going to save a lot of reloaded that, like me have dropped out.
Thanks for lead through articles that inspire and give hope. To actually get back in a good comfort zone with the right equipment that supports success.
How does the 45 ACP die work for hold down on the primer and also same for primer hole swagger?
What about maintenance, lubrication,written,and or video instruction?