How did I EVER get along without an e-target system? I’ve asked that several times in the last six months or so. That’s when I got my first ShotMarker setup! It has literally changed how I shoot, perform load development, and tell stories. In short, it’s been a game changer!
If you are a part of a club, a competitive shooting organization, or are just really serious about rifle shooting, you’ll want to check out ShotMarker! In this article, I’ll walk through everything from opening the case, setting up the system, and getting things dialed in. In future stories, I’ll cover additional topics related to ShotMarker. Let’s get started!
*Correction: When adjusting shot placement during calibration, you drag the “shots” to the location on the calibration target where shots hit (physically), *not* the center of the target (unless shots hit the exact center). This is important when exact shot placement is critical such as in a scored match. See steps below.
What’s “In the Box”
ShotMarker comes with everything you’ll need to use your e-target system except a mobile device (such as a tablet or phone), the target stand (target you are shooting), and the frame for the ShotMarker sensors (you easily make one from wood). Here’s what’s in the soft case:
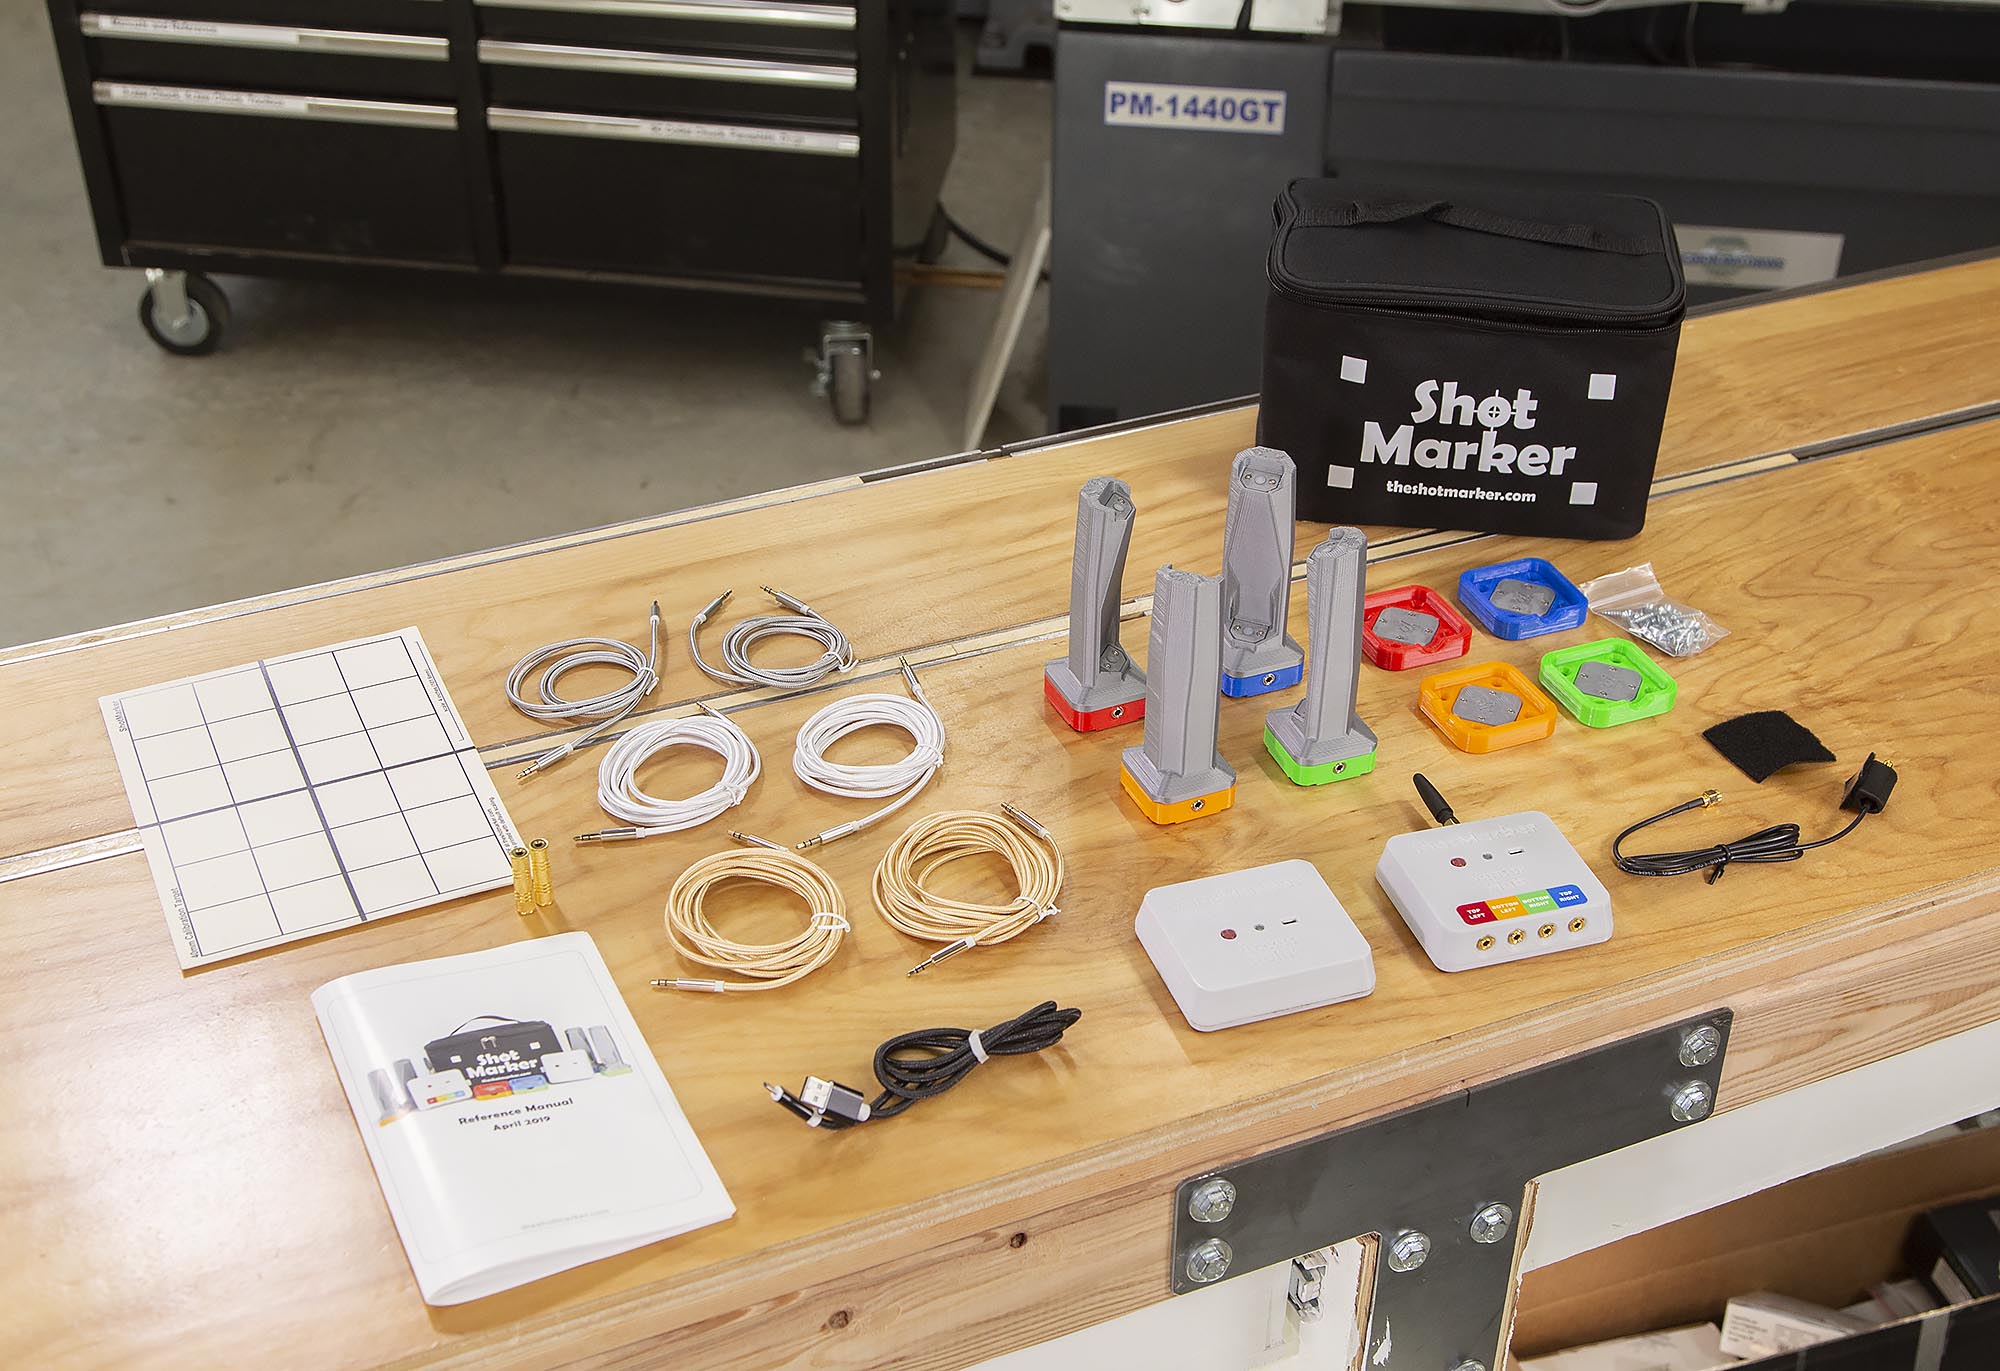
Pictured above: (clockwise from top-right)
- Soft case (holds everything shown)
- Acoustic sensors and magnetic mounts (color coded)
- Antenna extension
- Sensor hub with antenna (connects to sensors)
- Access Point (talks to target, connects to your mobile device via WiFi)
- Charging cable (Micro USB)
- Sensor cables- standard 3.5mm audio cables and extenders (various lengths included, you only need 4 for install)
- Owner’s Manual
- Calibration target
Target Frames: Sensor Frame and Target Stand
The first step in setup is to charge the sensor hub and the access point. I use a 6-outlet USB wall brick and two Micro USB cables to charge them both at the same time. While your devices are charging, you’ll want to start construction on your target frame. My 1000 yard target frame looks like this:
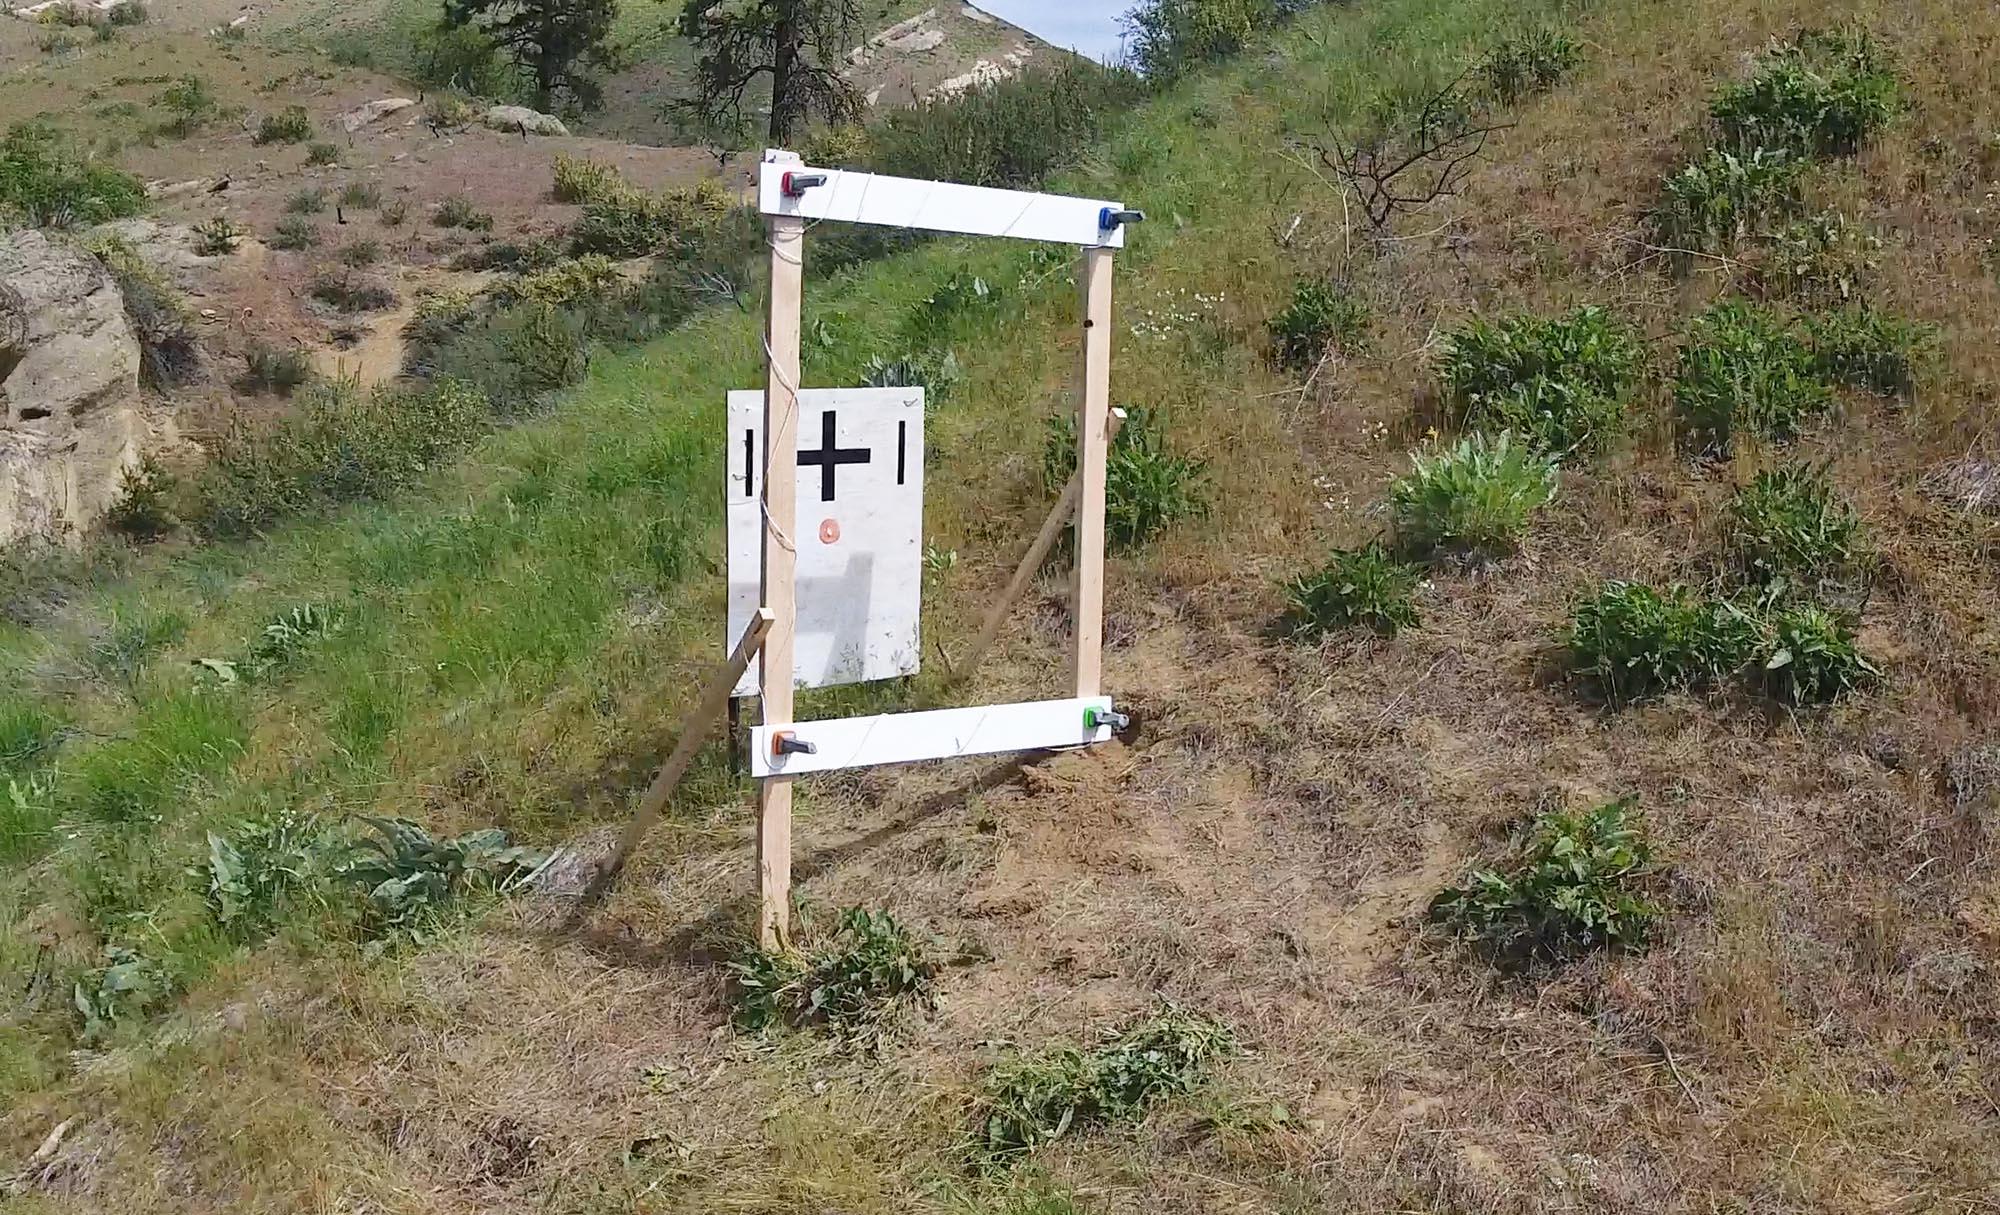
In the foreground you see the target frame used to support the sensors and the sensor hub. Note the stabilizing members running back from the frame which prevent the frame from moving in the wind. I’ve also added a solar panel which keeps the sensor hub charged, a GREAT setup! Behind the target frame is the target stand- it holds the aiming point(s) or target(s) being shot at during your range trip or competition. It’s important that these two target stands are separate so that the acoustic sensors don’t vibrate when the target is hit! The target frame (for sensors) shown above is about 4′ on each side. This is great for 1000 yards, but I chose to make a smaller target frame for 100 yards since I’m hitting within a couple inches from my aiming point regardless of the rifle being used (OK, the AK-47 might hit 5″ away 🙂 ).
Setup
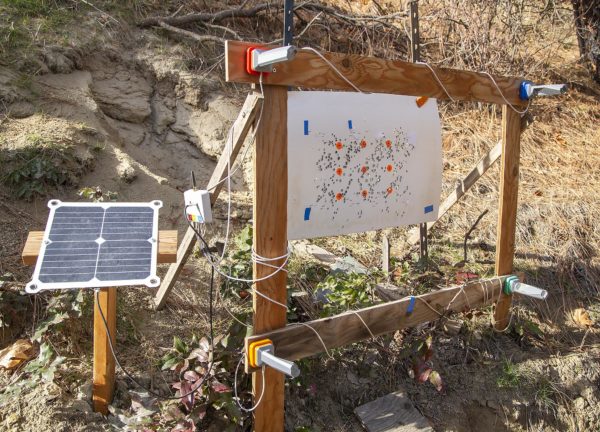
Here you can see my temporary 100 yard ShotMarker install with solar panel:
Once you have your target stand and target frame (for sensors) erected, install proceeds as follows:
- The sensor brackets (magnetic mounts) are screwed into the target frame. Be careful to observe the colors/placements, and to make sure diagonal measurements agree, a non-skewed rectangle is what you need.
- Width and height (center to center) between each sensor bracket is carefully measured and written down.
- The sensors are attached to the mounts (set in place).
- The sensor hub is mounted with velcro or screws (there are two screw cutouts on the back of the sensor hub).
- The antenna is screwed onto the sensor hub (can use optional extender).
- 3.5mm cables are run between the sensors and the sensor hub.
- Sensor hub is turned on.
- Access point is turned on.
- The ShotMarker web page (see IP address on back of access point) is accessed from a mobile device or laptop to verify that the target shows up.
That’s it! It doesn’t take long at all to setup the ShotMarker system.
Configuration
A basic configuration for ShotMarker will consist of naming the target, setting the target width/height, and calibrating the target (aligning center of physical target to center of virtual target). In order perform these steps, you’ll launch what’s called “Target Configuration”: (click/tap to enlarge)
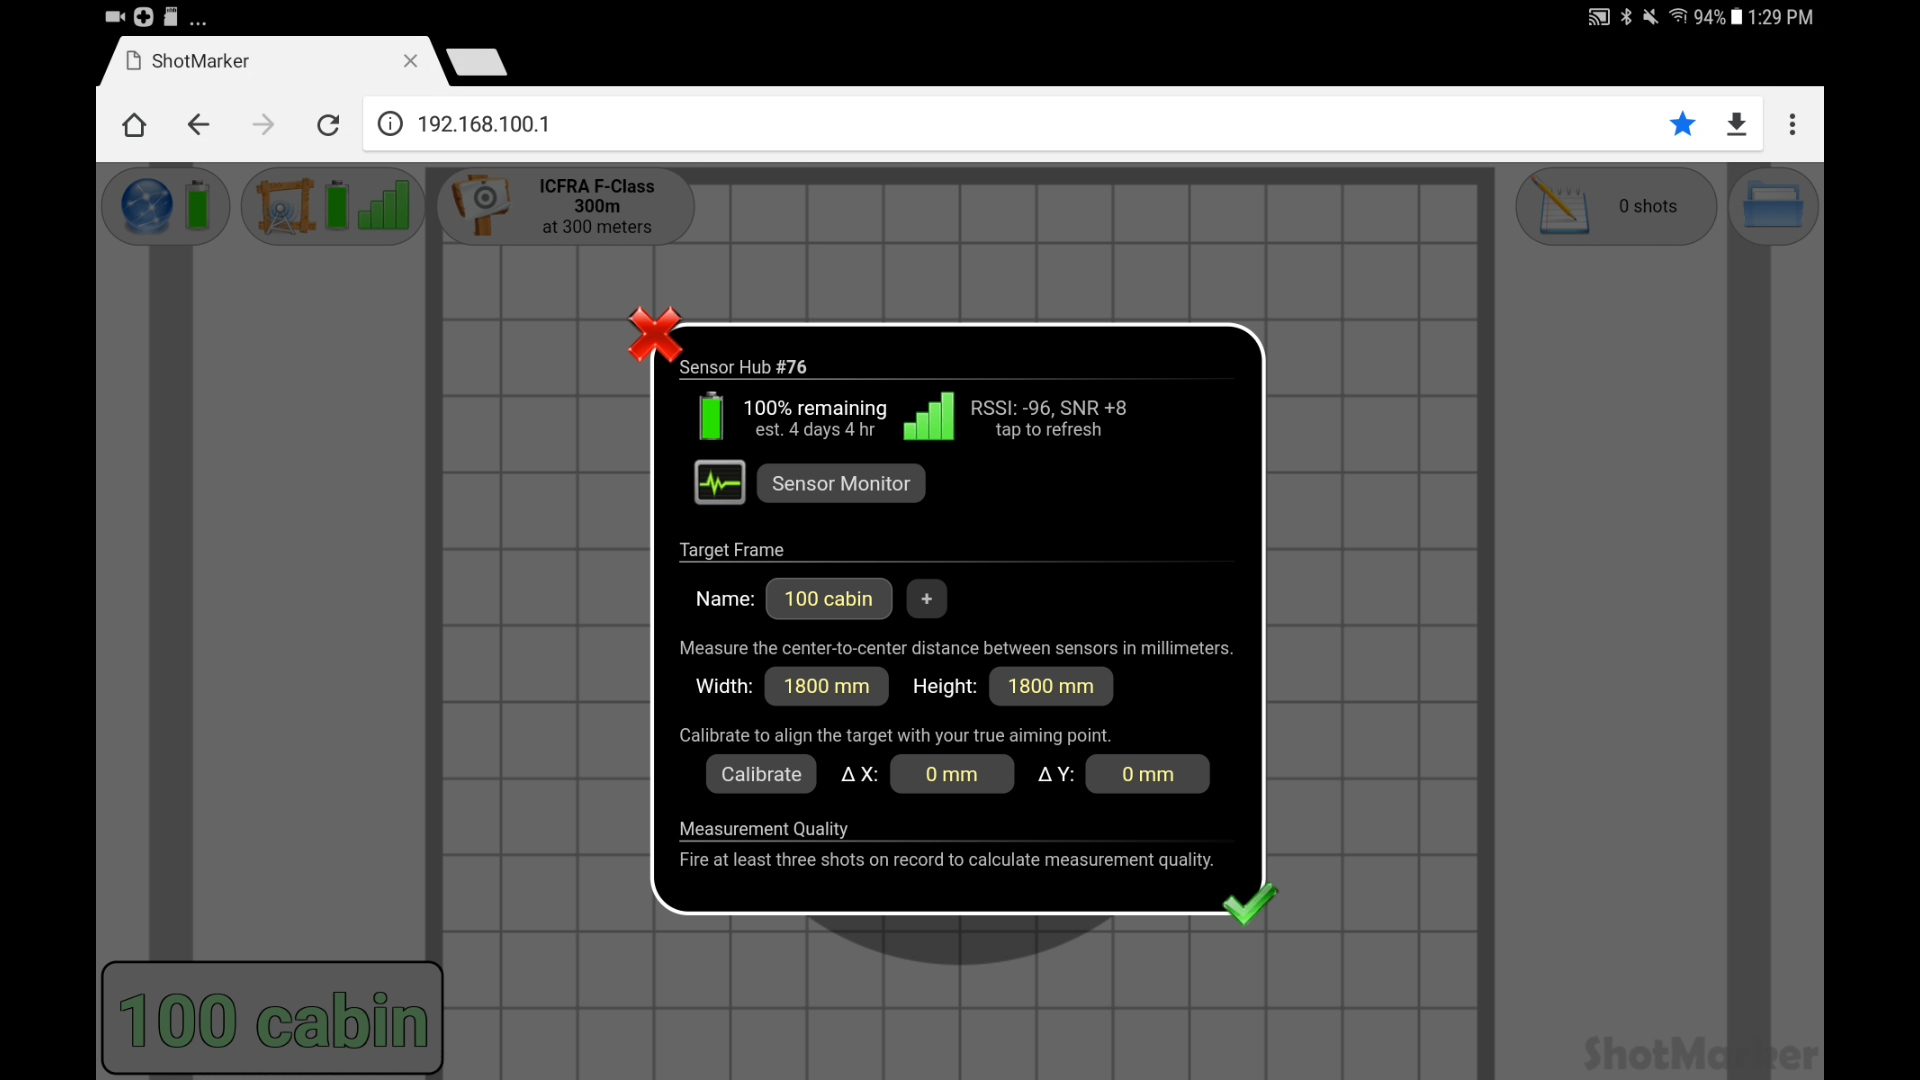
Settting Target Width and Height
Above is a screenshot from my Samsung Galaxy Tablet. In order to enter the width and height of the target, just tap or click on the values shown and type in new values (in mm, not inches). By entering these values, you’ll ensure accurate shot placement data points regardless of whether you’re shooting through the center of the target frame, or towards the edges/corners.
Calibrating the Target
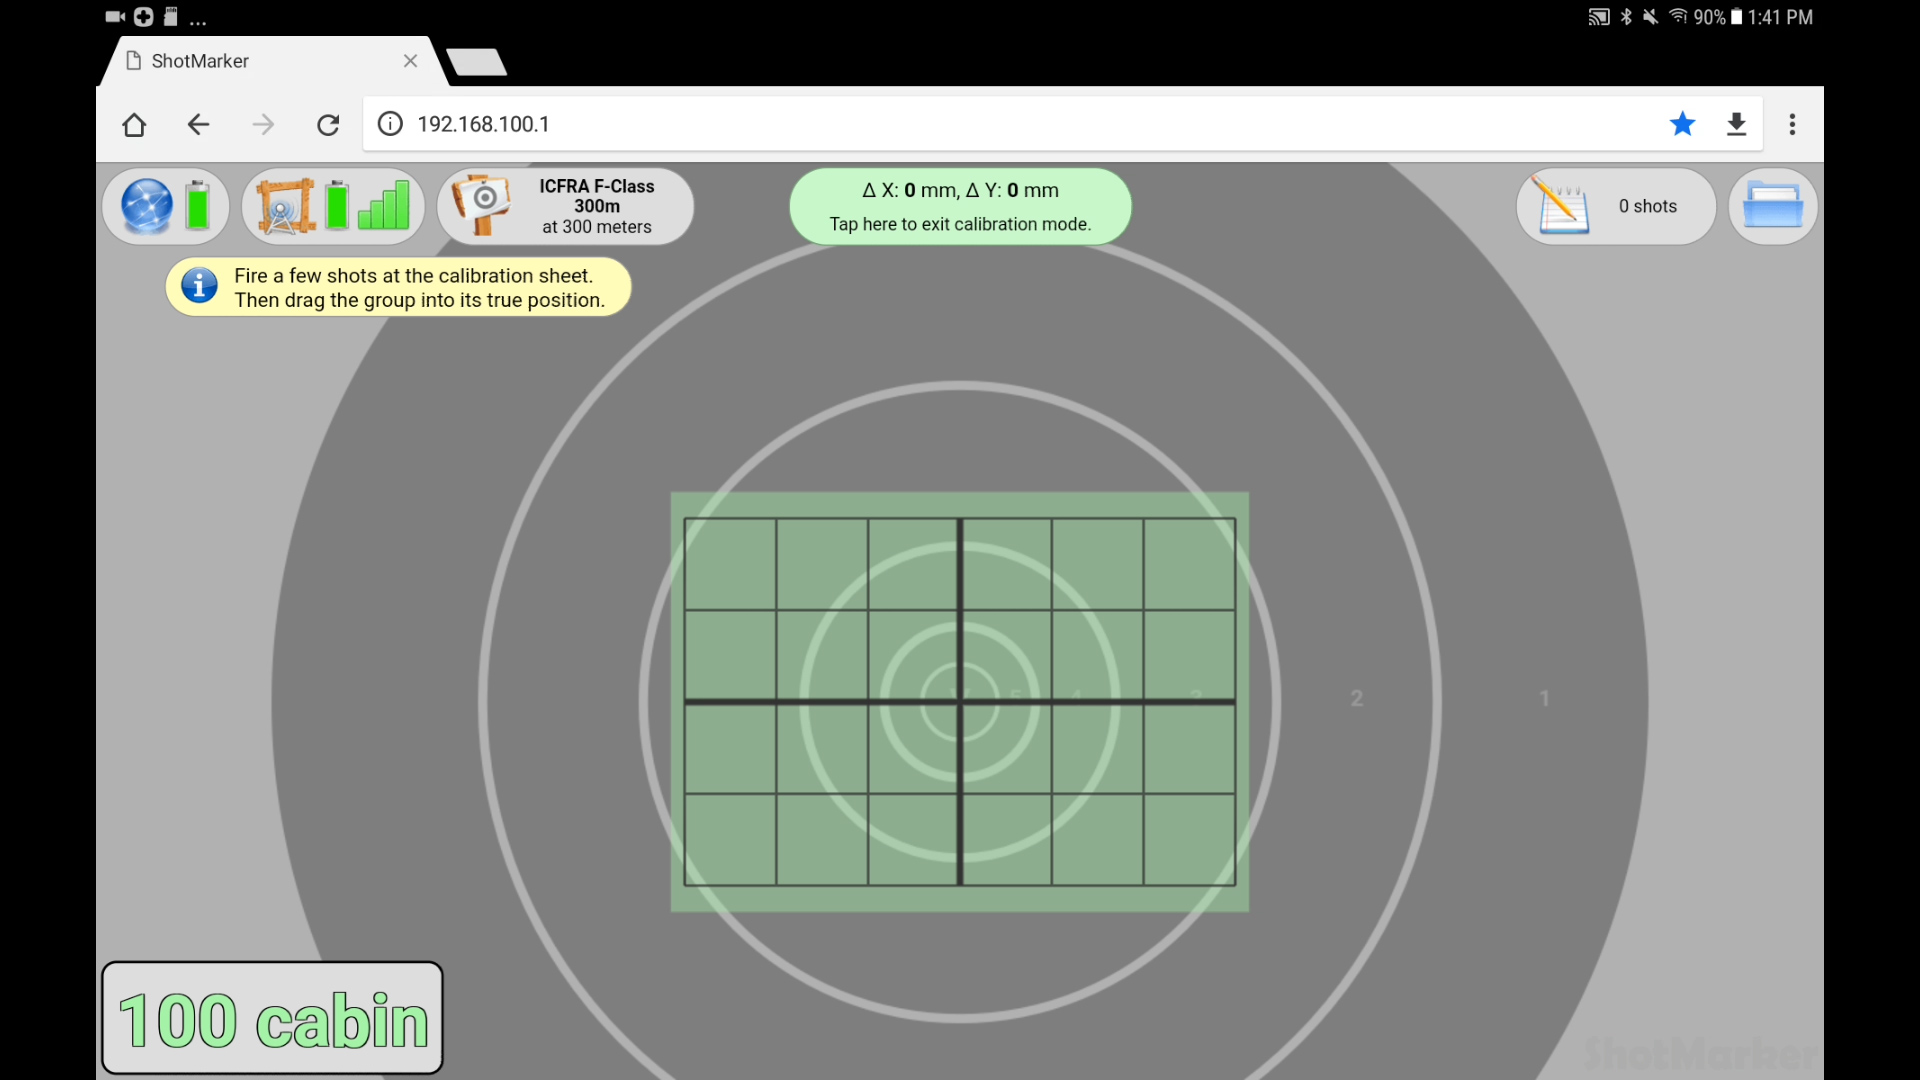
Target calibration is EASY. First, you’ll hang the supplied calibration target on your target frame in the center. Then simply click on the “Calibrate” button from the Target Configuration dialog to get started. You’ll see a view that looks like this:
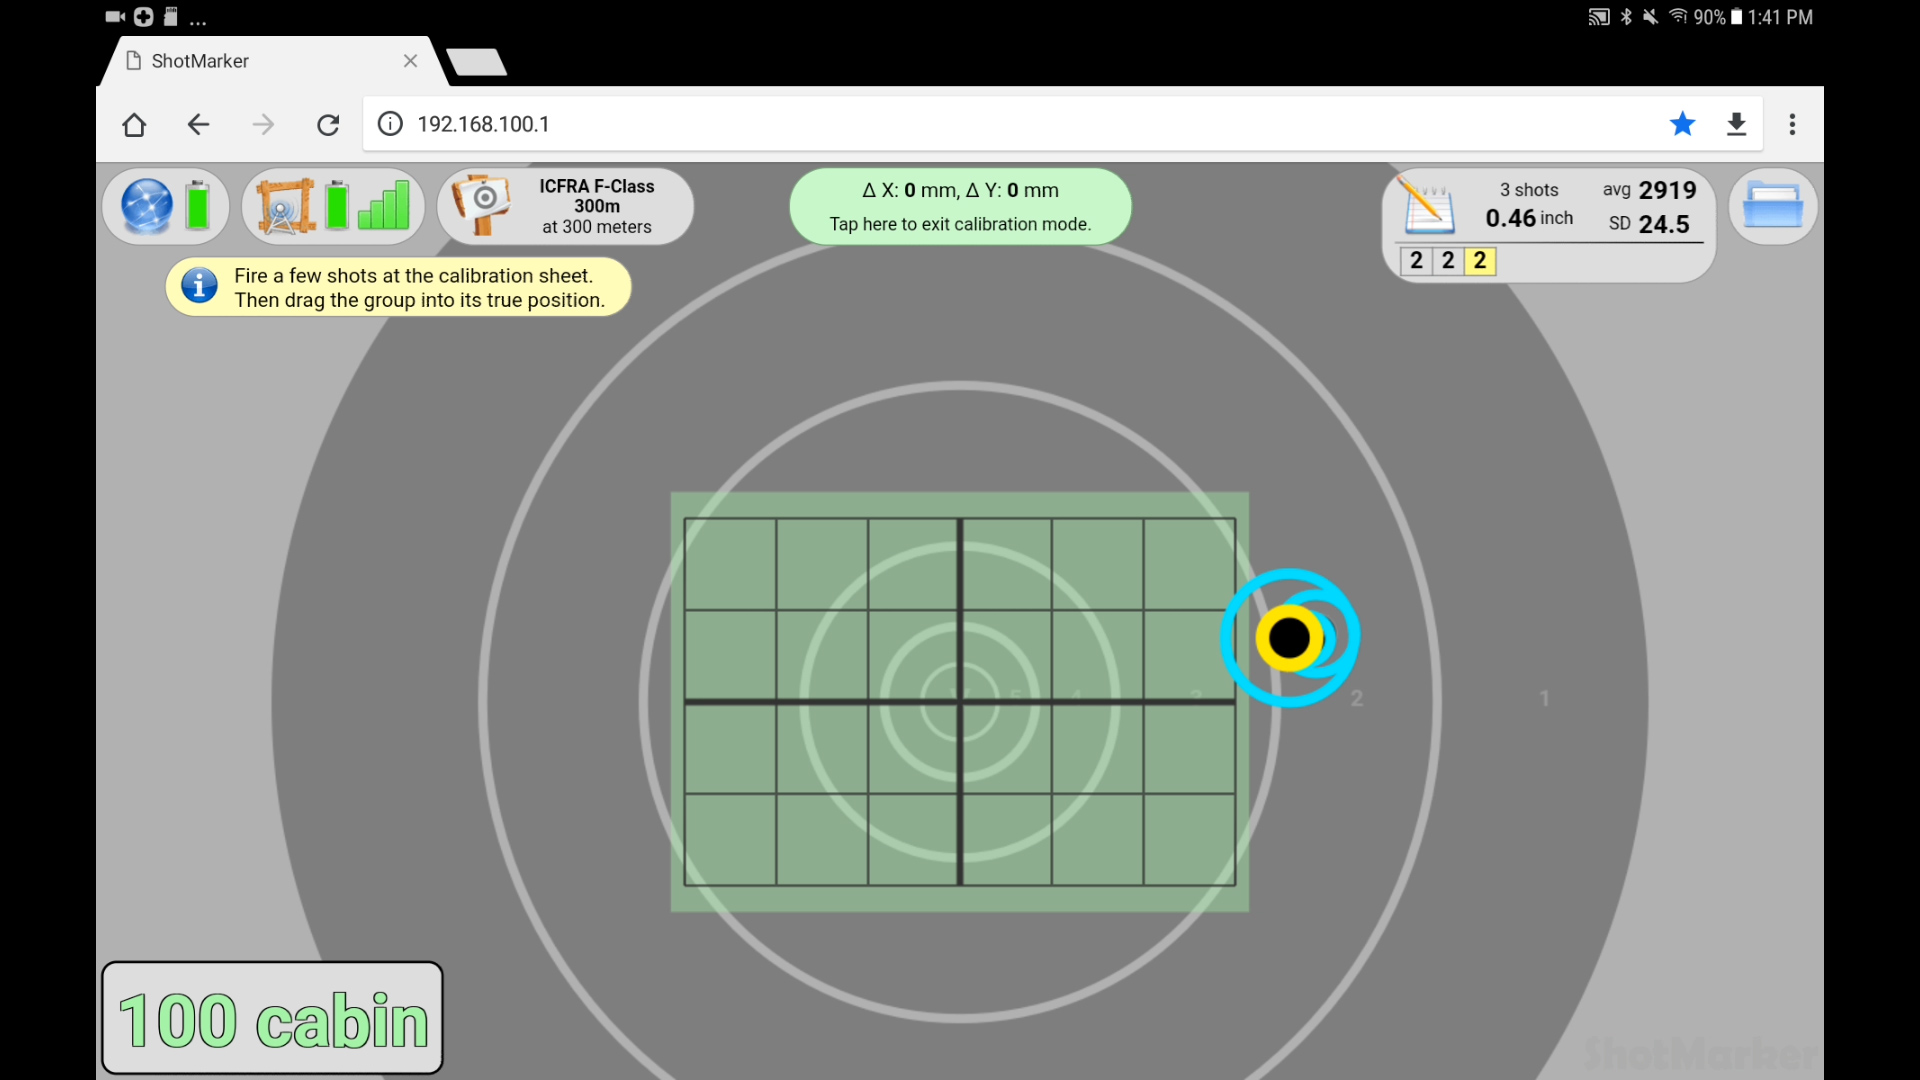
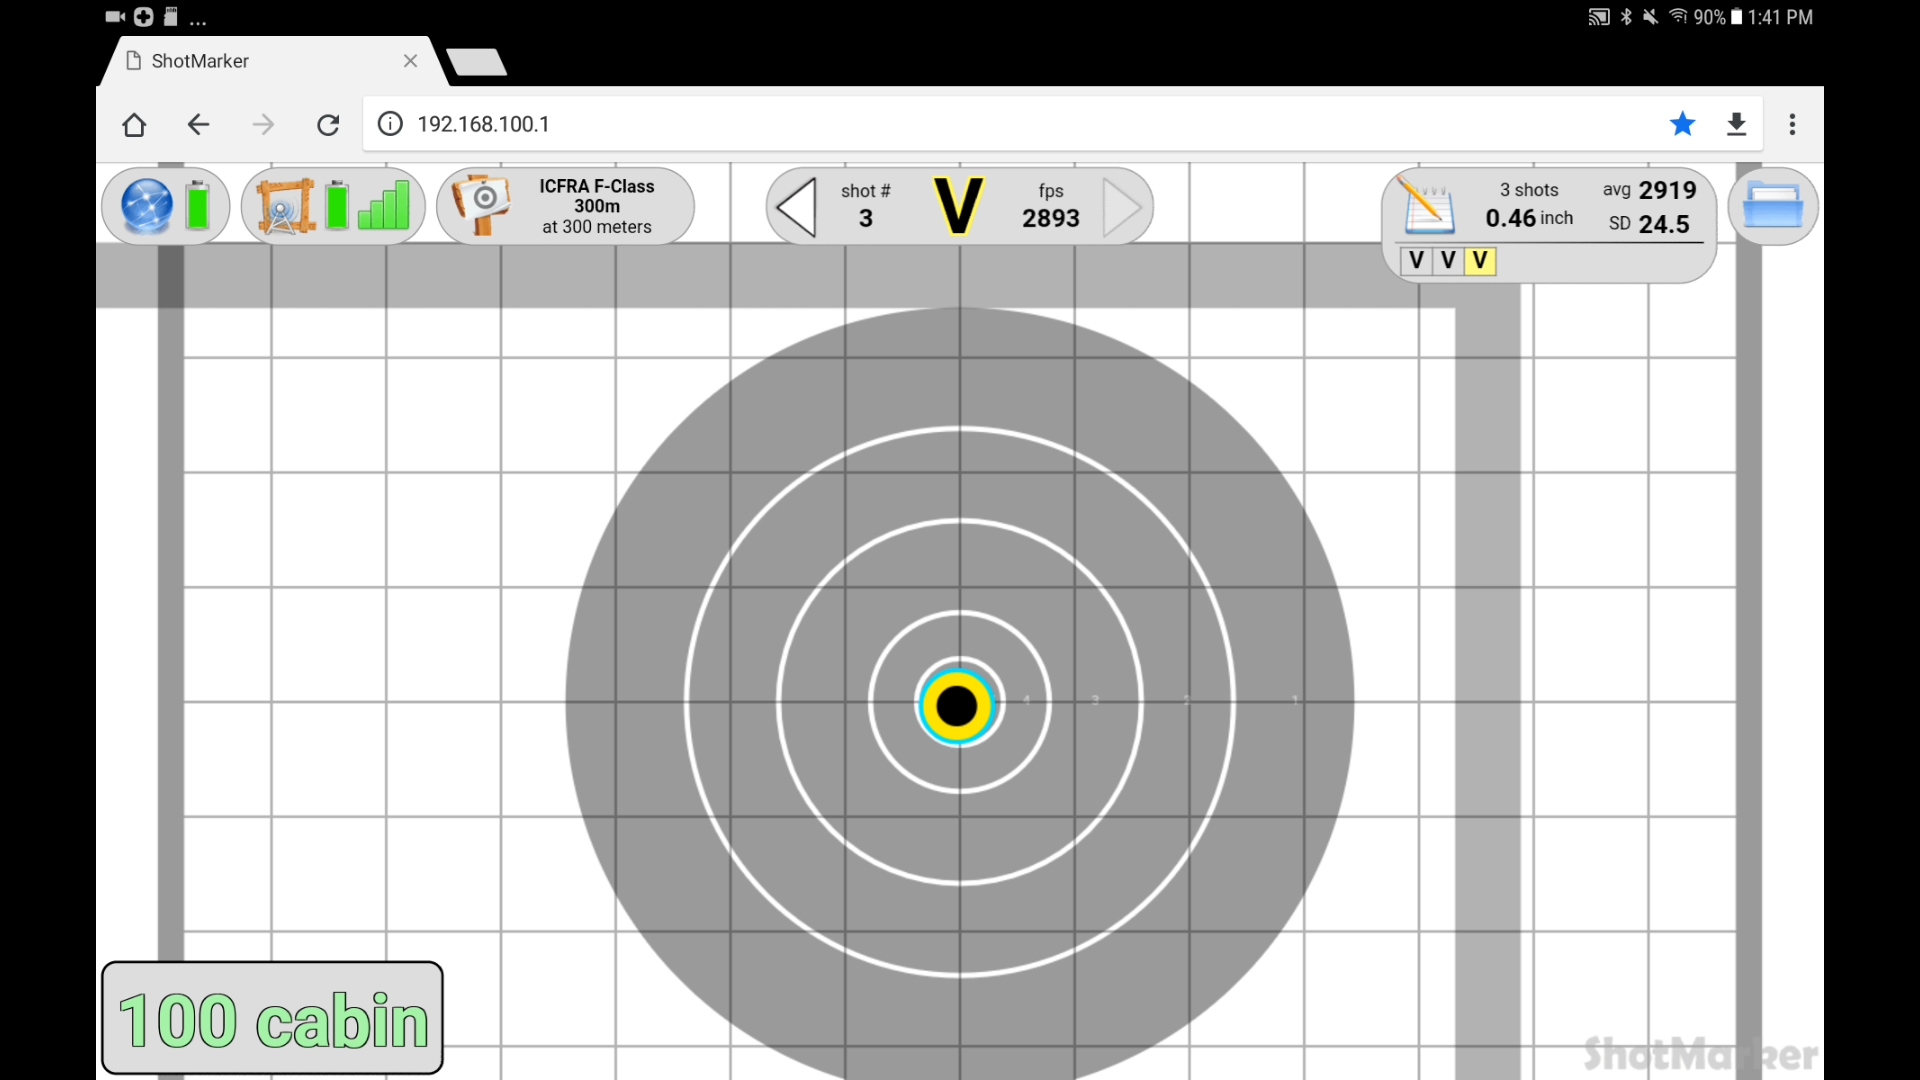
Next you’ll take a few shots at the center of the target, and you’ll likely see your shots off to the side of center. Here was my result after three shots:
Now comes the cool part- you simply click/tap and drag the shots to the place on the physical target where the shots hit! Here’s my calibration screen after I centered the shots:
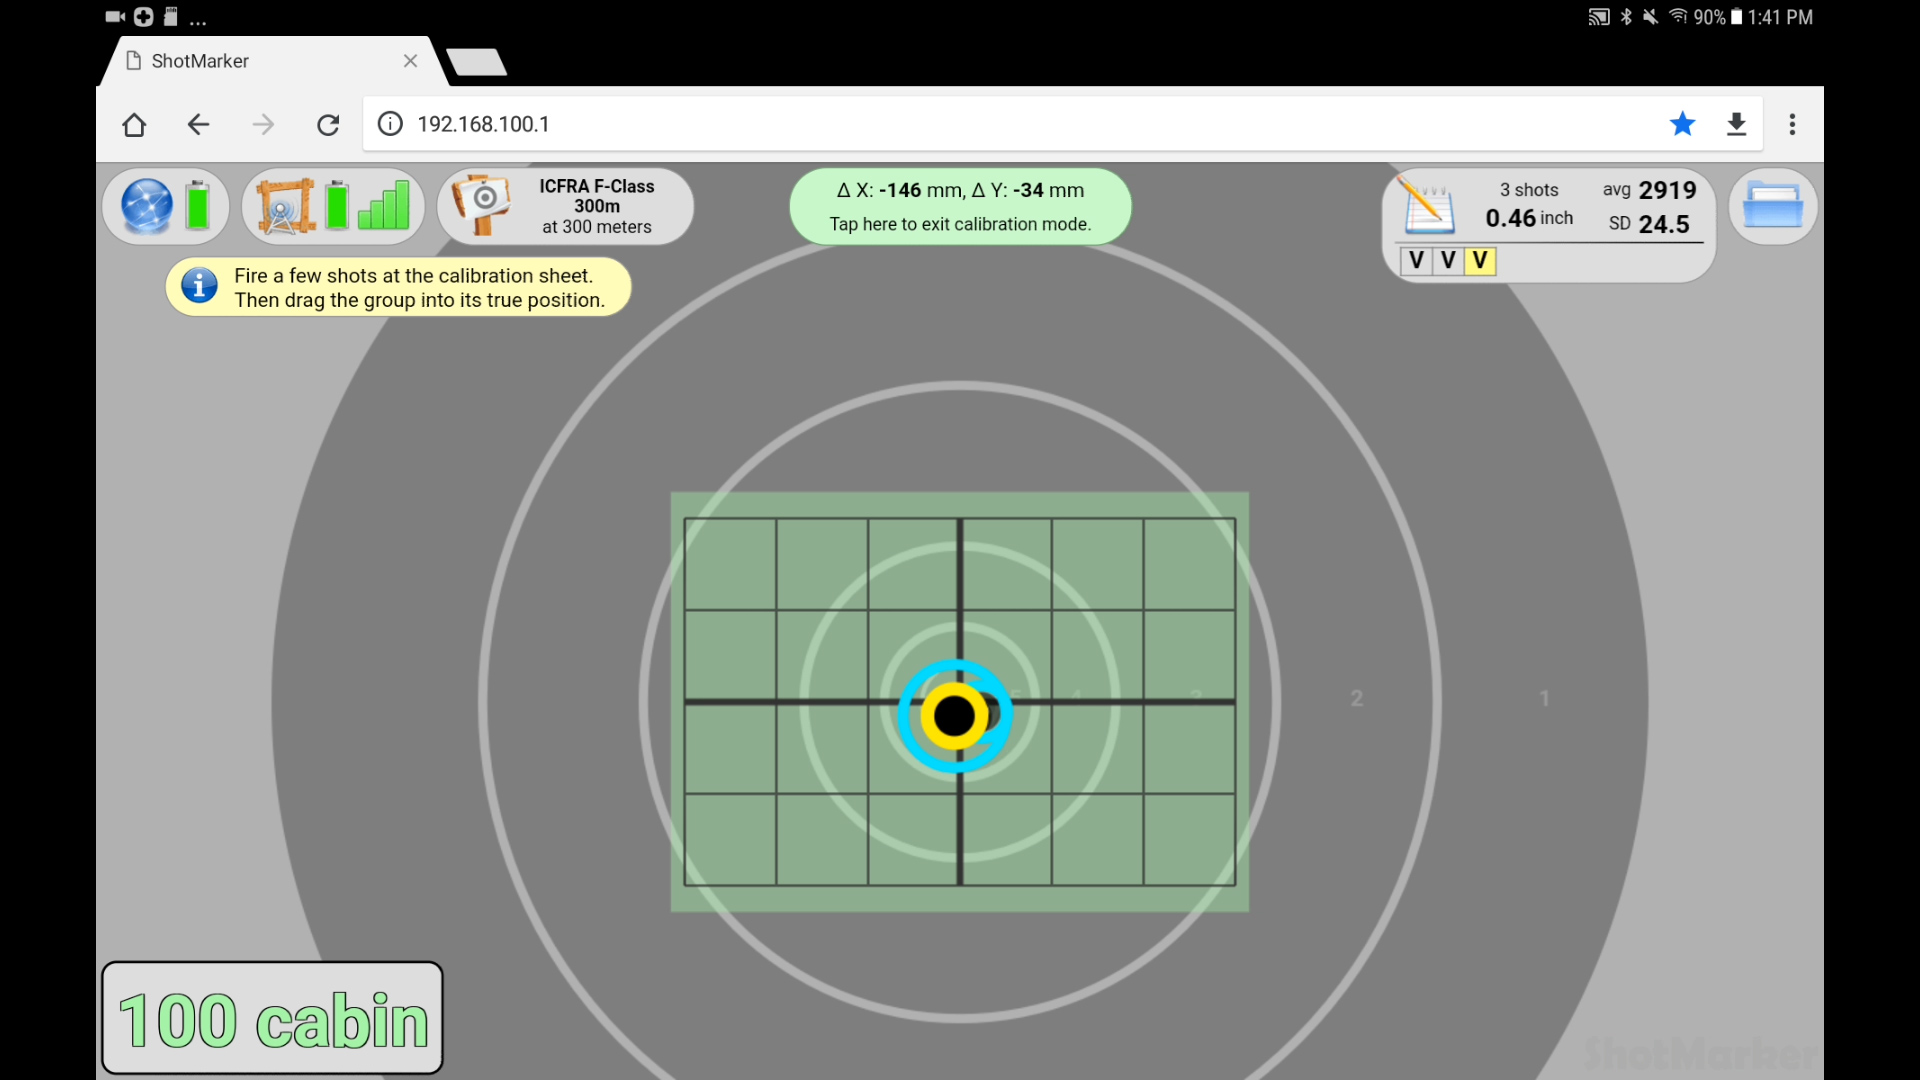
And when you tap the top green box (that shows target offsets for calibration) the calibration screen is dismissed, and you are presented with the corrected target view for the shots fired:
It literally couldn’t be any easier!
Using ShotMarker
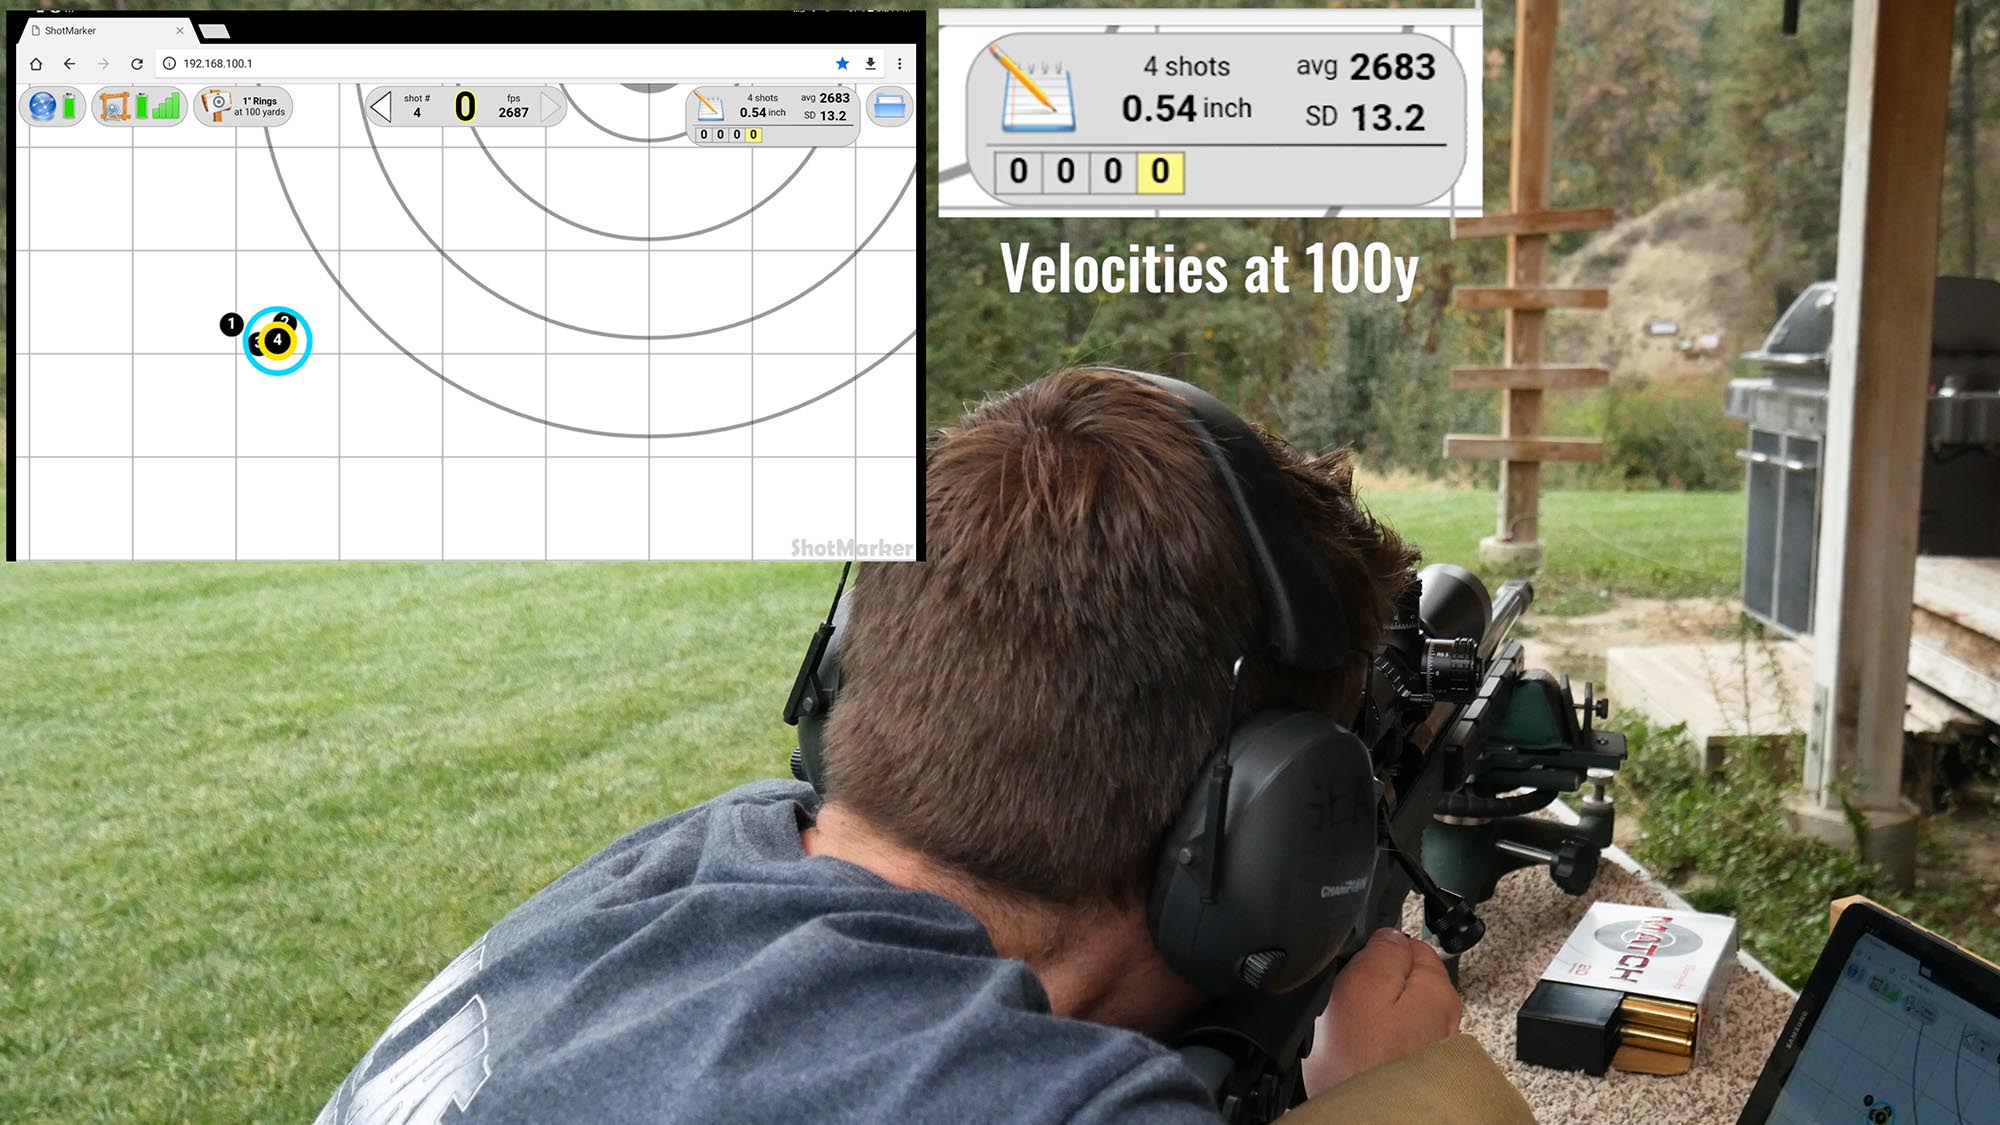
Above you can see a frame from one of my recent videos where I was performing load development for 300 PRC. When shooting with ShotMarker, you can great feedback in real-time including:
- Shot placement (within about 1mm!)
- Shot velocity
- Standard deviation for shots fired in string
- Additional stats for shots fired
ShotMarker uses the acoustic sensors to very accurately measure bullet velocity at the target. This velocity data can be quite useful at long range when you are validating bullet/rifle/load performance. You can even “reverse engineer validate” the ballistic coefficient for the bullet you are shooting. There’s a lot that you can do with ShotMarker, too much to cover in this article, so stay tuned for more related stories and updates!
If you want to buy ShotMarker, you can do so directly from the ShotMarker website.
Don’t miss out on Ultimate Reloader updates, make sure you’re subscribed!
Thanks,
Gavin


I’m interested in information on evaluating the data that we get by emails after the match can you help