This last year, I have been using an loving my Athlon Midas TAC 6-24x50mm FFP riflescope (see my original story HERE). In the first story, I gave an in-depth overview of the Athlon Midas TAC 6-24x50mm scope including unboxing, overview, setup, through-the-scope views, sight-in, and initial impressions. Since then I’ve been using this scope a LOT, and have had a LOT of questions and requests from you all: my readers and viewers. How about a reticle alignment test? How about the “Christmas Tree” reticle (APRS3), how about a tracking test? In this story, I’ll “pick up where I left off” last time, and will address all of these questions and requests as well.
APRS3: Elevation AND Windage Holdover
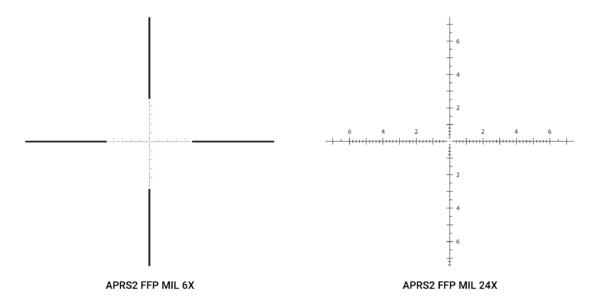
The only difference between the scope featured in this story and the scope featured in the last story is the style of the reticle. The APRS2 reticle featured in the last story is a standard MIL-graduated reticle. The graduations in a standard reticle make it easy to hold over for either windage OR elevation, but it’s not super straightforward to holdover for both with this style of reticle.
APRS2 (standard) reticle: (click/tap to enlarge)
If you are looking for a reticle that can be used for simultaneous windage and elevation holdover, a “Christmas Tree” type reticle is a great option. The scope featured in this story features this style of reticle, with the designation “APRS3”.
APRS3 (Christmas Tree) reticle: (click/tap to enlarge)
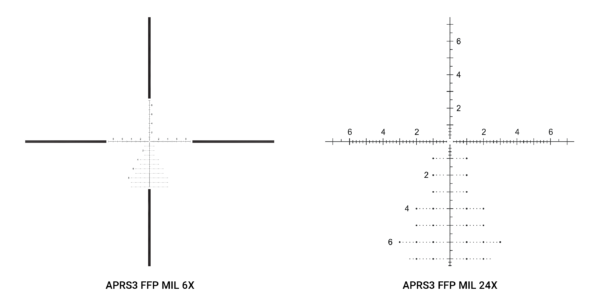
Athlon’s APRS3 reticle gives you the ability to use the lower “grid” to find the right elevation and wind holdover, without the need to dial your turrets. This is great for situations where you need to shoot quickly in variable winds and/or at variable ranges. Hunting and PRS style competition are good examples.
Reticle to Scope Body Alignment
After getting the scope setup I performed the “plumb bob test”.
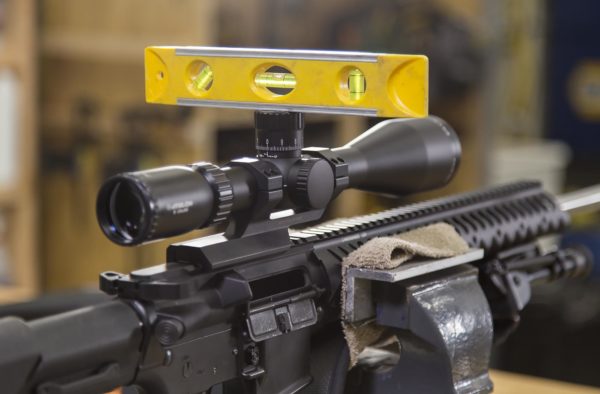
The test is simple:
- Position the rifle so that the scope body is level, and the scope/rifle does not move AT ALL. I did this by placing the rifle in a padded vice and adjusting the rifle until it was steady, and the top turret cap indicated totally level.
- Hang a plumb bob in front of the scope so that you can compare the plumb bob line with the vertical reticle line.
Here’s the result of my plumb bob test:
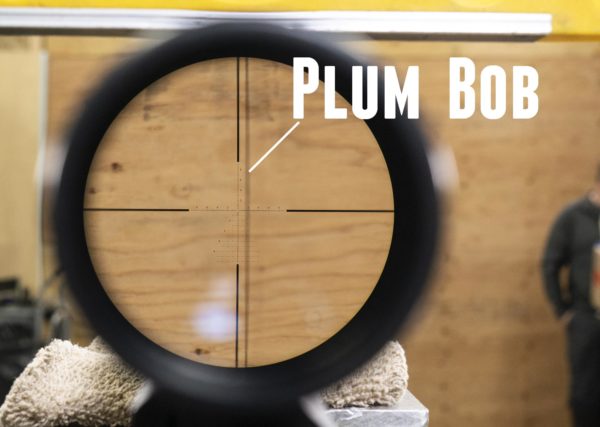
An ideal outcome is realized when the plumb bob line and vertical reticle lines are parallel. And that’s what happened when I tested this scope!
Tracking Test
There are different tracking tests for testing rifle scopes, but the basic idea is the same: validate that when you adjust windage and elevation (dialing dope) and return to those adjustments to zero, the point of impact really does return to zero. For this test I decided on a simple box test. I drew out a square on a piece of paper that’s the equivalent of 4 MILs wide at 100 yards: 14.396″ across each side. A target dot was added in the exact middle of the square, and another dot off to the side of the square.
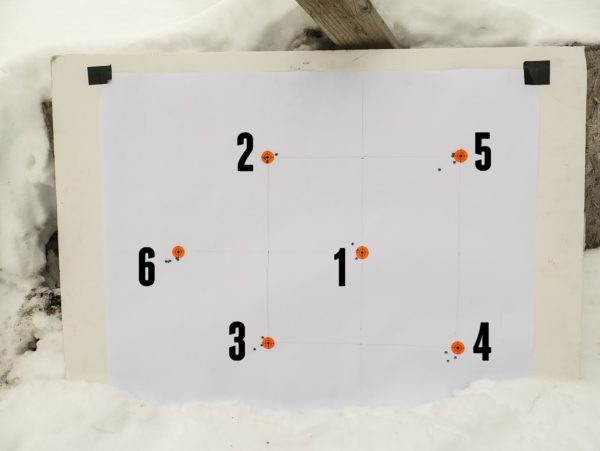
I first sighted in the rifle and confirmed my zero at 100 yards. Then, the shooting sequence was as follows:
- Shoot 3 shots in the center with rifle zeroed (aiming at center of square)
- Shoot 3 shots with Elevation at 2 MIL UP, Windage at 2 MIL LEFT (aiming at center of square)
- Shoot 3 shots with Elevation at 2 MIL DOWN, Windage at 2 MIL LEFT (aiming at center of square)
- Shoot 3 shots with Elevation at 2 MIL DOWN, Windage at 2 MIL RIGHT (aiming at center of square)
- Shoot 3 shots with Elevation at 2 MIL UP, Windage at 2 MIL RIGHT (aiming at center of square)
- Shoot 3 shots in the center with rifle zeroed (aiming at target spot off to the side)
Overall, the tracking was excellent. I did have a flier (see shot to the side in group #5) so I shot a fourth shot and disregarded the flier. My return to zero (group 6) showed slightly low, but I confirmed with my previous test (dress rehearsal) that I got a clean return to zero that time. So I’m confident this scope will track well even when I’m dialing dope frequently for long-range shooting. That’s reassuring.
Sunshade: Solution For My Sun Problems
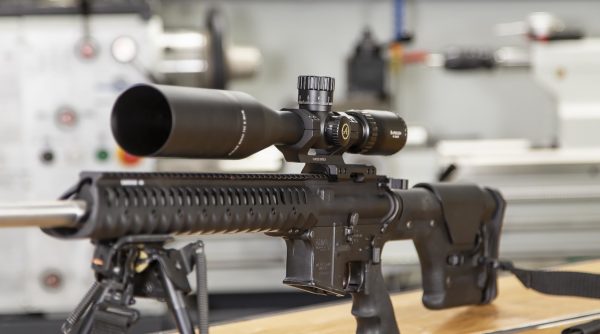
When I’m shooting at my 600 yard range, I’m frequently shooting right into the sun (mid-day). And when shooting at my 100 yard range late in the day I have the same problem: sun flare in the scope! It can make it impossible to shoot. During the filming of this story, I tried out my new sunshade for this Athlon scope, and it worked wonders! A necessity for me for sure…
Here are links to both versions of this scope on Amazon:
Athlon Midas TAC 6-24x50mm FFP riflescope (APRS2)
Athlon Midas TAC 6-24x50mm FFP riflescope (APRS3) – shown in this article!
Don’t miss out on Ultimate Reloader updates, make sure you’re subscribed!
Thanks,
Gavin






Not necessarily related to this scope (although one of the ones I’m looking at), but is it possible to get a review of one of the Cabelas Covenant 7 (or 5) FFP scopes? There is almost no information about them anywhere, & for a FFP scope in the $350-$400 price range has the potential of an entry level PRS scope. Any input would be very helpful.
I don’t think it’s important to get the rifle leveled. If the scope is level and plumb and the rifle has a 10 deg cant you’ll be off maybe .250″ at 100 yards and .250″ off at 1000 yards. Put the bubble level on the scope tube not the pic rail.