I’ve always wanted to build a Remington 700 custom bolt-action rifle, and now is the time! As a part of the lager 224 Valkyrie project (two rifle builds, reloading, ballistics, …) this smaller collection of videos and articles will outline a complete Remington 700 build- from start to finish! Later, we’ll compare ballistics and accuracy results between the Remington 700, and the custom AR-15 (that’s next).
Series navigation:
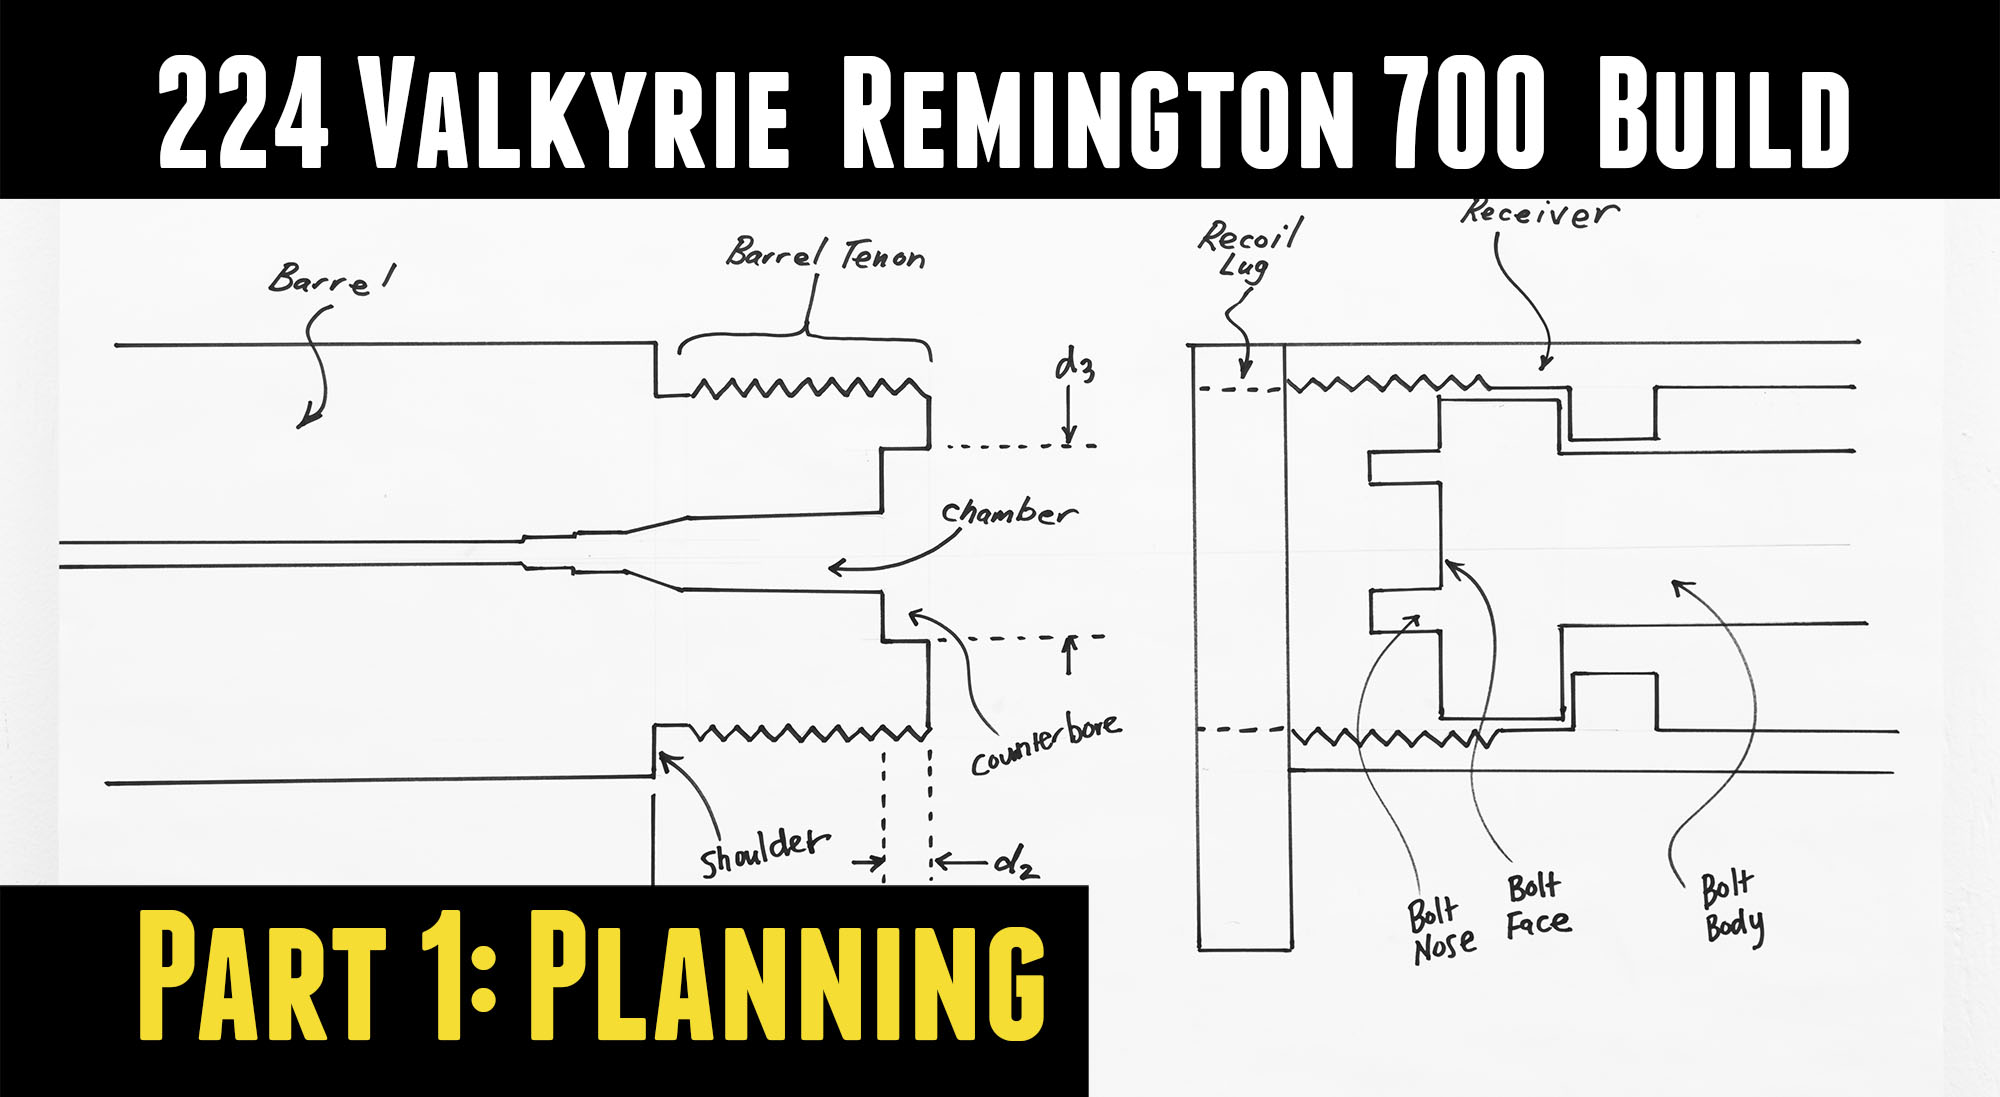
- 224 Valkyrie Remington 700 Build P1: Planning the Build (you are here)
- 224 Valkyrie Remington 700 Build P2: Barrel Prep and Alignment In the Lathe
- 224 Valkyrie Remington 700 Build P3: Chambering and Machining
- 224 Valkyrie Remington 700 Build P4: Muzzle Threading and Barrel Install
- 224 Valkyrie Remington 700 Build P5: Custom Thread Protector
- 224 Valkyrie Remington 700 Build P6: KRG Bravo Stock, TriggerTech Special Trigger
- 224 Valkyrie Remington 700 Build P7: AICS Magazine Conversion
- 224 Valkyrie Remington 700 Build P8: Barrel Break In, First Groups, First Loads
- Athlon Midas TAC 6-24x50mm HD Riflescope: In-Depth Overview
As a quick recap from the rifle builds overview post, here’s what we’ll be using for this Remington 700 build:
- Kinetic Research (KRG) Bravo Remington 700 Chassis
- Benchmark Barrels 224 barrel blank, 1:7 twist, 24″ finished length (Sendero)
- New Remington 700 Action with bolt modified by Benchmark for 6.8/Valkyrie (with Sako-style extractor)
- Badger Ordnance .312″ oversize Remington 700 Recoil Lug
- TriggerTech Special 1lb – 3.5lb trigger for Remington 700
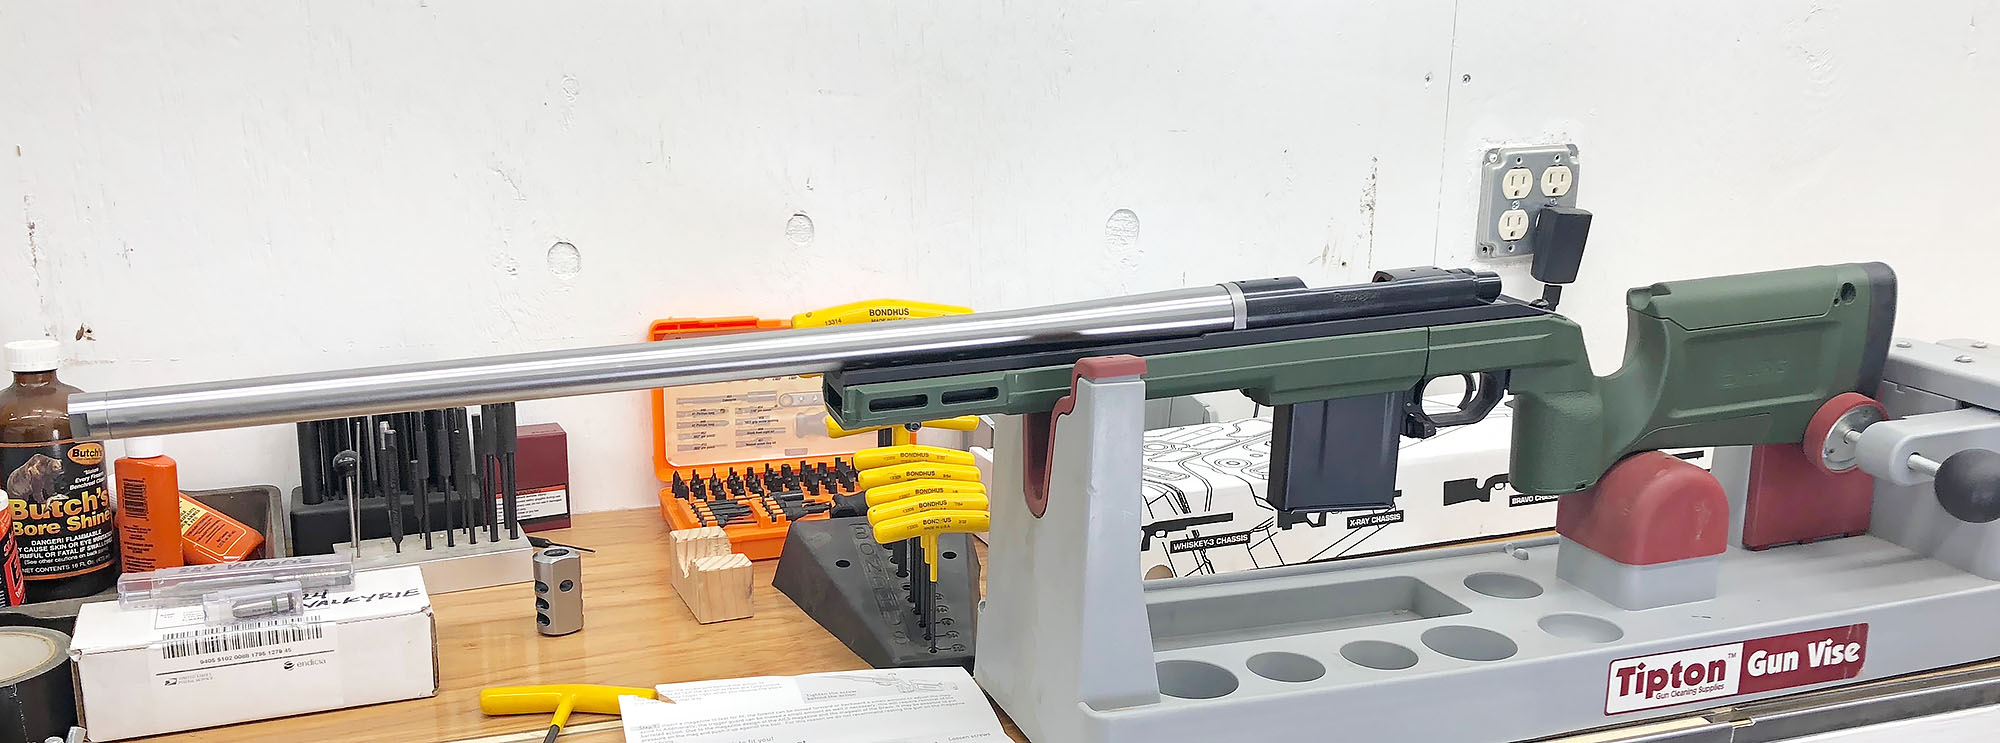
Here’s what the rifle looks like as of the writing of this article. Right now I’m test fitting the KRG Bravo stock:
Let’s go back to the start of the build process. Before we can start work on machining the barrel, some careful and meticulous planning is needed. We’ll need to take precise measurements, decide on tolerances, and calculate the critical dimensions for machining. How is this done? Let’s get into it!
Disclaimer
Ultimate Reloader LLC / Making with Metal Disclaimer: (by reading this article and/or watching video content you accept these terms)
- The content on this website (including videos, articles, ammunition reloading data, technical articles, gunsmithing and other information) is for demonstration purposes only.
- Do not attempt any of the processes or procedures shown or described on this website.
- All gunsmithing procedures should be carried out by a qualified and licensed gunsmith at their own risk.
- Do not attempt to repair or modify any firearms based on information on this website
- Ultimate Reloader, LLC and Making With Metal can not be held liable for property or personal damage due to viewers/readers of this website performing activities, procedures, techniques, or practices described in whole or part on this website.
- By accepting these terms, you agree that you alone are solely responsible for your own safety and property as it pertains to activities, procedures, techniques, or practices described in whole or part on this website.
Remington 700 Barreled Action Basics
The Remington 700 is today’s most popular action design for bolt-action rifles. And it’s not too hard to understand why. The Remington 700 is strong: there’s “three rings of steel” encasing the case rim (bolt nose, barrel tenon, and receiver). Remington also came up with a design for the 700 which minimizes manufacturing costs: with a separate recoil lug and round-profile receiver body. These and other factors have contributed to the popularity of the Remington 700.
Let’s take a quick look at the key components we’ll be working with for a custom rifle build: (click to enlarge)
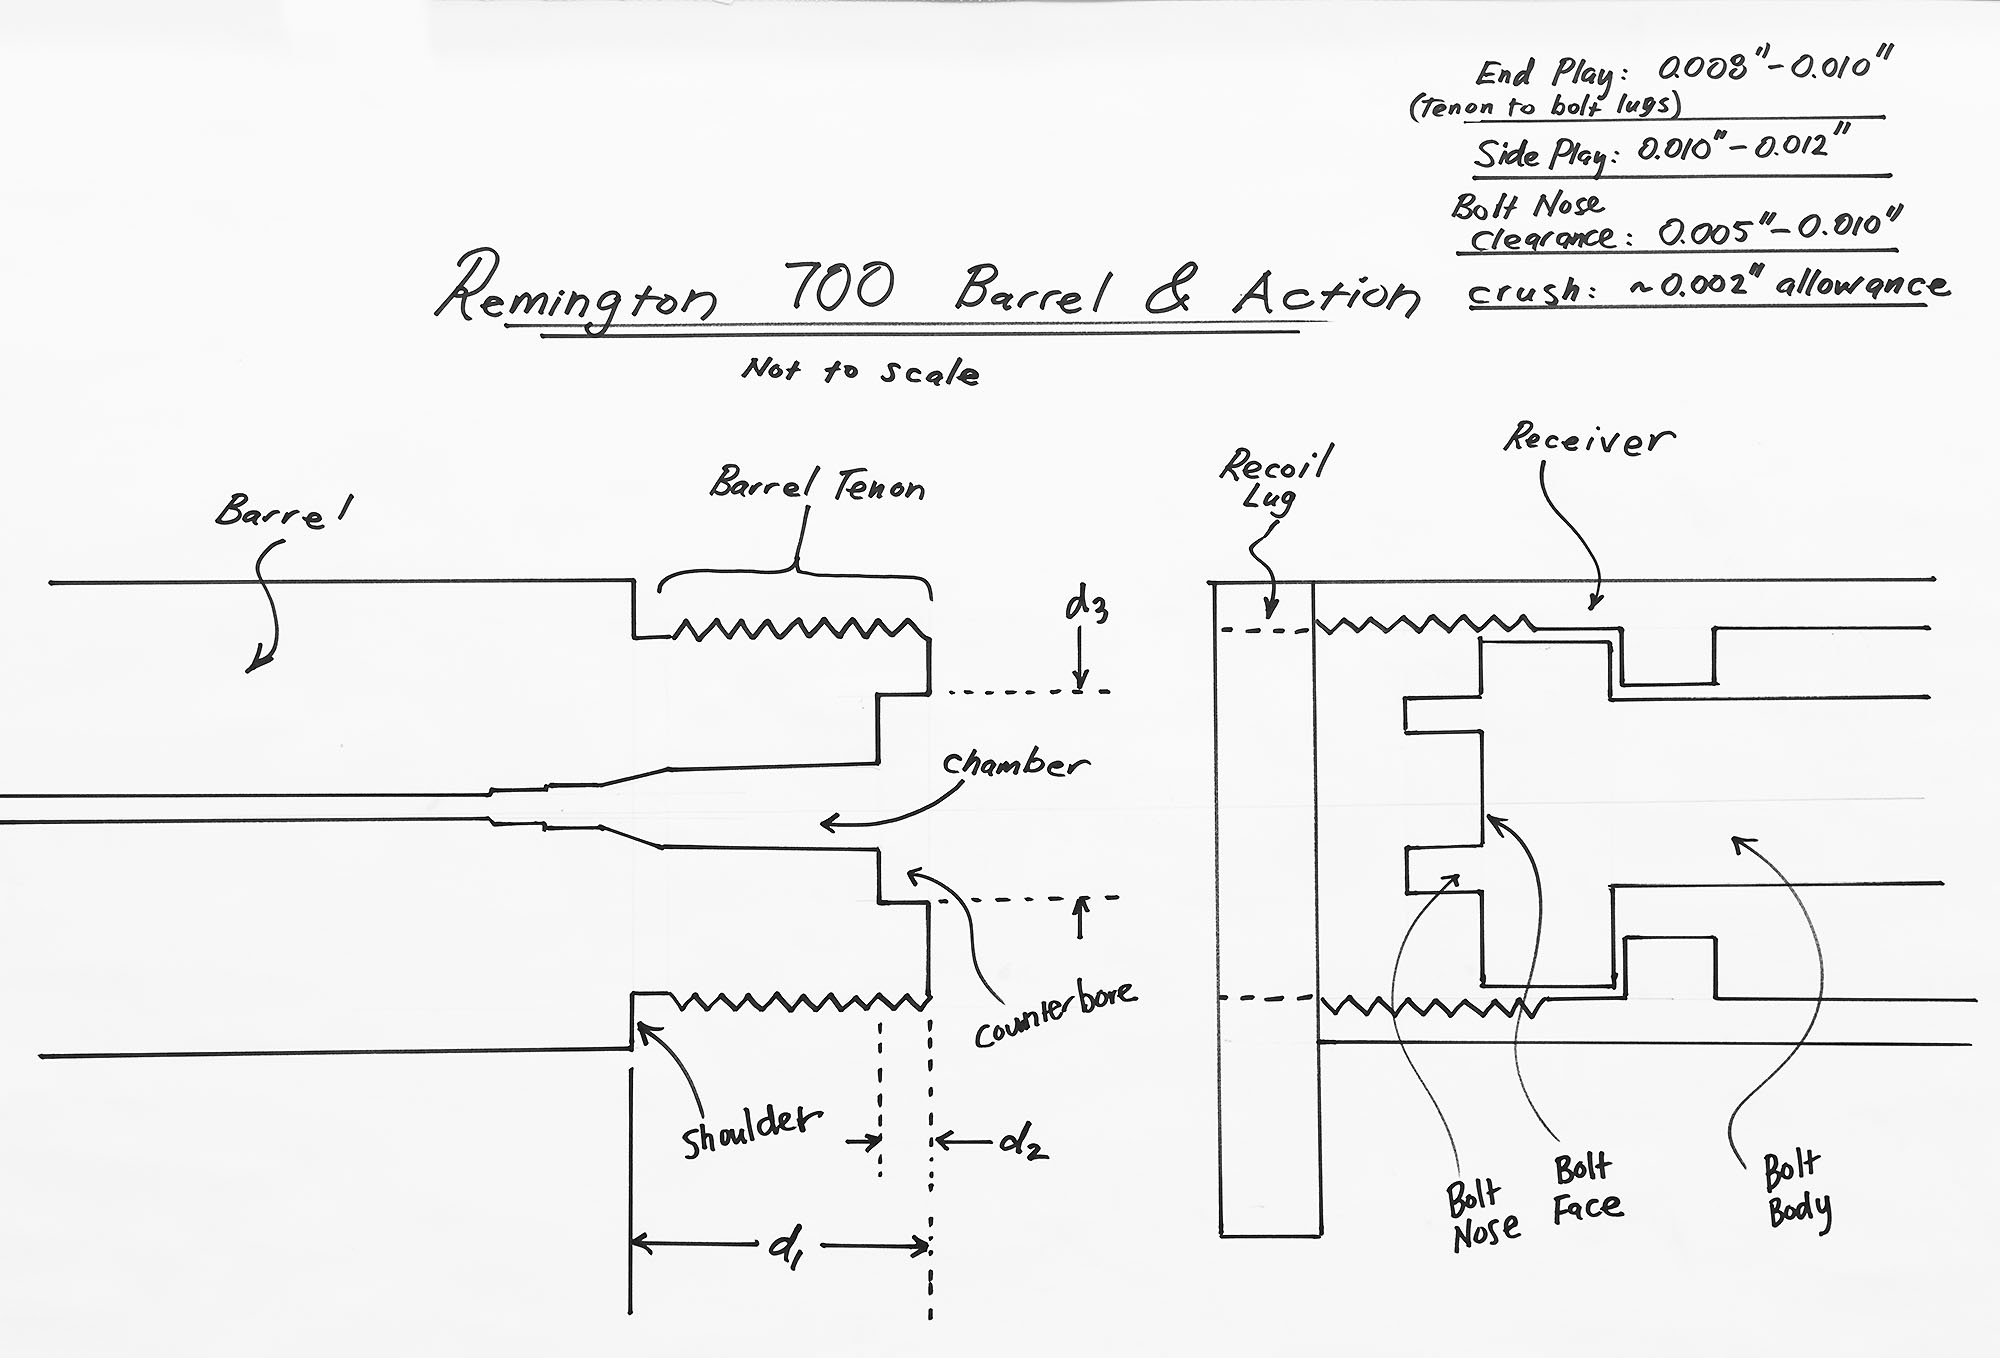
*Tolerances in this drawing are for illustration purposes only, do not use these values without cross-referencing with a known resource (gunsmithing reference, blueprints, other). These values will vary based on the type of rifle you’re building, and the components you’re using.
When machining/chambering a barrel, there are some key tolerances we’ll need to calculate and incorporate into our “build sheet”:
- End play between the end of the barrel tenon and bolt lugs
- Side play (difference in bolt nose diameter and counterbore diameter)
- Bolt nose clearance (between front of bolt nose and depth of counterbore)
- Crush factor (generally approximately 0.002″) when tightening barrel into receiver
With an understanding of the above diagram, it’s time to start taking measurements, and to create the “Build Sheet”.
Creating Your Build Sheet
With the bolt locked in place, and the recoil lug stacked on the end of the receiver, it’s time to take specific measurements for your rifle. These include:
From the front face of the recoil lug:
- Depth to bolt lugs
- Depth to bolt nose
- Depth to bolt face
- Bolt nose diameter (with bolt removed)
In my case I am using an oversize recoil lug (thicker- measuring 0.312″) which has an effect on all of these measurements.
You’ll also want to measure from a take-off barrel if you have one:
- Tenon length (for reference, can’t assume recoil lug thickness and other dimensions are the same)
- Tenon thread outside diameter
- Tenon thread relief width and depth
- Counterbore diameter (for reference)
- Counterbore depth (for reference)
With these dimensions in hand, it’s time to draw up a build sheet. Here’s what my build sheet looked like (click/tap to enlarge, all dimensions for reference only, do not use for your build):
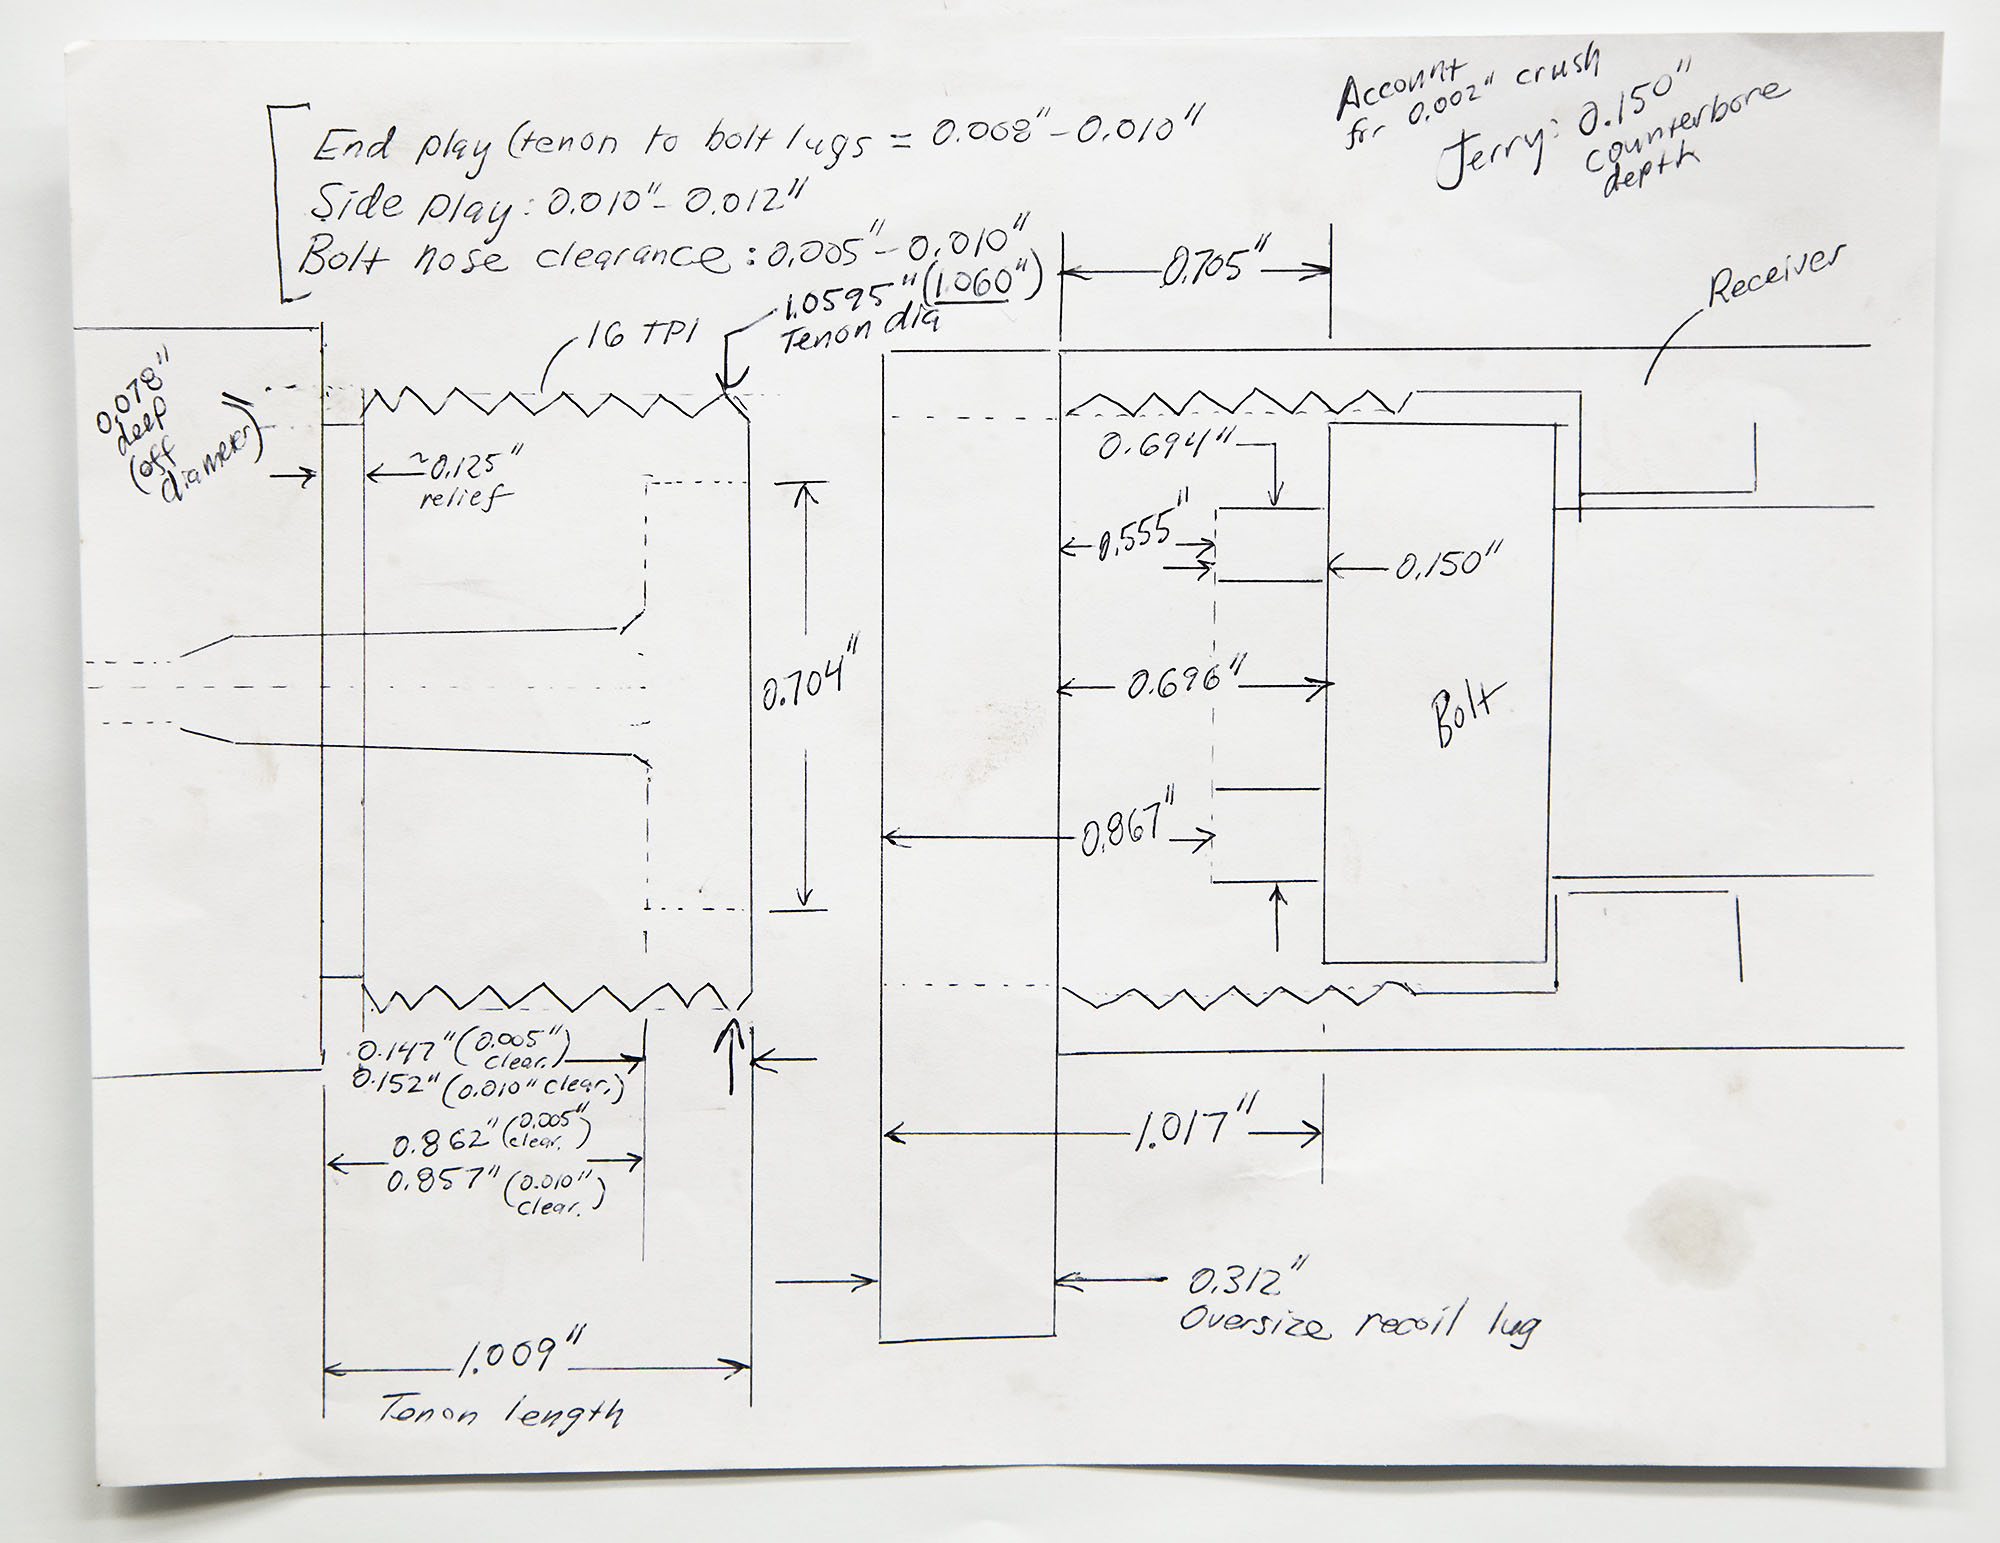
One of the most important things to keep in mind when performing these calculations are how the tolerances affect other measurements, specifically:
- The tenon end-play needs to be added back into the equation when you look at distances referencing the end of the tenon (it’s shorter and won’t touch the bolt lugs, by design).
- For headspace, keep in mind the bolt nose clearance will come into play. This is why the receiver, bolt, recoil lug, and headspace gauge are assembled and screwed onto the action when cutting the chamber (to check headspace).
- When assembled, the tolerances between the barrel and the receiver will be “crushed down” about 0.002″. So you need to have about 0.002″ extra tolerance for those key factors.
Take your time, double and triple check your measurements (measure multiple points, both bolt lugs, etc), and cross-check your math. All of this attention to detail will pay off when you “Get it right the first time”. If you don’t get these dimensions correct, you could have issues with safety, reliability, and accuracy.
In the next post, I’ll cover barrel blank prep, and we’ll see how the barrel is secured/aligned in the lathe. Make sure you’re subscribed!
Thanks,
Gavin


