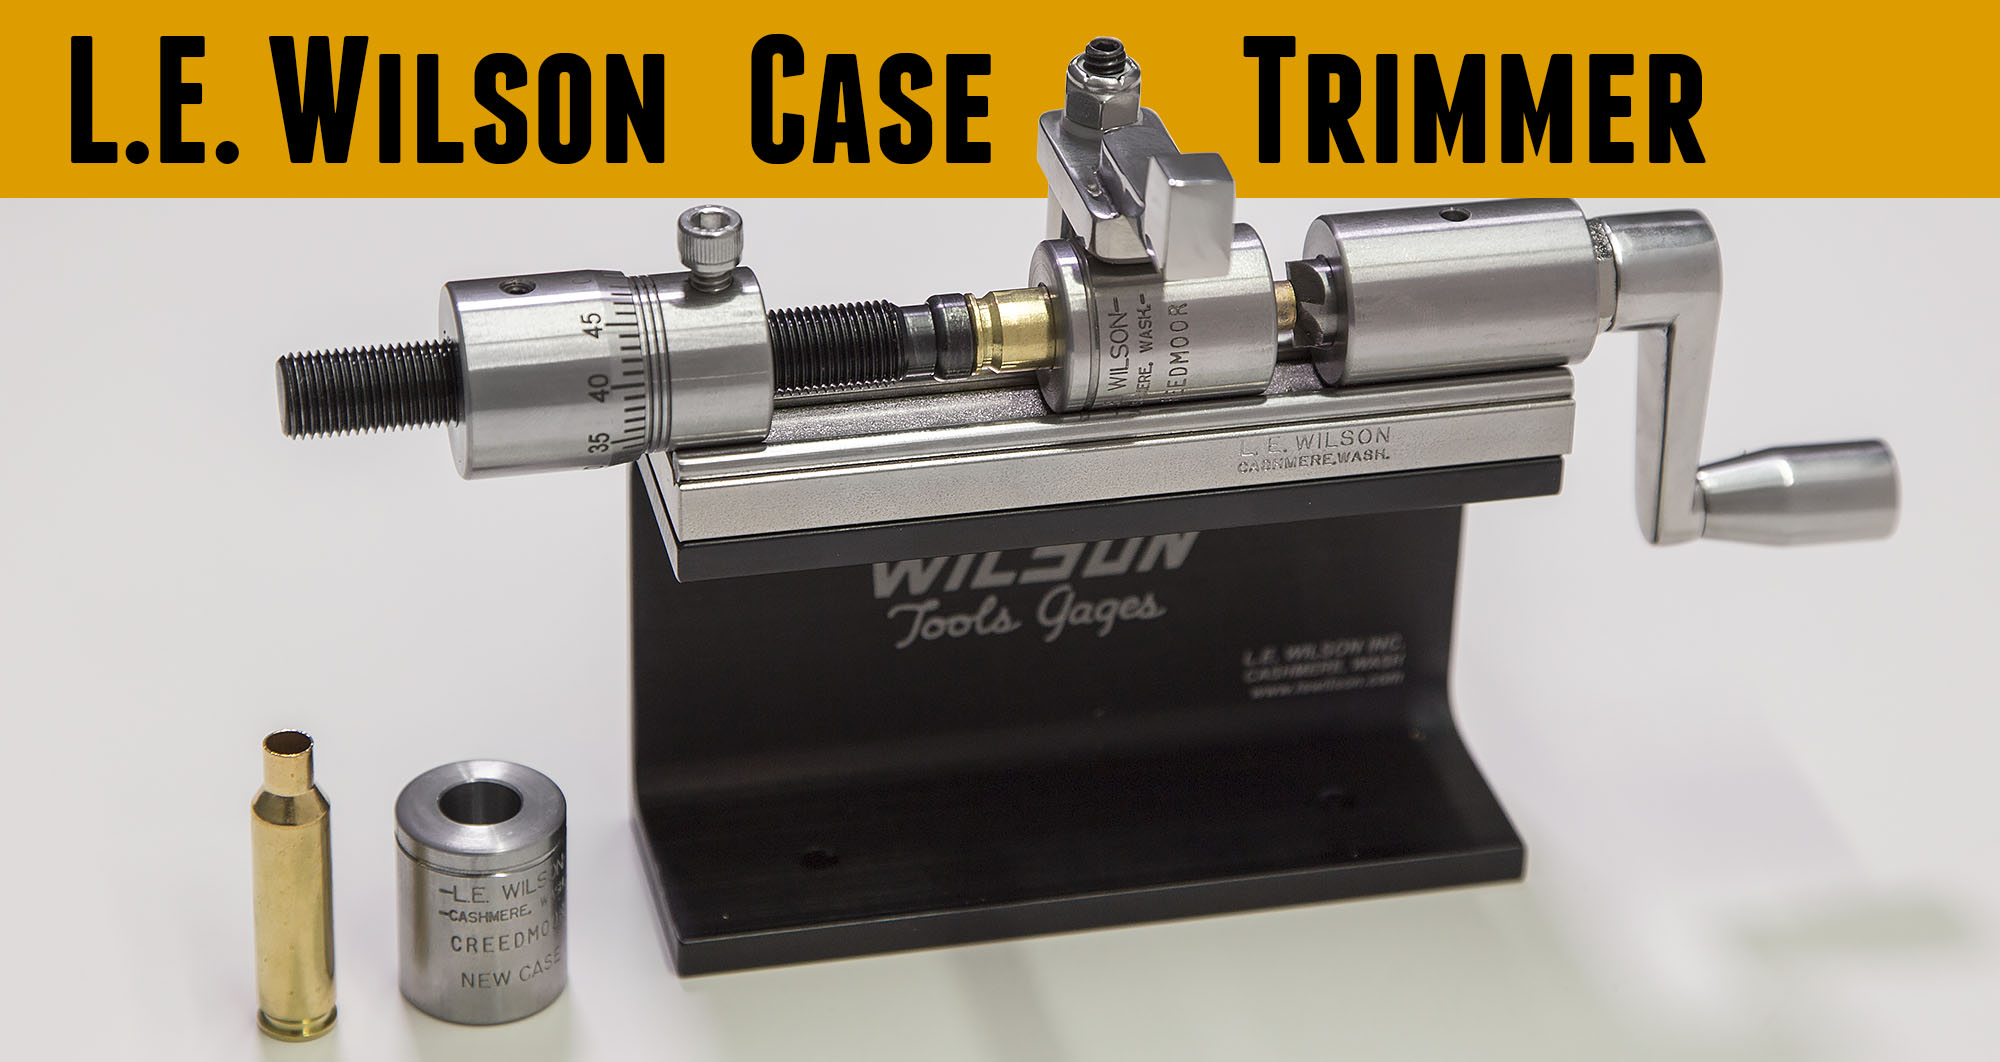
Any shooting sport that takes precision to the extreme will involve exacting brass prep as a part of the reloading process. In order to achieve such exacting standards, case length and case squareness must be held to exacting tolerances. L.E. Wilson has spent the last 81 years perfecting their case trimming system, one that was originally patented way back in 1936.
In-Depth Video Walkthrough
L.E. Wilson Case Trimmer Overview
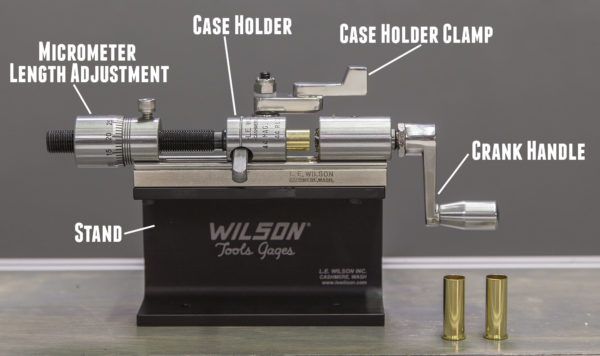
The L.E. Wilson case trimmer uses a lathe-type design to trim cases, and employs a unique design to secure the cases while they are trimmed. Here’s the parts that make up the case trimming machine:
Above we see:
- Micrometer Length Adjustment: Trim length can be “dialed in” using .001″ graduations on the micrometer scale. This trimmer is so precise, you can actually dial your case trim length to a handful of tenths! (about .0002″ or so). This kind of accuracy is beyond what is necessary even for the most demanding shooting scenarios.
- Case Holder: Cases are held in place with a special case holder (sold separately) which maintains perfect axial alignment between the case and the cutter head.
- Case Holder Clamp: (optional) This clamp holds the case and holder in place while trimming
- Crank Handle: Turned by hand to rotate the cutter, can be replaced with optional power adapter which permits the use of a power screwdriver instead of hand cranking. The cutter head is a part of this assembly.
- Stand: (optional) A precision aluminum stand which facilitates mounting the trimmer to a bench or other mount/fixture. This stand also has a place to mount the optional case holder clamp (as pictured).
One of the unique features of this trimmer is the dual-rod setup that works with grooves in the base in order to perfectly align the depth stop, the case holder, and the cutter/crank. Made with extreme precision, this tool is both accurate and nice to look at (actually looks more like jewelry than a typical tool).
Trimming Rifle Brass
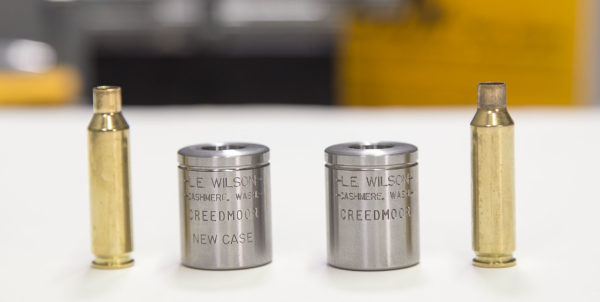
Tapered-body rifle brass is secured in the trimmer by means of two different types of case holders:
- New case holders: for brand new cases (typically under-size compared to fired cases)
- Fired case holders: for cases that have been fired previously (typically over-size compared to new brass)
Here’s what the case holders look like (6.5 Creedmoor used as an example):
As shown in the video, the setup and trimming process is straightforward:
Setup procedure:
- Set trim length dataum/reference using reference brass or an L.E. Wilson case gage
- Set trim increment (Ex: .005″ less than case gage is typically ideal trim length)
- Trim a case, measure
- Make micro-adjustments until desired trim length is acheived
Trim procedure:
- Insert case into holder
- Tap rim of case on bench to engage case with case holder taper
- Insert case and holder into trimmer (sitting on bars) holding against depth stop
- Hold case holder down or engage case holder clamp
- Rotate crank while pressing towards case
- Continue rotating cutter (~100 RPM is optimal) until brass shavings stop falling
- Remove case and holder from trimmer
- Rap case on case mouth to remove from case holder
Sounds like a lot of steps, but you can trim a case in about 10 seconds when you get into the groove!
Trimming Pistol Brass
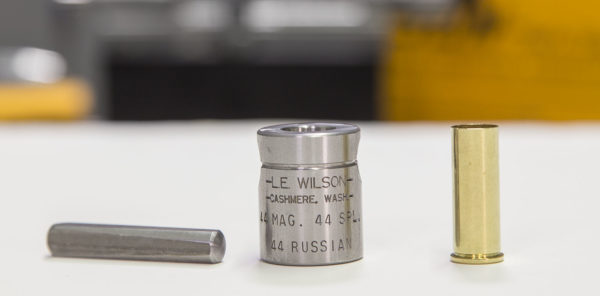
Trimming pistol brass is essentially the same as trimming rifle brass with the exception of how cases are held and inserted/removed from the case holder. For rimmed cases like 44 Magnum, the following type of case holder can be used: (Q-Type)
As shown in the video, the case is inserted into the holder and is held in place by a cross-pin. You can lightly rap the pin on the bench top to clamp and release the case. Just like when trimming rifle brass, the case is held perfectly square and concentric compared with the cutter. L.E. Wilson also offers standard case holders for pistol cartridges. These standard case holders don’t have the cross-pin, and take a bit more time to be use since the cases have to be pressed in and out of the holder.
Conclusion
The L.E. Wilson case trimmer leaves nothing to be desired if you demand the utmost precision in your brass prep. Made from stainless steel, this is certainly a lifetime tool that you’ll want to pass down to your kids.
Stay tuned for more content featuring this tool, and if you are interested in purchasing this trimmer, a great place to purchase the trimmer, case holders, and accessories is Midsouth Shooters Supply!
Do you have one of these trimmers? Please leave a comment and share your experiences.
Thanks,
Gavin











Over the last 60 years I’ve used case trimming dies, a Lymans, lee case gauges trimmers, and the Wilson Sinclair adaptation. By far the Wilson is not only beautiful in appearance but in use. The case holders eliminate the aching fingers during every aspect of case prep especially primer pockets that need work.
“The case holders eliminate the aching fingers during every aspect of case prep especially primer pockets that need work.” I discovered this also just a couple weeks ago myself, 100% better way. Another thing that worked fantastic is a Sinclair flash hole reamer, “guide portion” as a go- no go gauge for primer pocket depth. If it wobbles in the pocket the uniformer cutter has not went its total depth
I’ve used Wilsons equipment for a number of years and have found it all to be of top notch quality. Far an absolute precision trim, I always use the Wilson case Trimmer.
As illustrated in the video, it’s good practice to lightly tap the case into the holder, however I would suggest tacking a piece of leather to a small block of wood, and use this to both seat and remove the casing from the holder.
Gavin
After seeing your video on the Wilson case trimmer I ordered one. I just finished trimming 200 308 cases and this tool is very precise and easy to use! By far the best case trimmer I have ever used!
Thanks!
Awesome! Glad you are liking it!