
Continuing our series of videos on the Mark 7 Apex 10, we have John Vlieger from Mark 7 on set to help us set up and dial in the powder measure.
Disclaimer
Ultimate Reloader LLC / Making with Metal Disclaimer: (by reading this article and/or watching video content you accept these terms). The content on this website (including videos, articles, ammunition reloading data, technical articles, gunsmithing and other information) is for demonstration purposes only. Do not attempt any of the processes or procedures shown or described on this website. All gunsmithing procedures should be carried out by a qualified and licensed gunsmith at their own risk. Do not attempt to repair or modify any firearms based on information on this website. Ultimate Reloader, LLC and Making With Metal can not be held liable for property or personal damage due to viewers/readers of this website performing activities, procedures, techniques, or practices described in whole or part on this website. By accepting these terms, you agree that you alone are solely responsible for your own safety and property as it pertains to activities, procedures, techniques, or practices described in whole or part on this website.
About the Mark 7 Apex 10 Powder Measure
This universal mechanical powder measure is currently set up for pistol.

This means we are using a pistol funnel with a pistol drum (suitable for 15 to 20 grains of powder) with the appropriate adjustment stem. Changing over to rifle is as simple as changing the drum and appropriate funnel. There are bearings on both sides of the drum for a smooth actuation. This newest powder measure has a built-in spring compliance. Users of previous generations were concerned with lowering the powder measure too much. This could cause damage to the equipment.
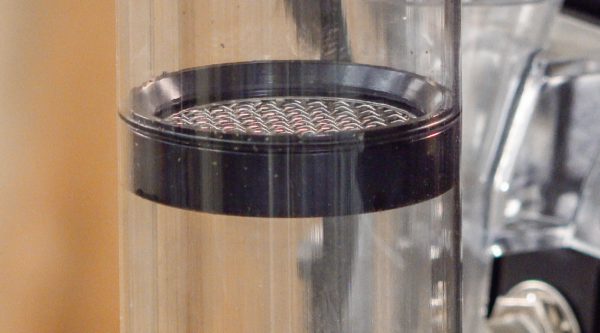
The updated powder measure has a rotating drum, integrated baffle and a screen that acts as a filter. Though it may filter out debris, John said it is more to prevent user error, like dropping a bullet or primer into the powder. This is easier than you would think with the bullet feeder close by. The baffle keeps the level of powder and prevents too much weight from the stack.
Setting Up the Apex 10 Mark 7 Powder Measure
The first step is to set the height. At this point, the charge does not matter. Take a prepped and primed case (can be dead primer) and running the measure down by hand or select “move to bottom.” The reason for using a primed case is so powder does not leak out the bottom of the case.
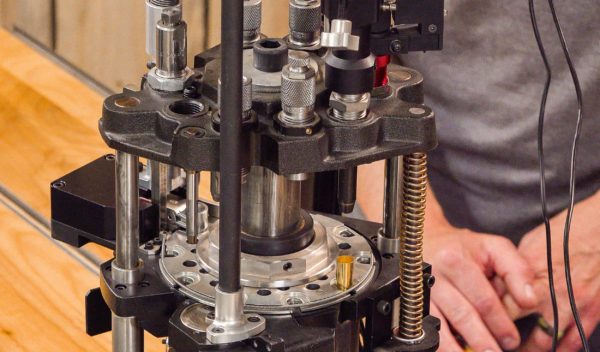
In this case, we are pretty close but not there yet. The O-ring is not yet making contact and the stem is not all the way up making contact with the housing. This means it is not throwing the entire way, increasing the risk of a light charge.
To fix this, run the die body down a little further until the stem contacts the housing. To ensure you haven’t gone too far, test by pulling down on the stem. As long as you have some travel left, you are ok. John opted to move the die a little further just to accommodate mixed brass before tightening the lock nut.
Please note that we have the powder measure positioned for ease of filming. During operation you would rotate the stem to the center of the tool head.
By this point, we have set the height. Regardless of caliber, this is the setting and test – do I still have a little bit of spring play that will prevent damage to the mechanism?
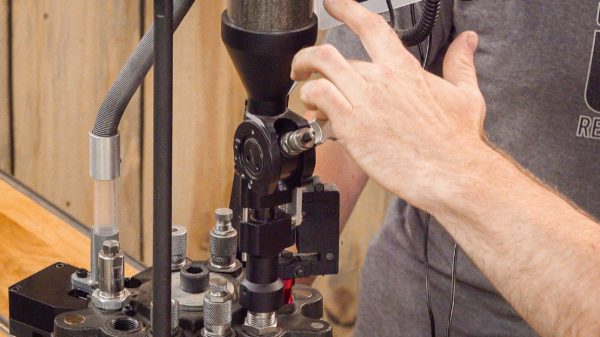
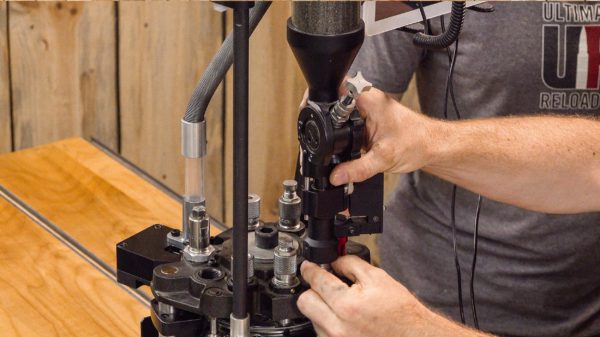
Before we move on to setting the charge, remember that if you just filled the powder measure, it hasn’t compacted yet. It hasn’t filtered past the baffle yet and given you a consistent fill of the cavity. Tap the side of the measure or run the machine to let the powder settle. You may also have to play with the top and bottom dwells. This depends on how much powder you are using. The more powder you are dropping, the longer it takes the cavity to fill and for the powder to fall into the case. If you are hand operating, you can build the dwells in with consistent processes.
To reduce the charge, thread the adjustment stem in, to increase the charge, move the stem the opposite direction. Zero your scale with the primed case. Cycle the machine under the same conditions you expect to be operating in and don’t be afraid to dump the first few charges back into the hopper to let things settle. Our first charge weighed 5.0 grain. Our goal is 6.0 grains. John threaded the adjustment stem out a bit, disregarded the first powder charge and ran another few charges. We repeated this process until we reached the desired charge.
Once you find the proper setting, be sure to lock the adjustment down. Leave the upper level of flats alone. This secures the entire stem and powder measure. Snug the lock nut, the smaller set of flats.
The biggest factor with powder measures is the powder you are using. Does it flow well and fill the volume consistently? Flake or spherical powders give the greatest and most consistent results.
Don’t miss out on Ultimate Reloader updates, make sure you’re subscribed!
Thanks,
Gavin Gear


