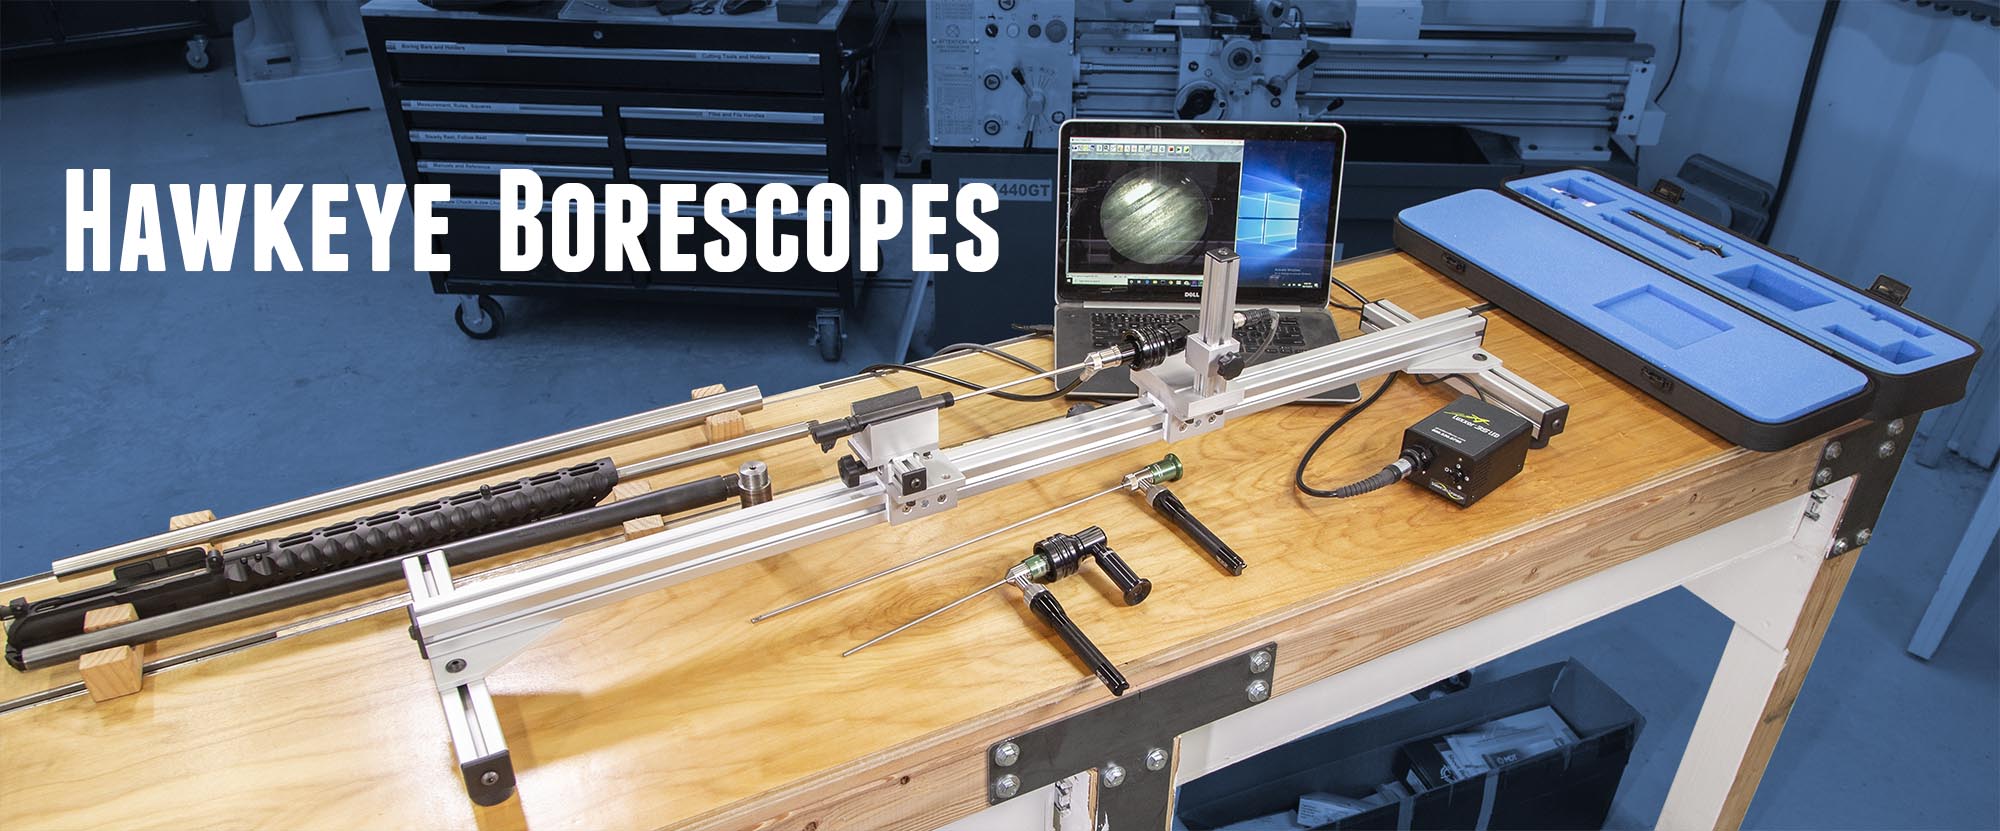
Sometimes you have to see something to believe it. I can recall looking though a Hawkeye Borescope for the first time and thinking “wow, that’s CLEAR”. When it comes to gunsmithing, gun inspection, and gun maintenance, a borescope can tell you things that nothing else can. And that’s why a borescope is an invaluable tool for gunsmiths, gun shop owners, competition shooters, and gun enthusiasts. In this article I’ll give you a “through the borescope view” using Hawkeye borescopes and a special video image acquisition system from Hawkeye- the Hawkeye Video Slide.
A Borescope for Every Occasion
The Hawkeye brand is a part of the Gradient Lens Corporation– they make all sorts of inspection tools for a variety of applications including industrial and scientific scenarios. For shooting sports applications, Gradient Lens makes the “Shooter’s Edition” line of borescopes. There are two lengths: 7″ and 17″ as seen here:

In the above picture:
- Bottom: 7″ Hawkeye Shooter’s Edition borescope with 90 degree eyepiece (eyepiece is quick-attach, and can be used on any Hawkeye borescope)
- Middle: 17″ Hawkeye Shooter’s Edition borescope
- Top: 7″ Hawkeye Pro borescope (commercial/industrial) mounted on Video Slide system
The Hawkeye Video Slide System
It doesn’t mean much for me to tell you “Wow, this is a great image through this borescope” without being able to SHOW you what I’m looking at, and that’s where the Hawkeye Video Slide system comes in handy!
Notes about the Hakeye Video Slide and video image acquisition system:
- The Hawkeye Video Slide and video image acquisition system is not intended for consumers, it is primarily used by laboratories, gun OEMs, and other commercial customers. I’m using it in this article to give you the “next best thing” to looking through one of these borescopes yourself.
- The image is more clear when looking through the borescope with your naked eye compared to the images shown in this article.
Here’s a quick overview of the components that make up the Hawkeye Video Slide system:
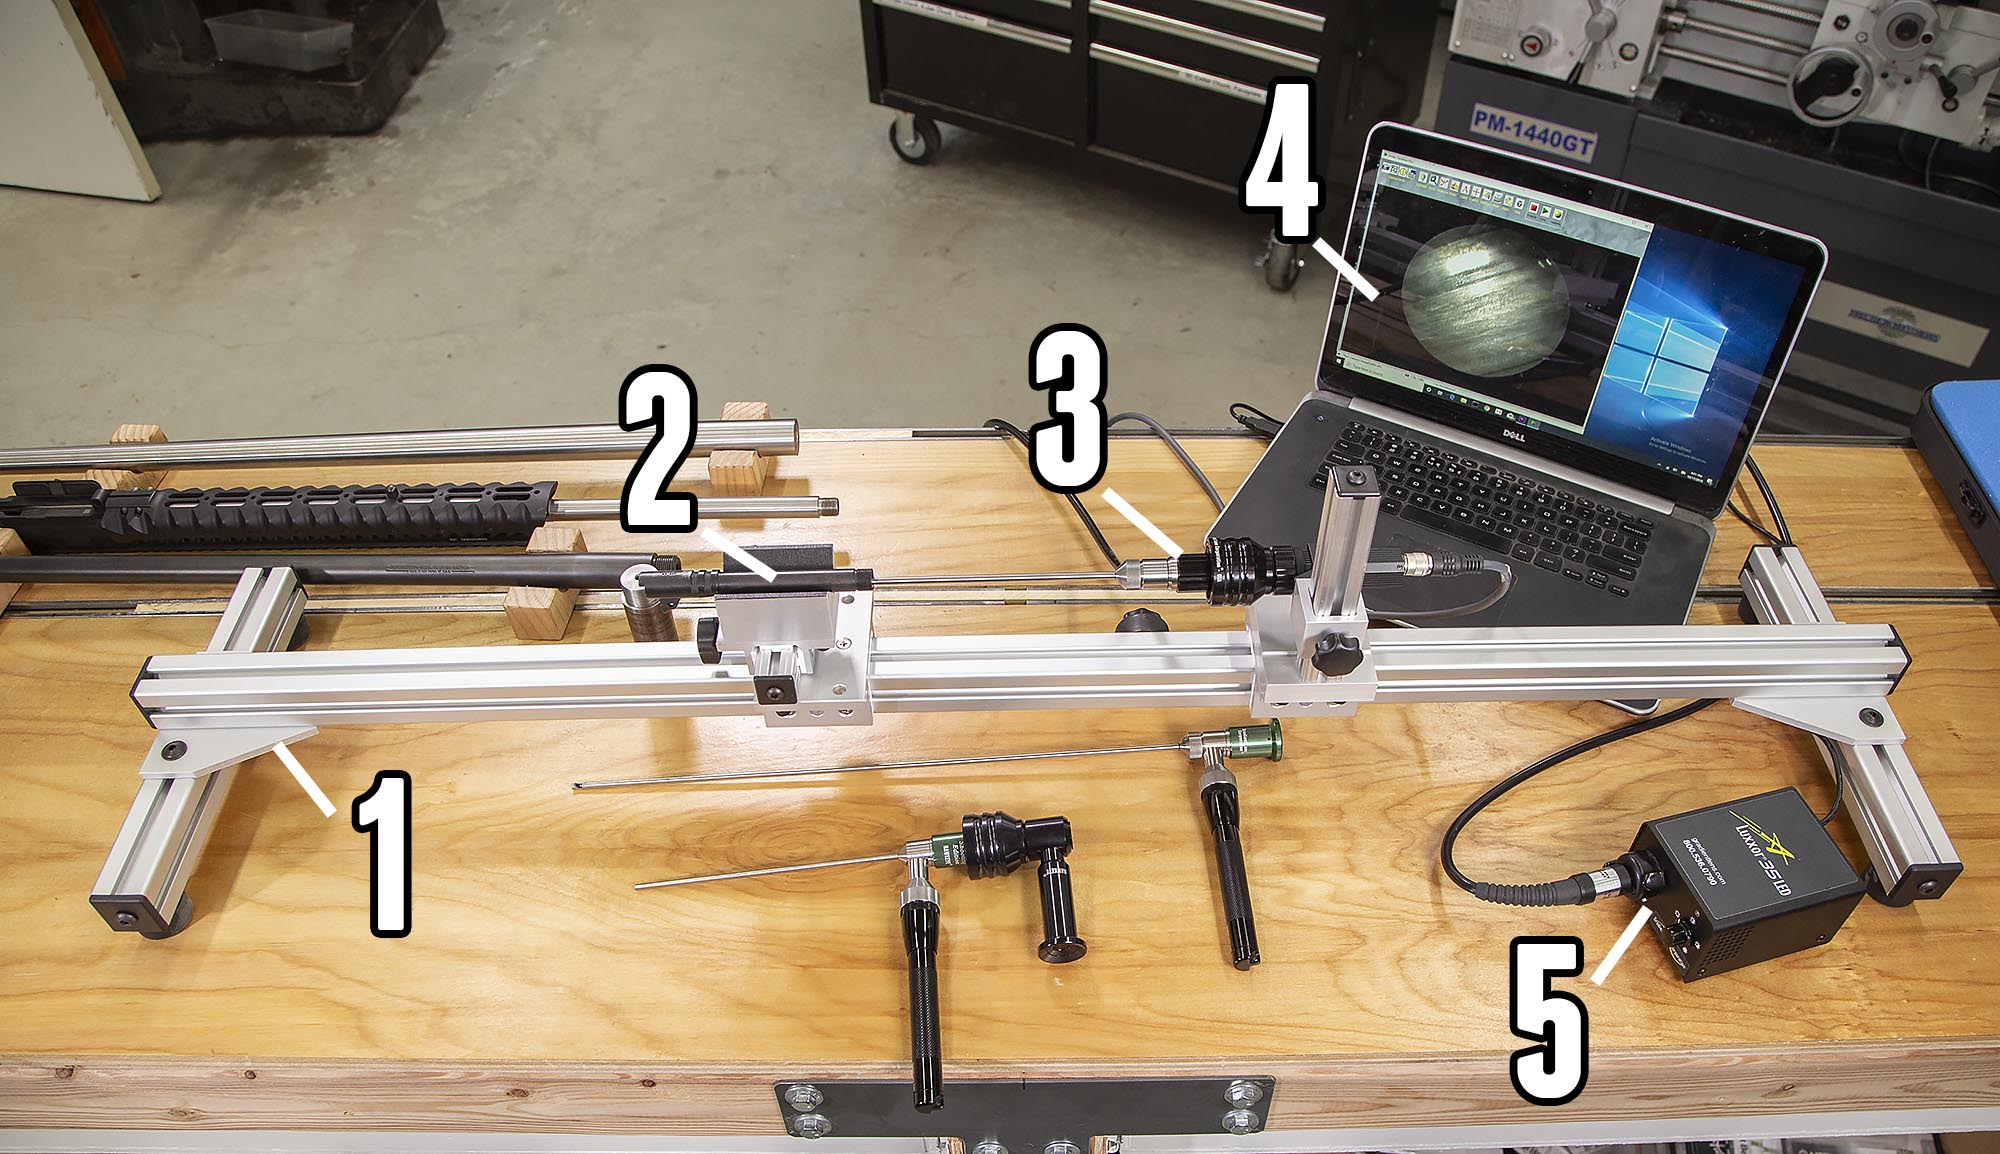
Above we have:
- Video Slide support system
- Barrel being inspected (1911 pistol barrel) and support/slide
- Borescope with quick-coupler equipped Sony camera
- Windows 10 PC running companion app (shows video feed from borescope)
- LED illumination for borescope
Bore and Chamber Inspection Examples (90 degree view)
Now’s when things get interesting! Let’s take a look at some common inspection scenarios when using the Hawkeye borescope in 90 degree view mode (looking towards the walls of the tube being inspected).
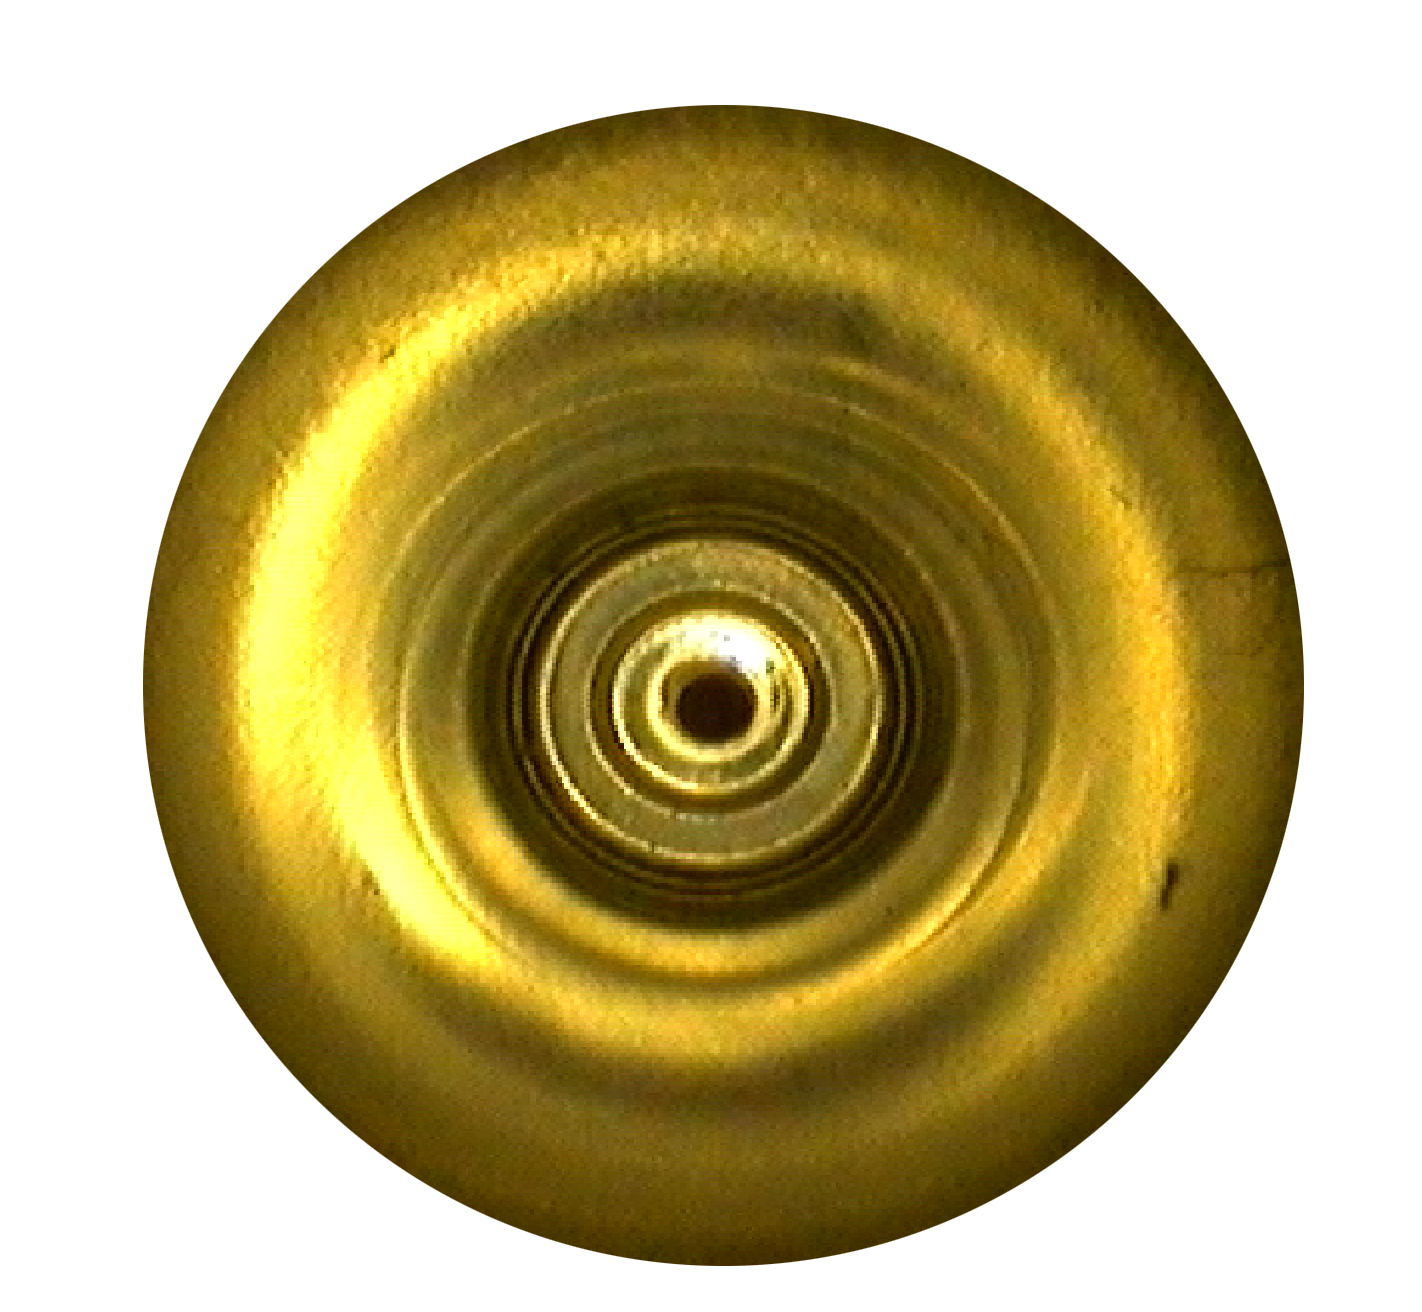
Brand New Match-Grade Bore
Before we get into the “fouled and damaged” scenarios, let’s take a look at what you’d expect to see when viewing a top-quality brand new bore: (click/tap to enlarge)

The image above shows a brand new match-grade hand-lapped 6mm bore from International Barrels. The interesting thing to note here is that when you’re looking at a top quality barrel with a borescope, you’ll always have a degree of “glare” – very shiny highlights. This is due to the fact that you are in a sense looking at a mirror and shining a light on it!
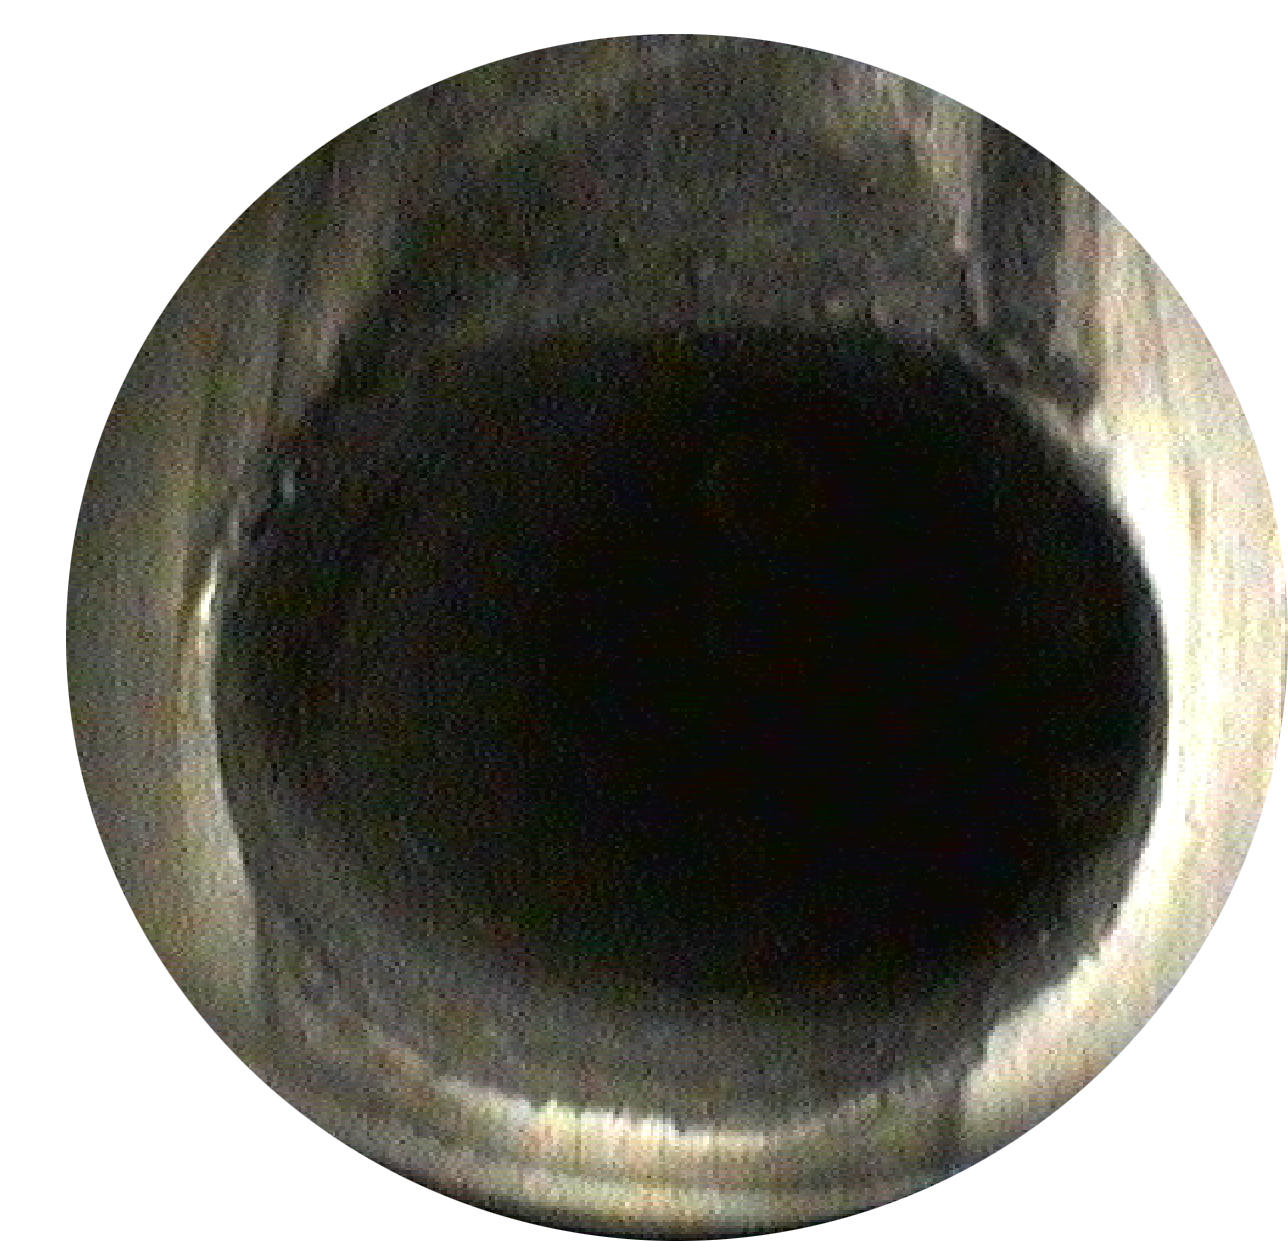
Copper Fouling
The image below shows the Hawkeye view of a copper fouled barrel. This is a 45 caliber low-quality barrel from a 1911: (click/tap to enlarge)
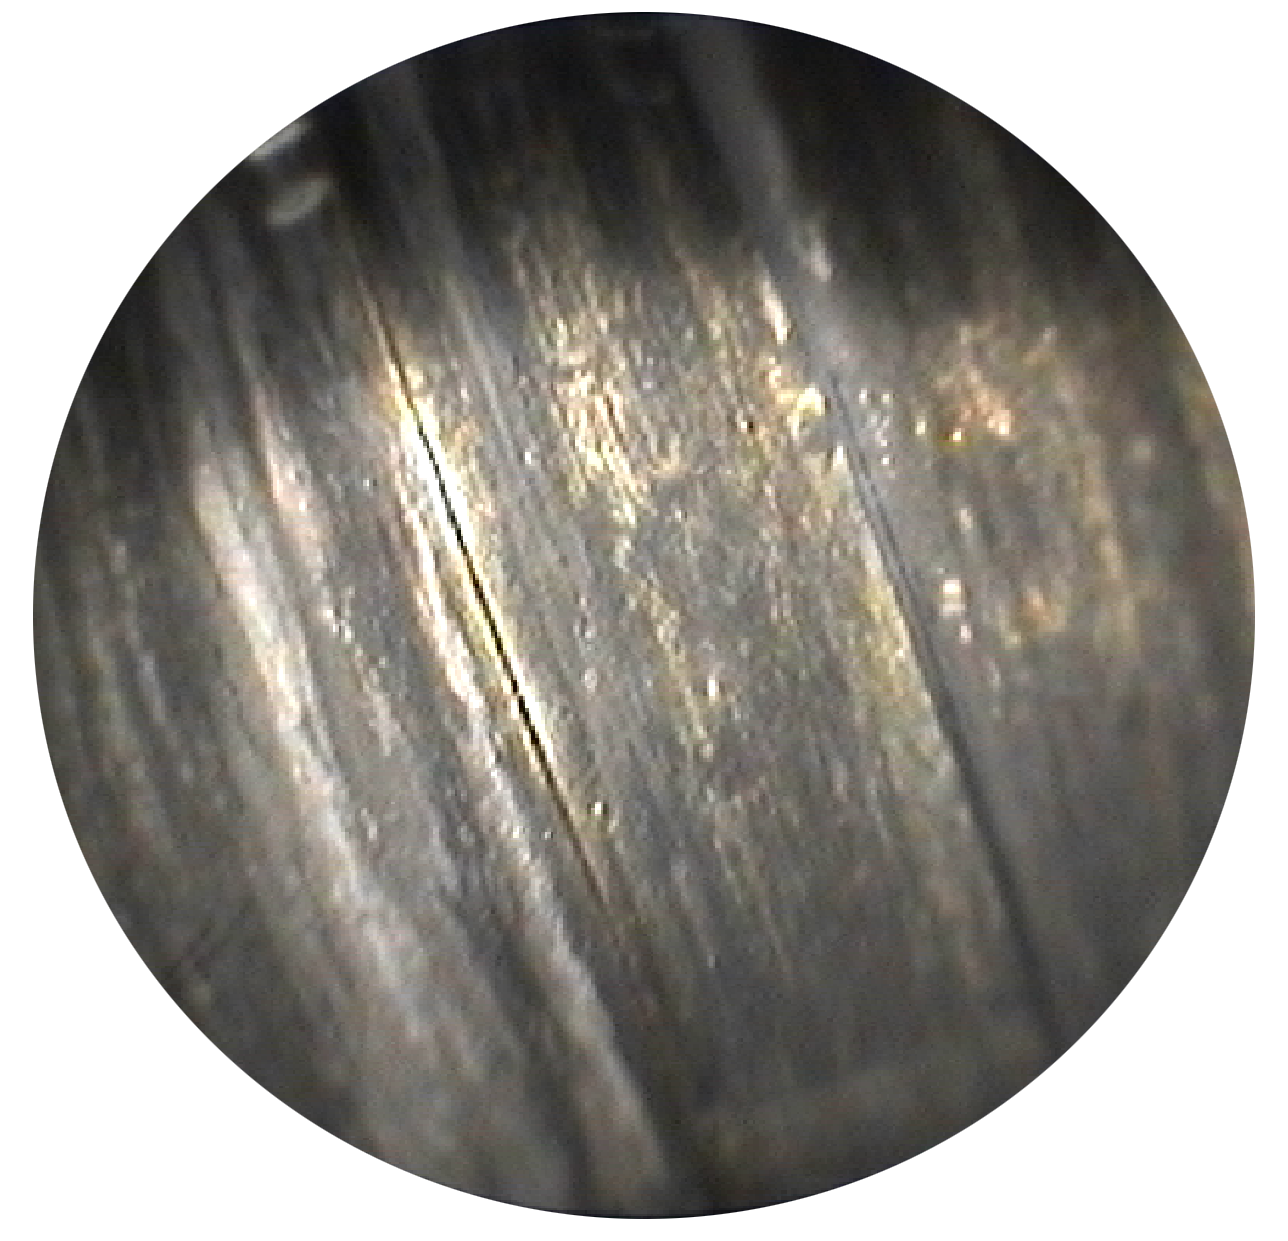
What this view illustrates is how well you can see fouling when you are cleaning barrels and checking up on bore quality. In my experience, higher quality smooth match-grade bores will not foul up nearly as quickly as lower quality bores like the one pictured above.
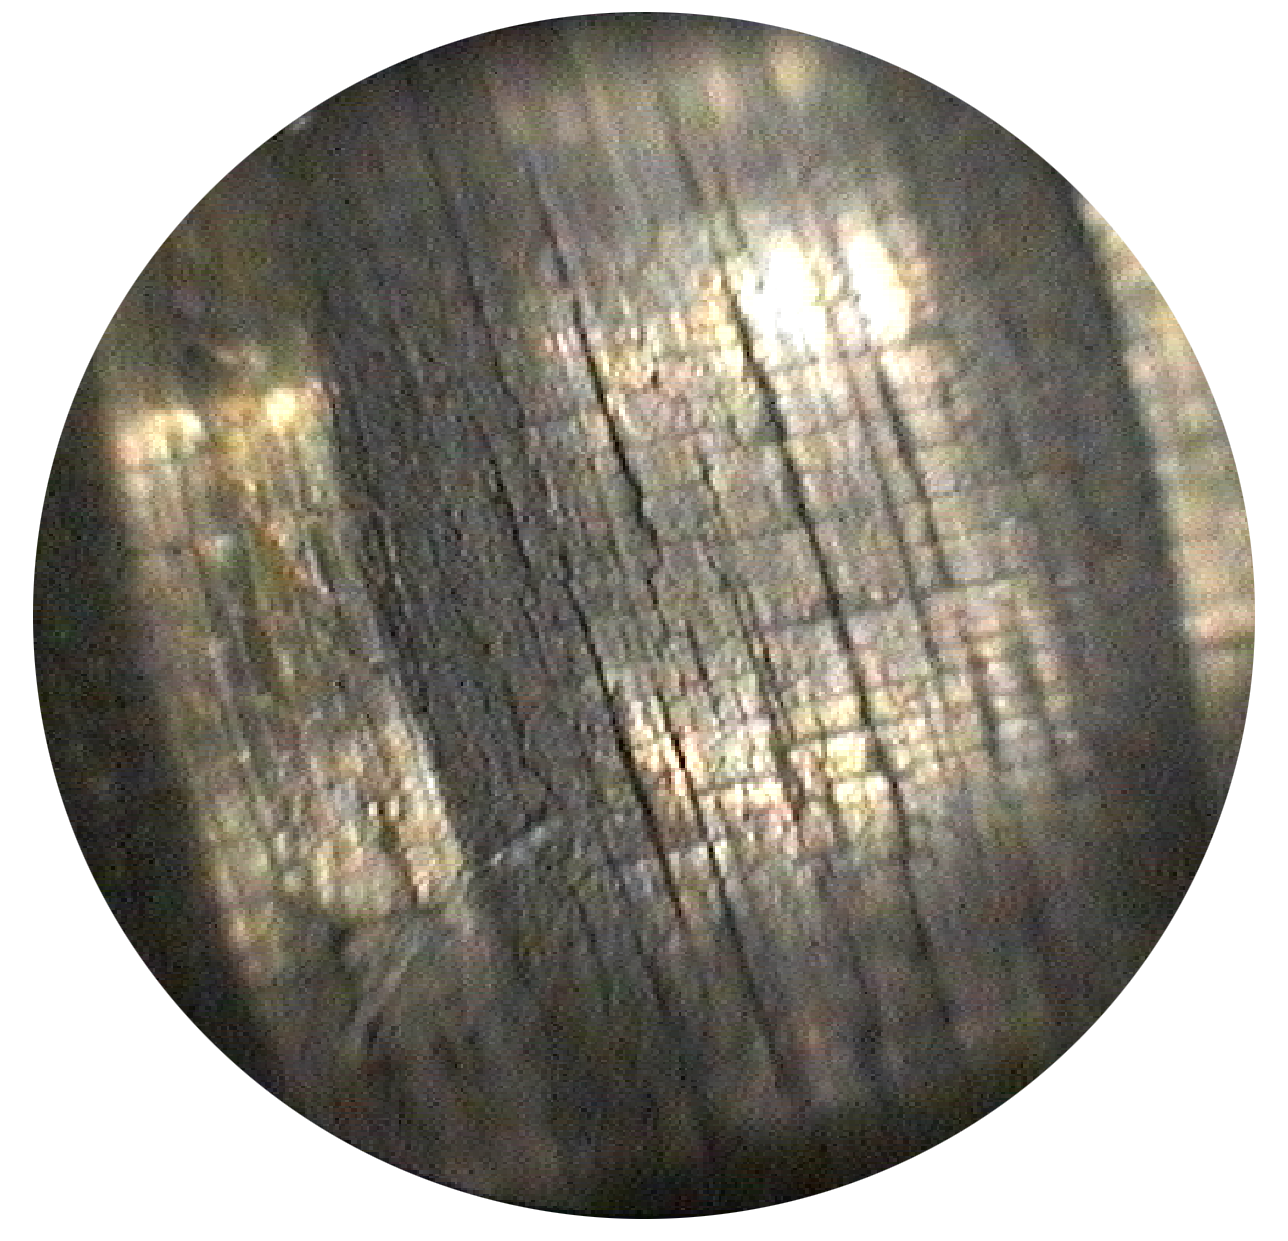
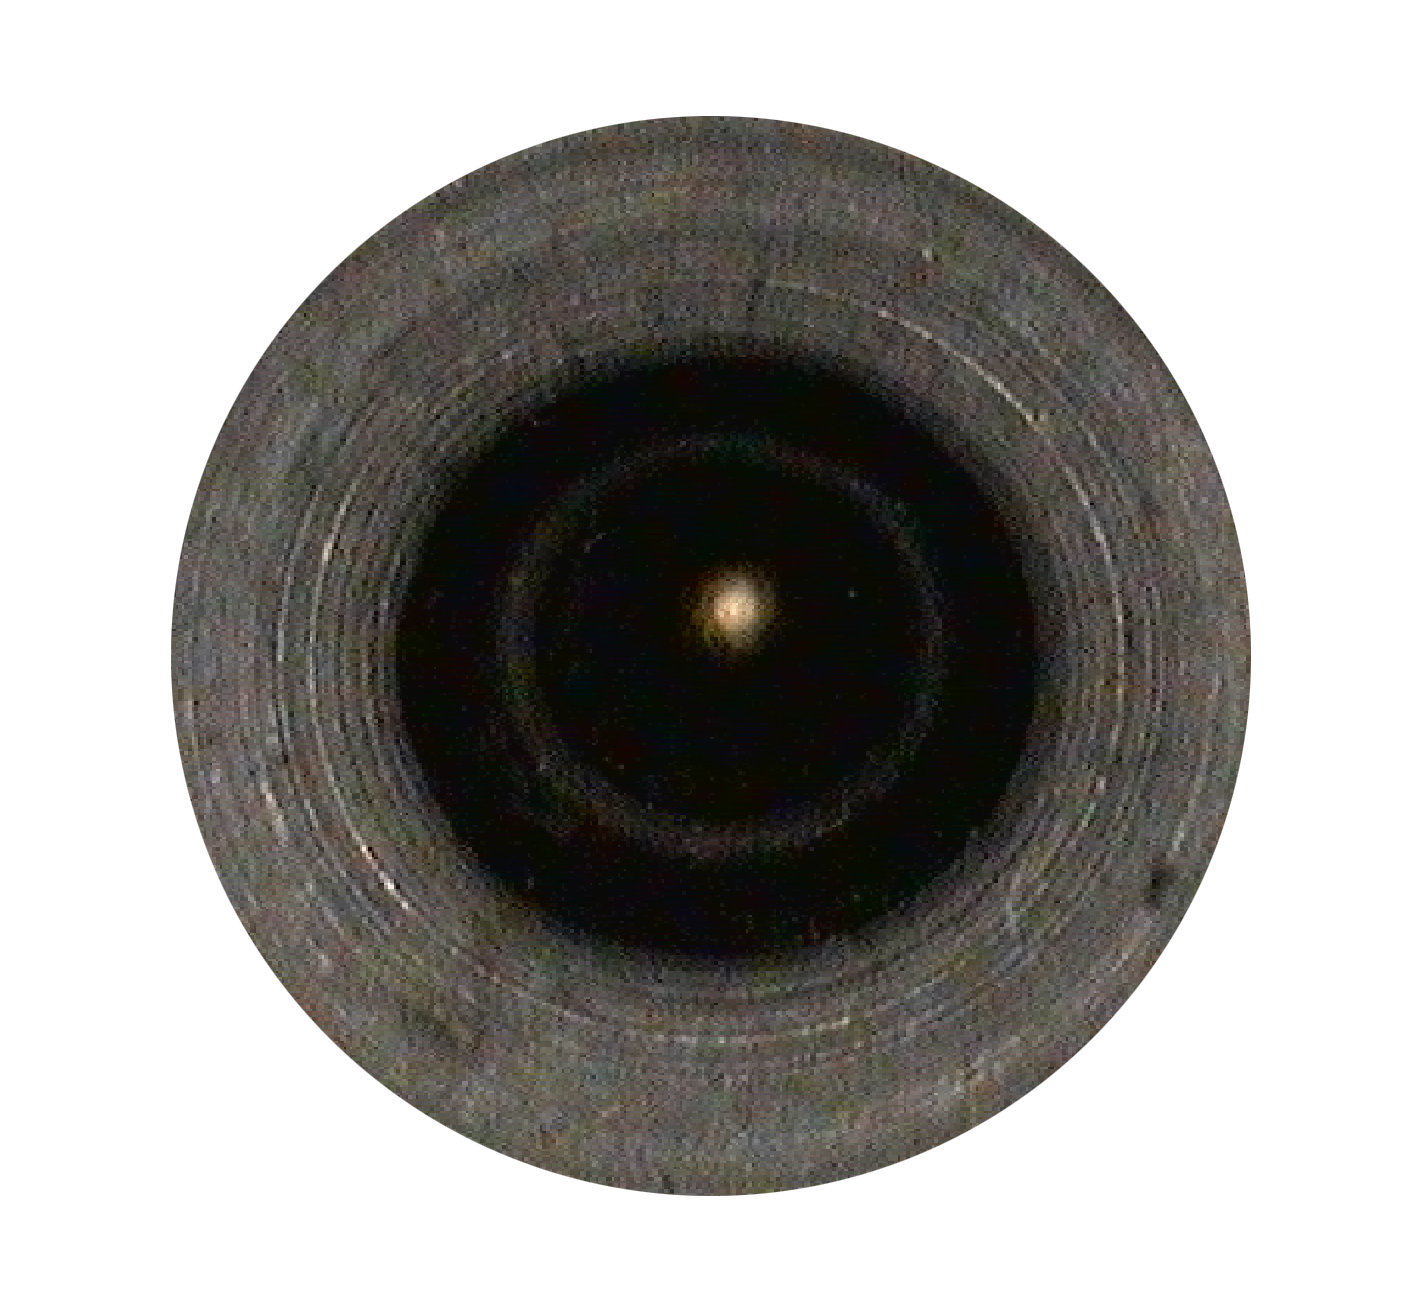
Chamber Imperfections and Issues
Here’s another view of that same low-quality 1911 barrel (I should have known for $35.00 it was too good to be true). After finding “rings” on my fired brass, I inspected the chamber with a Hawkeye borescope. Sure enough, there’s a “ring depression” in that barrel. I’m surprised any of the spent shellcasings extracted!
Here’s what that ring looks like through the Hawkeye borescope, clear as day: (click/tap to enlarge)

Heat Cracking and Throat Erosion
Throat erosion is one of the most common issues hampering rifle performance, especially with “hot wildcats” like 22-250 and 6mm Creedmoor. Some rifles will shoot great even with some throat/bore erosion and damage, while other’s will fall flat on their face. With the Hawkeye, you can visually quantify exactly what’s going on with your throat and bore!
Here’s a shot-out 22-250 barrel right where the throat starts- lots of heat damage here! (click/tap to enlarge)
![]()
And here’s the same bore, further down in the middle of the rifled section: (click/tap to enlarge)
This barrel is torched from the throat to the muzzle! And when I bought this rifle, I had no idea since I didn’t have a borescope at the time.
AR-15/AR-10 Gas Port and Gas Block
I recently did a complete AR-15 build, including machining/chambering the barrel from a blank. One of the machining operations is to drill the gas port in the barrel right where the gas block will line up with it. When you do this job, there are a few things that absolutely must be done correctly:
- Drilling the gas port tot the correct diameter
- Drilling the hole cleanly
- Achieving correct alignment between the gas port and the gas block (no obstruction)
And this is where a borescope comes in handy!
Here’s a view of the gas port hole after lots of shooting: (click/tap to enlarge)
The edges of the hole are clean (that’s good), and there’s some typical “wiping” where the bullet passes by the gas port hole. All good here!
If we adjust the illumination up a bit, we can actually see into the gas port hole: (click/tap to enlarge)

…and with the Hawkeye, we can pinpoint our focus to bring the interior of the gas port and gas block into sharp detail. Again, all good here: no obstructions or misalignment present!
There are quite a few other scenarios for using the 90 degree inspection view with the Hawkeye- you’ll want to check out some of my other stories!
Straight-On View (0 Degree)
If you remove the 90 degree mirror tube from a Hawkeye borescope, you’ll see a “straight on” view which can be very useful for various inspection tasks.
Here’s a look at the shoulder area of a 22-250 rifle chamber: (click/tap to enlarge)
When looking straight on, you’ll need to pick an area to focus since depth-of field is narrower than the entire view “looking forward”. Here’s the view looking straight down the rifled portion of the 22-250 bore. What’s interesting is how you can see the rifling direction, but you can’t clearly see the heat cracking that you’ll observe via the 90 degree view (see previous images).
Via the Hawkeye: (click/tap to enlarge)

And here’s what the inside of a brand new Hornady 300 PRC case looks like- looking towards the flash hole at the base of the cartridge: (click/tap to enlarge)
Is your case head about to separate? With the Hawkeye you can look at the inside of the case instead of using the “paper clip trick”. Now that’s handy!
I wish I had room here to show you all the many many more things you can do with Hawkeye borescopes, but don’t worry, I’ll have a lot more features as a part of upcoming stories where these tools will be used.
If you are looking to buy a Hawkeye borescope, you’ll want to check out the complete collection at Brownells!
Don’t miss out on Ultimate Reloader updates, make sure you’re subscribed!
Thanks,
Gavin


Outstanding review, Gavin. The video and stills sold me on getting one.