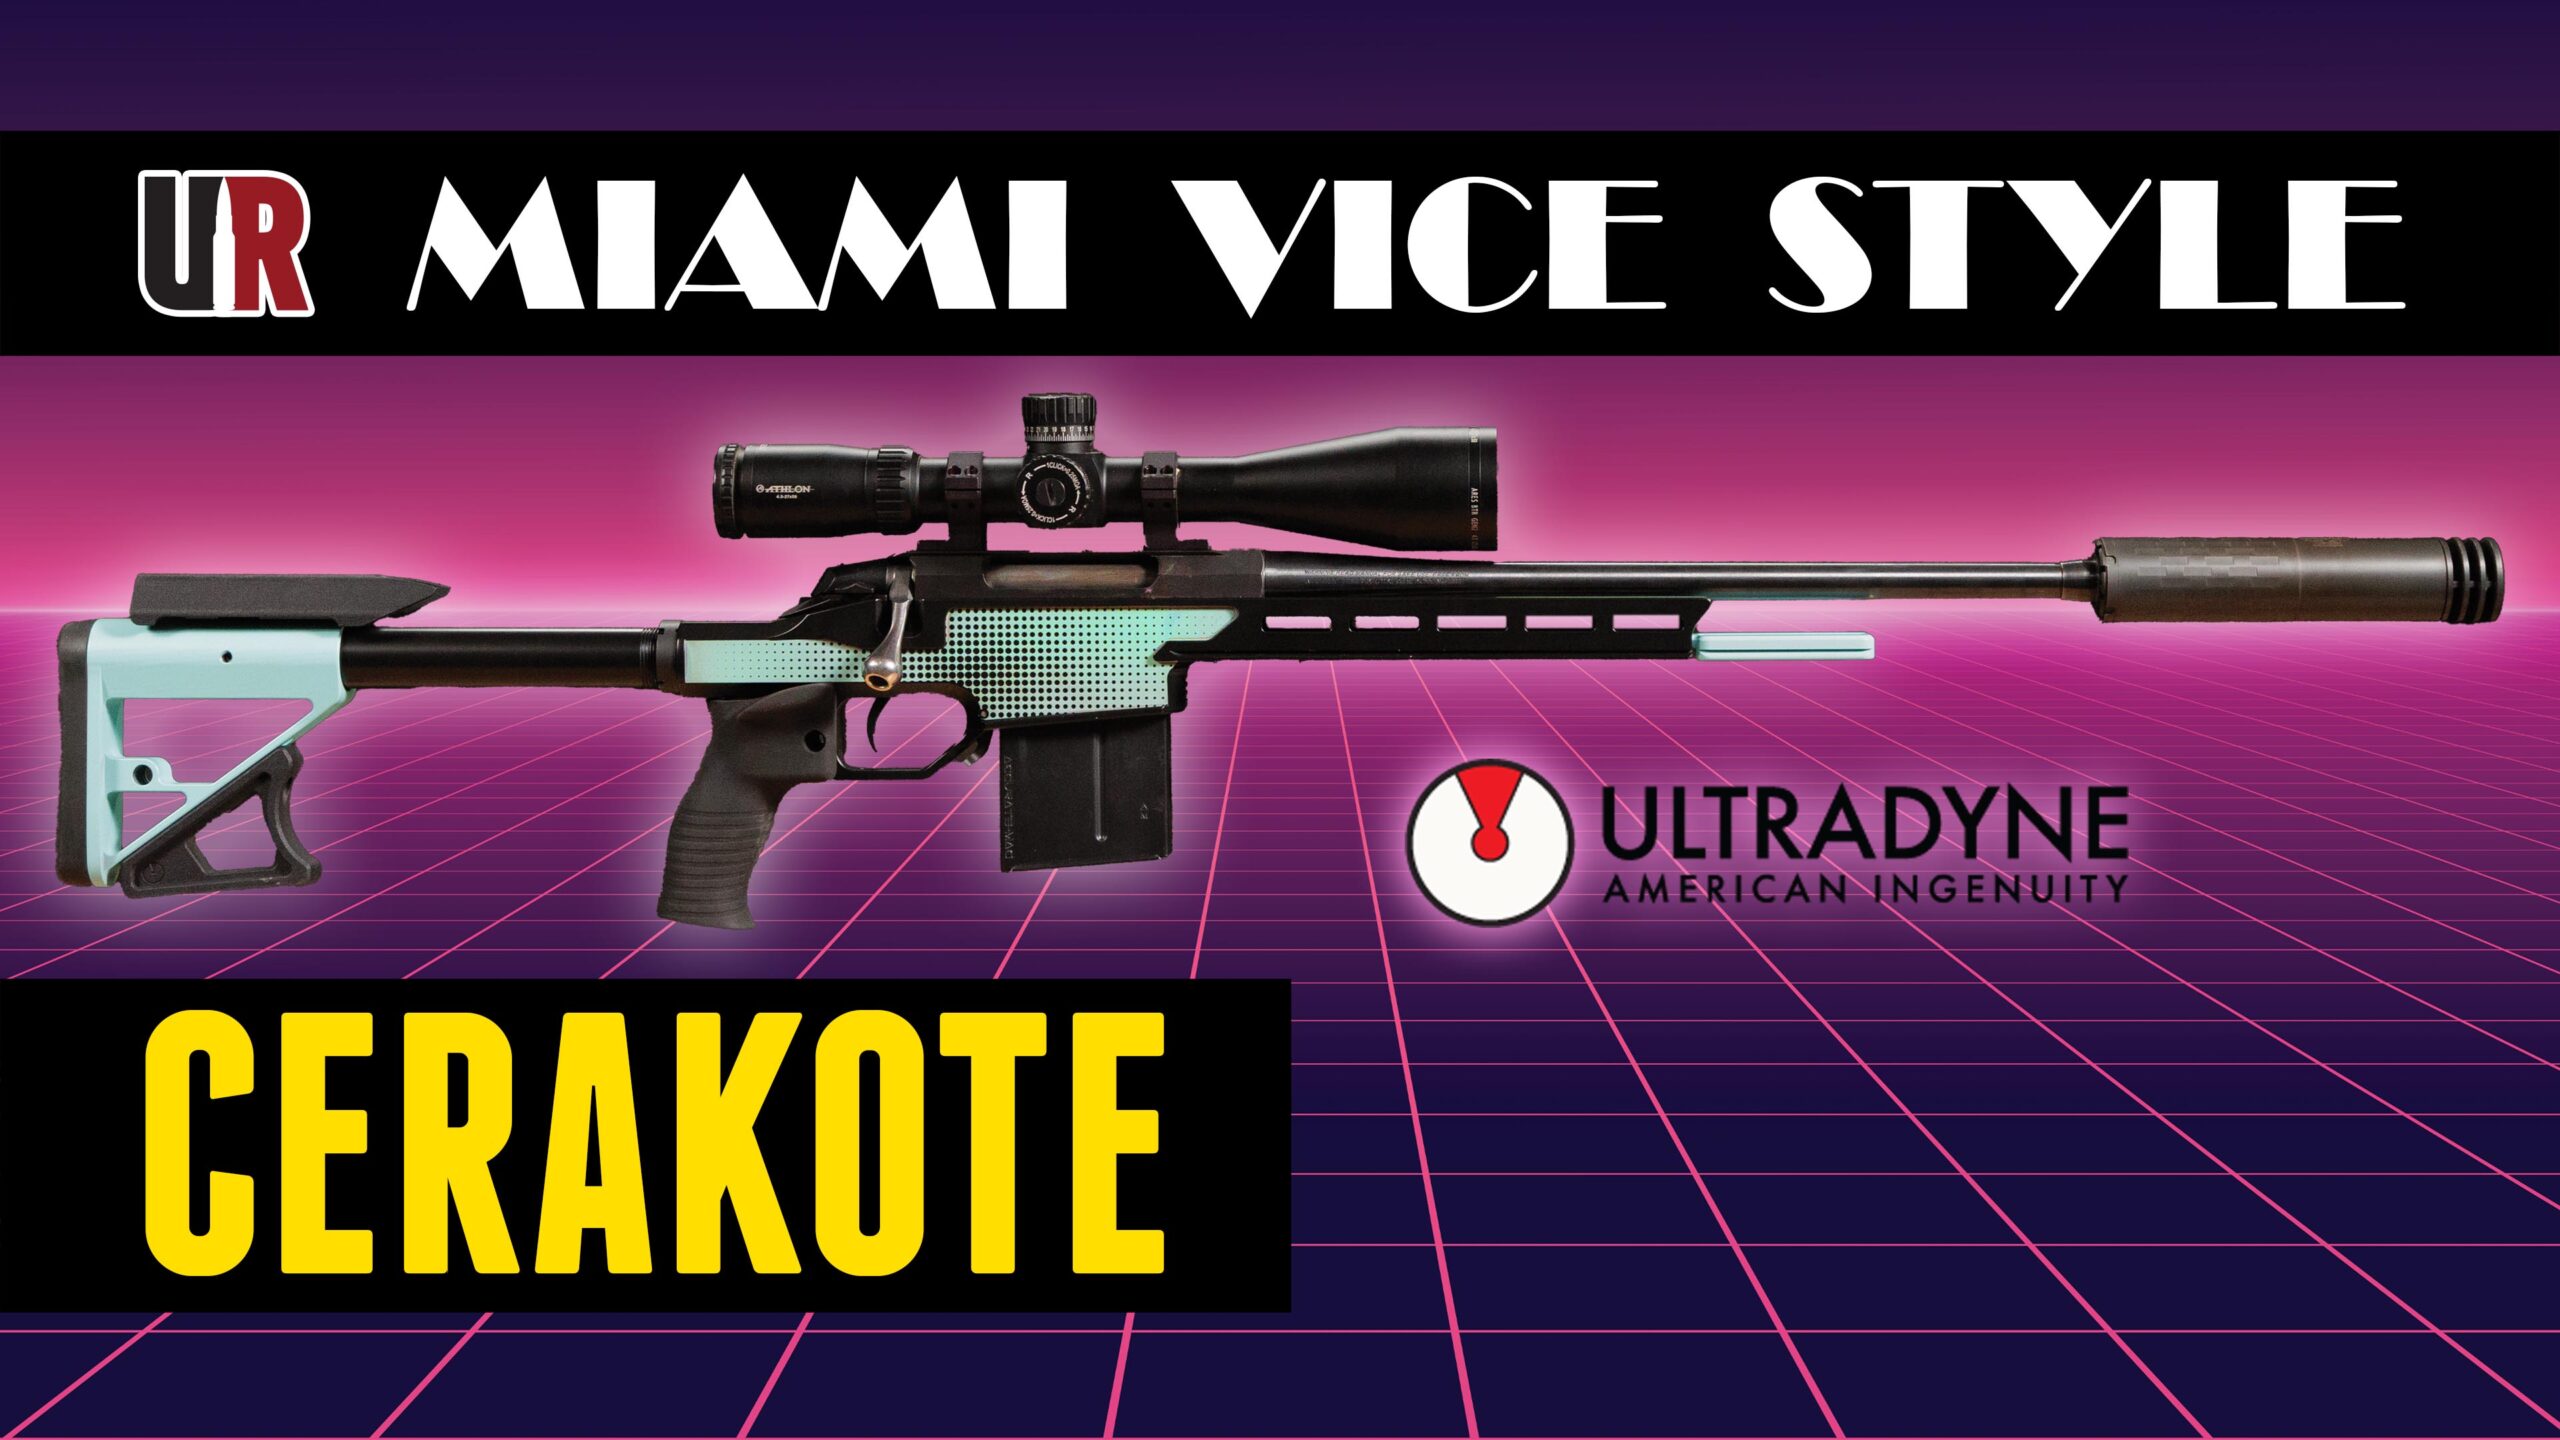
Customization through Cerakote and laser imaging is one of my favorite projects. I recently gave my Tikka T3x in Ultradyne UD5 a complete visual overhaul—Miami Vice style.
Disclaimer
Ultimate Reloader LLC / Making with Metal Disclaimer: (by reading this article and/or watching video content you accept these terms). The content on this website (including videos, articles, ammunition reloading data, technical articles, gunsmithing and other information) is for demonstration purposes only. Do not attempt any of the processes or procedures shown or described on this website. All gunsmithing procedures should be carried out by a qualified and licensed gunsmith at their own risk. Do not attempt to repair or modify any firearms based on information on this website. Ultimate Reloader, LLC and Making With Metal can not be held liable for property or personal damage due to viewers/readers of this website performing activities, procedures, techniques, or practices described in whole or part on this website. By accepting these terms, you agree that you alone are solely responsible for your own safety and property as it pertains to activities, procedures, techniques, or practices described in whole or part on this website.
Rifle Recap
The stock Tikka T3x comes unthreaded, so I had to employ my threading thin sporter barrel technique using my Precision Matthews TL-1660 lathe. I also added the Ultradyne UD5 chassis and accessories as well as a Bix’n Andy Dakota trigger.
The Ultradyne UD chassis is very convenient to work with and only takes a few minutes to disassemble. It is also incredibly customizable. I had added the Ultradyne adjustable buttstock, UD spigot, and double thumb rest grip.
New Technique
Lately I had been thinking of trying a new Cerakote technique: laser burn through reveal technique. This process consists of spraying a few coats of the Cerakote color you want to “reveal” and covering it with a top layer to burn through.

The Ultradyne UD5 came with a gray Cerakote from the factory. I blasted it down to bare aluminum with 100 grit aluminum oxide.

This technique works best with a top layer that efficiently absorbs laser energy. Darker colors burn more easily. I used a single, thin coat of graphite black (H-146).

To avoid discoloration, the best base colors are lighter and resistant to laser – I selected H-175 robin’s egg blue. There are endless possibilities of how to employ this technique including multiple colors and degrees of discoloration. I also used H-175 for accessories like the UD spigot.

Central to this project were the Built American DSBE-1500 spray booth and BAE-0200 oven. (Don’t forget to use code UR5 to save 5% on BuiltAmericanEquipment.com!)

I cured the Cerakote at 250 degrees Fahrenheit for two hours before moving to laser imaging.

Laser imaging requires some pre-production. I had scanned the UD chassis against a ruler while I had it apart to make the artwork and trace easier. After completing the trace, I added a half tone pattern consisting of different-sized circles.

This produces a gradient effect. I then took this vector artwork to the 50 watt fiber laser engraver and imported it into the lightburn software.

Before I burned the actual chassis, I employed the same technique on a test plate.

Laser engraving Cerakote is a fantastic way to produce art with significant detail.

Reassembly and Test
Once I had completed the laser imaging, I put the rifle back together and took it up to the ridgeline.

I stopped at 100 yards to confirm the zero as I had swapped my brake for a suppressor and to my great surprise, my first three shots landed into 0.220”.

I needed to make a sight adjustment for the group to be perfectly centered, but the ammunition I grabbed to plink with performed better than the load I had used last time!

The “magic” load consisted of 42.0 grains of Varget under a 155 grain Sierra MatchKing in Alpha Munitions brass. (Do not use this load data, always consult with multiple manufacturer sources.)

I shot some steel after zeroing then switched over to a .308 subsonic load with Berry’s 220 grain bullets.

Conclusion
I am very pleased with how this rifle turned out. The retro 80s look is a departure from my traditional OD green and FDE and incredibly unique.

This is also one of several projects on which I’ve used the UD chassis—check out my videos on the UD3 and UD7.
Get the Gear

Order and customize your UD Chassis from UltradyneUSA.com.
Accurate Mag AICS Magazine from Ultradyne
Use the code UR5 to save 5% sitewide on BuiltAmericanEquipment.com!
BAE-0200 Standup Capacity Cerakote Convection Oven
Hawkins Precision Featherweight Scope Rings
Athlon Ares BTR GEN2 4.5-27x50mm Riflescope
Arrow Products Rock Vise Precision Firearm Vise
Cambridge Environmental A&D EJ-3000 Balance
Purchase the Bix’n Andy Dakota Trigger from Bullet Central
Hodgdon Varget at Midsouth Shooters Supply
Sierra .308 155 Grain HPBT MatchKing at Creedmoor Sports and Midsouth Shooters Supply
Berry’s 300 AAC .308 Diameter 220 Grain TMJ Spire Point Bullets at Midsouth Shooters Supply
IMR Trail Boss Smokeless Powder at Midsouth Shooters Supply
Don’t miss out on Ultimate Reloader updates, make sure you’re subscribed!
Gavin Gear


