Also published on our sister website http://makingwithmetal.com
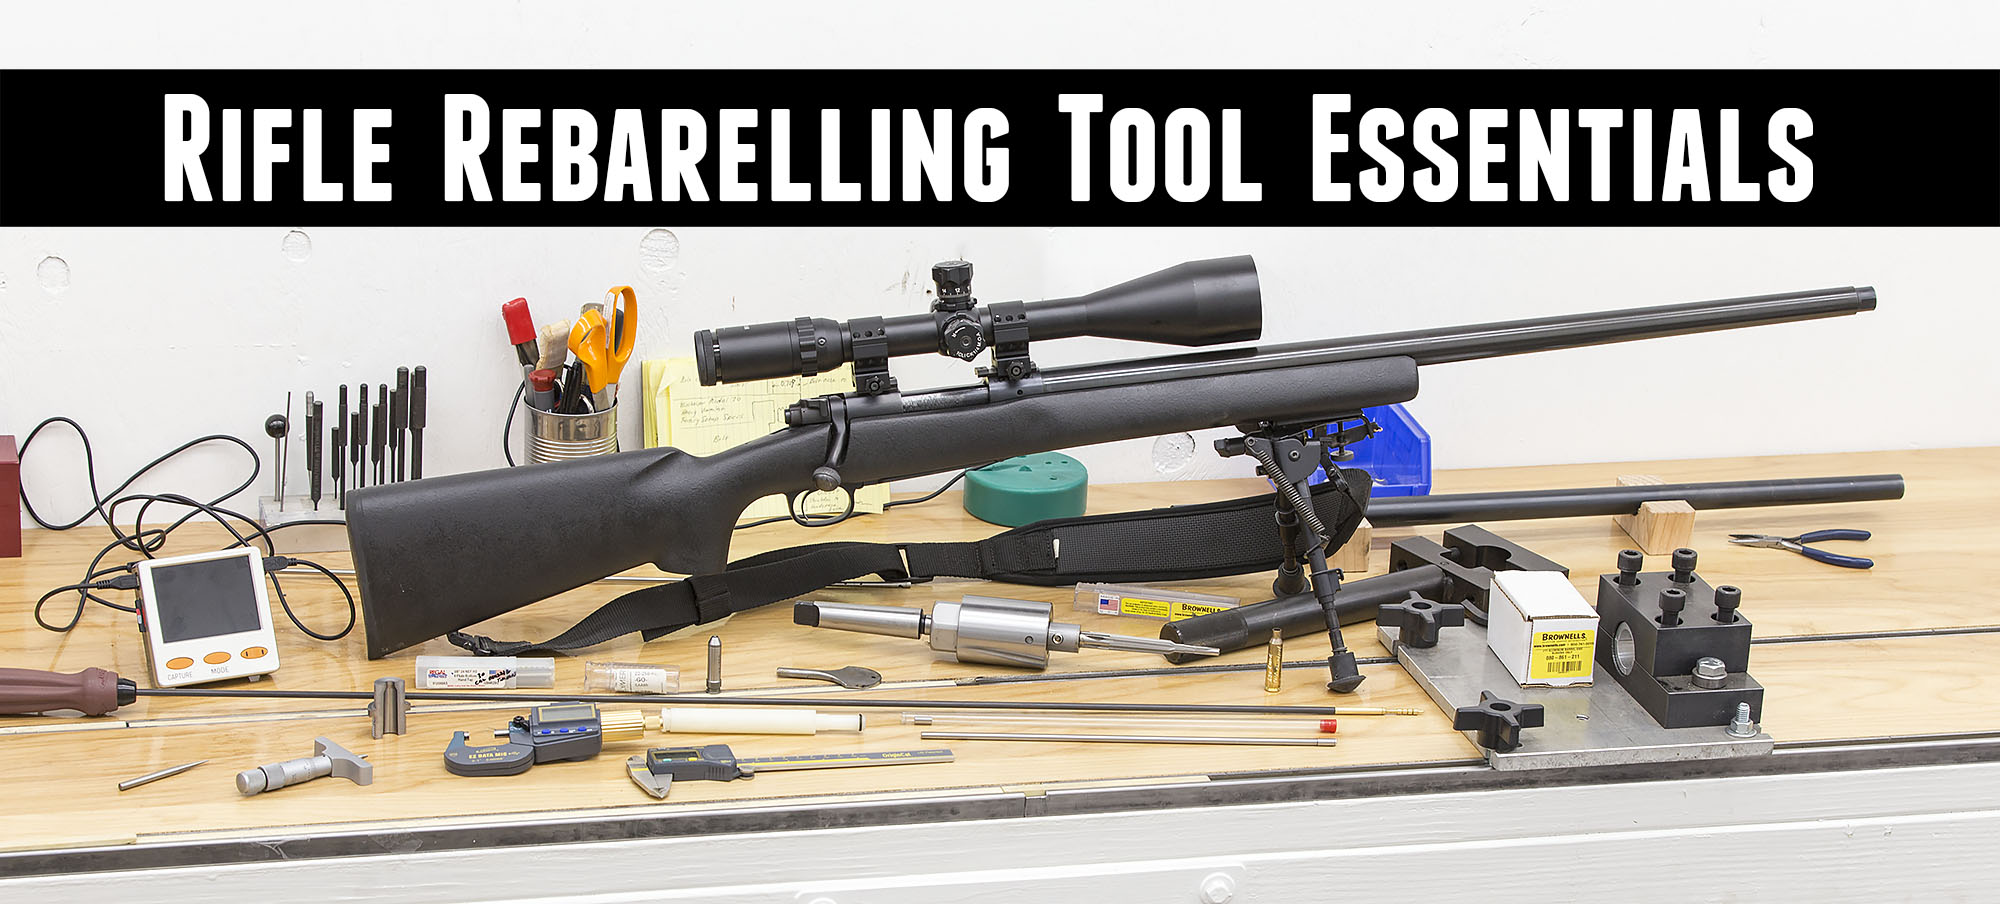
Complex gunsmithing jobs require a lot of specialized tooling, and some common shop tools as well. In this post, I’ll walk through the tools and supplies I used during the rebarelling of my Winchester Model 70. There are a lot of options when it comes to tooling setups, and that will be a focus of this blog over time: comparing and contrasting different tools, setups, and techniques. So while your tooling setup will likely differ from what I talk about in this article, you should have a good idea of what you’ll need when you are finished reading! Let’s walk through this “station by station”.
Series navigation:
- Winchester 70 Rebarrel Part 1: Overview
- Winchester 70 Rebarrel Part 2: Start to Finish Process
- Winchester 70 Rebarrel Part 3: Tools of the Trade (you are HERE)
Disclaimer
Ultimate Reloader LLC / Making with Metal Disclaimer: (by reading this article and/or watching video content you accept these terms)
- The content on this website (including videos, articles, ammunition reloading data, technical articles, gunsmithing and other information) is for demonstration purposes only.
- Do not attempt any of the processes or procedures shown or described on this website.
- All gunsmithing procedures should be carried out by a qualified and licensed gunsmith at their own risk.
- Do not attempt to repair or modify any firearms based on information on this website
- Ultimate Reloader, LLC and Making With Metal can not be held liable for property or personal damage due to viewers/readers of this website performing activities, procedures, techniques, or practices described in whole or part on this website.
- By accepting these terms, you agree that you alone are solely responsible for your own safety and property as it pertains to activities, procedures, techniques, or practices described in whole or part on this website.
Machinery/Tools/Parts/Supplies Walkthrough
Cartridge/Caliber Specific Parts and Tools
There are two categories of tools and parts you’ll need for a rebarelling job: general, and caliber/cartridge specific. For each caliber and chambering, you’ll want to make sure you have the following:

In this picture we have:
- Barrel blank or barrel to re-chamber: You’ll need a barrel of the appropriate caliber (bore diameter), length, contour, material, and grade (standard -vs- match) based on your project requirements.
- Chambering Reamer(s): You’ll need at minimum a quality finisher reamer in order to chamber your barrel. You can optionally use a rougher reamer to remove the bulk of the material from the chamber prior to using a finisher reamer. You’ll also need to decide between solid pilot reamers and a bushing pilot reamers.
- Headspace Gauge(s): At minimum you’ll need a go-gauge for the chambering you’re working with. A no-go gauge is also required, but can be “improvised” with a go-gauge if you apply scotch tape to the back side (thickness needs to be ~.002″).
- Ranging Rod or Grizzly Bar: Depending on how you’re “dialing in” the barrel- you’ll need a bar and one or more bushings.
And here’s what I used for this project:
- Shilen Match-Grade 22 caliber chromoly barrel, 1:12 twist, #7 profile
- Manson Precision Reamers 22-250 solid pilot finisher reamer
- Clymer 22-250 Go-Gauge (and scotch tape for no-go configuration)
- PTG #1 Grizzly Rod (from 22 caliber to 6mm)
- PTG 22 Caliber Bushing Set (9pc)
Inspection and Precision Measurement
The tools you use to take measurements while gunsmithing are absolutely critical if you want to obtain great results. That doesn’t mean you need to spend a ton of money on these tools- there are many bargains to be found at estate sales, ebay, and Craigslist on older quality tools. I use a mix of American made, imported, new, and used tools for these tasks.
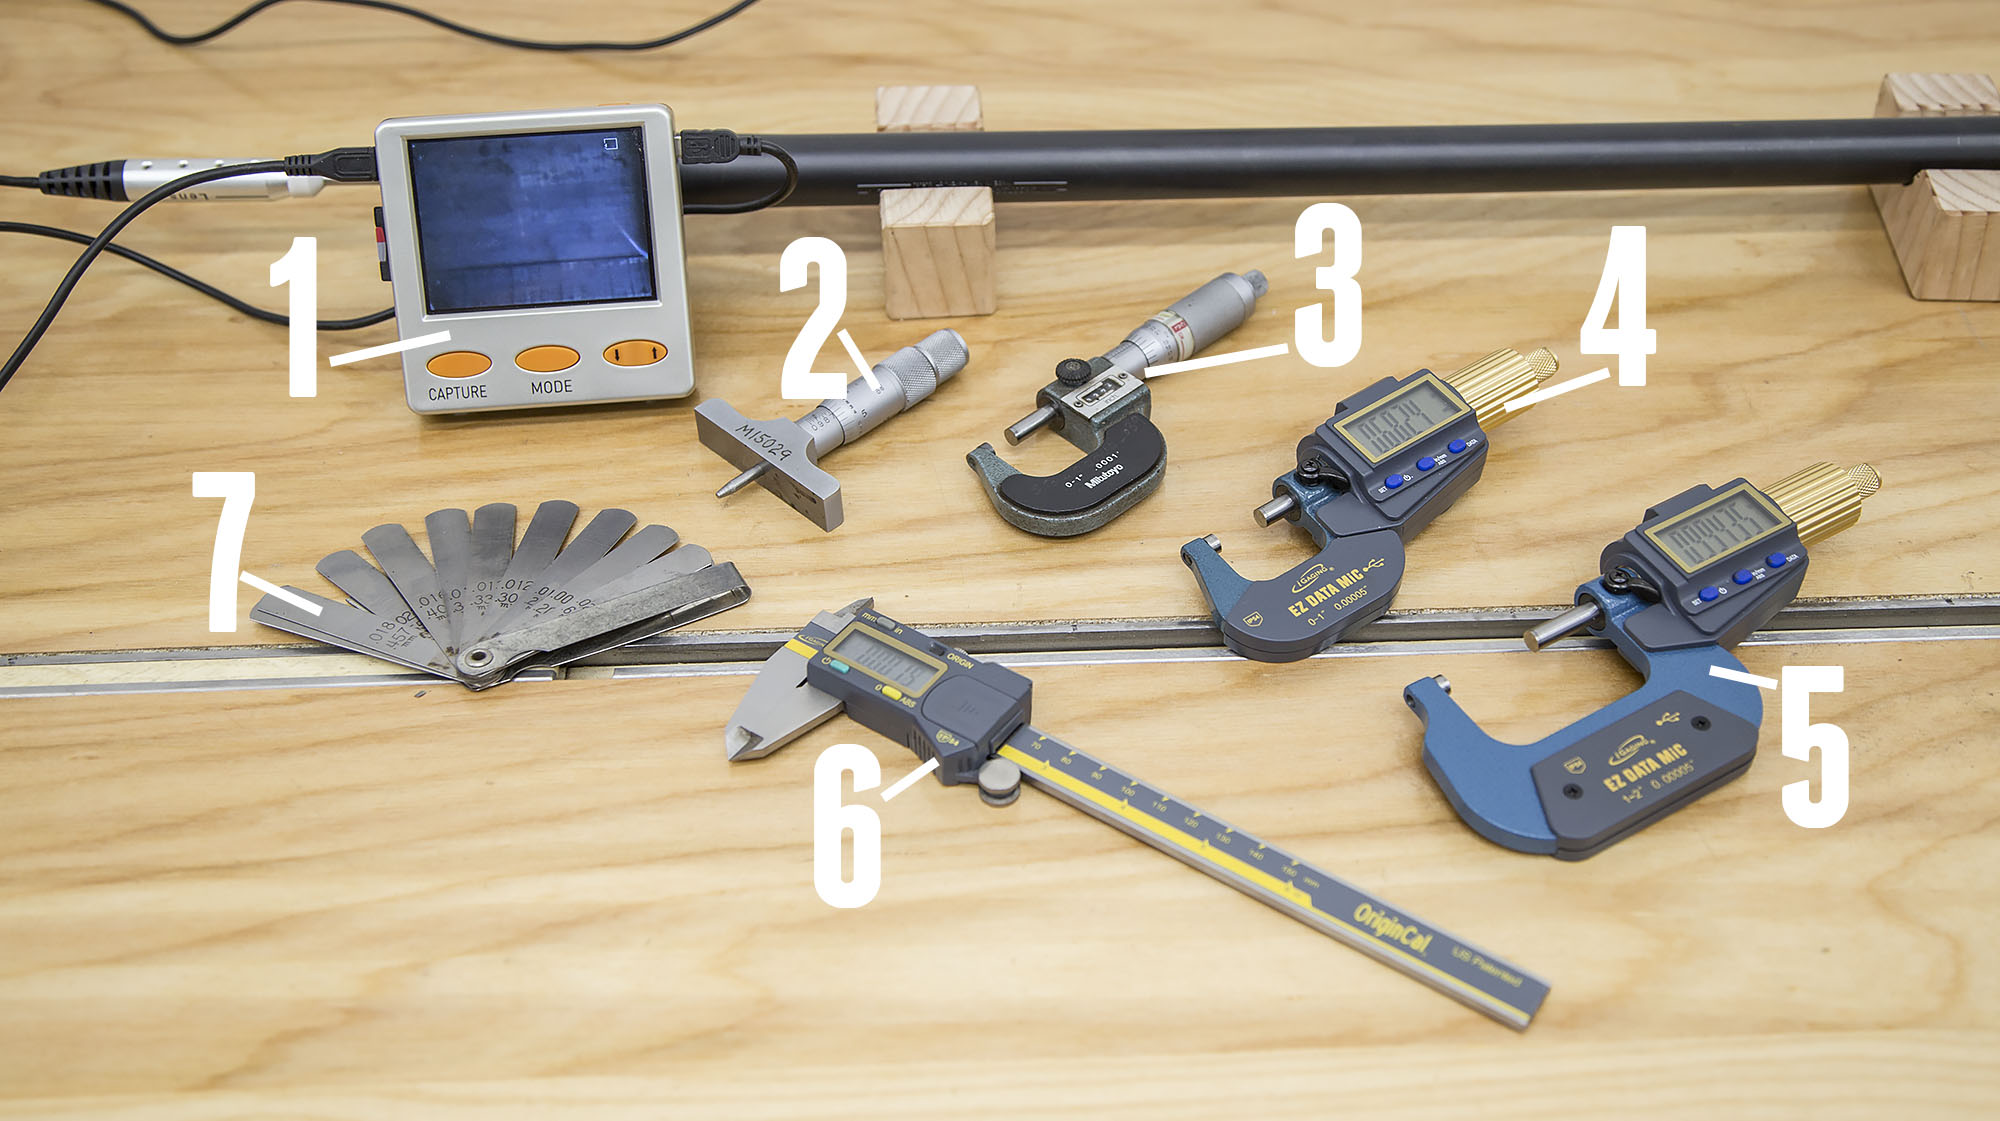
This picture shows the tools I used for precision measurement during this project:
- Lyman Borecam V2 Digital Borescope – This has proven to be an invaluable tool for inspecting bores and chambers. Was this barrel shot out? YES. Any chatter in the chamber? NO. Awesome.
- Brown and Sharpe Depth Micrometer (ebay) – A depth micrometer is critical for measuring tenon length, and chamber depth during the rebarelling process. This unit has worked great and was inexpensive. I’m looking forward to trying a digital depth micrometer!
- Mitutoyo .001″ Digital Micrometer (ebay) – I’ve had this Micrometer for 10 years and love how quickly it adjusts to different measurements, and the easy-to-read digits. These digital counter micrometers are really “analog digital” (how strange sounding) since they have a non-electronic digital display.
- iGaging EZ-Data Micrometer 0-1″ – For measuring turned diameters (Ex: tenon before threading) while machining, and making corresponding DRO adjustments. This is a great inexpensive digital micrometer with .00005″ (half-tenth) resolution, and one-touch calibration (I calibrate each time I use due to temperature and the extreme sensitivity of measurements taken).
- iGaging EZ-Data Micrometer 1-2″ – Same as 0-1″, but I use this micrometer to measure turning diameters greater than 1″ in diameter (Ex: barrel blank and turned tenon after initial pass).
- iGaging Origincal 0-6″ Digital Caliper – (see my post on this tool HERE) Perhaps the most versatile measurement tool in the machine shop. I used these for rough depth measurements, measuring outside and inside diameters, and rough thread depth measurements while threading the tenon and muzzle.
- Feeler Gauge Set (generic) – You probably already have these laying around if you work on cars. I use these to check cutting tool height on the lathe: when on center, the feeler gauge will rest perfectly vertical when held between the work and the cutting edge with slight pressure. I also used these gauges to measure chamber depth by measuring the gap between the action and shoulder when the action was spun on the barrel (with bolt and headspace gauge installed, bolt handle down).
Now on to the “machining center”!
Metal Lathe, Cutting Tools, Accessories
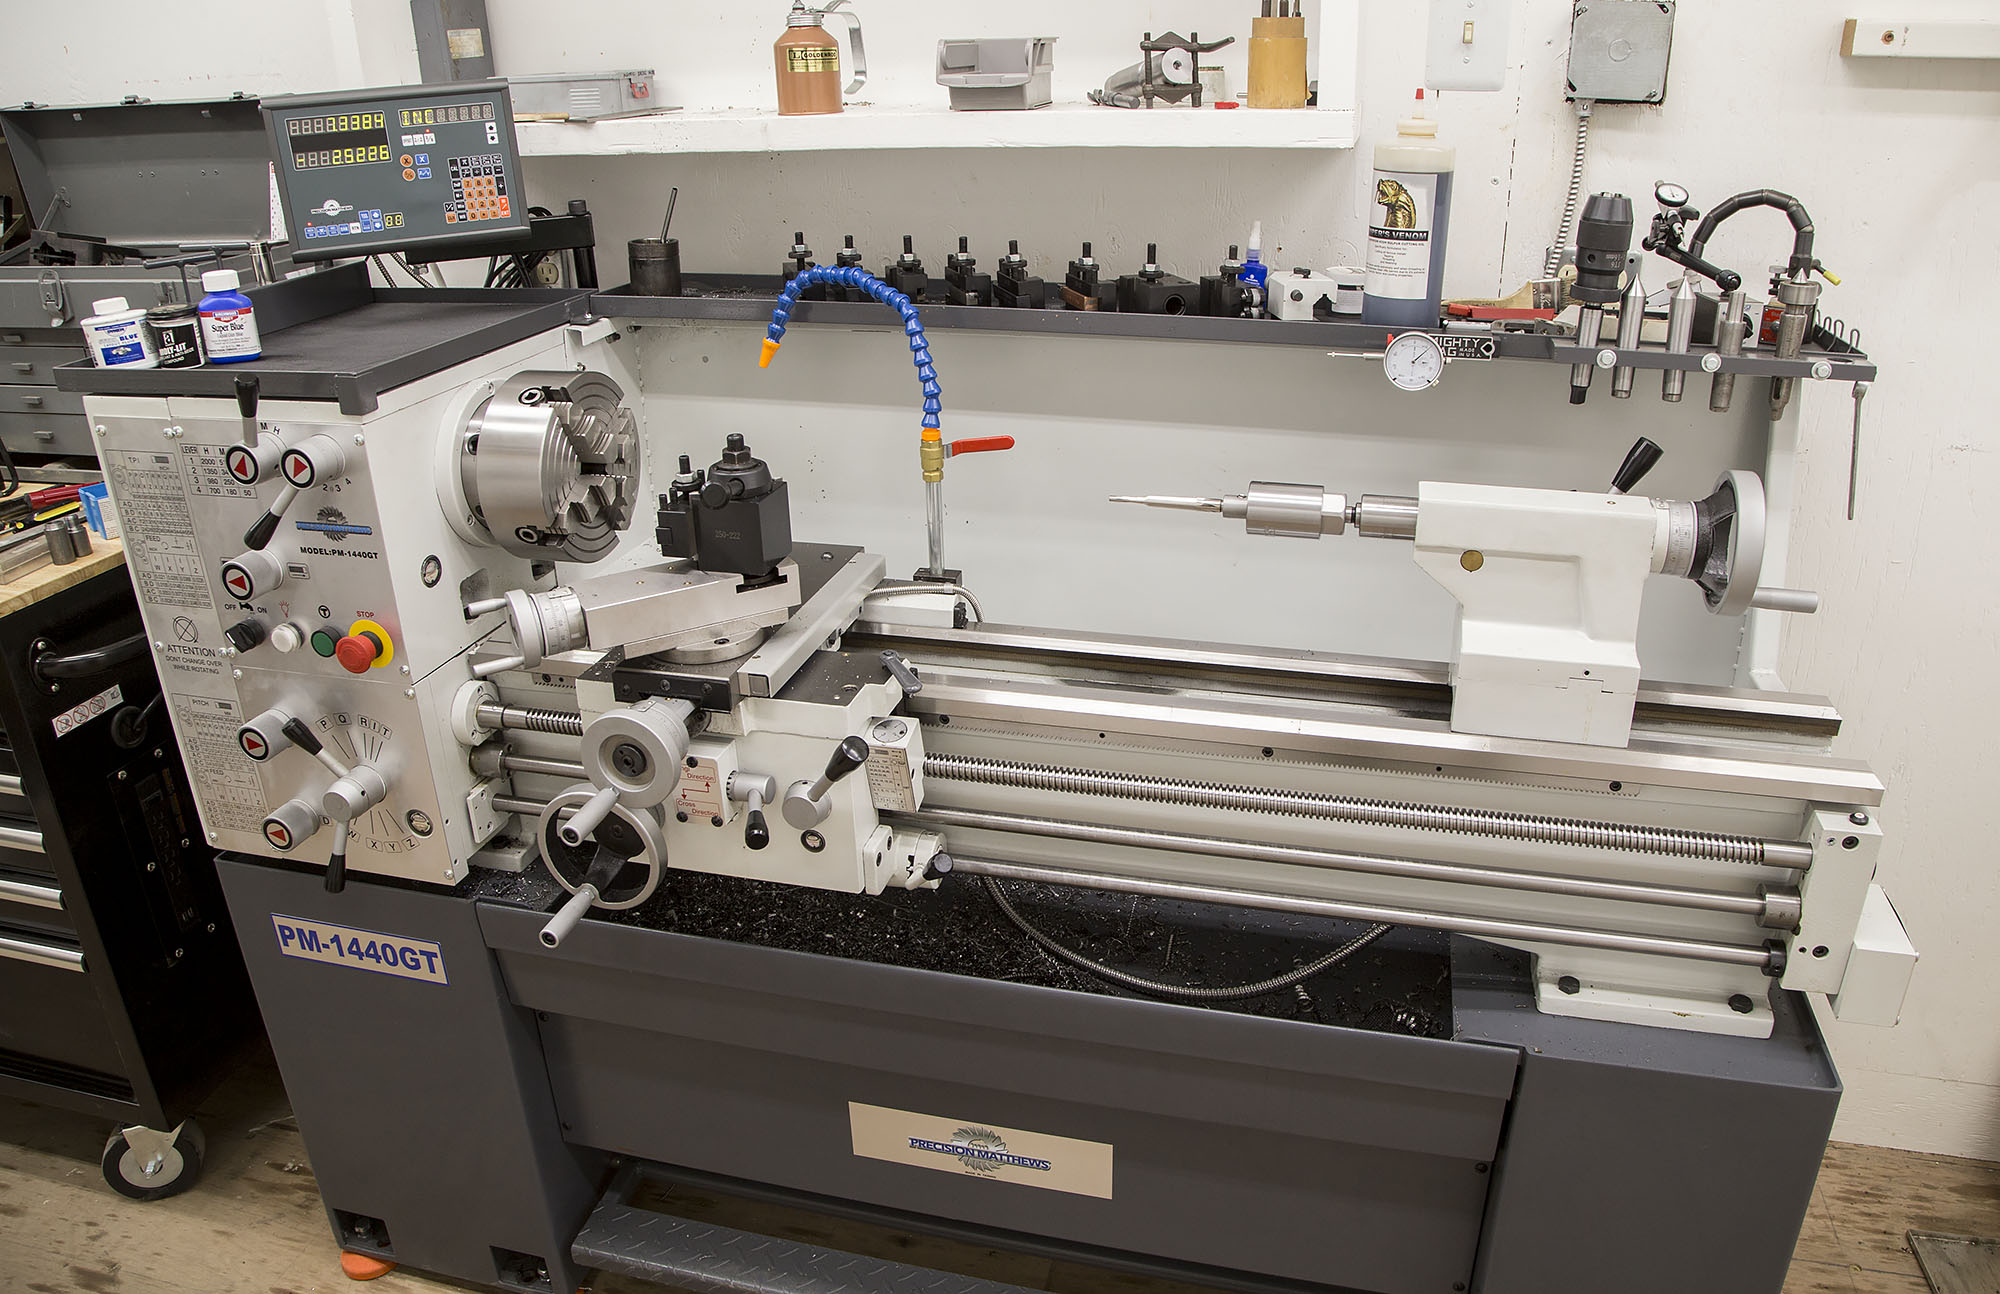
The metal lathe is the one essential piece of machine shop equipment for barrel work. It’s critical that you have the right machine setup with the right tooling if you’re exacting about your work.
Here’s what I look for in a gunsmithing lathe setup:
- Precision and rigidity: Weight, headstock spindle bearing quality, tailstock alignment and precision, capacities (between centers, swing, through-spindle)
- Thread cutting capabilities for English and Metric threads
- Accessories: 4-Jaw independent chuck, outboard spider for barrel support
- DRO: A 2-axis DRO with high-resolution cross slide scale is a huge benefit when working on rifle barrels! You can quickly estimate your tenon length cut, keep track of current turned diameter, and much more!
My new gunsmithing lathe is a Precision Matthews PM-1440 GT all-Taiwanese precision lathe– it has all of the above! (click/tap to enlarge)
For this project, I used the following lathe cutting tools:
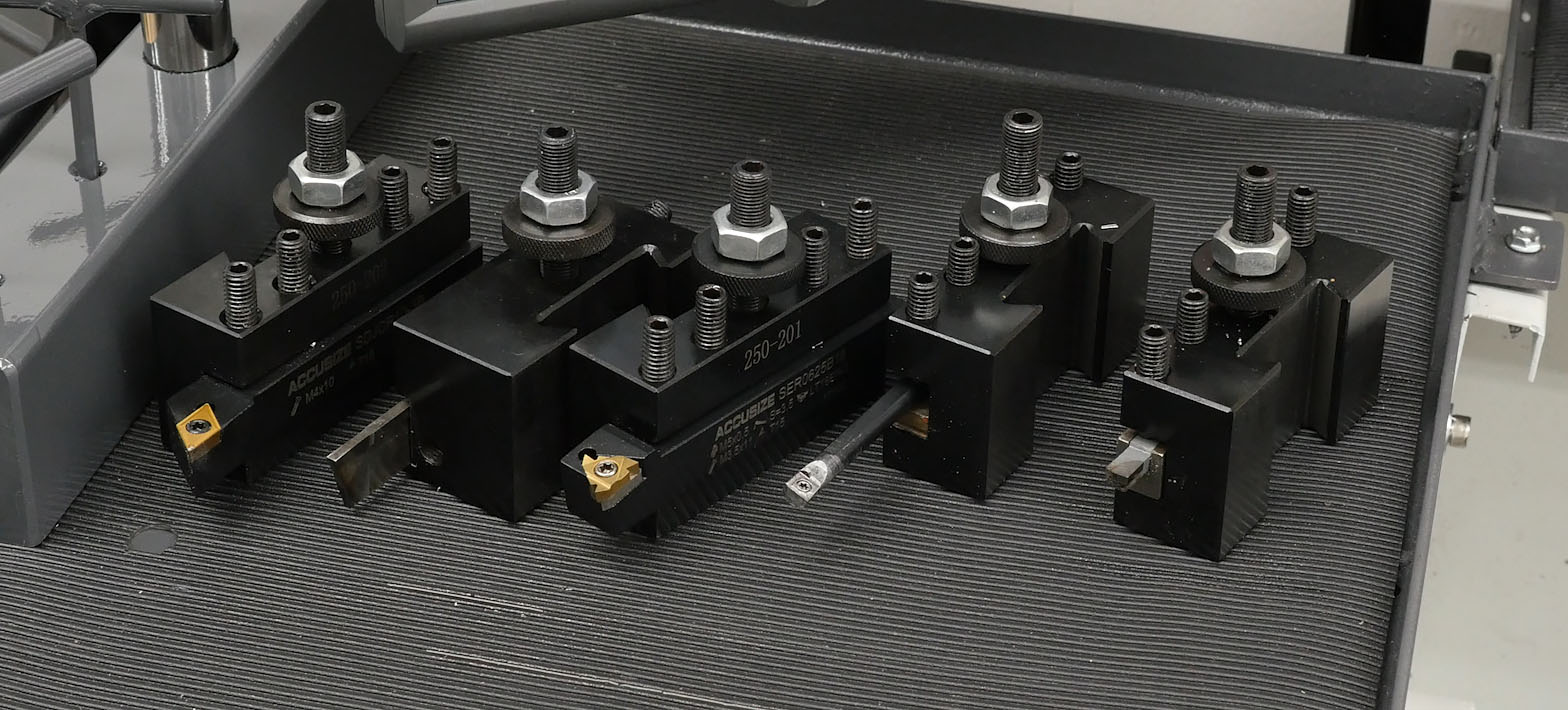
From left to right we have:
- Left-cutting (right-hand) general purpose indexable carbide tool
- HSS parting blade (narrow and wide ends both used) in Aloris-style parting blade holder
- 60 degree indexable threading tool
- Small boring bar with indexable carbide insert (for chamfering the chamber entrance)
- 1/4″ brazed carbide tool in 1/4″ to 1/2″ adapter (used for cutting recessed muzzle face and crown)
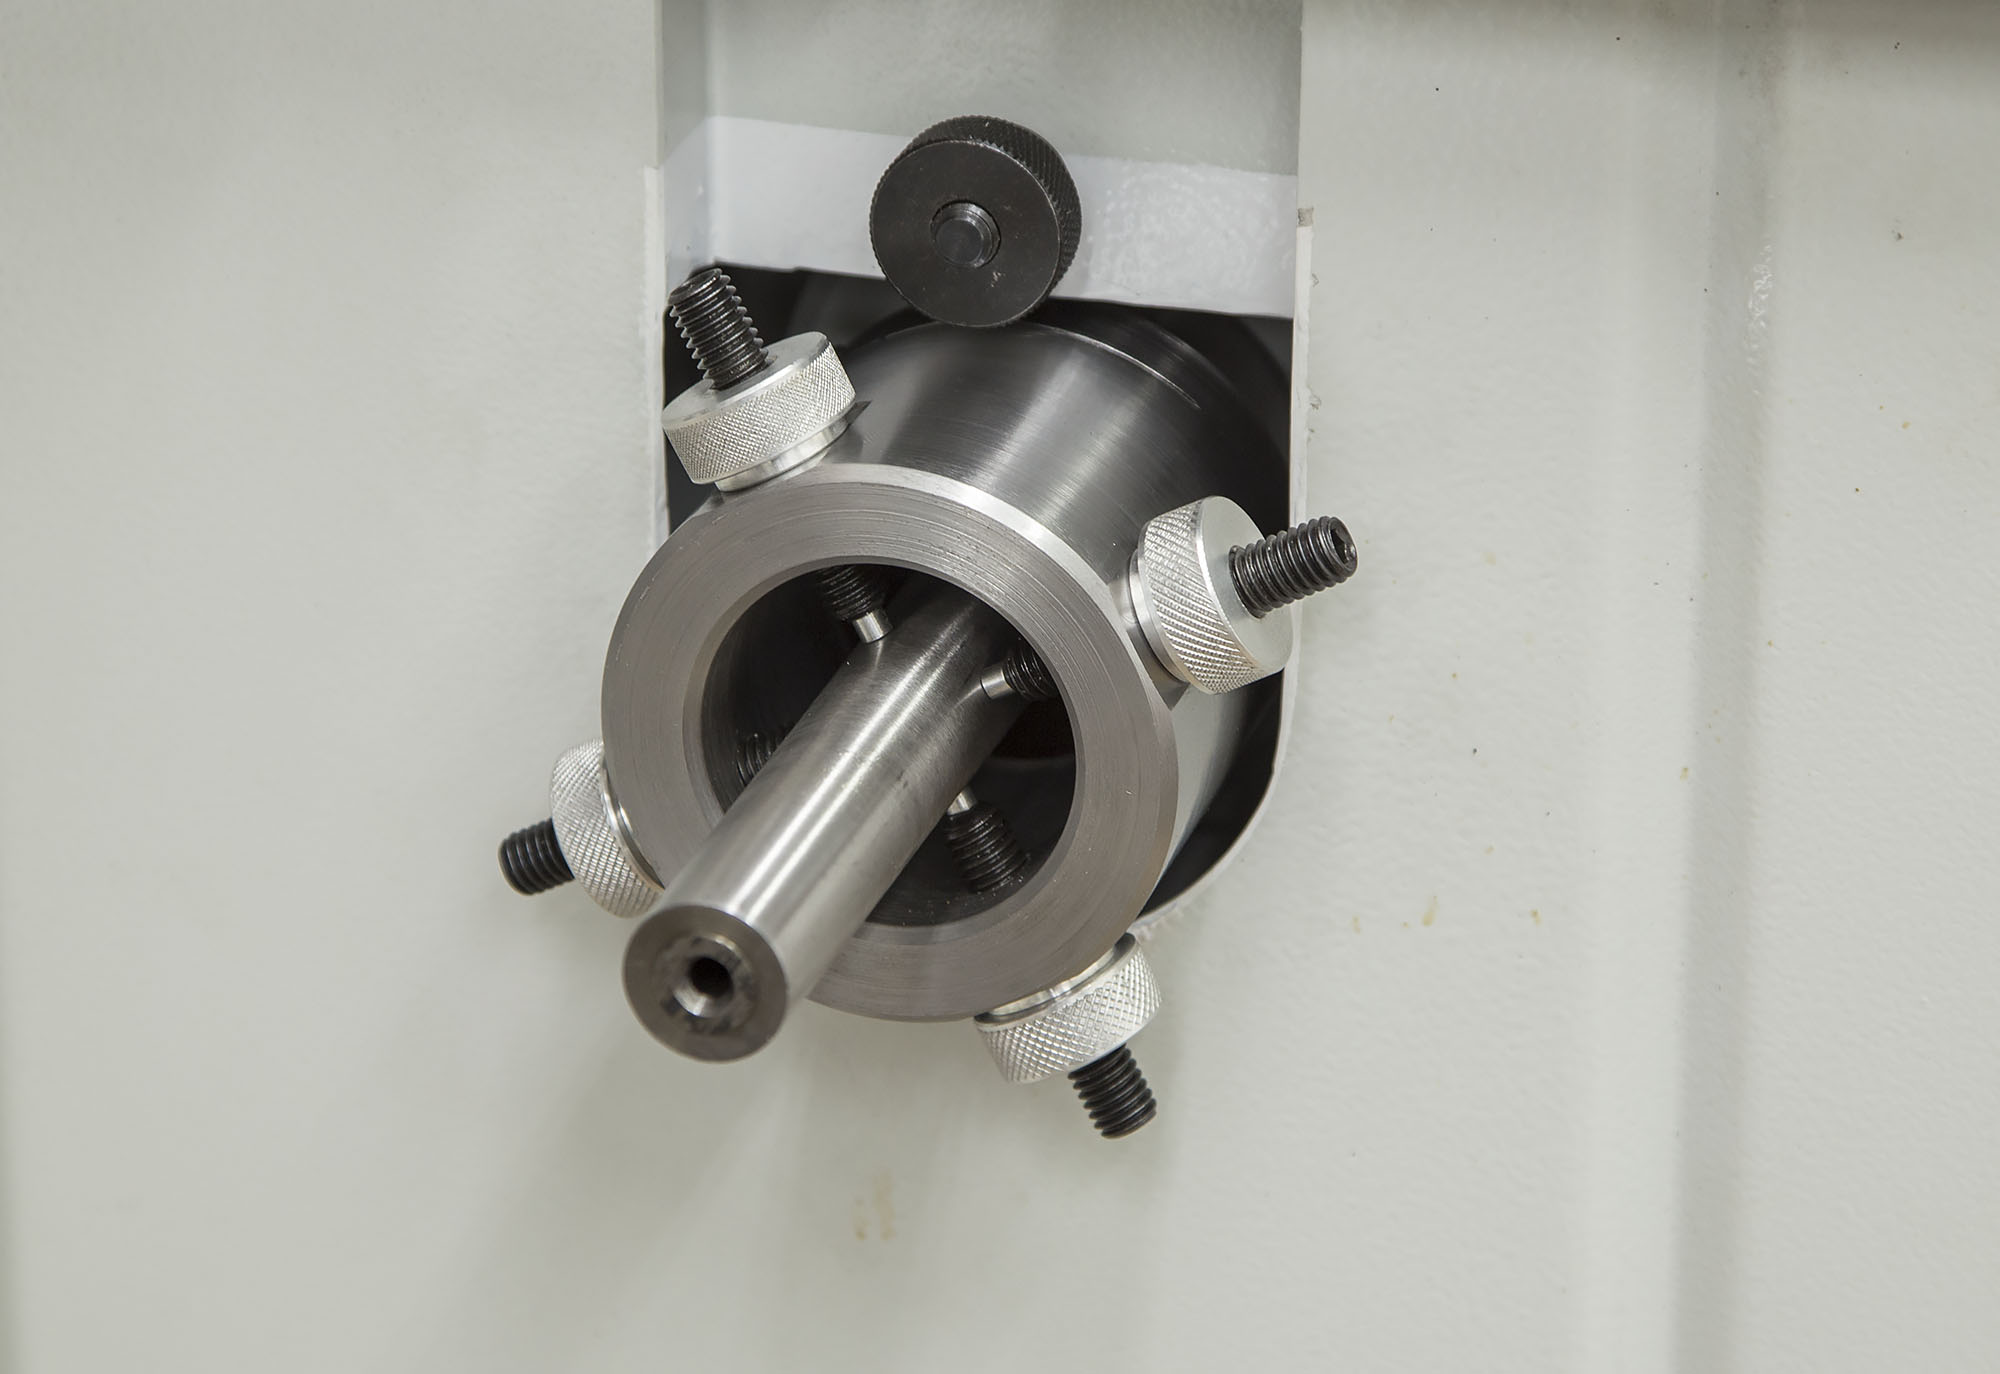
Another important accessory for a gunsmithing lathe is an “outboard spider” which enables you to support and “tweak” the outboard end of the barrel when you are getting things dialed in. I made this deluxe outboard spider which features pinch clamp one-screw mount, hand nuts for the set screws, and custom aluminum tips on the set screws:
In order to “dial in” the barrel, I used two Noga bases, one with a .001″ indicator to “rough things in”, and a Mitutoyo .0001″ indicator to fine-tune the barrel alignment between the lathe’s spindle axis, and the bore axis:
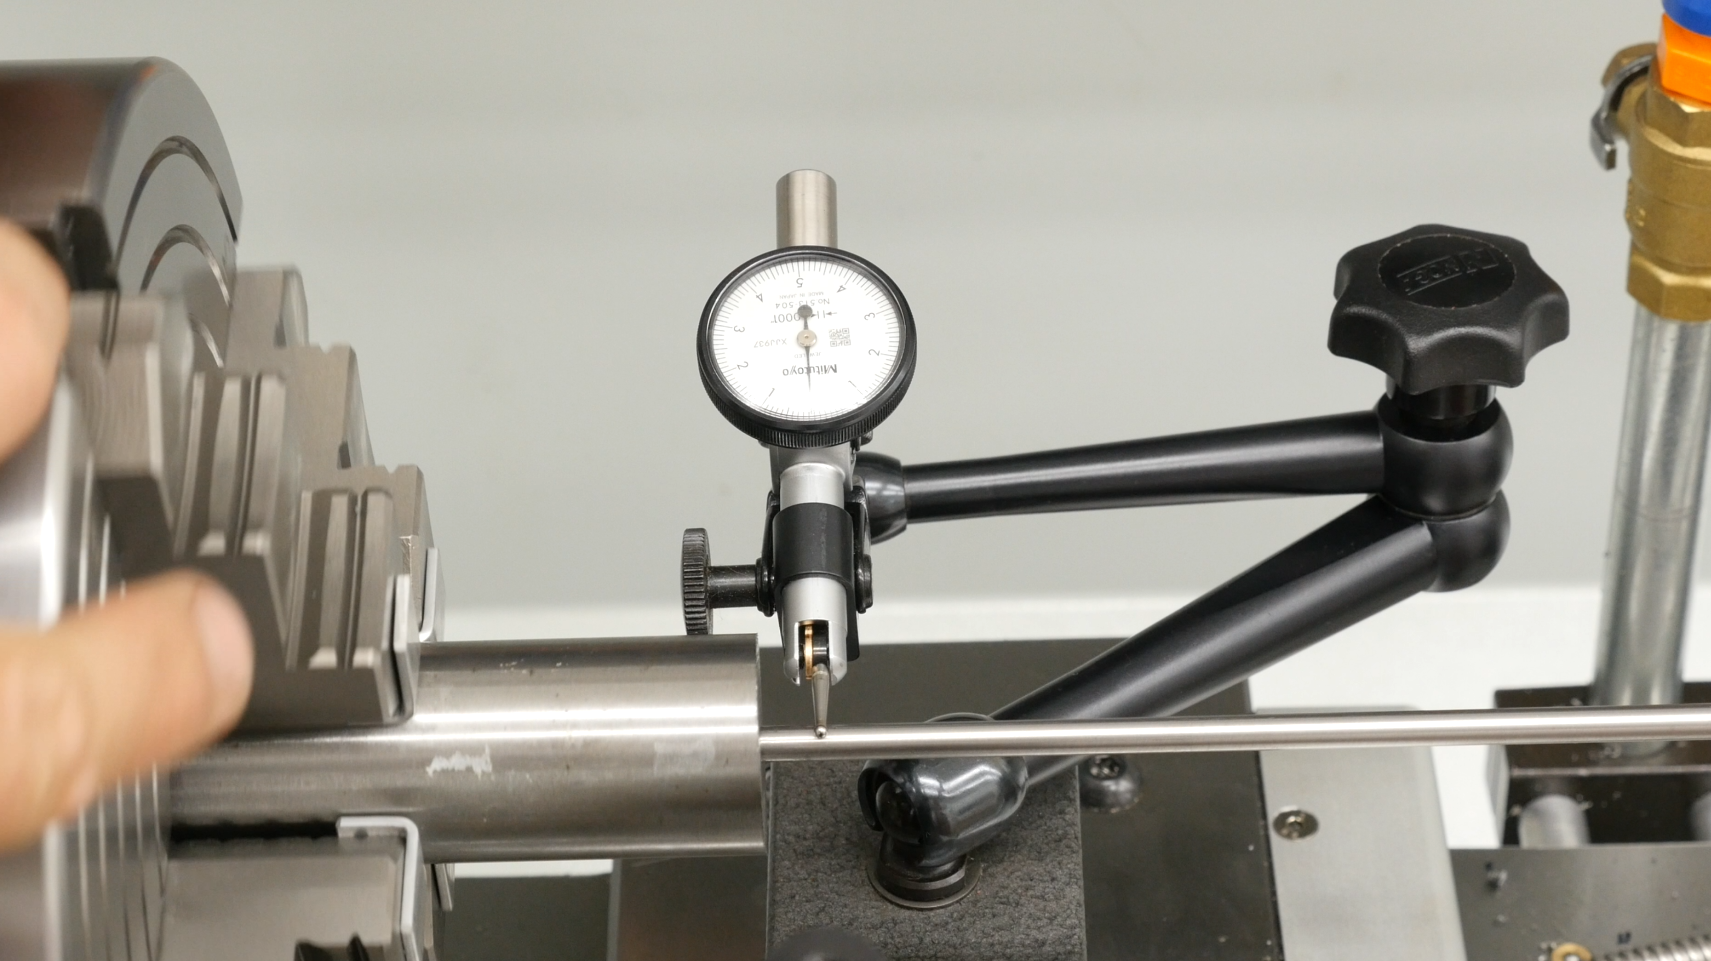
I used the “Gordy Gritters Method” for this which involves the ~3-4″ of bore towards the end you are working on. Using a Grizzly Rod, precisely fit bushings, and an indicator you make 4-jaw and outboard spider adjustments until there is virtually no indicator movement along the section of bore you are working on.
I’ll have much more content related to this lathe, and various rifle chambering setups posted here, so make sure you’re subscribed!
Chambering Tooling
The “main event” with a rebarelling job is the chambering process- let’s take a look at what I used during chambering for this Winchester Model 70 project: (click/tap to enlarge)
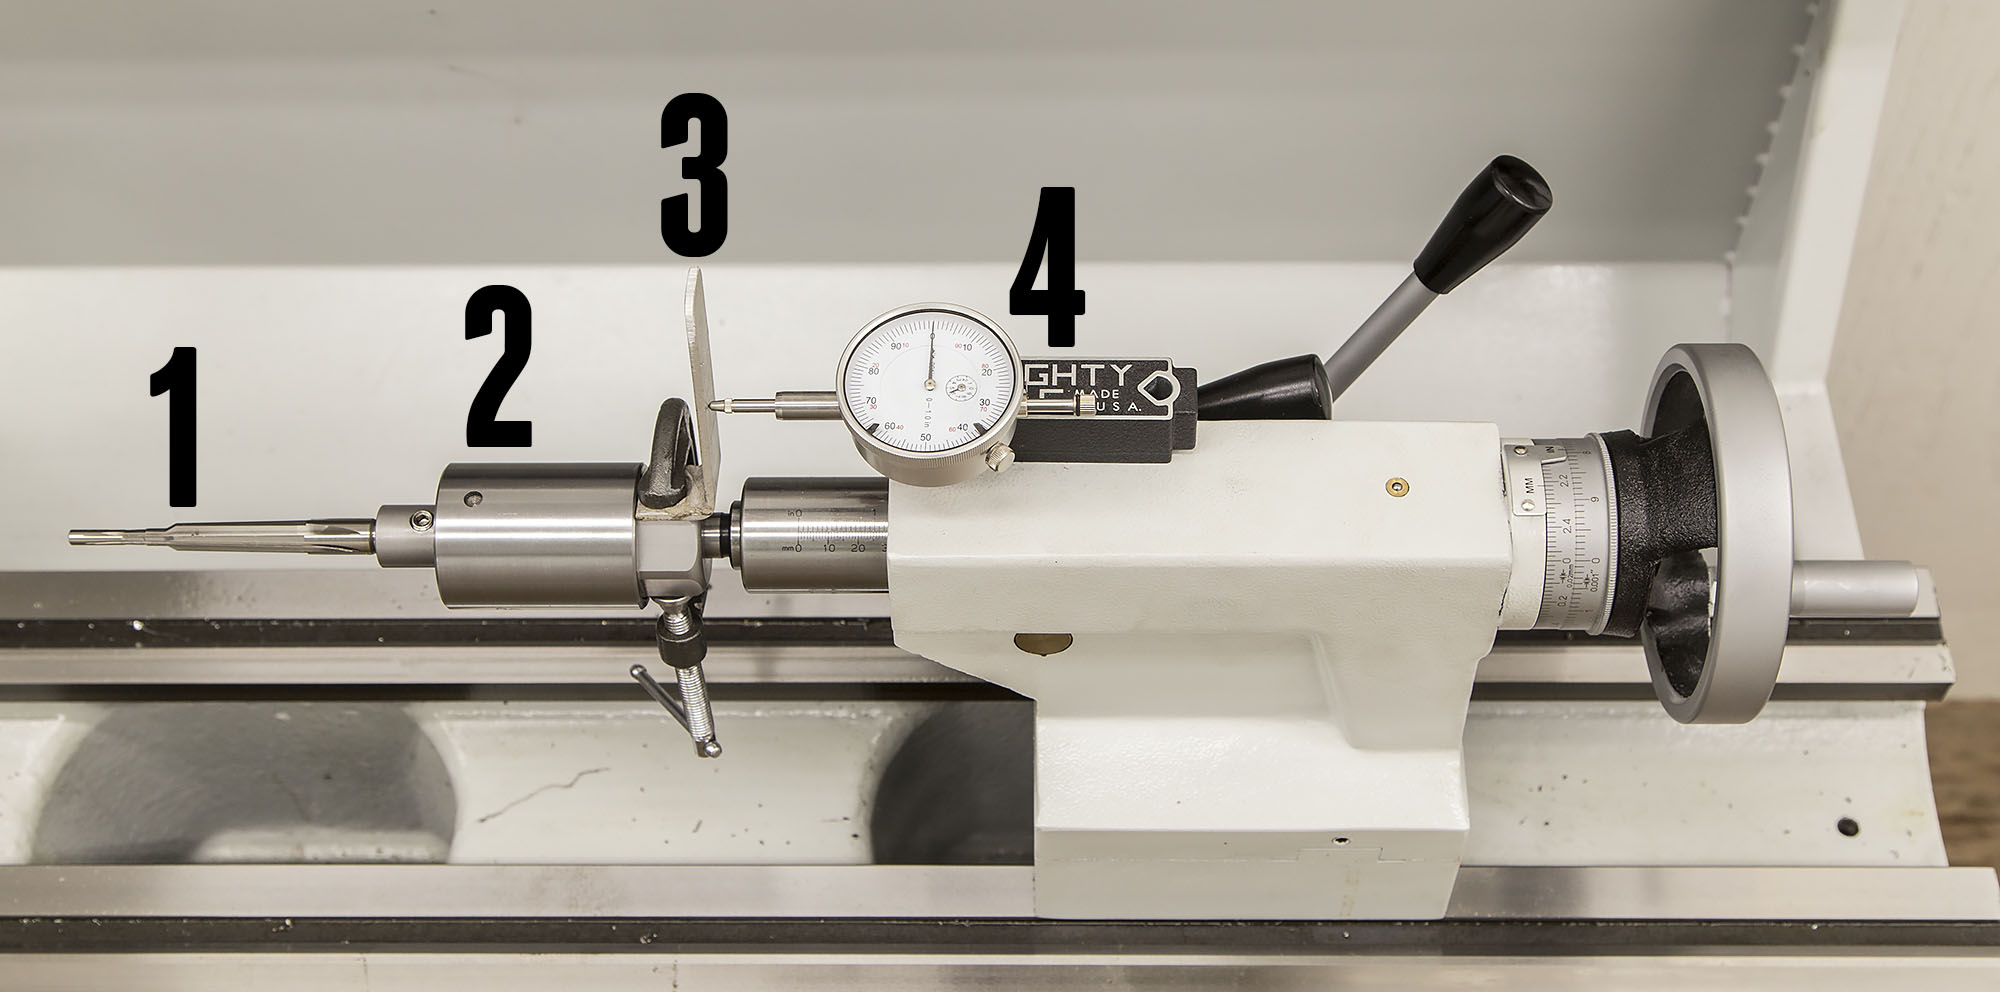
Here’s what’s shown in the above picture:
- Manson Precision Reamers 22-250 solid pilot finisher reamer
- JGS Precision Floating Reamer Holder
- Angle aluminum clamped to floating reamer holder
- .001″ dial indicator mounted to tailstock with Mighty Mag magnetic base
And here’s a snapshot of the reaming process:

This setup worked great, but I do have in mind to make a more substantial stop for the indicator- It’s not really necessary, so it may take a few years for me to get around to it.
Additional Sundries
You’ll also need some additional items, some of which are shown in this picture:
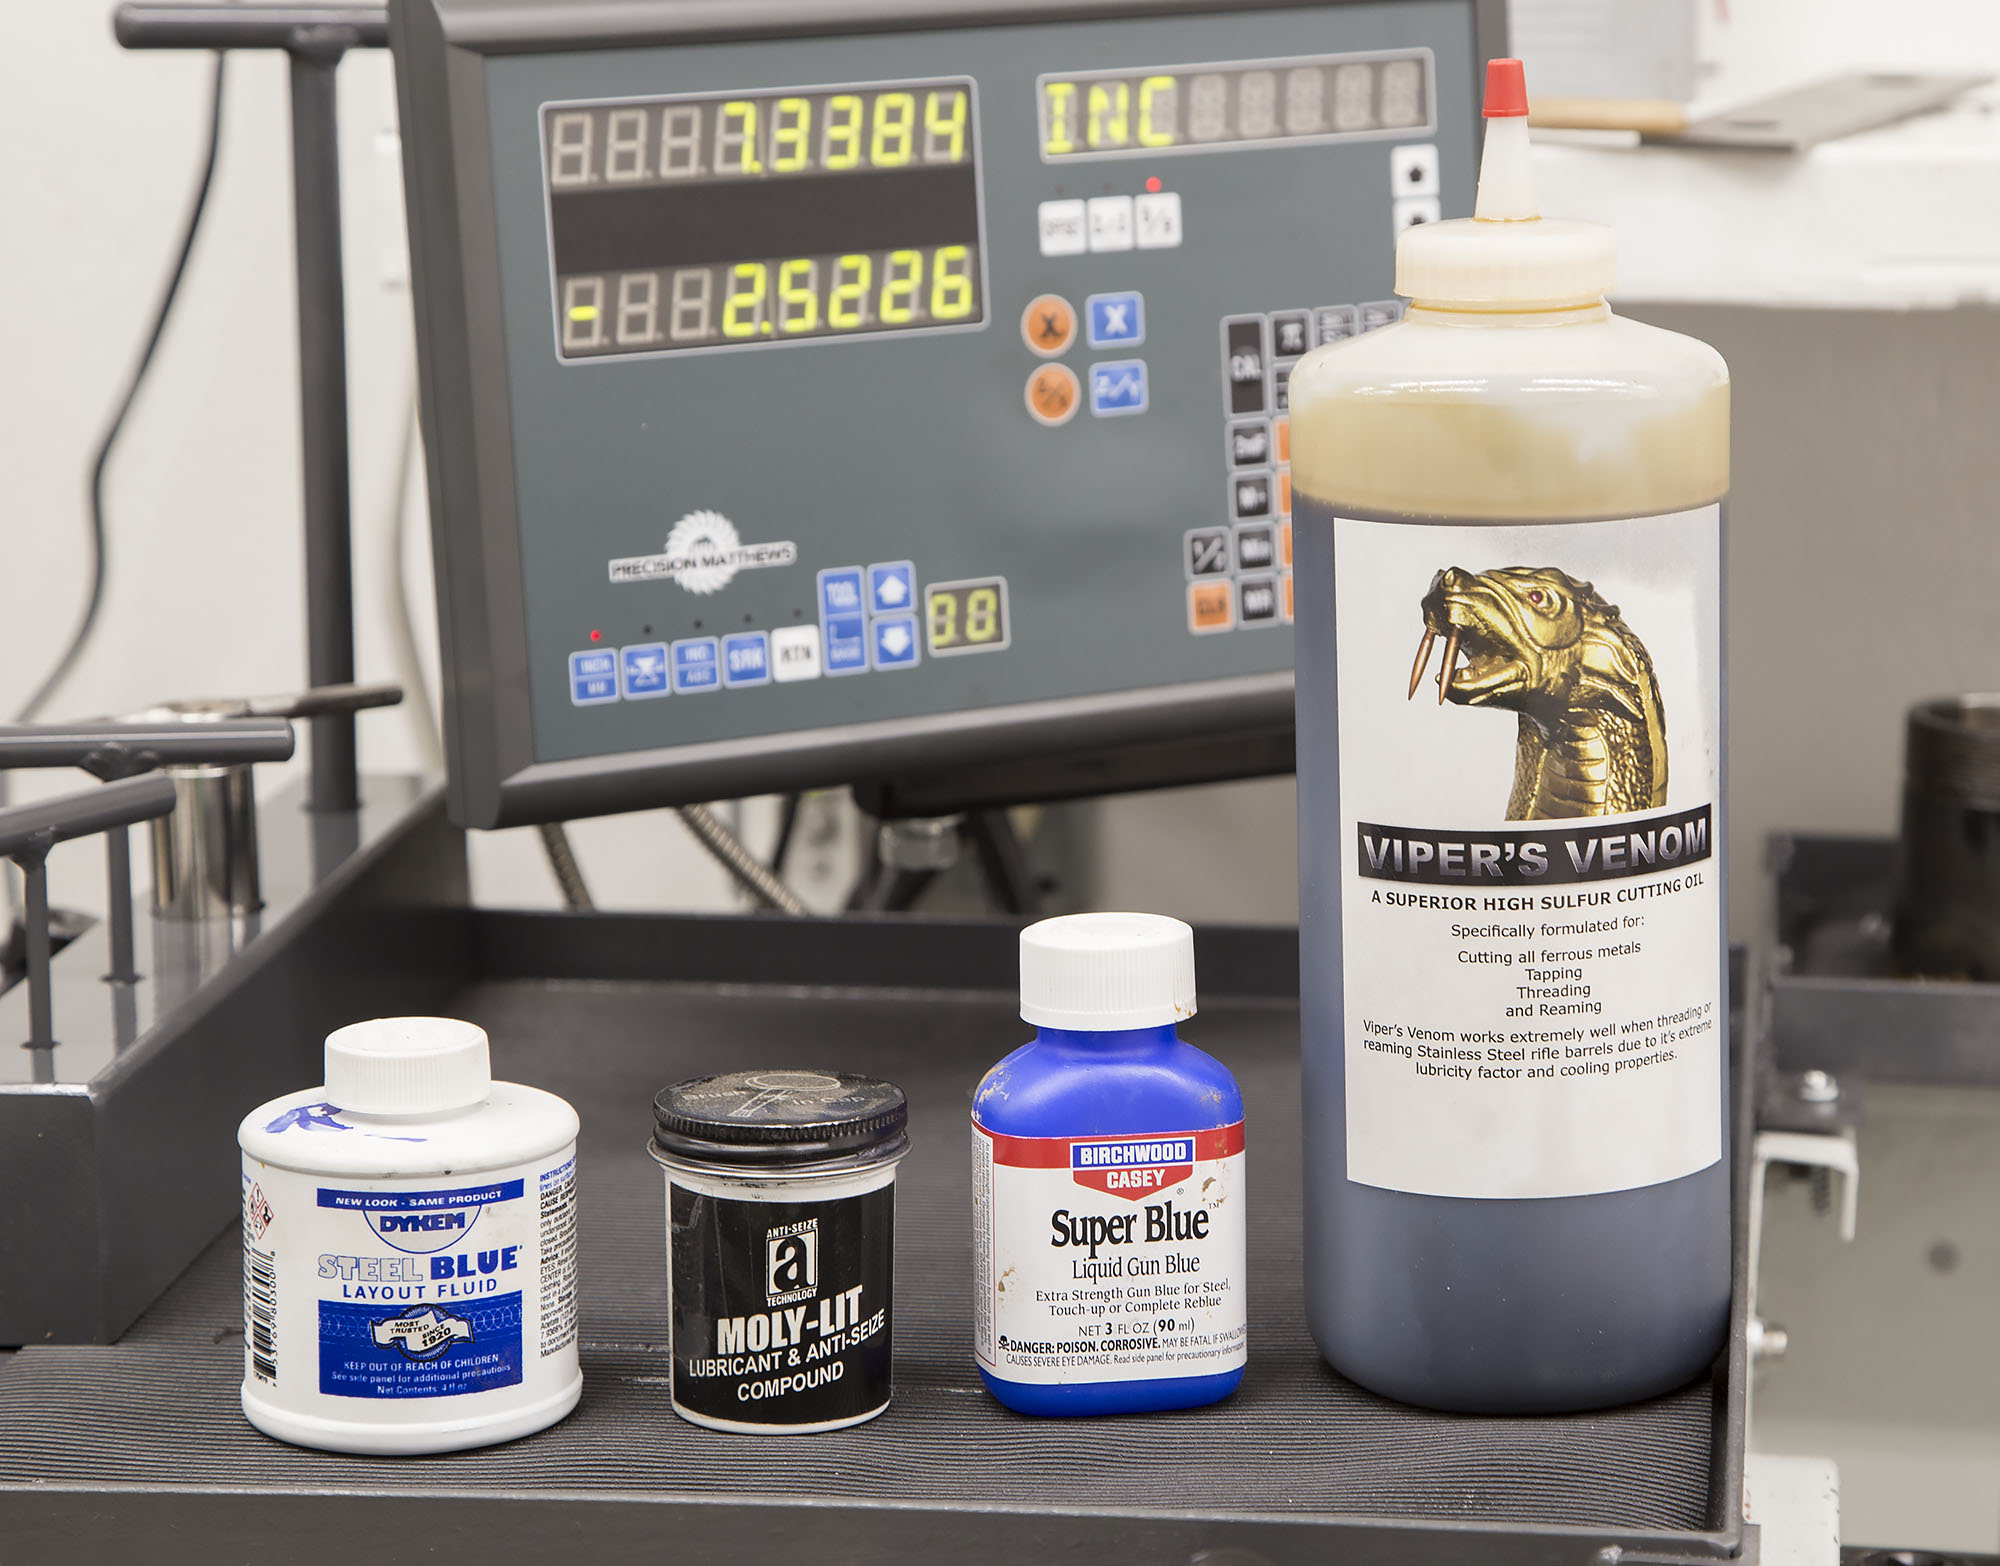
From left to right shown above:
- DYKEM layout fluid (for checking thread pitch and other measurements)
- Moly grease (for tenon threads, especially important when working on stainless barrels)
- Birchwood Casey Super Blue – best for touch-ups, I blued barrel with this product with pretty good results
- Viper’s Venom cutting fluid (for chambering, high-sulfur content)
And then there are the “other items” I didn’t show in the video or this post:
- Thread pitch gauge (to check your threading setups)
- Wood dowel and 320 grit sand paper (for polishing the chamber)
- Cutting oil (for turning and parting)
- Files (large/flat, triangular/small) for chamfering corners and smoothing tops of threads
- Live center (for polishing the barrel the way I did it on the lathe)
Conclusion
Like my collection, your inventory of tools, machinery, parts, and and supplies will grow and evolve over time. I like to start simple, and get more “elegant” as time moves on. For example, some day I would like to have a pressure flush system for cutting oil while chambering. For now, the “manual method” of clearing chips and applying cutting oil works fine.
Series navigation:
- Winchester 70 Rebarrel Part 1: Overview
- Winchester 70 Rebarrel Part 2: Start to Finish Process
- Winchester 70 Rebarrel Part 3: Tools of the Trade (you are HERE)
Do you rebarrel rifles? I’d love to hear about your setup! Please leave a comment…
Thanks,
Gavin