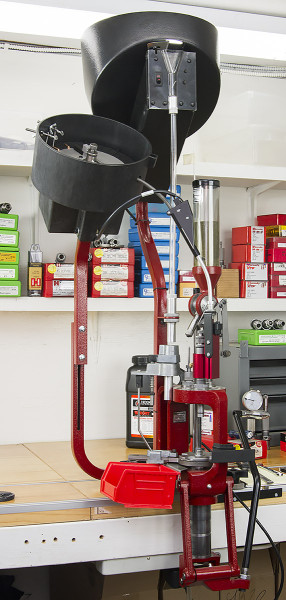
In this post I’ll cover the high-level details outlining the setup process for the Hornady Lock-N-Load Rifle Bullet Feeder (.22 caliber in this case). Be sure to check out the video at the end of this post and the overview post if you haven’t already.
Fortunately, Hornady supplies an excellent owner’s manual with this rifle bullet feeder which guides you through the fine points of the setup procedure. To summarize, the following steps are involved:
- Unboxing
- Installing the support tube (brackets) – I have a single bolt which attaches the unit to my custom aluminum baseplate (two bolts are supplied). A positive side-benefit of the single bolt install is that you can “swing” the entire assembly which fine-tunes the drop tube spring “sag” – essential to get proper drop feeding
- Hopper installation (feed bowl)
- Hopper adjustment (feed plate height, bullet wipers)
- Feed tube and switch connection
- Installing and configuring the bullet feed die: (pivot block selection, bullet drop, bullet seat and bullet crimp)
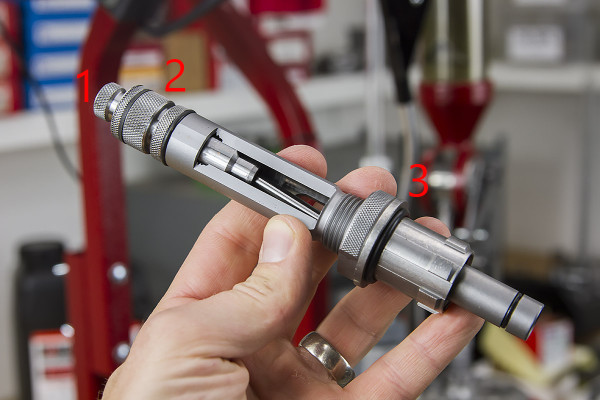
In the above picture you can see all of the major components of the bullet feed die. There are three primary adjustments for the die:
- Bullet seat depth
- Crimp level (crimp is optional and does not take place if screw is backed out sufficiently)
- Die height: bullet drop
Another key part of the setup procedure will depend on the specific bullets being used (length, profile, etc). This step involves adjustments in the case feed bowl.
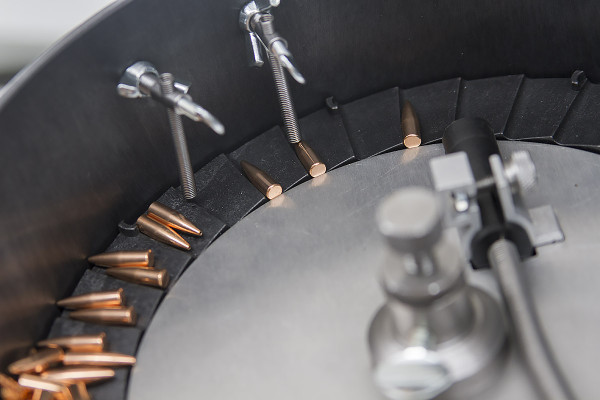
In the above picture you can see the primary adjustments that are made for each bullet type used: the feed wipers (top, springs and wingnuts), and the feed plate height (central knob and nut). It’s worth taking your time to ensure that these adjustments are made properly so that you don’t feed bullets upside-down.
Here’s a video that I put together that illustrates the setup process at a high-level:
Next, we’ll load some 5.56/.223 Remington, so stay tuned!
-Gavin


Will it work on a Dillon 550B? That is the big question.
Bruce
Bruce- It should work on a Dillon 550B as long as there is clearance… (Unfortunately I don’t currently have one to test with).
will the feeding system to your knowledge work with 300blk? I hate to assume that it will and look forward to your answer.
Thanks
Very nice bullet feeder, a little finesse tweeking here and there,but works great once you have it all setup. One thing I can’t seem to figure out is on the first case that passes in the bullet feed die,no bullet, but the second case I get a bullet. I have to put a dummy round in to activate the bullet feed die. IS it just me missing some fine print or is that the way it is?
Just added the rifle bullet feeder today. The whole system is awesome. The set-up was easy and took about an hour. After a few adjustments to the die, I cranked out 100 fast, all with excellent specs maintained from start to finish. I love this bullet feeder.