
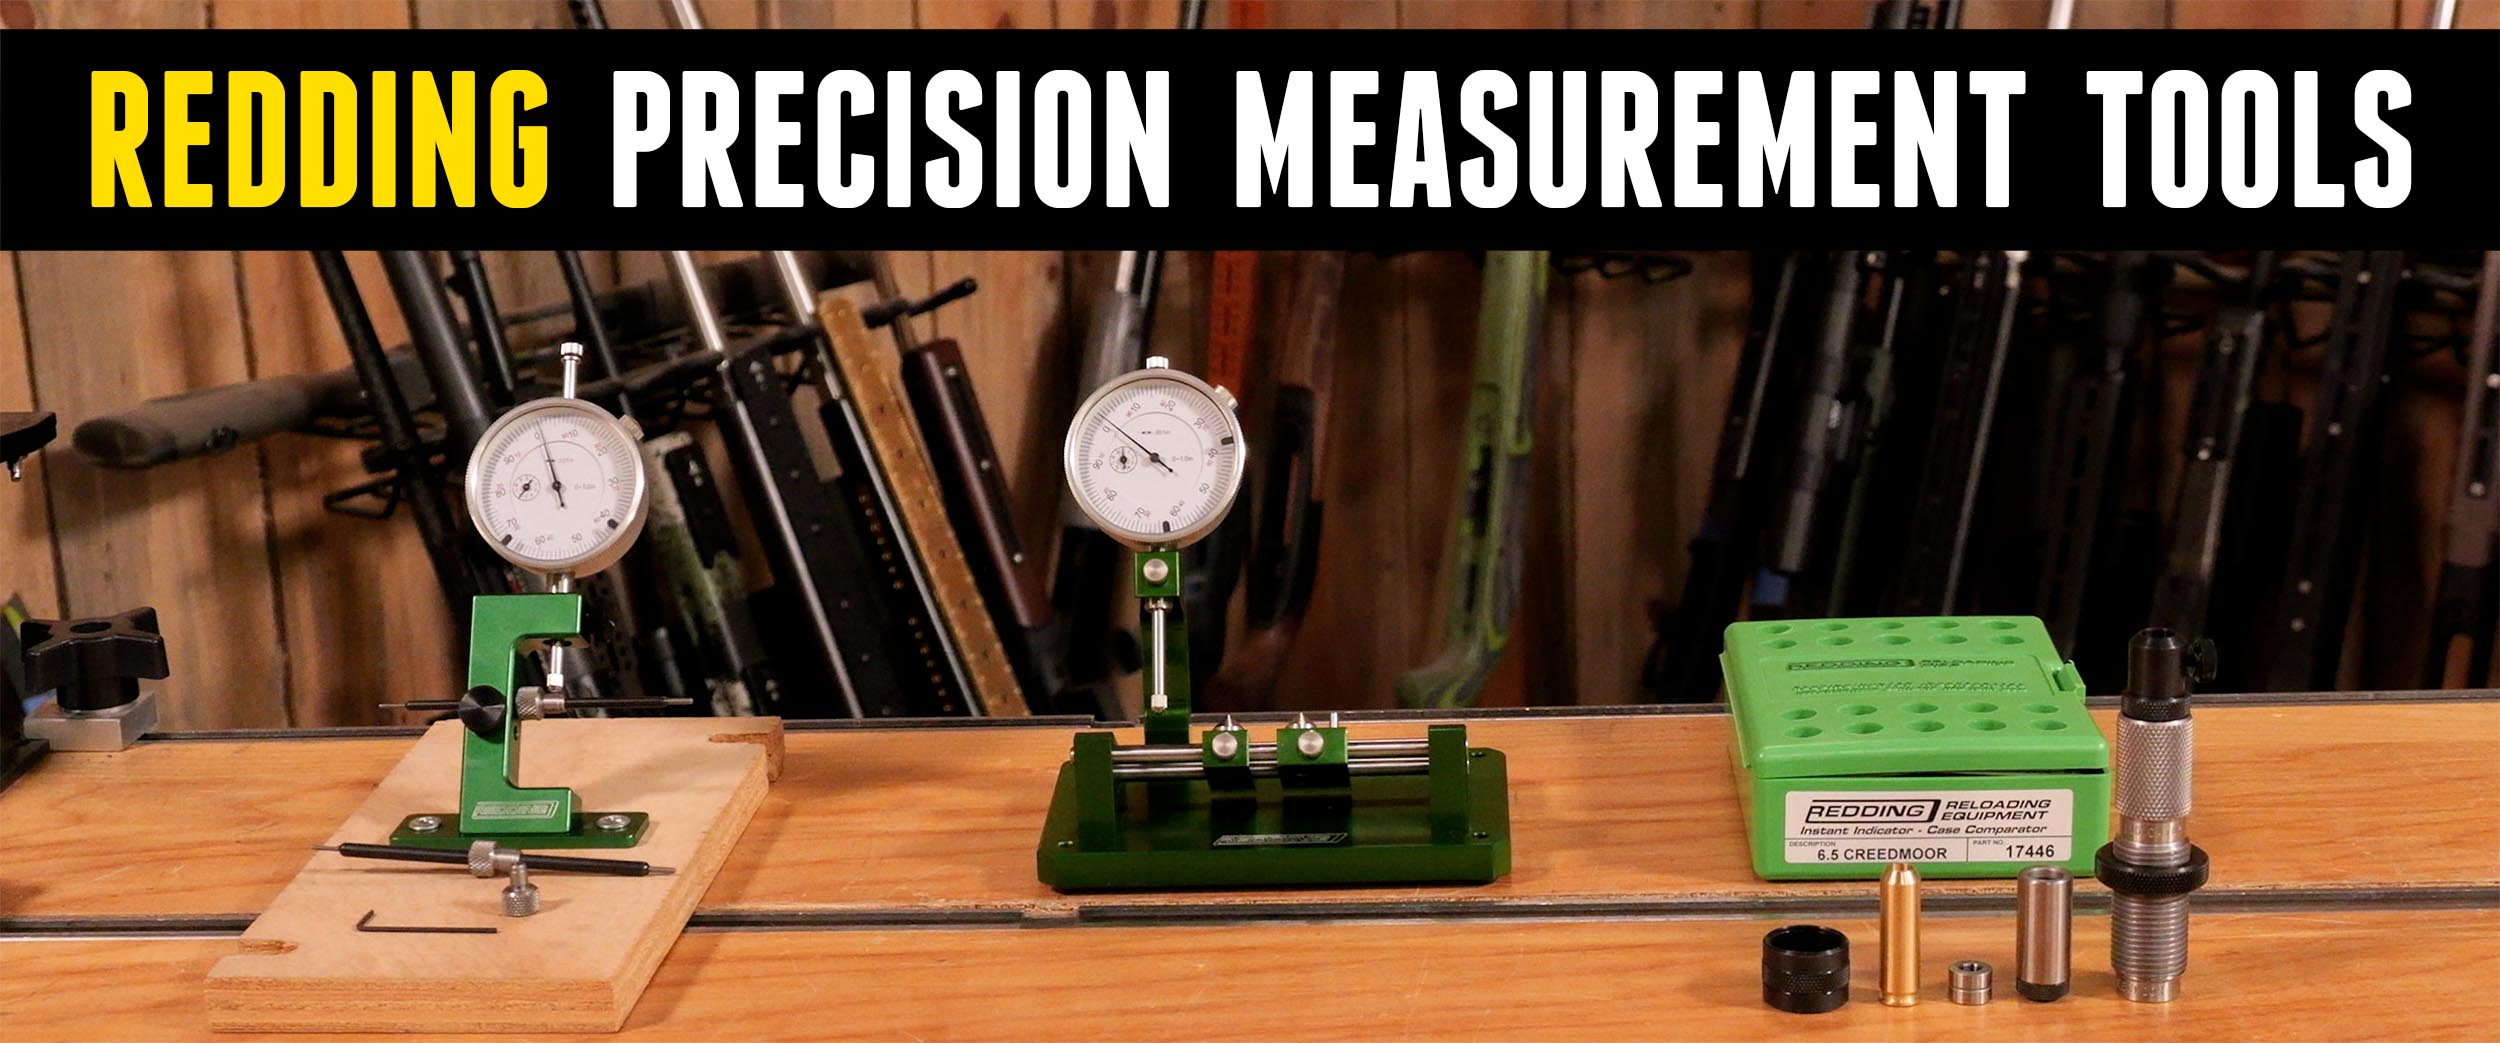
In this article, we’re taking a look at a few of Redding Reloading’s popular ammunition measurement tools: the Instant Indicator, the Case Neck Gauge and the Slant Bed Concentricity Gauge. We’ll go over what’s included with each, how they work, and some real measurements on 6.5 Creedmoor brass and ammunition. Watch or read on!
Disclaimer
Ultimate Reloader LLC / Making with Metal Disclaimer: (by reading this article and/or watching video content you accept these terms). The content on this website (including videos, articles, ammunition reloading data, technical articles, gunsmithing and other information) is for demonstration purposes only. Do not attempt any of the processes or procedures shown or described on this website. All gunsmithing procedures should be carried out by a qualified and licensed gunsmith at their own risk. Do not attempt to repair or modify any firearms based on information on this website. Ultimate Reloader, LLC and Making With Metal can not be held liable for property or personal damage due to viewers/readers of this website performing activities, procedures, techniques, or practices described in whole or part on this website. By accepting these terms, you agree that you alone are solely responsible for your own safety and property as it pertains to activities, procedures, techniques, or practices described in whole or part on this website.
Overview
I’m a huge fan of Redding Reloading. They emphasize high-precision, high-quality, made-in-USA gear across the board. We’ve shown their dies and presses, and now I want to show you a few tools for precision measurement of your cases and ammunition.
- Instant Indicator: Tells us things like how consistent our case length is, where our base-to-datum on the shoulder is (in other words, headspace for the case itself), and what our base-to-ogive for bullet seating depth looks like, along with how consistent those numbers are. It’s a press-mounted die, so it’s awesome for use on a single stage, turret or even a progressive.
- Case Neck Gauge: Tells us how consistent our case neck thickness is. If the neck is really thick on one side and thin on the other, the bullet is offset to the side, so it won’t engage the rifling perfectly. It’ll wobble a little like a football, and that means shot dispersion, which is definitely not what we want. Sorting by neck thickness uniformity is one of the tricks benchrest shooters use to improve their groups.
- Slant Bed Concentricity Gauge: Tells us whether there’s any runout in the case neck, and what our bullet runout is.
All of these perform very important functions, and they work a little differently. Let’s get started.
Redding Instant Indicator
Our Instant Indicator is specifically for 6.5 Creedmoor. Here’s what comes with it:
- Die body with the shoulder contactor inside and a tensioning spring
- Shoulder contactor: Contacts the shoulder to give relative base-to-datum readings
- Bore diameter bushing: Used to compare bullet base-to-ogive, in other words, seating depth based on the bullet’s ogive, which is what really matters at the end of the day
- Blank contactor: For case length and other relative and absolute measurements
- Setup gauge: Basically a go gauge, cut to SAAMI minimum, which gives you a relative datum to measure new brass, fired brass or shoulder bump against
- Range adapter: Screws onto the bottom of the die so you can take relative readings without a reloading press
That’s a lot, isn’t it? Next, we’ll work through each scenario step by step.
Base to Datum (Shoulder)
With the shoulder contactor and tensioning spring in place, tighten down the top assembly and put the die in the press. Setting die height is a one-time step:
- Raise the ram to the top and run the die down until it contacts the shell holder.
- Give it about an extra eighth of a turn.
- With the lock ring backed off just a touch, so it isn’t being held by the bushing below it, tighten the lock ring.
Next, put in the setup gauge to establish your headspace zero. Get the indicator close to zero, then rotate the dial so it’s exactly zero. It repeats nicely.
Now this is like magic. A brand-new Lapua 6.5 Creedmoor case read 0.002 inch below the setup gauge, which is exactly what I expected. That means we’d have 0.002 inch of clearance in a SAAMI-minimum chamber. In reality, chambers are typically more like +0.002, which would give us about 0.004 inch total breathing room at the shoulder.
A fired case moved forward only about 0.001 inch from that, so the chamber was about a thousandth over (you have to account for spring back as well). A brand-new Peterson case read closer to zero than the Lapua. So different brass, different headspace.
This gives you a really great way to set up a sizing die. With your fired case as zero, how much do you want to bump the shoulder back relative to your rifle’s chamber?
- Precision bolt gun: Somewhere between -0.0015 and -0.0025 inch
- AR: Possibly as much as -0.004 inch
Base to Ogive (Bullet)
To switch to base-to-ogive, remove the assembly from the press, remove the dial indicator and the contactor, take the top cap off the shoulder contactor, drop in the bore diameter bushing, and reassemble. It’s just that easy.
With Hornady 100 grain ELD-VT factory ammunition, I set the gauge close to zero and adjusted it. Compared to another cartridge, it was basically within zero. That’s very consistent ammo, and pretty impressive.
Where things get interesting is with different ogive profiles. Berger 140 grain factory ammo read about -0.013 inch relative to the Hornady. After re-zeroing on the Berger ammo, I checked more cartridges: one read +0.001, and the rest were basically zero. That’s pretty consistent, with one outlier.
This also lets you set bullet seating depth relative to a dummy cartridge. What we like to do is chamber a fired case with a bullet loose-fitting in the neck and some blue Loctite in place, then let it sit for five minutes. That basically sets the bullet at the lands. Use that dummy cartridge as your zero, and if you want 0.020 inch of jump, you’ll be at -0.020 inch on the indicator. That’s a very handy capability.
Case Length
To check case length, take the die out, remove the shoulder contactor assembly, remove the bore diameter bushing (so you don’t forget it’s in there), and remove the dial indicator. Any dial indicator with a 3/8-inch stem will work. The blank contactor is the same on both ends, so it doesn’t matter which way it goes in. Then put the tension spring and top assembly back on, and put the die back in the press.
I used a brand-new Lapua case as the datum. You could measure it and even adjust the dial to compensate for SAAMI minimum or maximum case length for a particular cartridge. I got a little picky getting the dial pointed straight up at zero.
| Case | Length vs. New Lapua |
| New Lapua (datum) | 0.000 in |
| Fired Lapua #1 | -0.0015 in |
| Fired Lapua #2 | -0.002 in |
| Fired Lapua #3 | -0.005 in |
| New Peterson | About -0.001 in |
Since we hadn’t sized the fired cases, it looks like they got a little shorter as the brass expanded. The -0.005 case may have been trimmed at some point; it came from a huge bag of once-fired Lapua cases. The Peterson cases were very consistent, within a thousandth of the Lapua. There’s a definite allowable tolerance range there.
This gauge is really handy when you want to make sure your trim length is consistent, or when you want relative measurements to set up a trimmer.
Using the Range Adapter
If you’re at the range and want to use the Instant Indicator without a press, that’s what the range adapter is for. I put my brand-new Lapua case in, screwed on the range adapter, and got exactly the same reading. Then I checked a Peterson case, which read approximately -0.001, just like on the press. Right on the money!
It’s going to be faster and easier with a press, but the range adapter gives you a portable solution, and that much more versatility.
Redding Case Neck Gauge
What’s Included
- Frame
- Two spindles, small diameter and large diameter
- Two pilot stops, for 22 caliber and 30 caliber
- Allen key for adjusting the pilot stop
- Dial indicator (in this configuration)
It’s a very nice-looking unit. I also separately have a pilot stop for 6.5mm, since we’re inspecting 6.5 Creedmoor.
Setup
I mounted the frame to a universal plate for my Ultimate Reloader bench system with two screws. It’s a super-simple design. A thumb screw releases the spindle; for 6.5mm, I used the small spindle.
With the 6.5mm pilot stop installed right below the dial indicator, I released the screw and set zero with the dial positioned at the top. The stop needed to come over just a little bit, and we were still at zero.
Measuring Neck Thickness
The first Lapua case read 0.014 inch plus just a little, which is exactly what I expected. Right away, you have a thickness you can use for things like calculating the bushing size you need to size your brass.
Then, when you spin the case, you see how consistent that thickness is. That looked really good, with a total indicator reading of about a thousandth of an inch. Some of that comes down to technique: apply pressure down in a constant way to keep the case against the stop. When I did that, we were seeing maybe a half thousandth of variation.
Additional brand-new Lapua cases showed the same thickness and similar variation, and if I’m very careful with how I roll the case, applying the same pressure in the same direction, there’s even less. This brass is very good; there’s no need for any neck turning. A Peterson case showed a very similar result.
This type of data is really helpful for precision shooters, and it’s going to keep me busy for quite a while!
Versatility
There are two spindle holes in the frame. To switch to the other spindle, go to the other hole, loosen it, and raise the gauge, and you can set it up for something like 308. There are also different flash hole pin diameters on either side of the spindle, so you can minimize the wobble between the pin and the flash hole and get the case to roll as consistently as possible.
Redding Slant Bed Concentricity Gauge
What’s Included:
- Base
- Support arm
- Allen key for adjustments
- Dial indicator
- Instructions
It’s pretty straightforward. Green is my favorite color, so I’m really liking how this looks!
I started with one of our Berger 140 grain 6.5 Creedmoor factory cartridges. After lining up the supports and making sure there was enough support on each side, I lowered the dial indicator into place, pressed down, and reset zero. It’s much easier to rotate the dial than to try to get the indicator’s vertical position perfect.
The neck showed about a thousandth of total runout. You have to push with really, really even pressure to get a clean reading.
With a thousandth of neck runout, I wouldn’t be surprised to see a thousandth of bullet runout. I moved both supports so the indicator was right around the ogive, re-zeroed, and sure enough, we had a thousandth. The neck runout was translating exactly to bullet runout.
Then I compared Hornady 100 grain ELD-VT 6.5 Creedmoor factory ammo:
| Cartridge | Bullet Runout (TIR) |
| Berger 140 gr factory | About 0.001 in |
| Hornady 100 gr #1 | About 0.003 in (-0.002 / +0.001) |
| Hornady 100 gr #2 | Under 0.002 in |
| Hornady 100 gr #3 | Under 0.001 in |
You can see how these things can vary a bit. This is a great way to check the quality of your ammo and the quality of your seater die.
I have to say, this tool is a new favorite for this type of measurement. The guides adjust so smoothly and lock down solid, and I really like how Redding designed the cones. The cartridges roll right on them with a really smooth motion that doesn’t grind at all, and we’re getting really good, consistent readings on the dial indicator.
Conclusion
The Instant Indicator, Slant Bed Concentricity Gauge and Case Neck Gauge will pretty much handle all your precision measurement needs: bullet runout, headspace, neck runout, case length and more.
Do you have one of these tools, or all of them? What have your experiences been, and what do you pay specific attention to? Let me know in the comments! Make sure you’re subscribed, because you’ll see these tools more and more in our reloading content.
Get the Gear
Redding Slant Bed Concentricity Gauge
Don’t miss out on Ultimate Reloader updates, make sure you’re subscribed!
Thanks,
Gavin Gear
About the author