
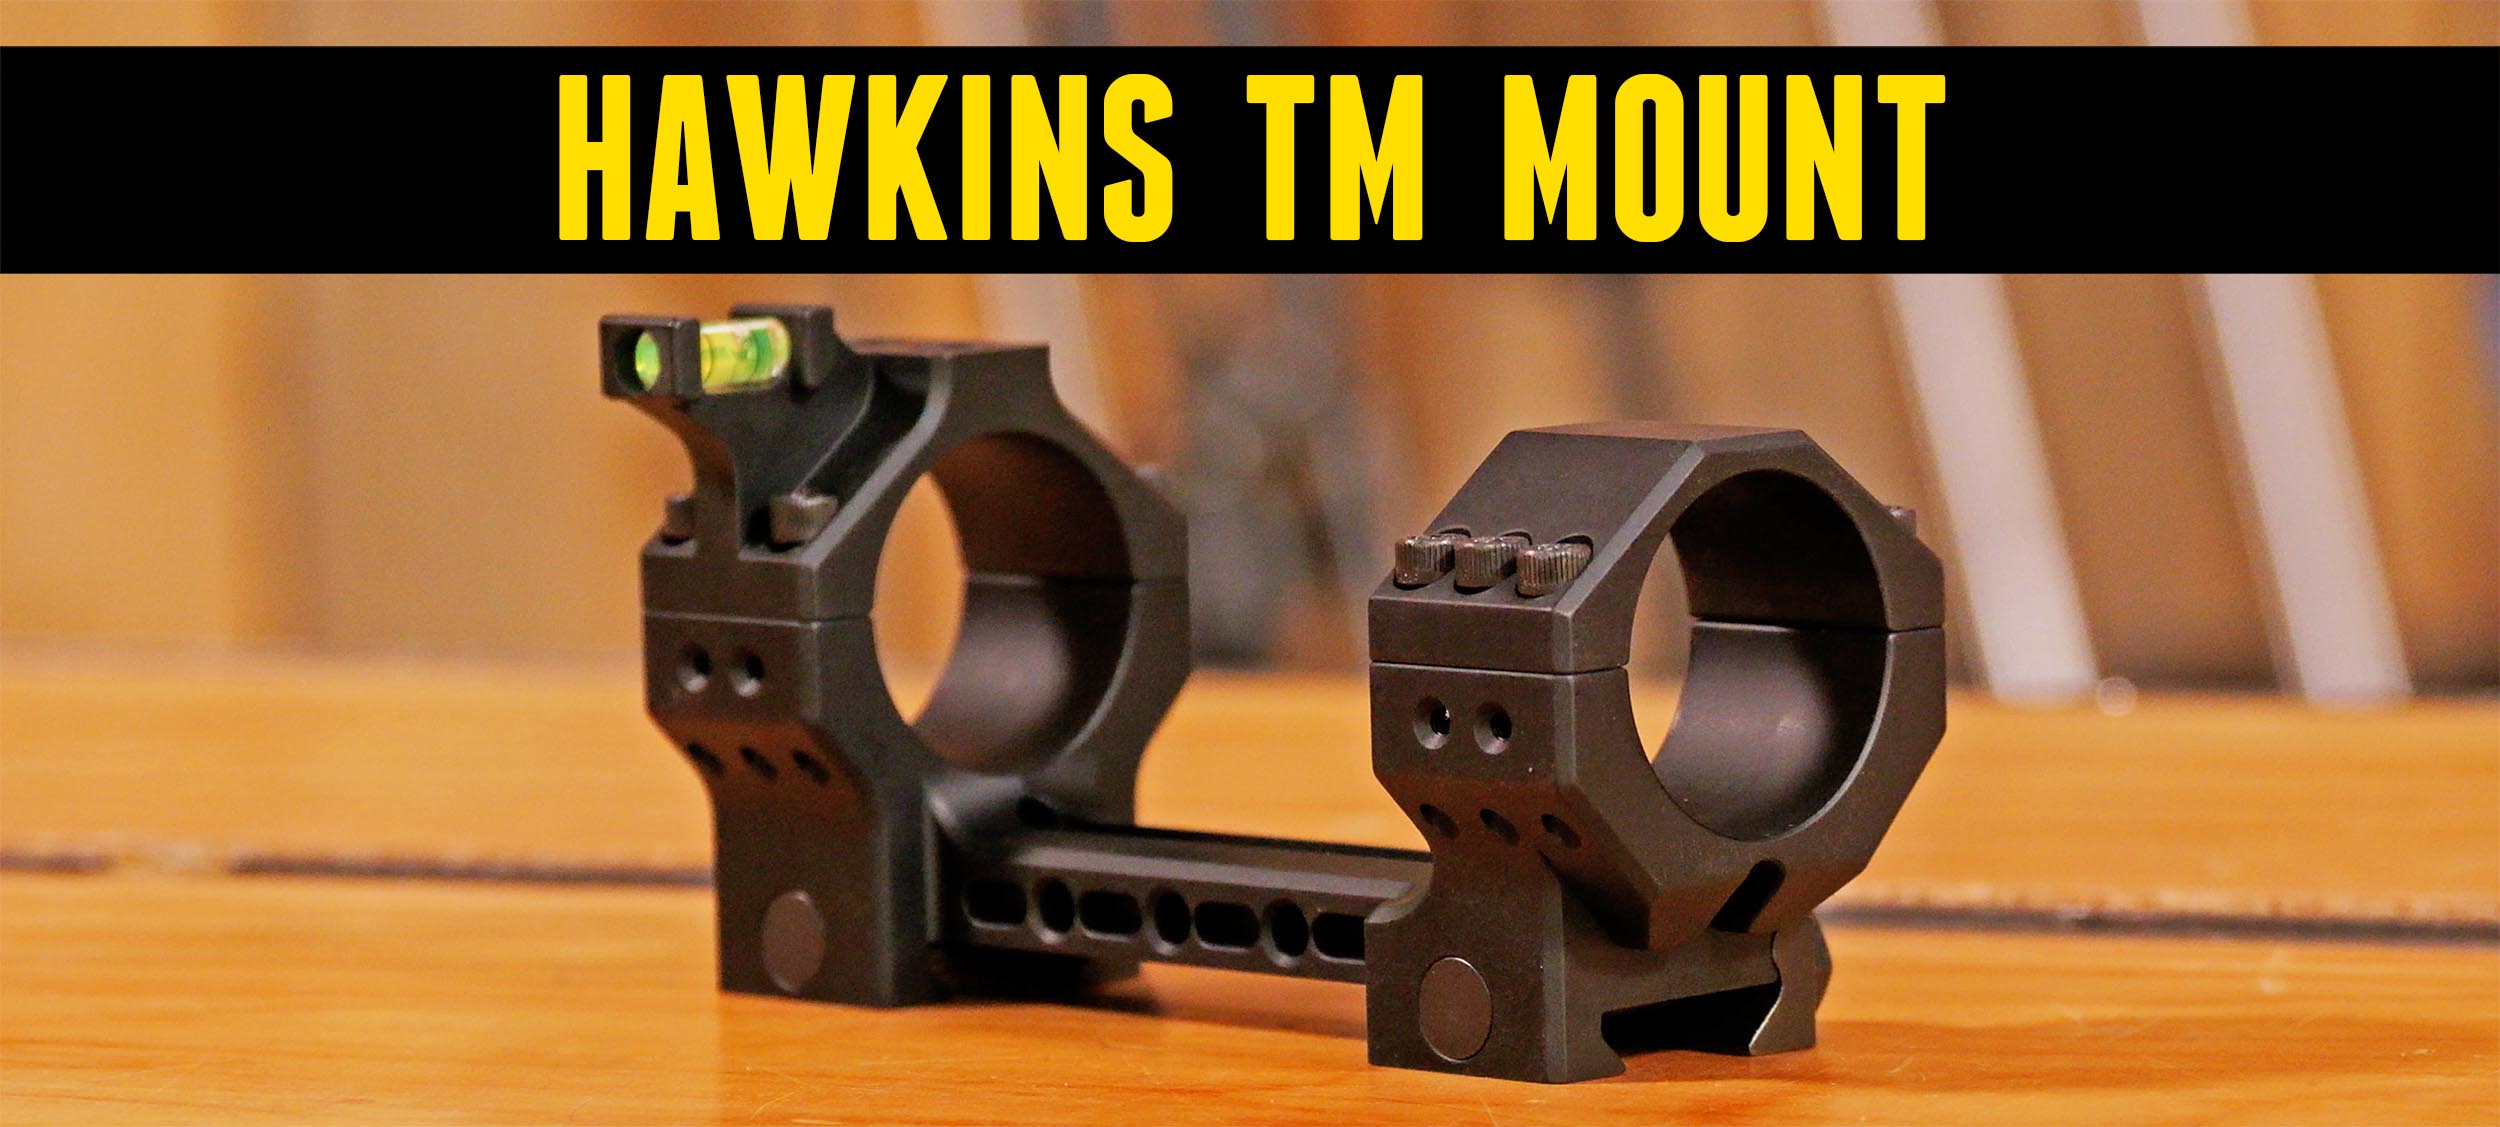
The all-new TM mount from Hawkins Precision is the successor to the popular Heavy Tactical Mount, and it’s packed with new features and options for mounting your shooting accessories. In this article, we’ll take a look at what’s included, get it installed on a PRS rifle, and show it in use in the field. Watch or read on!
Disclaimer
Ultimate Reloader LLC / Making with Metal Disclaimer: (by reading this article and/or watching video content you accept these terms). The content on this website (including videos, articles, ammunition reloading data, technical articles, gunsmithing and other information) is for demonstration purposes only. Do not attempt any of the processes or procedures shown or described on this website. All gunsmithing procedures should be carried out by a qualified and licensed gunsmith at their own risk. Do not attempt to repair or modify any firearms based on information on this website. Ultimate Reloader, LLC and Making With Metal can not be held liable for property or personal damage due to viewers/readers of this website performing activities, procedures, techniques, or practices described in whole or part on this website. By accepting these terms, you agree that you alone are solely responsible for your own safety and property as it pertains to activities, procedures, techniques, or practices described in whole or part on this website.
About the Hawkins TM Mount
The TM mount has just recently become available to the general public, but we’ve actually been using it for a while now. If you look at our Ultimate 25×47 PRS build and our 25×47 load development and shooting story, you’ll see it there.
What’s really cool about the TM mount is all of the refinements and upgrades made compared to its predecessor, the Heavy Tactical Mount. For one, Hawkins shortened the design by a full Picatinny bar. That lets you move it further forward when you have limited Picatinny space, and it takes up less space overall.
What’s Included and Features
- Mount: The scope mount itself
- Cap with diving board mount and offset level: If you don’t plan to use an electronic level, you’ve got a bubble level right here. And if your electronic level runs out of battery, you’ve got a backup. I love that.
- Two Picatinny sections: These can be installed in any of four positions, left and right on the front and left and right on the rear, for mounting accessories.
- Diving board: Optimized for things like weapon-mounted laser rangefinders, which we’ll show in this article.
There are also sockets on the mount for a dope card holder that Hawkins is working on. It will slide right in and click in place, and you’ll be able to remove it and put it in multiple places.
Down below, there’s a cable tray. This is really cool if you’re running fiber optics, with your level electronics mounted on the front and the fiber optics for the indicator under the eyepiece. The fiber routes right through the tray and keeps things nice and clean, and there are holes in the front and back to mount the fiber optics as well.
We’re really just going to scratch the surface of what you can do with this mount, because we don’t have a shot timer or an electronic level on this rifle yet. Those are things I’m looking at and will probably add to this Ultimate 25×47 PRS rig.
Options
- Tube diameters: 34mm, 35mm and 36mm
- Heights: 1.270 inch and 1.540 inch
- Inclination: 0 MOA (20 MOA is planned)
We have the 36mm variant because our Element Theos 6-36×56 has a 36mm tube. We’re using the 1.270-inch height, which worked perfectly with that optic on our Ultimate PRS rifle.
There’s a lot we can do with this. It’s one mount for our scope, which is obviously its primary purpose, but also for an electronic level, a weapon-mounted laser rangefinder, a dope card attachment point and a shot timer. We can load this baby down with all of those accessories, all elegantly integrated with our scope mount, and I think that’s really the way to go.
Installation
Tools and Torque Specs
Here’s what I used for the install:
- Element Theos 6-36×56, an absolutely outstanding PRS scope
- Hawkins TM mount and all of its parts
- Wheeler mounting tools, including the FAT Wrench
- Torque limiter with a 1/2-inch socket
- TW25B grease
What’s nice about the TM mount packaging is that the torque specs are prominently outlined right on it. We followed them religiously:
Mounting the Base
The first thing I did was put just a little bit of grease on the rail. That way, as the mount gets torqued down, friction doesn’t contribute to faulty torque application. We want this to be as accurate as possible. This is [VERIFY: TW25B], probably the best grease around.
With the bump facing forward, I set the mount in place, starting all the way forward. While tightening the half-inch bolt heads by hand, I pushed forward on the mount. Then I applied 65 in-lb in a couple of steps.
Mounting the Scope
Next came the meticulous process of getting the scope level with the rifle, then torquing the caps down to 25 in-lb. To set eye relief, I like to crank the magnification up to max, get behind the rifle in a comfortable position, and adjust until everything is perfectly in frame. The scope ended up perfectly level, with eye relief just where I want it.
Diving Board and Seeker
Next, I mounted the diving board. It looks like we had just enough clearance there, which is nice. These bolts are also 25 in-lb. I snugged them up with a regular T25 Torx driver, then did the final torquing with the FAT Wrench so we were right at 25 in-lb.
Then I attached the Element Seeker weapon-mounted laser rangefinder. I centered it up more or less, then pushed forward on it so it engaged the surfaces it will be engaged with under recoil. Isn’t that nice?
Finally, I installed the Picatinny rail sections, which use a smaller bit. I’m putting these on as placeholders for now, and we’ll see what we might want to attach a little later.
Field Test
With mounting and configuration done, it was time to shoot. For the 25×47, my first shot came after bore-sighting to get on paper. I made my corrections, and the next shot was dead on, so this was another two-shot zero. I had another one happen today with the 7 PRC, too. Got to love that.
It’s always fun to shoot the 25×47, and this is turning out to be literally the Ultimate PRS rifle, especially now that I’ve got the Element Seeker combined with the Element Theos 6-36×56. This is a killer setup, and with the TM mount, I know I can continue to add things. I definitely think an electronic level is something I’m going to want.
The Rifle
- Cartridge: 25×47
- Action: BAT Hammerhead short action, 75-degree bolt throw
- Stock: Foundation Stocks Samson XT (longer version)
- Bottom metal: Hawkins M5 DBM
- Trigger: TriggerTech Remington 700 Diamond
- Scope: Element Theos 6-36×56
- Rangefinder: Element Seeker
- Mount: Hawkins TM mount
Final Thoughts
At the end of the day, the TM mount lives up to the Hawkins Precision reputation. It’s top quality, it’s packed with great features, and the fit and finish is second to none. It’s compact, adaptable and versatile. I know I can add on to it, which I plan to do, and that’s awesome. It’s also USA made.
What do you think of the TM mount? Is it something you’re looking at getting? If so, what diameter tube are you running, and would you go for the 20 MOA inclination if it comes out in the future? Tell me about the rig you’d put it on: what’s it chambered in, what barrel length do you have, and is it an NRL Hunter rig or a PRS rig? Let me know in the comments!
Get the Gear
Don’t miss out on Ultimate Reloader updates, make sure you’re subscribed!
Thanks,
Gavin Gear
About the author