It’s time for some insane precision with 6GT! In this story we get hands on with the load, the gear, and the process from start to finish.
Disclaimer
Ultimate Reloader LLC / Making with Metal Disclaimer: (by reading this article and/or watching video content you accept these terms). The content on this website (including videos, articles, ammunition reloading data, technical articles, gunsmithing and other information) is for demonstration purposes only. Do not attempt any of the processes or procedures shown or described on this website. All gunsmithing procedures should be carried out by a qualified and licensed gunsmith at their own risk. Do not attempt to repair or modify any firearms based on information on this website. Ultimate Reloader, LLC and Making With Metal can not be held liable for property or personal damage due to viewers/readers of this website performing activities, procedures, techniques, or practices described in whole or part on this website. By accepting these terms, you agree that you alone are solely responsible for your own safety and property as it pertains to activities, procedures, techniques, or practices described in whole or part on this website.
Review: The Ultimate Reloader 6GT Build
You’ve seen my previous 6GT stories including the Build Kickoff, Barrel Work, and Break in with initial load development. Today, we’re continuing the 6GT saga with some epic precision loading and Long Range Shooting!
Before we get into the load, here’s a quick recap of the project.
The Build
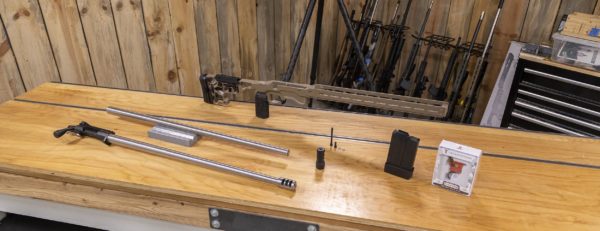
- MDT ACC Chassis
- AICS MDT mag with extension
- TriggerTech Diamond Remington 700 Trigger
- BAT TR action (stolen from 6mm Dasher barreled Action)
- Krieger Match Grade 1:7.5 twist, 5-groove barrel (which I plan to finish off at 26”)
- Area 419 Hellfire Muzzle Brake
The Tools:
- Precision Matthews TL-1660 Lathe
- SSG True Bore Alignment System (TBAS) and SSG Range Rod
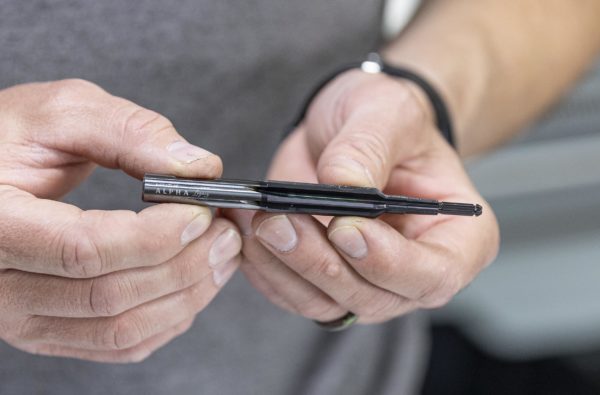
- Alpha 6GT Carbide Reamer
- Dave Manson 6GT Go Gauge, (Added Scotch Tape for No-Go)
Here’s the video for this build:
Loading Precision 6GT

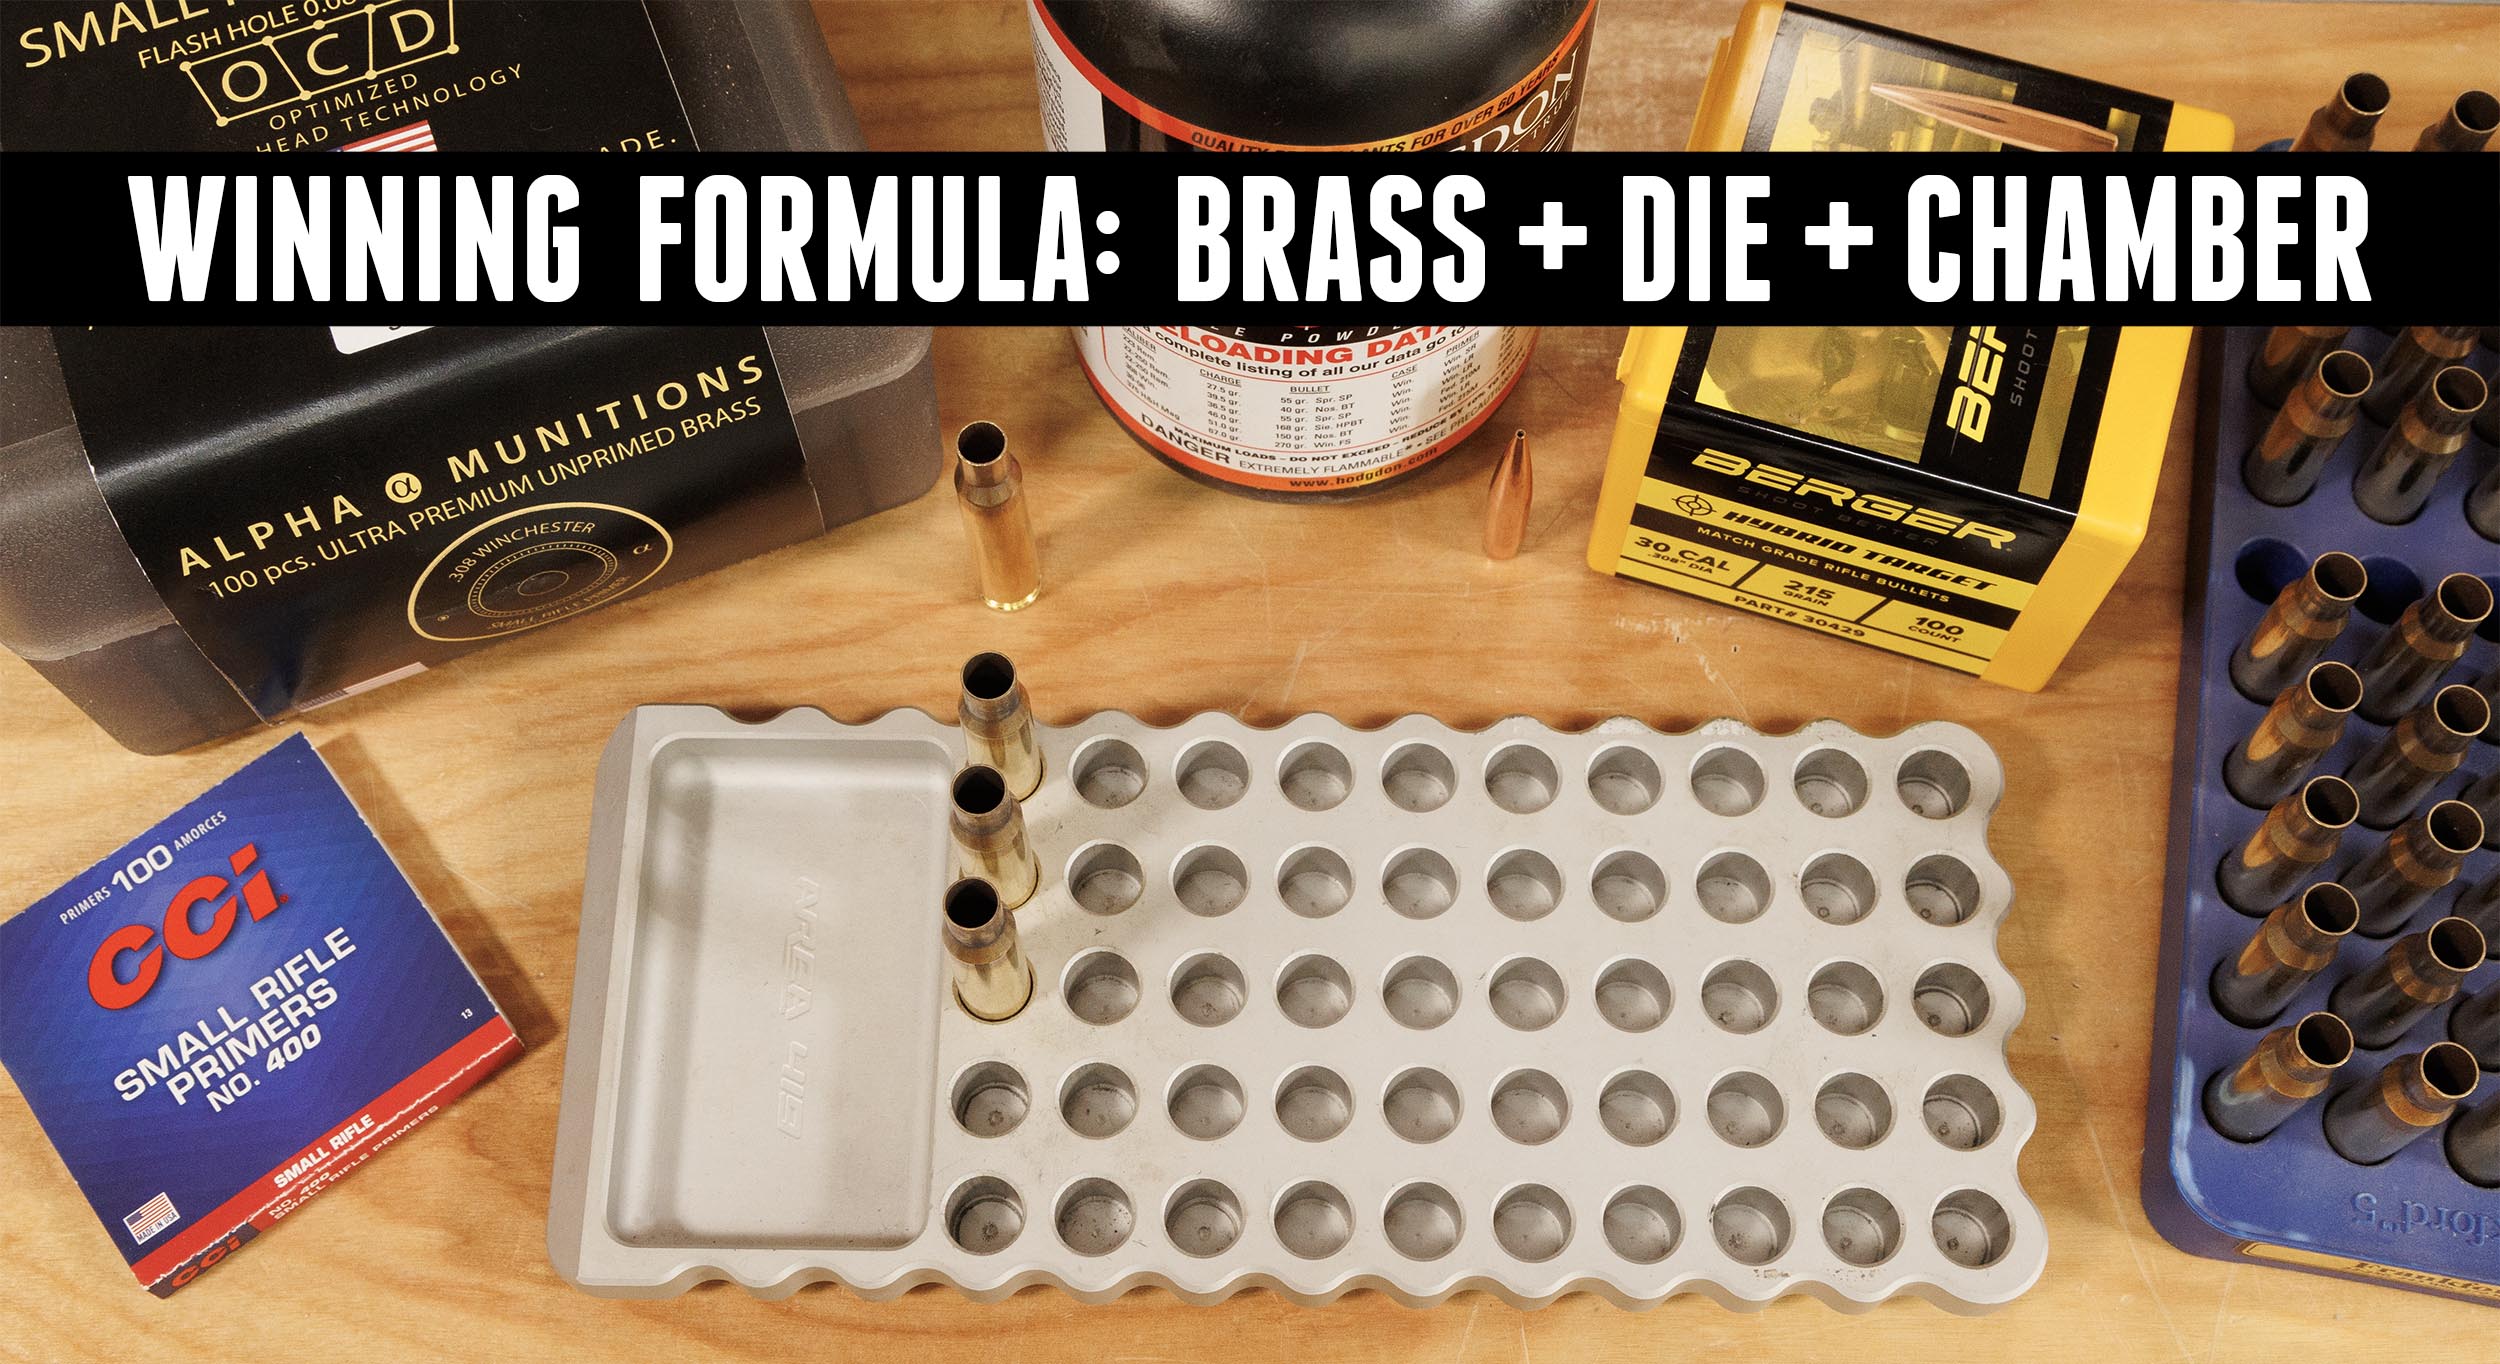
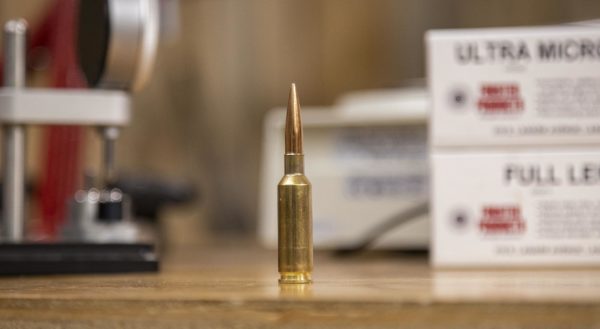
When I was breaking in this file, for my initial loads I focused on 2 bullets, the Hornady 110gr A-Tip, and the Berger 109 Long Range Hybrid Target. I liked sub-half MOA results I saw from the Berger 109 LRTHs, so that’s what I’ve decided to focus on today. To send these Berger LRHTs down range I’m using 34.6 grains of Varget, and Federal small rifle primers in Alpha 6GT Brass.
Before I start loading, let’s take a look at the gear we have on hand today.
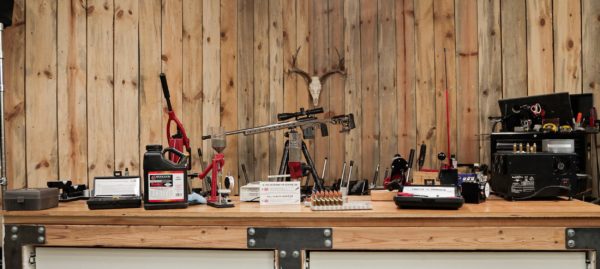
The Equipment:
- Forster Ultra Micrometer Seater Die for 6GT, adjustable by .001
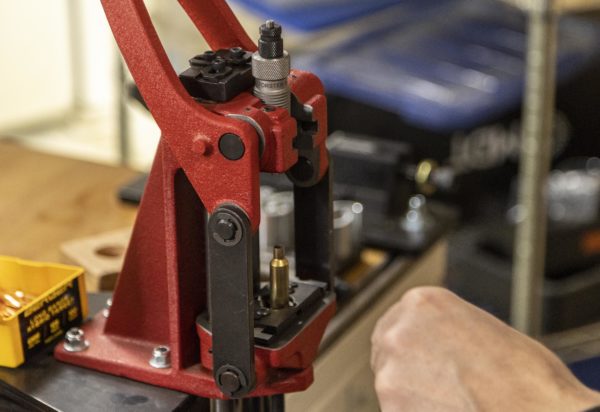
- Forster Custom Honed Full Length Sizer Die, for optimal concentricity
- The Forster Co-Ax Press set up with large jaws for a .308 case rim (Includes built it priming for large and small, no need for shell holders)
- Forster Bench Rest Powder Measure
- Cambridge Environmental A&D FX120i Precision Laboratory Balance
- Hornady Trickler
- Area 419 Billet Loading Block
- Area 419 Master Funnel Kit
- Imperial Case Sizing Wax
- Sinclair Concentricity Gauge (To check runout)
- Forster Datum Dial Kit, (To check shoulder bump, and measure base to ogive)
- Henderson V3 Powered Trimmer
- Forster Neck Tension Gauge Kit
- Primal Rights Competition Primer Seater
- Primal Rights PrimeWhere Depth Checker
- AMP Mark II Annealer
The Process
I’ve loaded 25 rounds already, so I’m walking through my process with another 5 rounds to demo for this story. Be sure to check out the full video to see the live action!
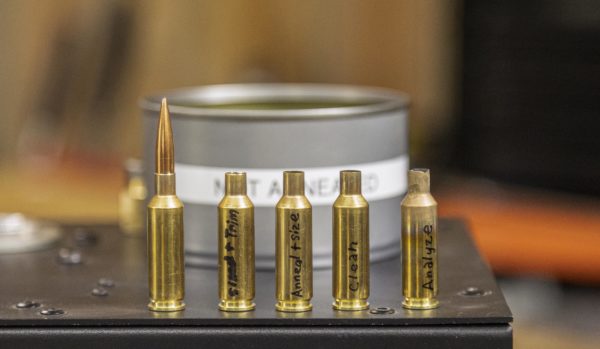
As a prerequisite, I’m taking a few measures to prepare my brass. I’ve tumbled all the brass with walnut media. I’ve performed an analysis pass on this Alpha 6GT brass in the AMP Mark II Annealer (more on this in a moment), and then annealed. I finished off by trimming to length, also performing an inside and outside chamfer on the case necks. Then I can move on to priming, charging, and seating bullets.
Now, let’s break these steps down in detail!
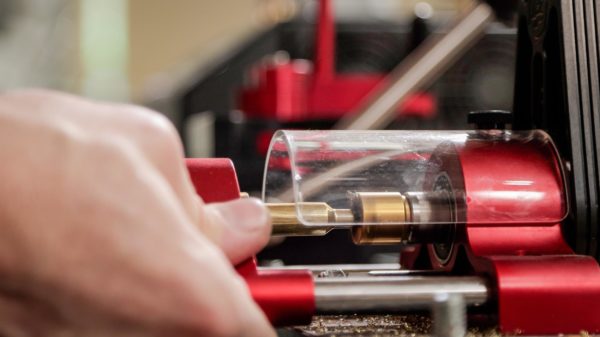
Annealing
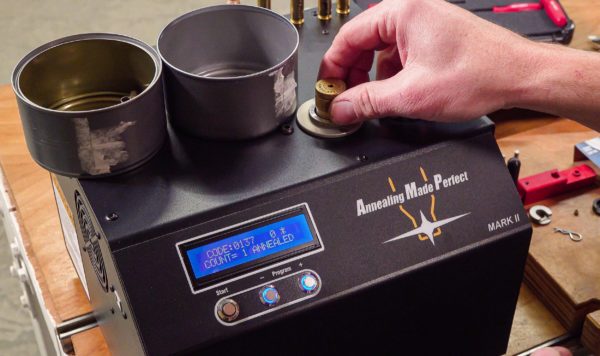
Before annealing with the AMP Mark II Annealer, I ran a case through an “Analyze” pass to make sure I had the correct setting for this specific brass. The Aztec technology Annealing Made Perfect has developed for this process is phenomenal. The Annealer heats the case mouth to the most extreme temperature it can withstand without melting. As soon as the case is about to reach melting point, annealing stops, and stores that point as a code. In this case, the code I received was 137. Now, each piece of brass will be annealed to perfection.
After annealing, I let my brass cool off, and got ready to size.
Sizing
I’m using Imperial Sizing Die Wax to ensure the expander glides through cases with ease. As I mentioned before, I’m using a Forster Custom Honed Full Length Sizer with a decapping pin. Sizing these cases went smoothly. However, I noticed that I was getting a little drawback, so if my first stroke didn’t de-prime, I had to re-actuate the ram. This helped and each time I heard that satisfying clink of the old primer pop out and land in the primer catch bin.
Trimming
Now it was time to wipe off the case lube and give my brass a good trim. Of course my favorite tool to turn to is the Henderson V3 Powered Trimmer. To learn more, be sure to check out the videos below where I go into detail on blade adjustment, and how to change the inside and outside chamfer independently.
Henderson overview:
Henderson cutter head adjustment:
I set my trim-to length at 1.079″ which is about .20” below max spec. Trimming on the Henderson V3 is smooth as butter. I can insert the case rim in the collet, pushing back to seat it securely. When trimming, the haptic feedback I get from pressing the case mouth into the blades is quite satisfying. I can feel when the trim is complete, removing the case and continuing with the next. Getting a rhythm going is no hard task with this trimmer!
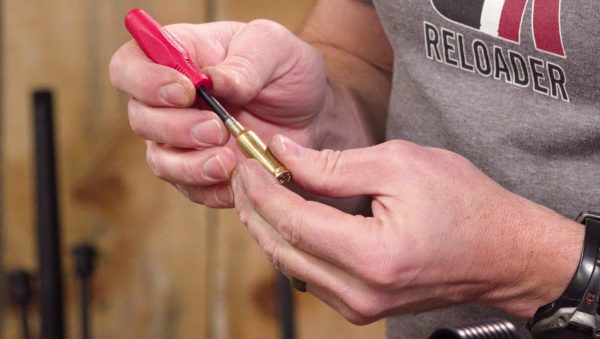
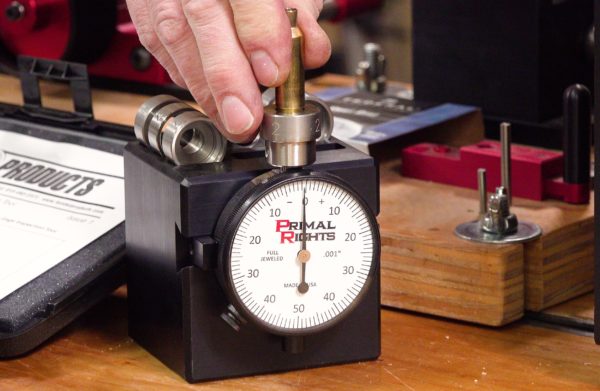
Once my case is sized and has a nice chamfer, it’s time to check how I did. In this case I opted to use the Forster Neck Tension Gauge. Slipping the case over the gauge, I can see it goes right over the stop for .241, and stops at the .242 mark. I know my bullet diameter is .243 so I’ll have .001 neck tension – just what I’m looking for.
Here’s our video covering this tool set:
I’m looking forward to how this trimming is going to help feeding once I’m out shooting. Next, on to priming!
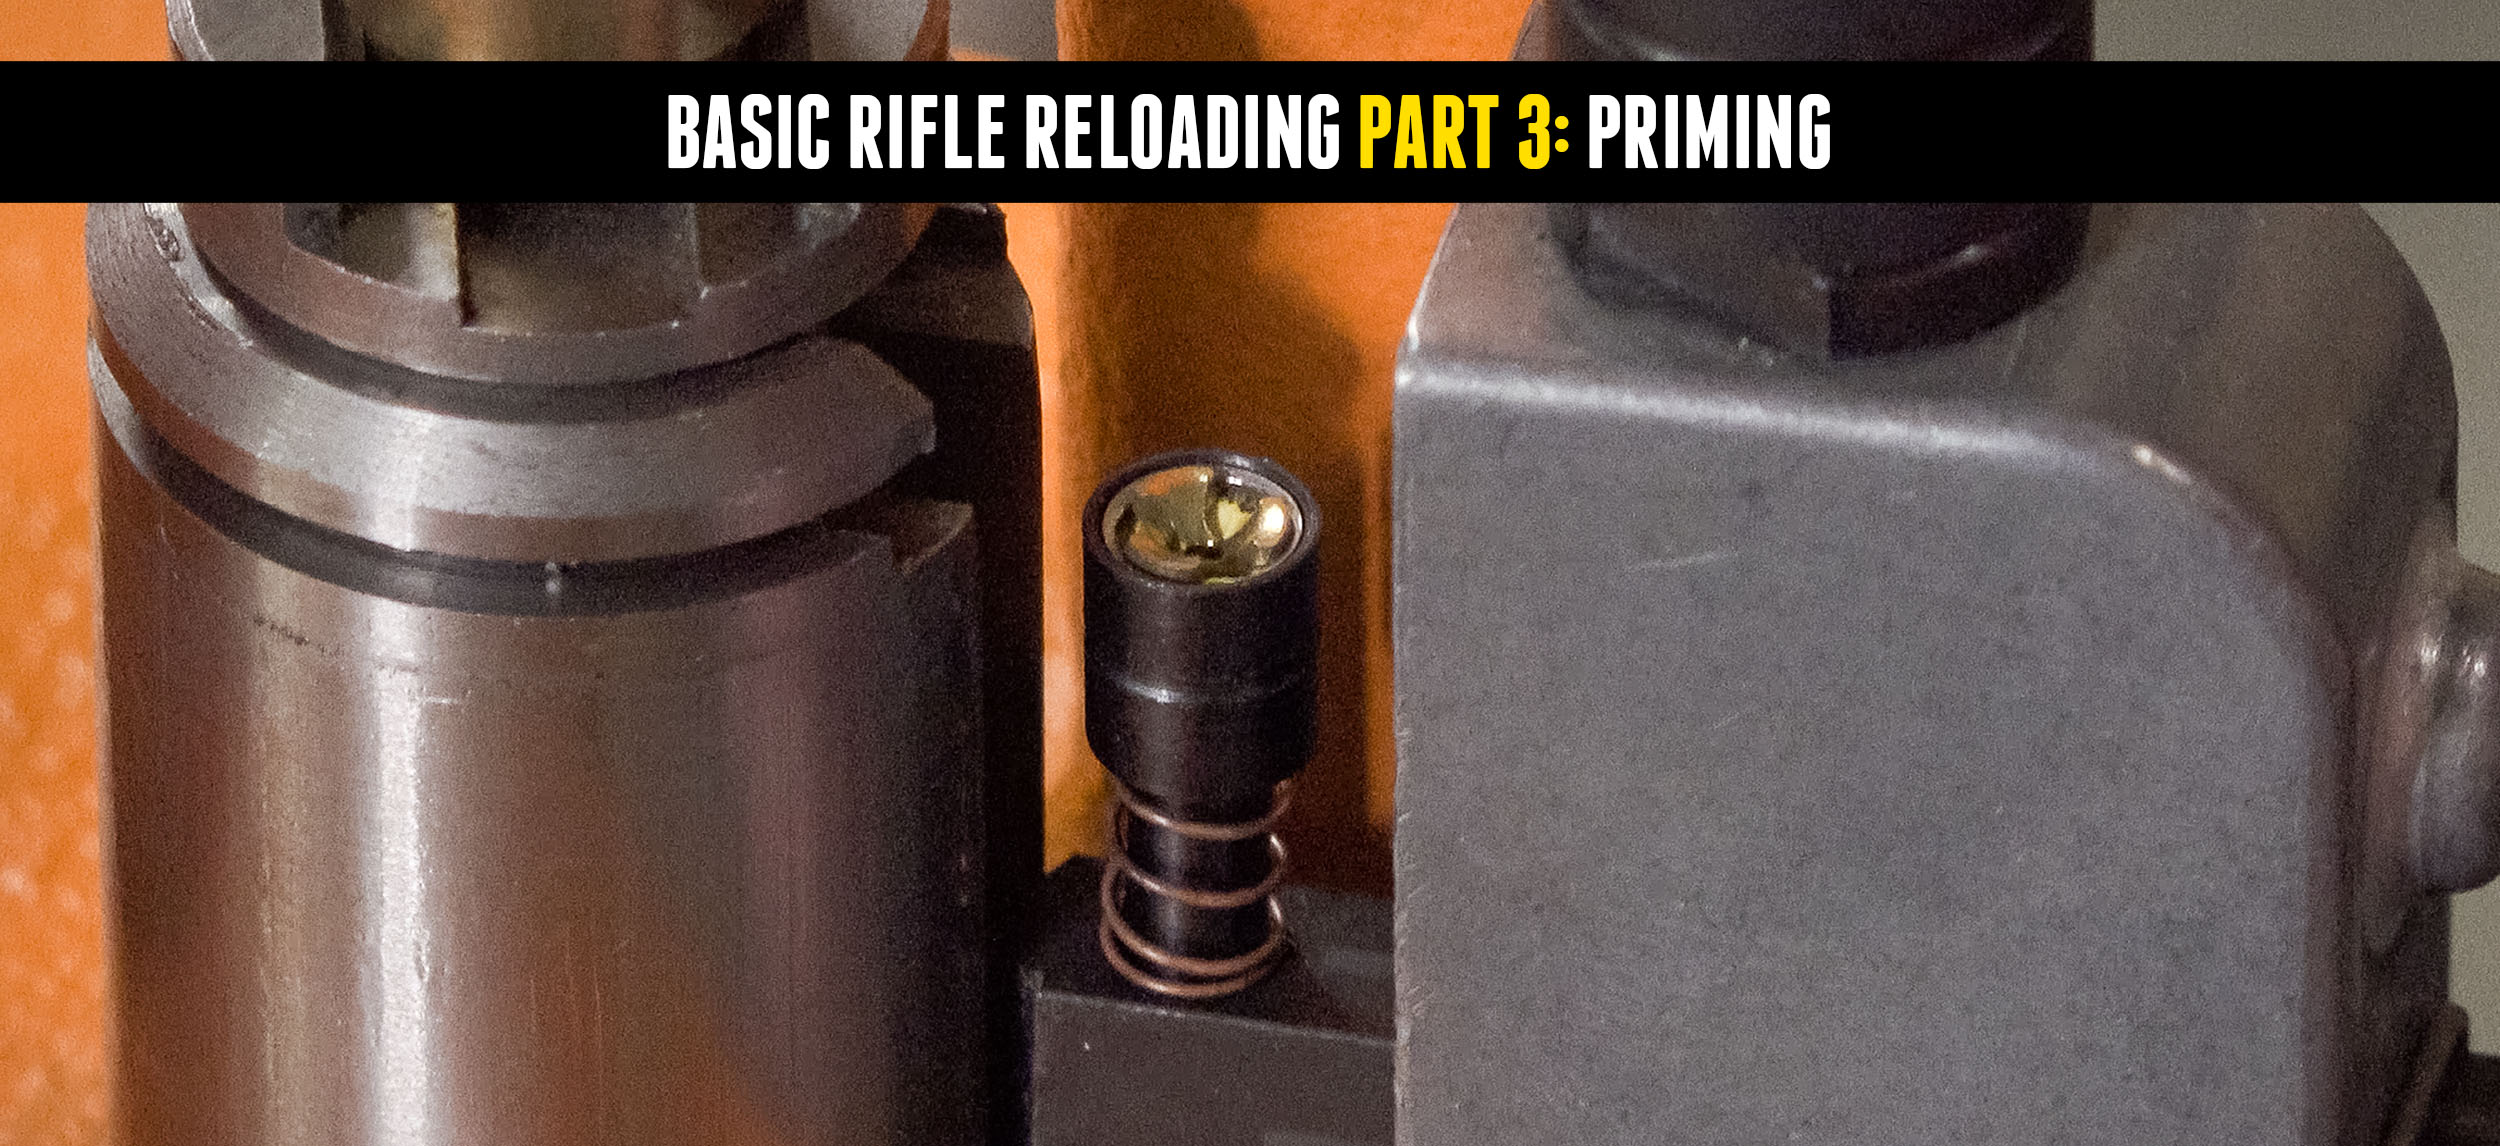
Priming
I’ve got a couple tools here from Primal Rights. The Competition Primer Seater gives me the confidence I need when I’m loading for precision. After priming my brass, I like to confirm my seating depth on the PrimeWhere depth checker.
I can see here that I’m seated to -.01 which is just what I want. I can finish off these cases, and move on to powder.
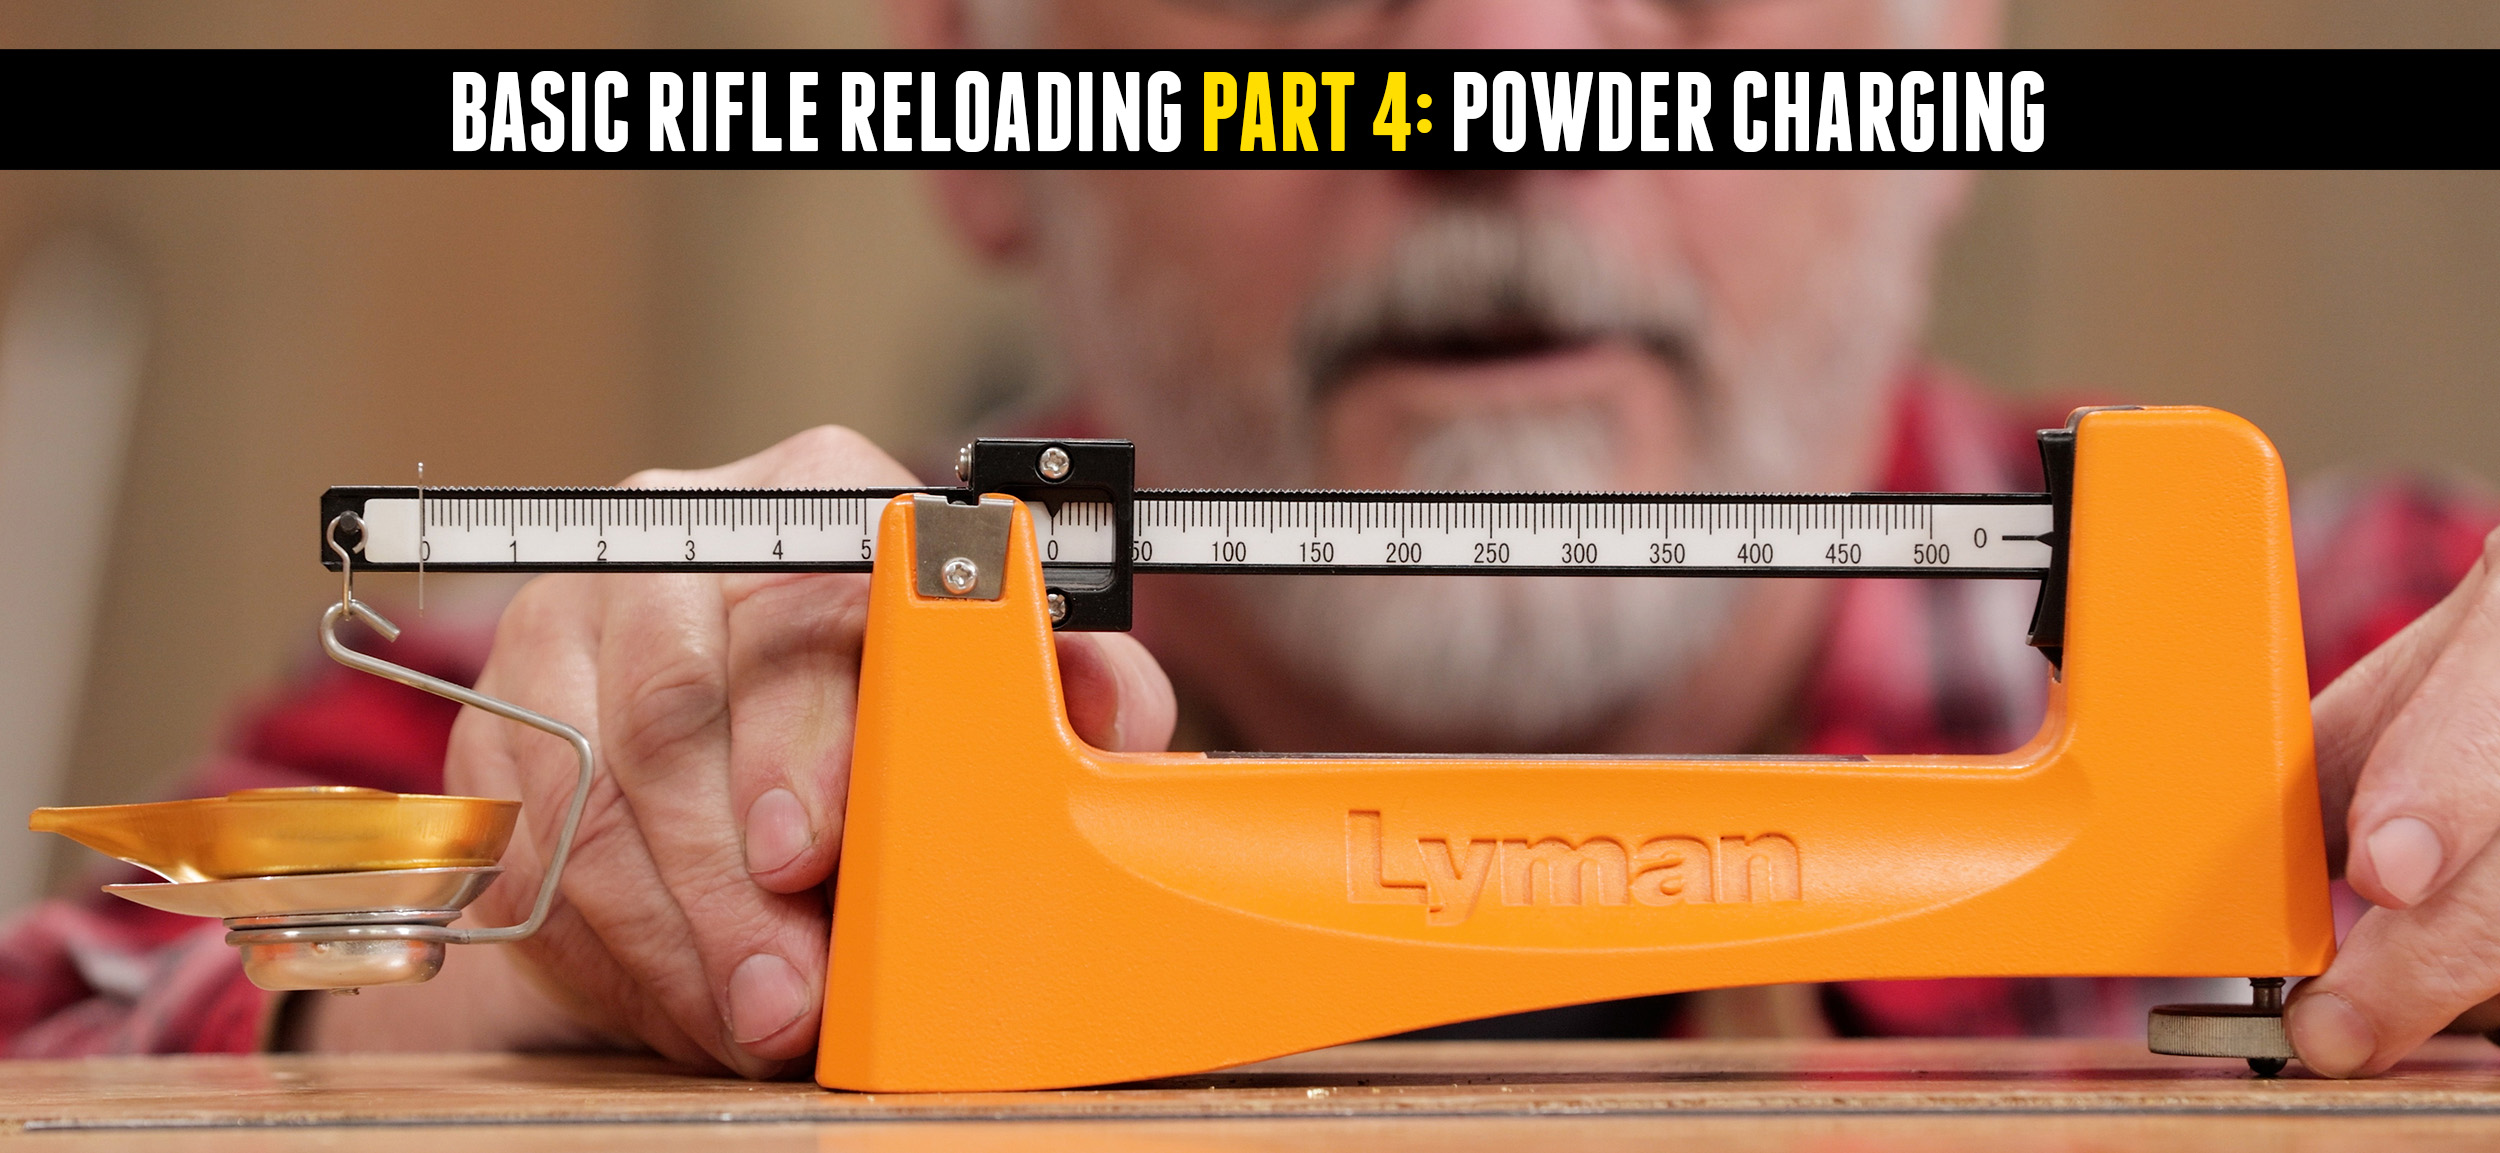
Charging
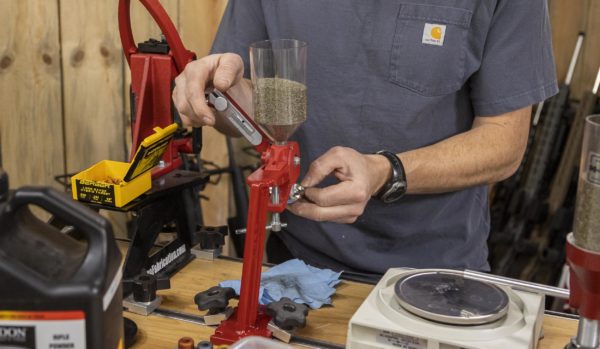
I’m throwing the bulk of my charge with the Forster Bench Rest Powder Measure, then I trickle to plus or minus .02 grains with the Hornady Trickler. This level of precision measurement calls for a high quality instrument, so I turned to my A&D FX120i.
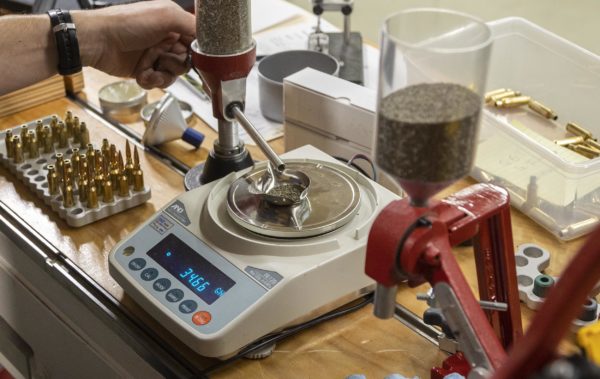
This is a precision laboratory balance with a resolution of .02 grains – that is actually the weight of a single granule of Varget!
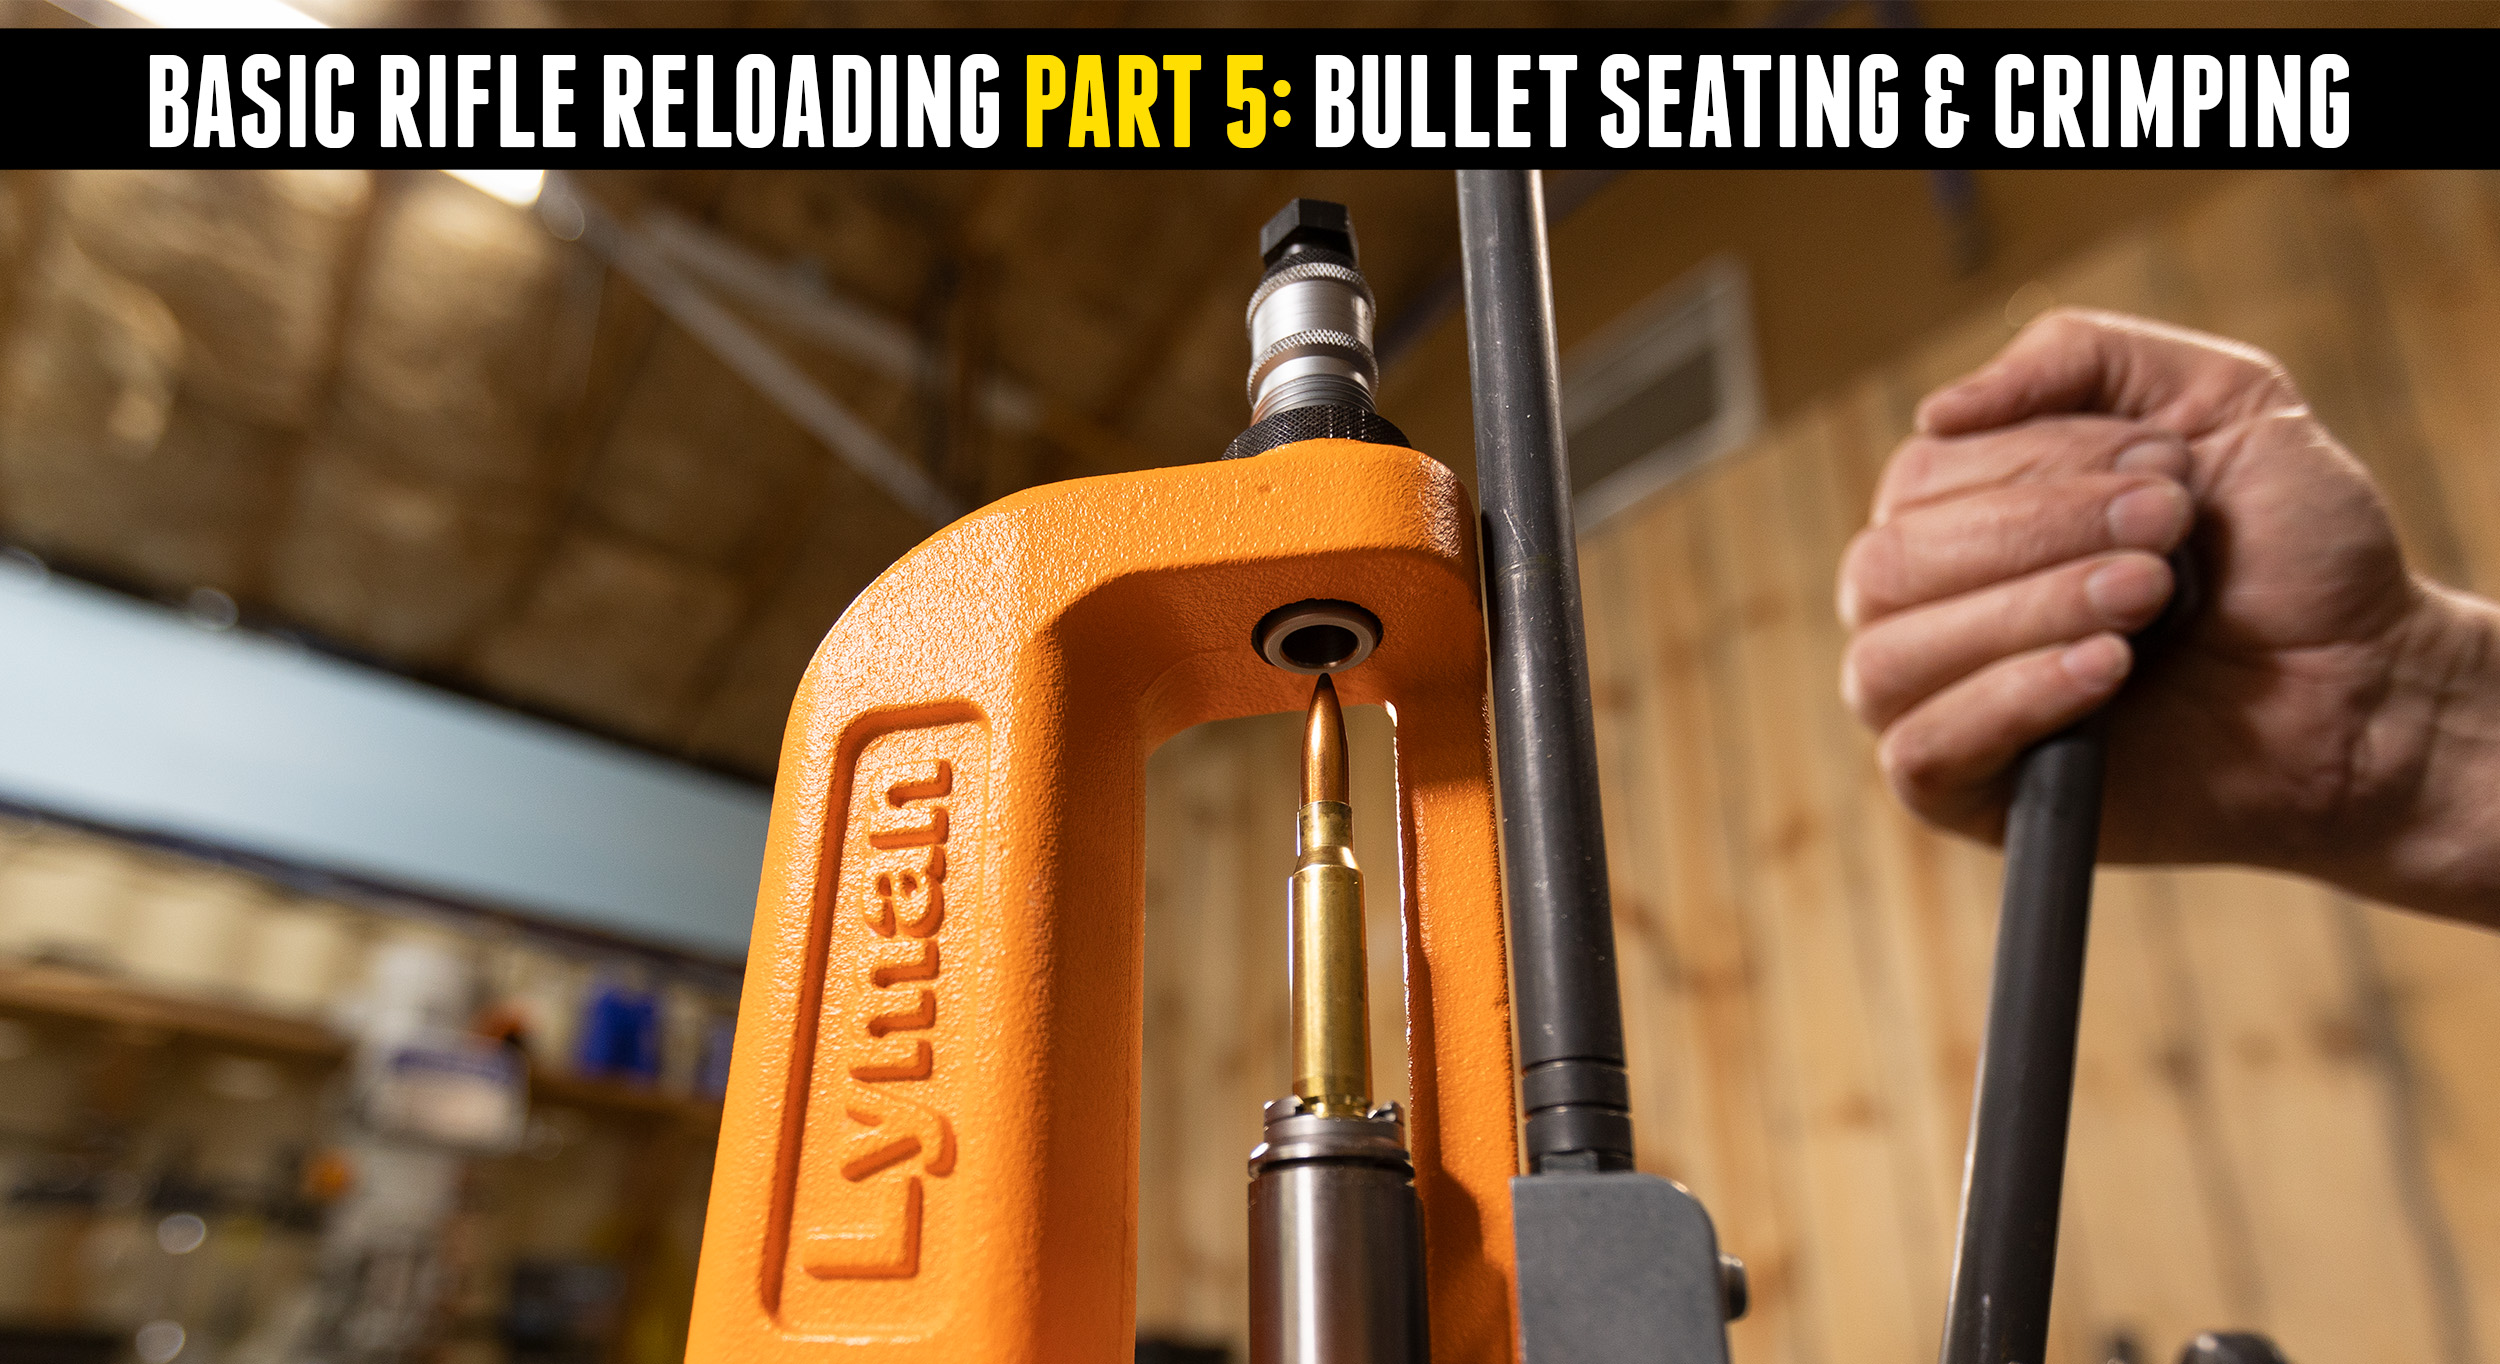
Seating
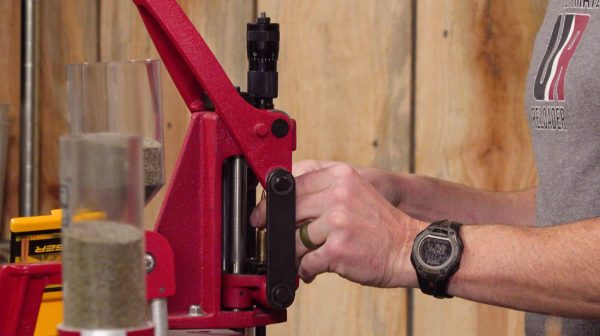
I always get pumped up at this part of loading because I know I’m almost to the finish line and just around the corner from shooting. So I removed the Full Length Sizer Die, and inserted my Ultramicrometer Seater. I’ve already set the Bullet Seating Depth. I fished these off quickly, but with care so I could get to shooting. Time to try this ammo out!
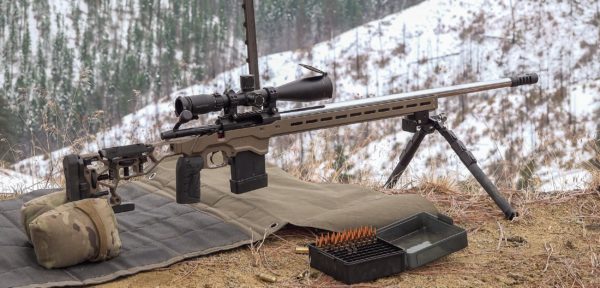
Field Test
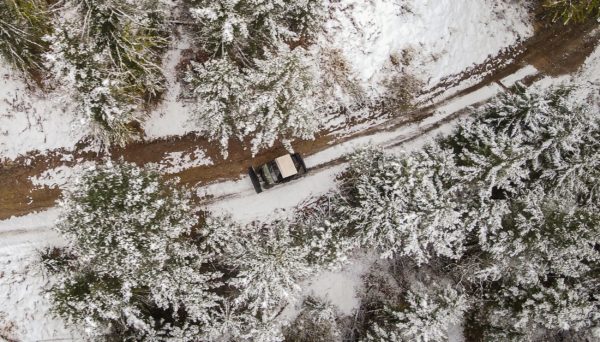
So, I made my way up to the Ultimate Reloader Ridgeline Range with high hopes! We haven’t been able to shoot up here for quite a while because of fire danger through the dry season. My anticipation was killing me. Would this ammo perform as well as I expected it? Would this rifle really shine like I imagined it? This is the amalgamation of every facet of the process – I’ve poured my time and energy into a killer build, I’ve focused on the critical aspects of loading for 6GT, and I’m ready to take this to the field. How will 6GT perform at distance?
340 Yards
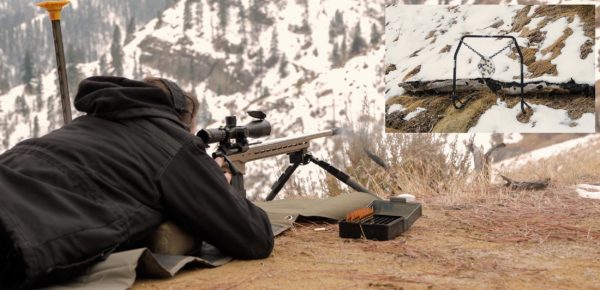
I decided to start off at 340 yards. Shooting prone at the Gong on the ridge is always a good time. For support, I’m set up on the MDT CKYE-POD Triple Pull Bipod. This bipod is rock solid, and if ever needed, reaches beyond your typical shooting positions. As expected, I center punched the target for a first round hit. Without hesitation, I landed 2 more successive hits. This is a precision instrument, no doubt, but it was time to take it further.
706 Yards
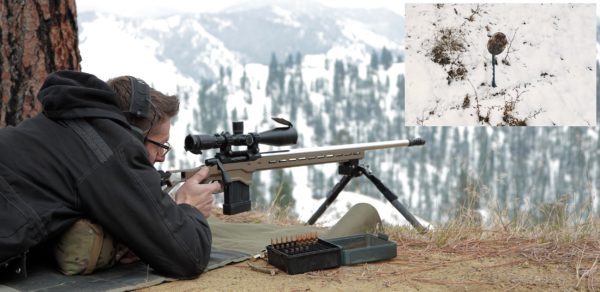
Reaching out nearly twice the distance, I settled into prone again. I calculated 3.9 come-up from the shooter app. I found the target, and leveled out my scope on the Hawkins Rings. Again, landing a first round hit brought the familiar feeling of satisfaction. And again, 2 more successive hits. I am now 3 for 3 at both ranges. Now, there was one range left to shoot, and my energy was high. I have no misses on target, and 1000 yards was calling to me.
1000 Yards
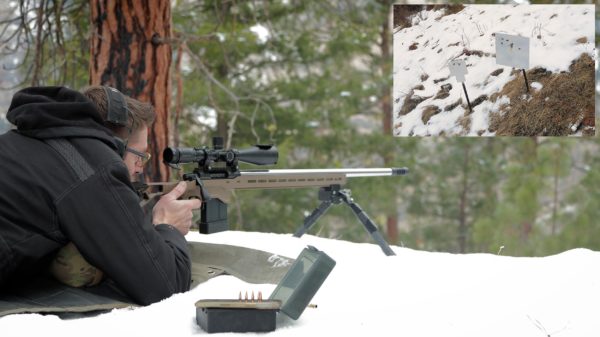
When the conditions are right, this is my favorite range to shoot at. At this point, this custom build and these precision loads have commanded confidence, and proved to be a worthwhile effort. I calculated up 7″, and settled in behind my rifle. With a level scope, and perfect sight picture at 27 power on the Zero Tech Trace, I pulled the trigger. Once again that awesome visual of rocking the target and the sound of steel confirmed a first round hit. As I continued shooting, each impact was followed by another. Again, Impact. Impact, impact, impact! I was now five for five on the 1000 yard main target. To finish off, I moved sights onto its neighbor target, a quite smaller upside down IPSC. Without fail, impact! This precision ammo is spot on!
Conclusion
It does suffice to say that I am happy, no, I am jacked up! This was an awesome ridgeline experience. Shooting at 340. 706, and 1000 yards with successive hits was fulfilling to say the least. This is a feeling that never gets old – when I can enjoy the payoff of all my hard work. This is a precision instrument, and these loads yielded fantastic results. I’m looking forward to further load development, and shooting scenarios with this rifle and cartridge!
Be sure to check out the stories and videos mentioned in this article for more information on this 6GT custom build, and all the gear used to load this awesome precision ammo.
Get the Gear
- Forster Ultra Micrometer Seater Die for 6GT, adjustable by .001
- Forster Custom Honed Full Length Sizer Die, for optimal concentricity
- The Forster Co-Ax Press set up with large jaws for a .308 case rim (Includes built it priming for large and small, no need for shell holders)
- Forster Bench Rest Powder Measure
- Cambridge Environmental A&D FX120i Precision Laboratory Balance
- Area 419 Billet Loading Block
- Area 419 Master Funnel Kit
- Imperial Case Sizing Wax
- Sinclair Concentricity Gauge (To check runout)
- Forster Datum Dial Kit, (To check shoulder bump, and measure base to ogive)
- Henderson V3 Powered Trimmer
- Forster Neck Tension Gauge Kit
- Primal Rights Competition Primer Seater
- Primal Rights PrimeWhere Depth Checker
- AMP Mark II Annealer
- MDT CKYE-POD Triple Pull Bipod
- MDT ACC Chassis
- AICS MDT mag with extension
- TriggerTech Diamond Remington 700 Trigger
- BAT TR action (stolen from 6mm Dasher barreled Action)
- Krieger Match Grade 1:7.5 twist, 5-groove barrel (which I plan to finish off at 26”)
- Area 419 Hellfire Muzzle Brake
- Precision Matthews TL-1660 Lathe
- Straight Shot Gunsmithing Range Rod
- SSG True Bore Alignment System (TBAS) and SSG Range Rod
- Alpha 6GT Carbide Reamer
Don’t miss out on Ultimate Reloader updates, make sure you’re subscribed!
Thanks,
Gavin Gear